📄 Contents#
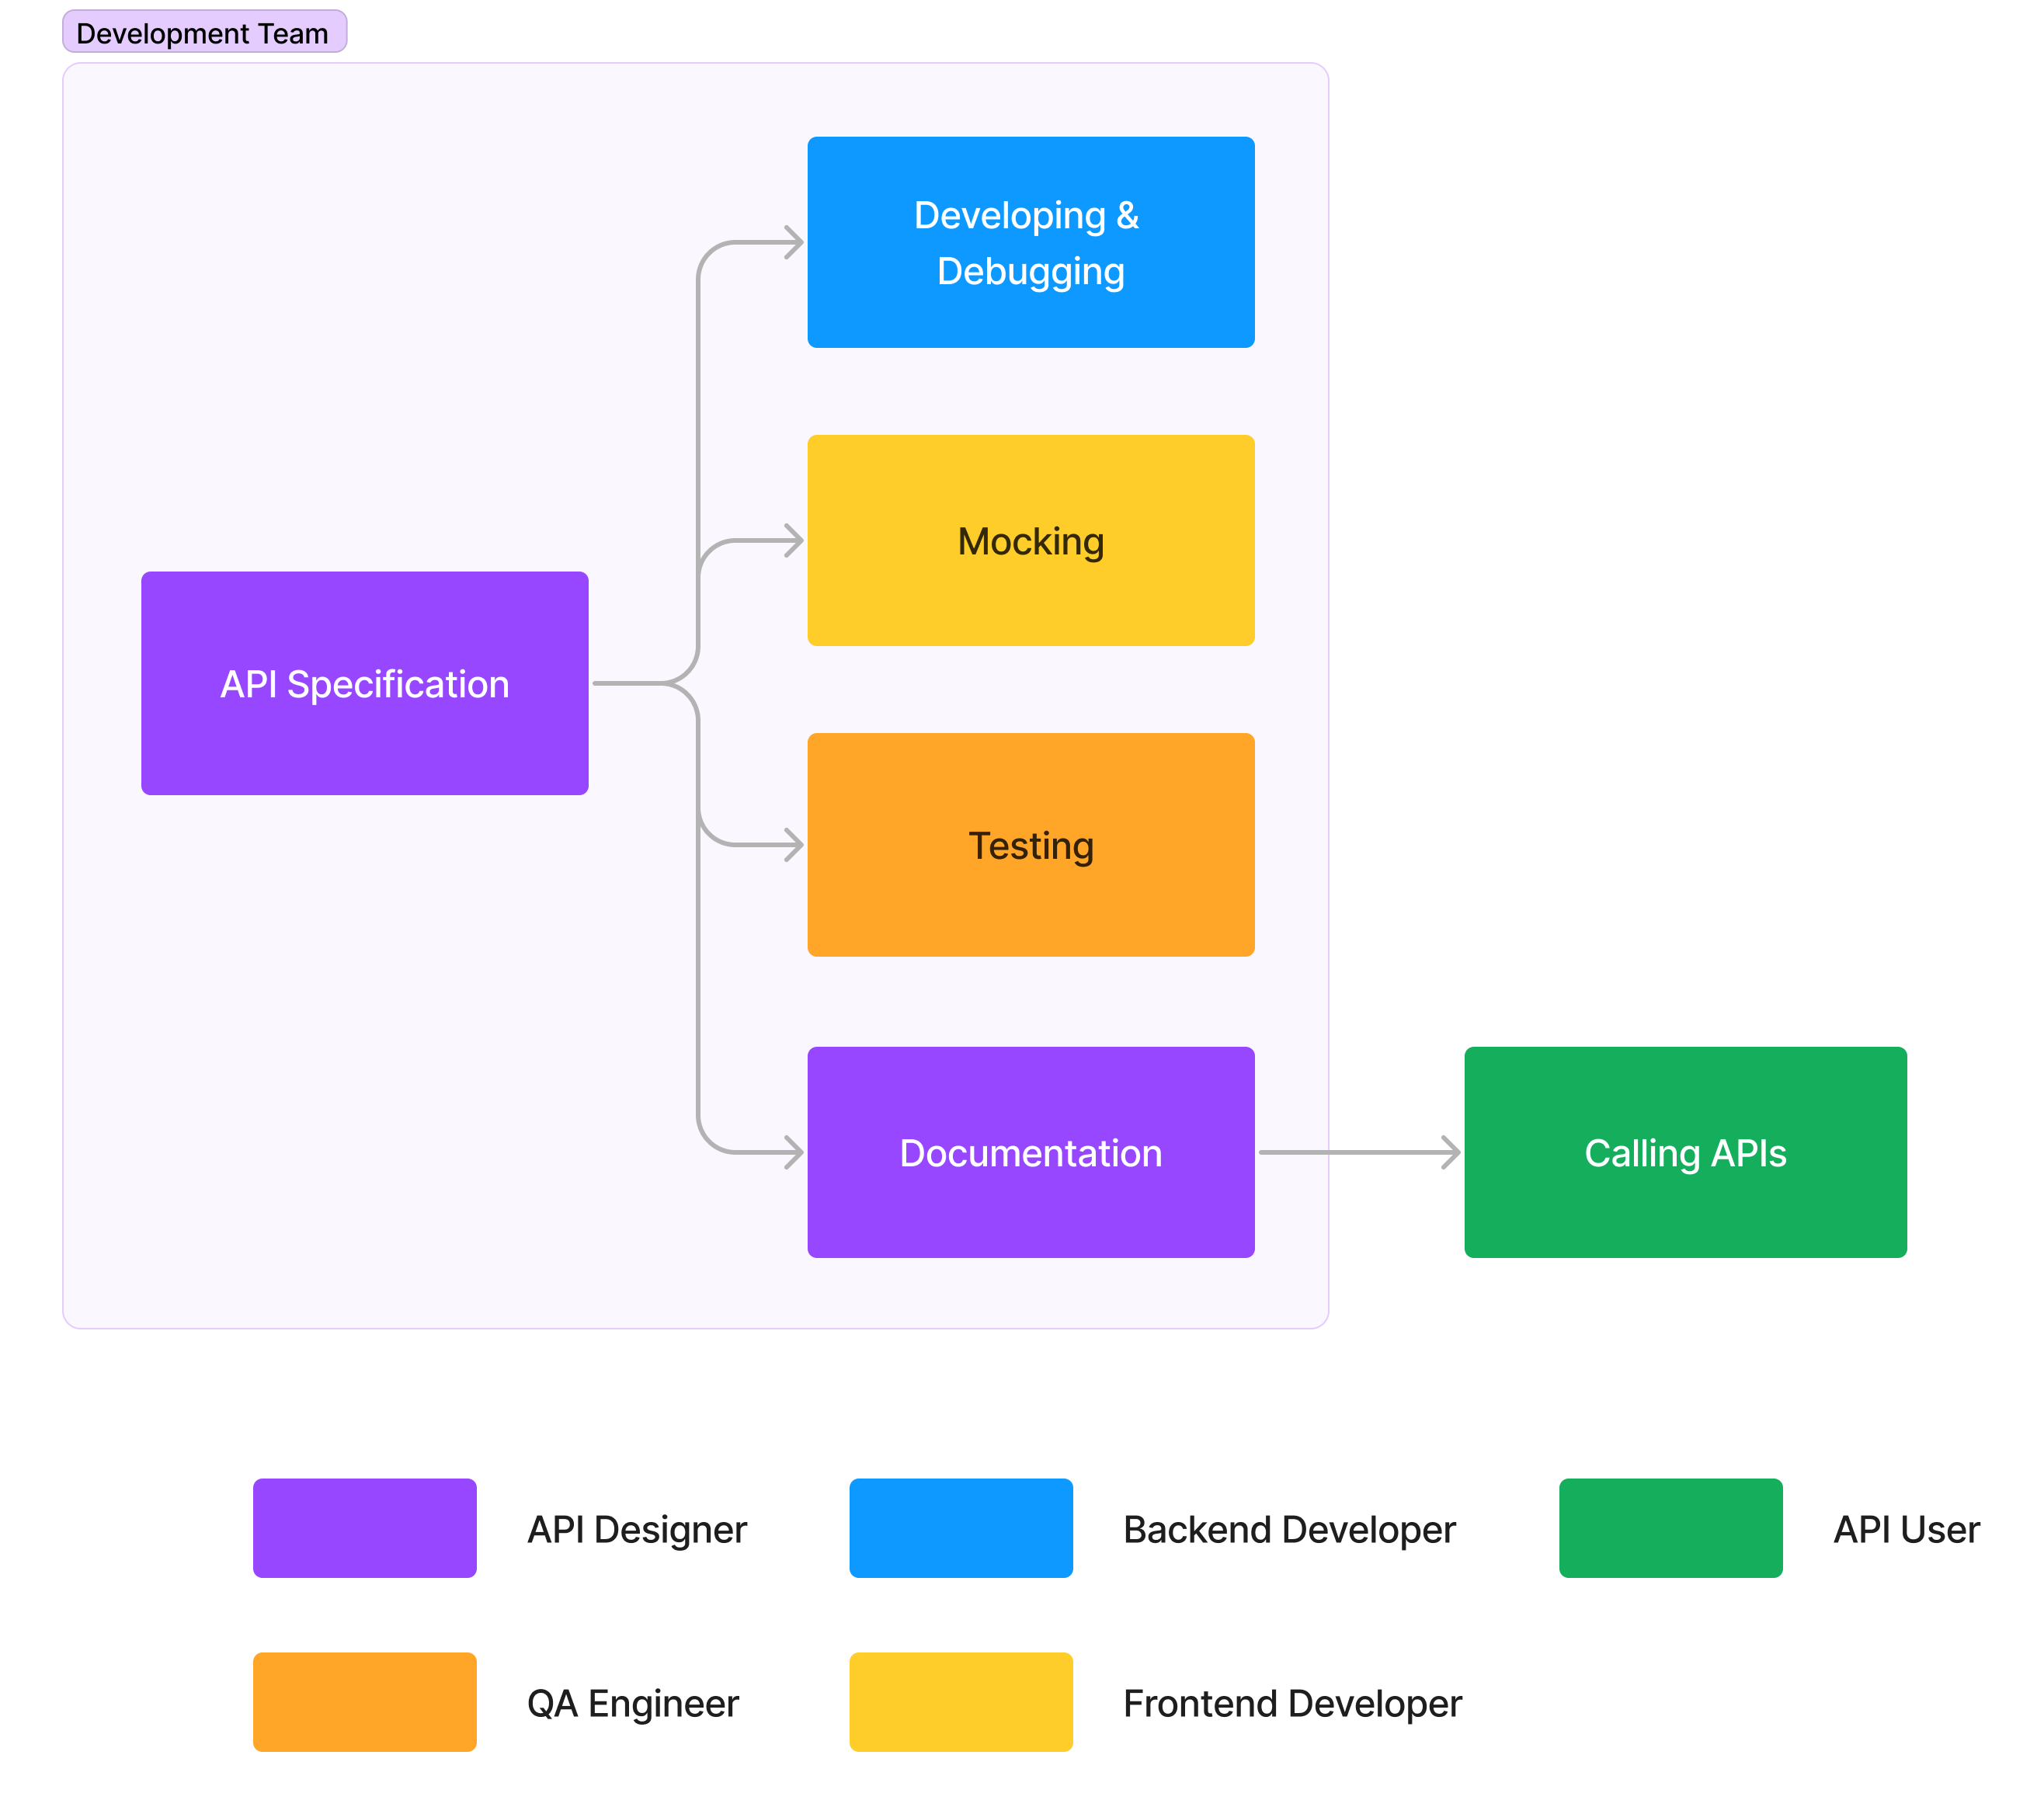
API Designers: Specify APls
Back-end Developers: API Developing & Debugging
Front-end Developers: API Mocking
QA Engineers: APl Testing
API Designers & API Consumers: APl Documentations
What is Apidog#
Apidog is an all-in-one toolkit for API development. The whole team can work on it together to produce APIs efficiently and conveniently. Each role in the team can use it to solve their own problems.Apidog follows the API-first approach, which is a development approach where the API is designed and developed before the user interface. This approach has several benefits, such as:1.
Apidog allows teams to work in parallel and establish a contract between services, allowing them to work on multiple APIs simultaneously and improving development speed.
2.
Automation can be achieved by using tools that import API definition files, reducing the time needed to develop and launch an API.
3.
It ensures a good developer experience, with well-designed and well-documented APIs, making it easy for developers to use and reuse code, onboard new developers, and reduce the learning curve.
4.
By solving most of the problems before any code is written, it can also prevent issues when integrating APIs with applications.
Why Apidog#
We have observed that development teams often utilize a variety of tools, such as Postman, Swagger, Stoplight, and Jmeter, to design, manage, and test APIs during the development process. However, the absence of data synchronization and collaboration between these tools can significantly hinder efficiency.A better solution is for the entire development team to work within a single API tool. As long as the API documentation is defined, back-end developers can easily implement and self-test the API, front-end developers can easily call the API and use mock data, and test engineers can directly test the API and easily generate test cases. This greatly improves the efficiency of team collaboration.That is why we created the Apidog product. It is a comprehensive tool for API design, development, testing, management, documentation, and mocking, specifically designed for team collaboration.API Designers: Specify APIs#
API designers can use Apidog to specify APIs visually or import from OpenAPI specifications.Import from OpenAPI specifications#
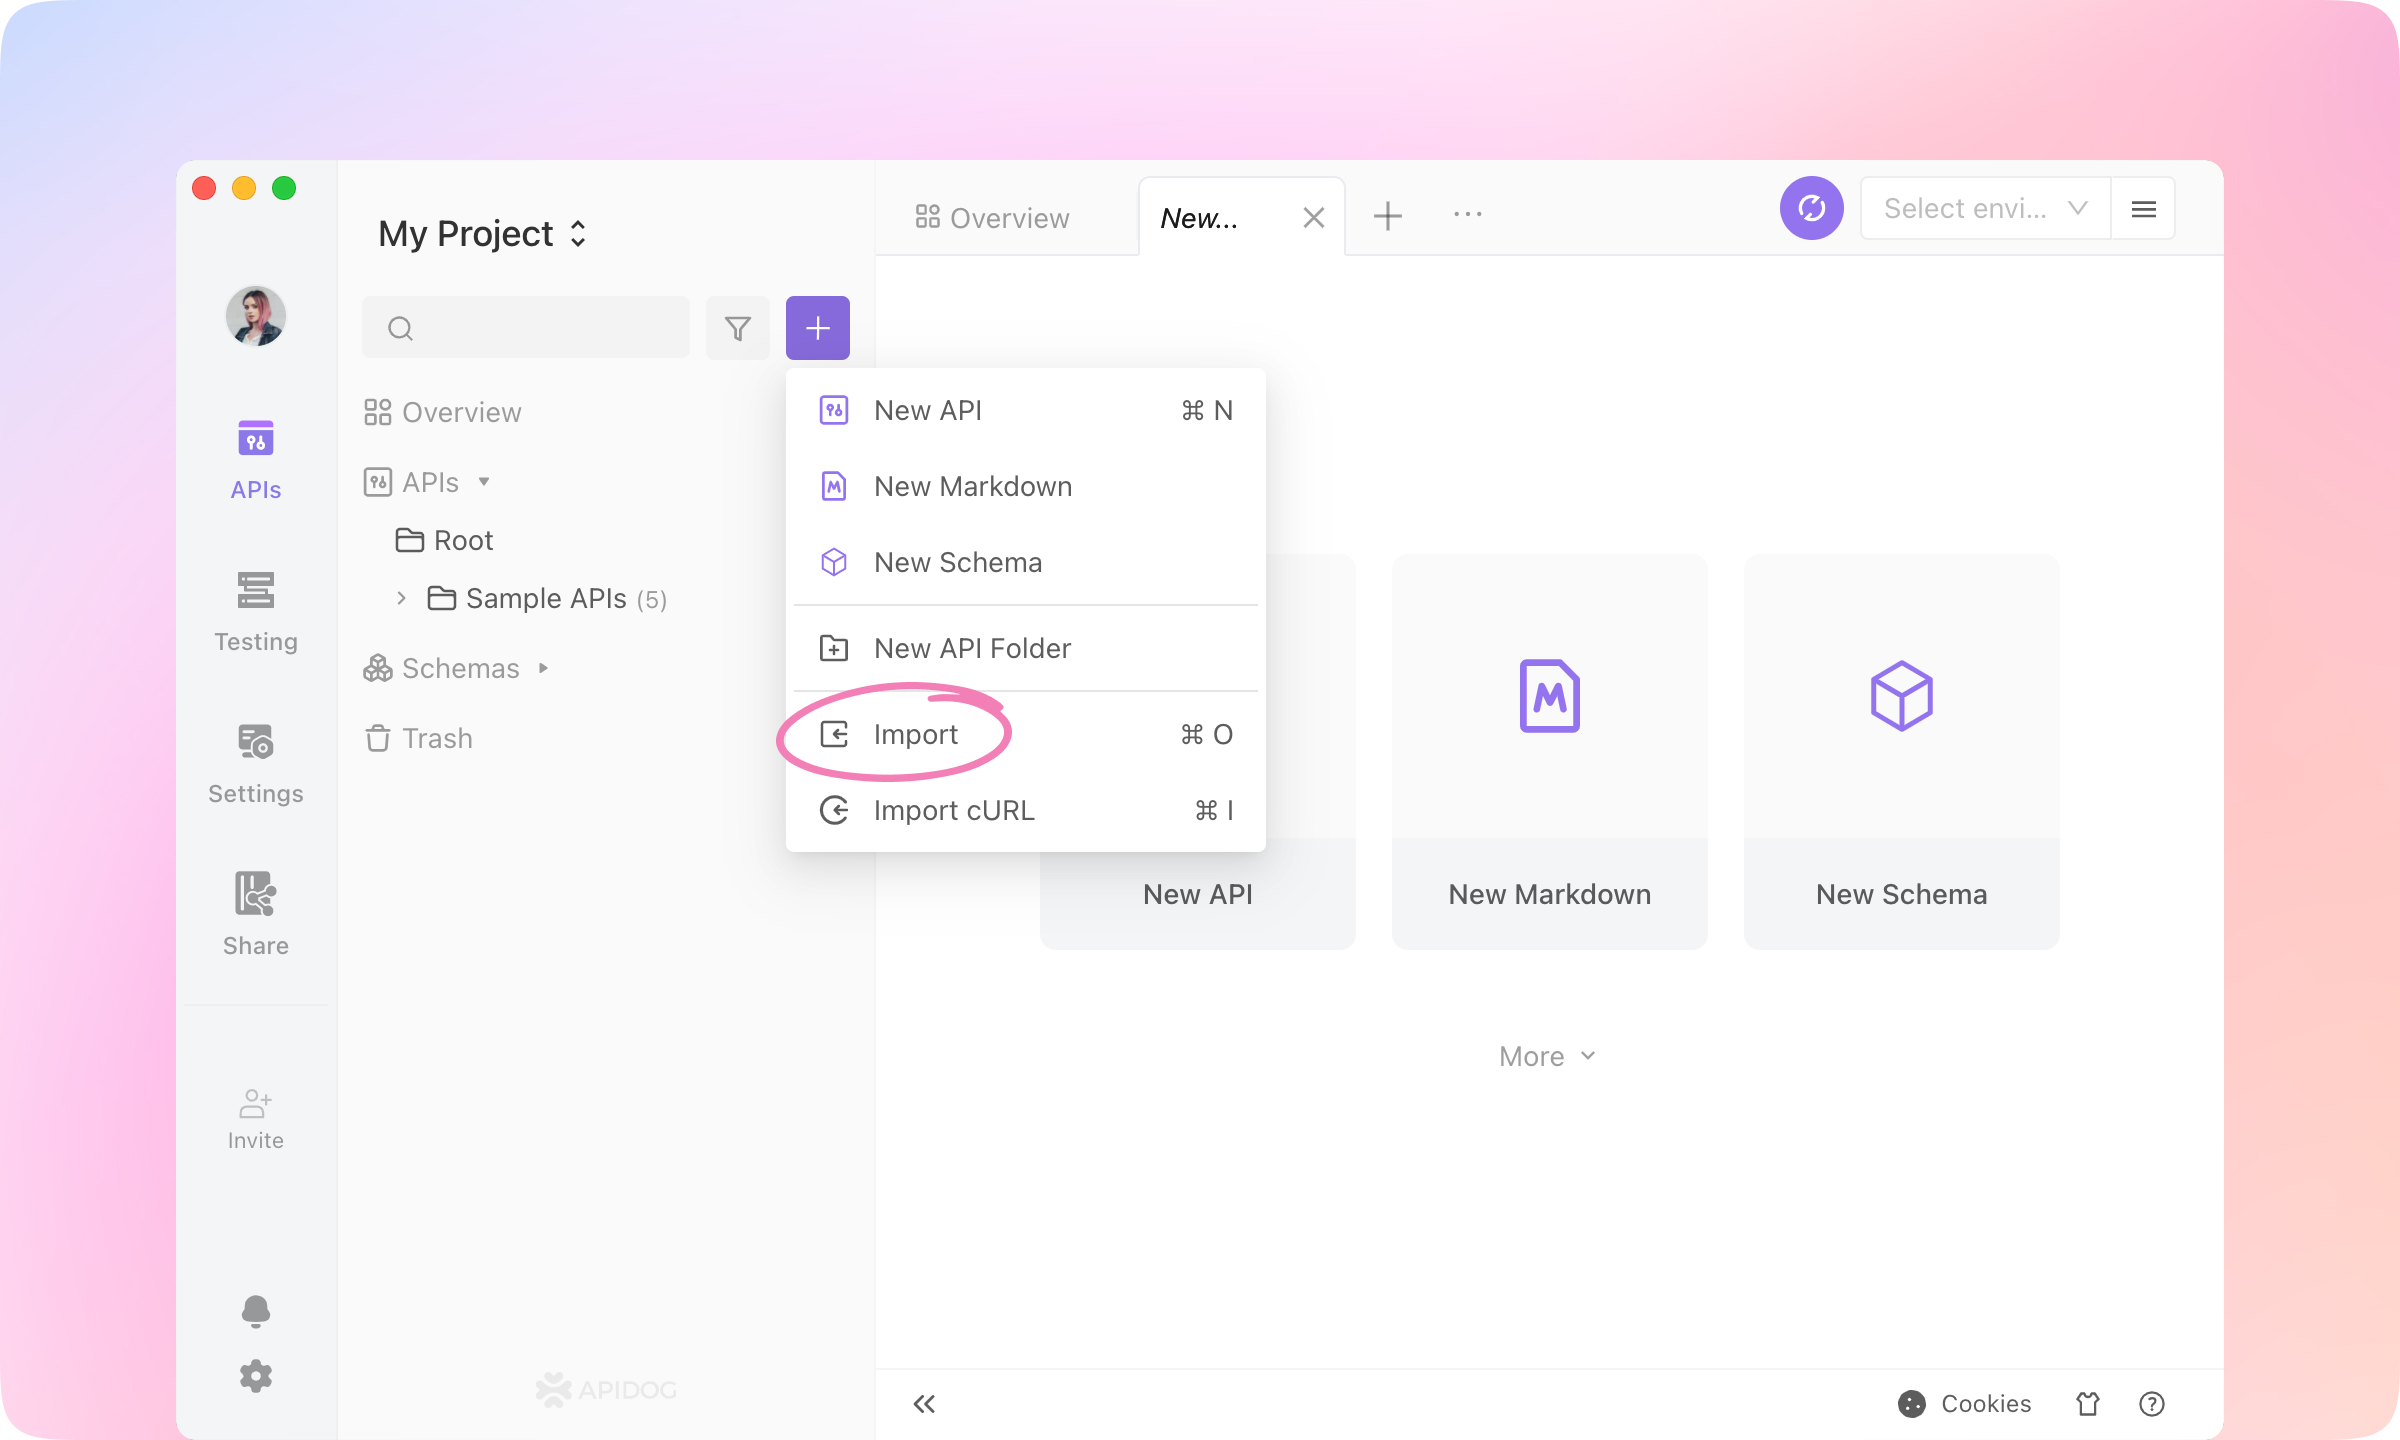
If your API has been specified in OpenAPI or any other format, you can import it into Apidog so that it can be easily debugged, tested, or mocked.1.
Click Import in an Apidog project.
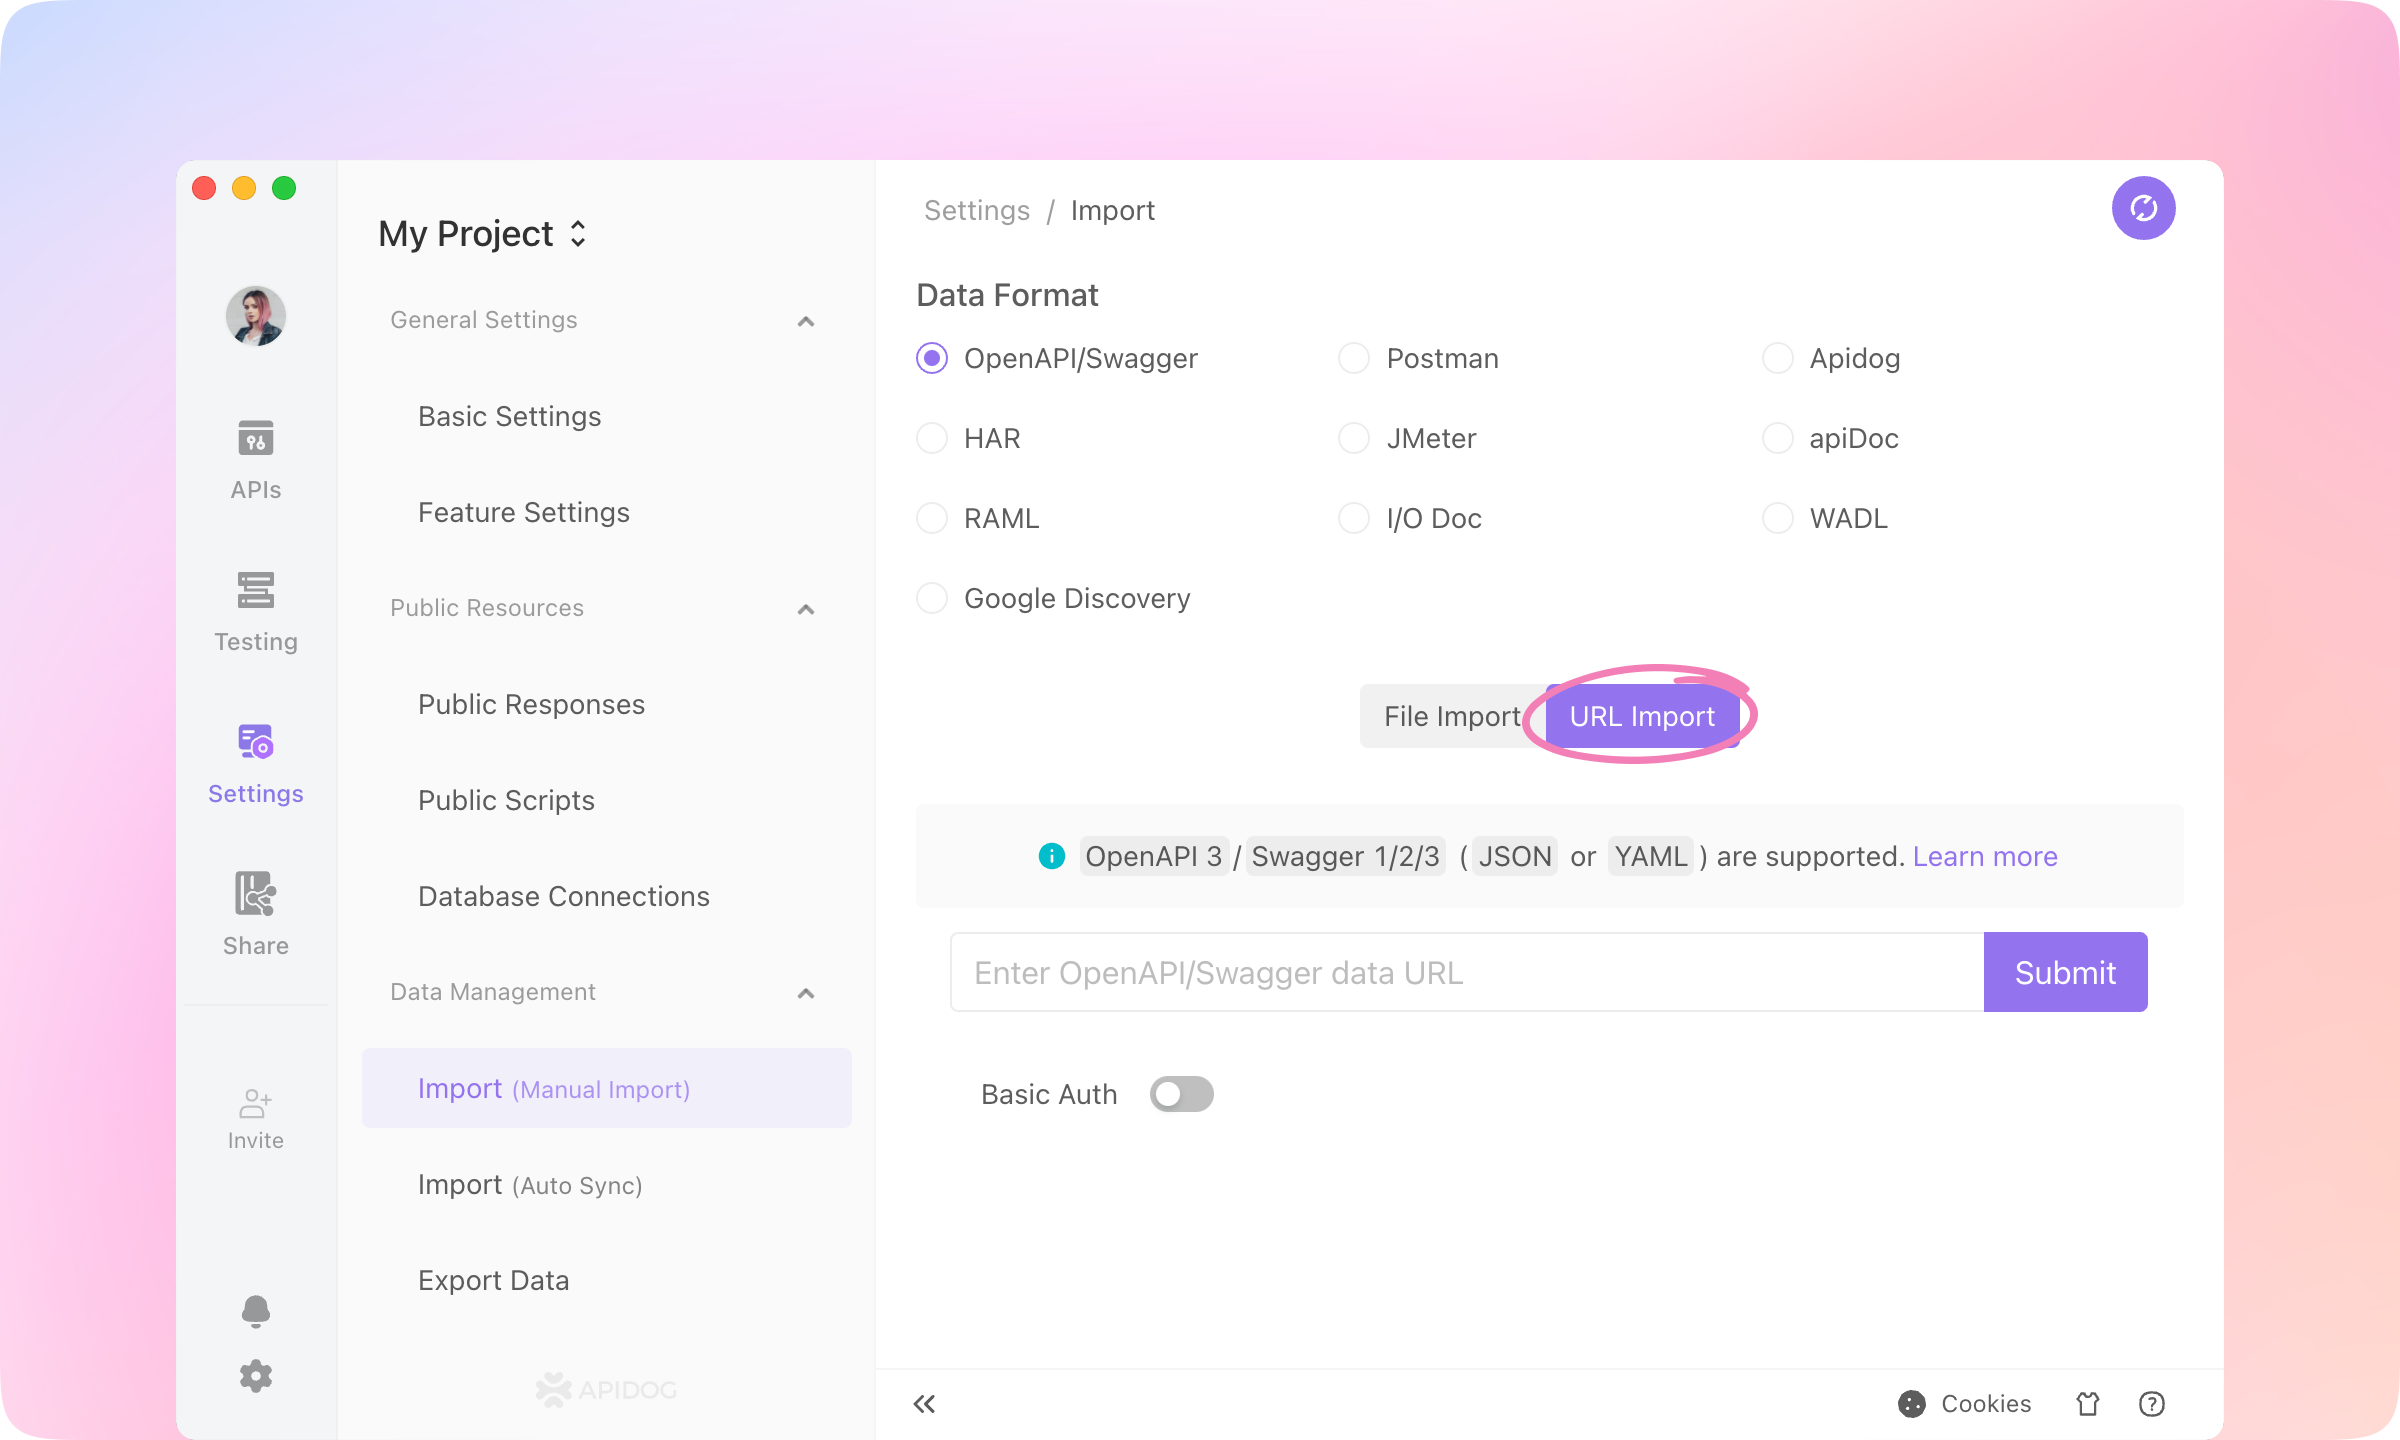
2.
Switch to URL Import, paste the following URL and click Submit.
https://petstore.swagger.io/v2/swagger.json
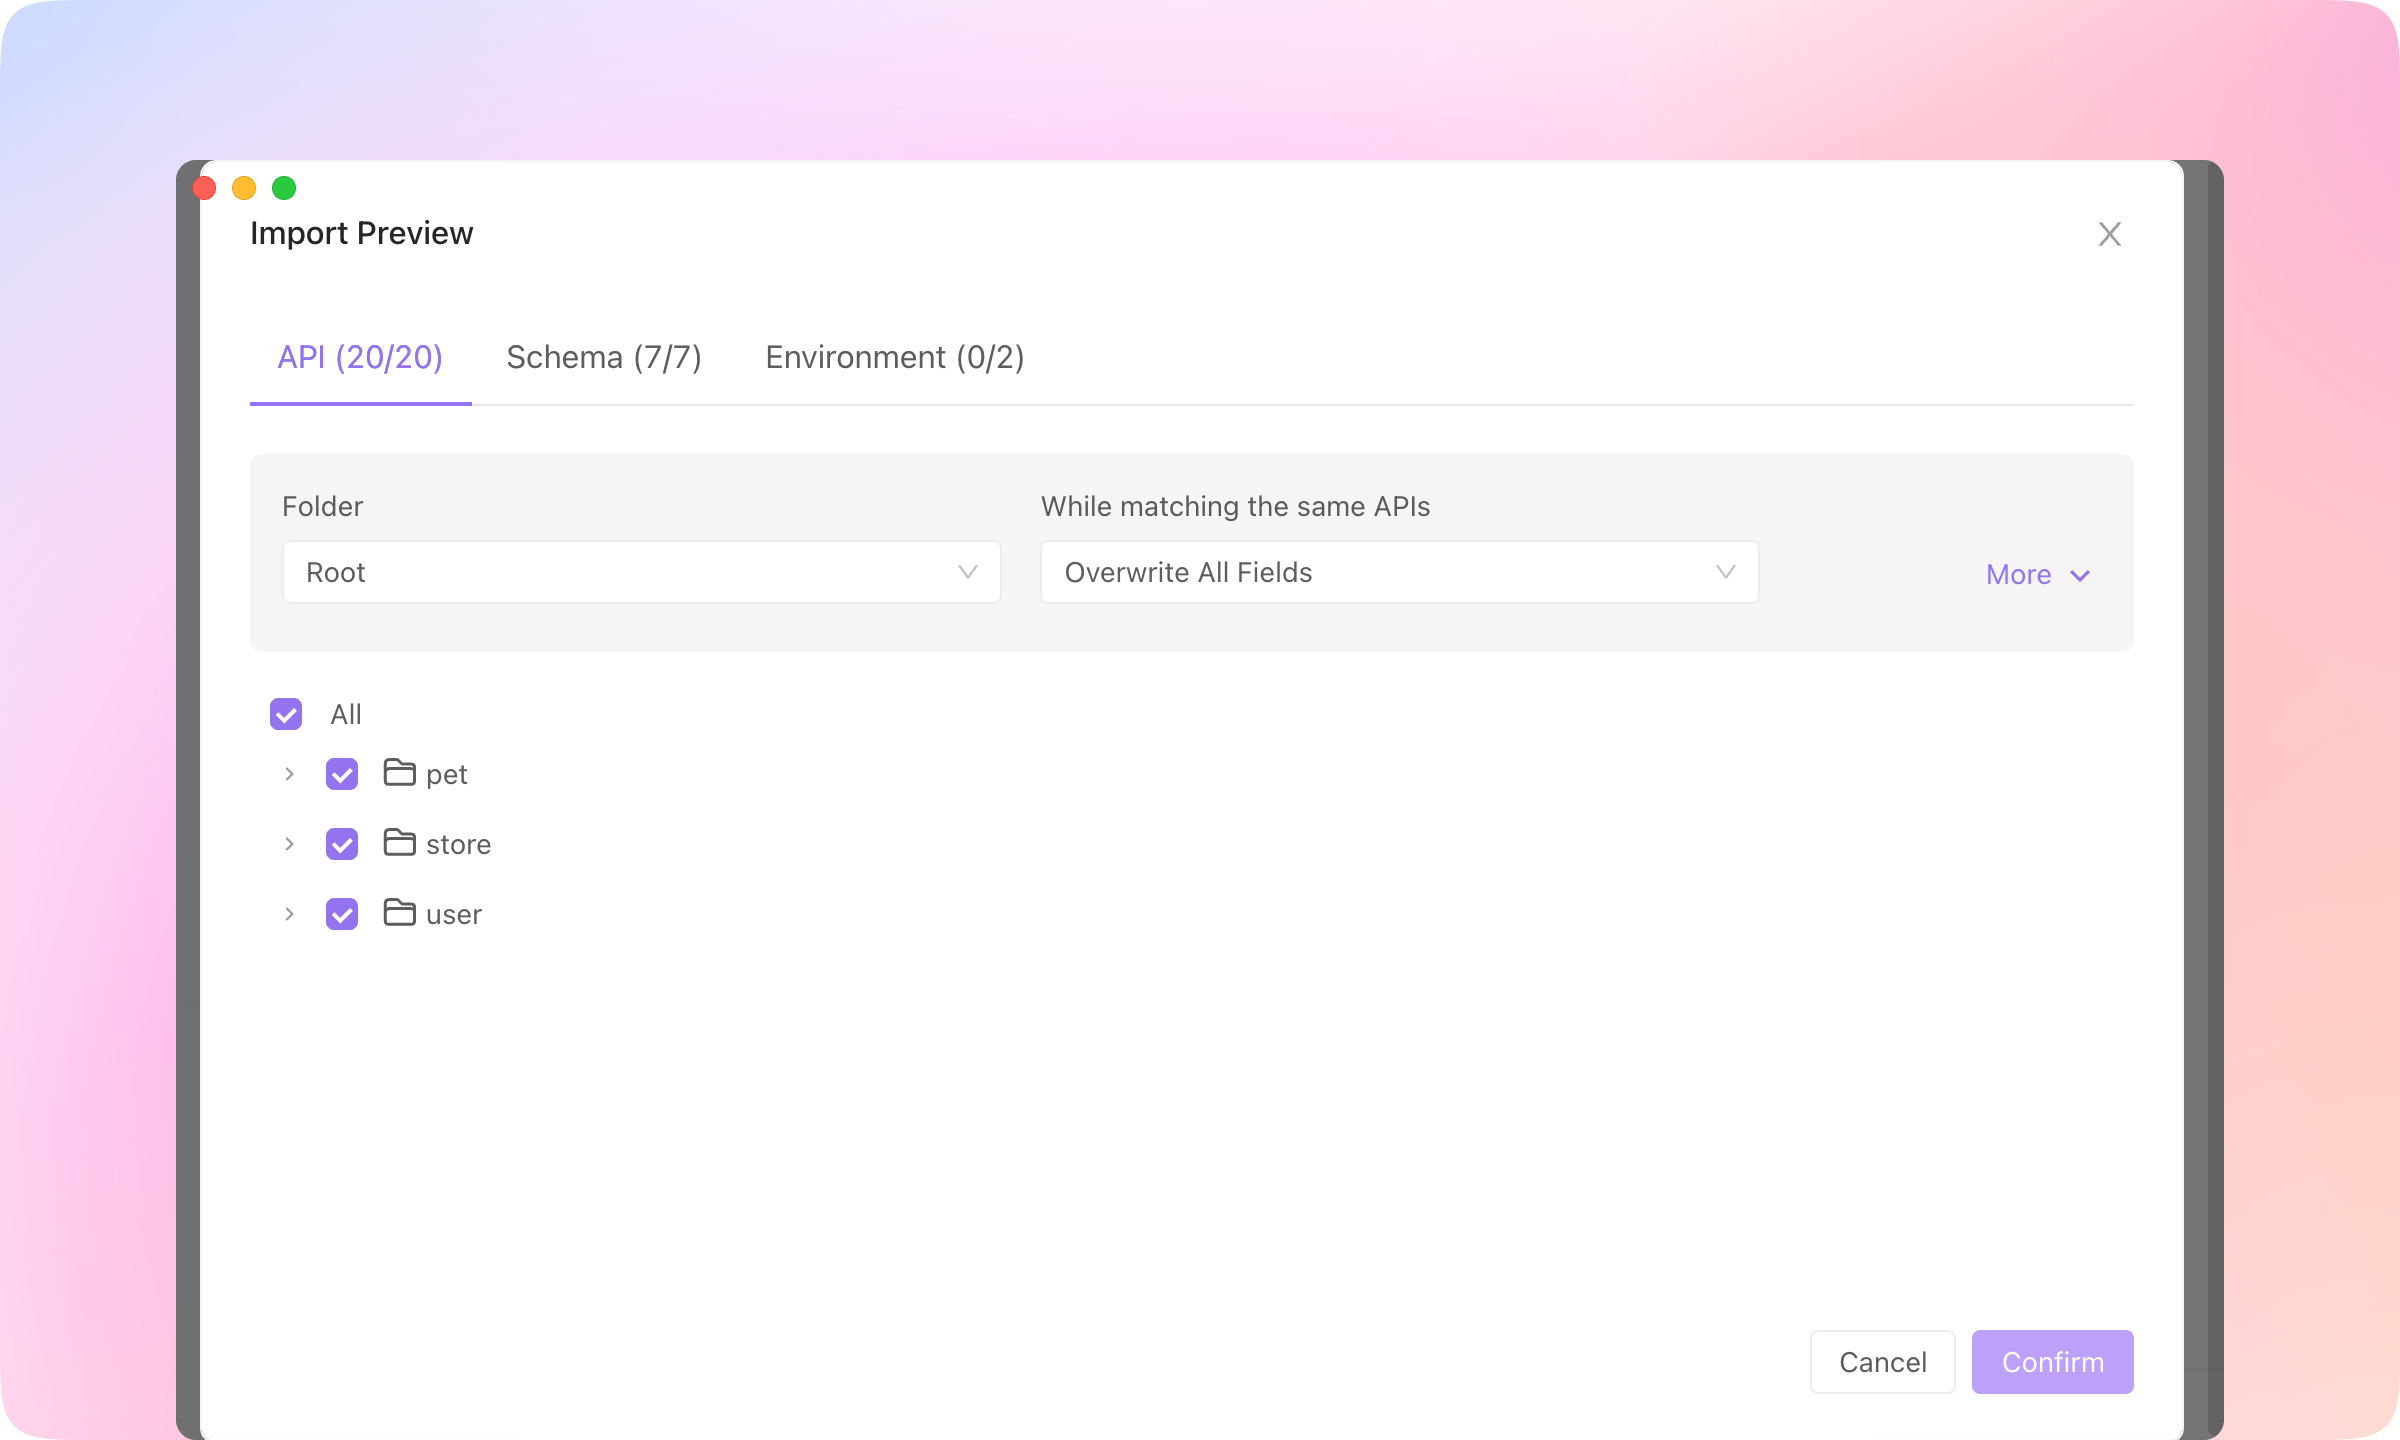
4.
Now you can run or test the API in Apidog.
Learn more about importing data here. Specify a new API#
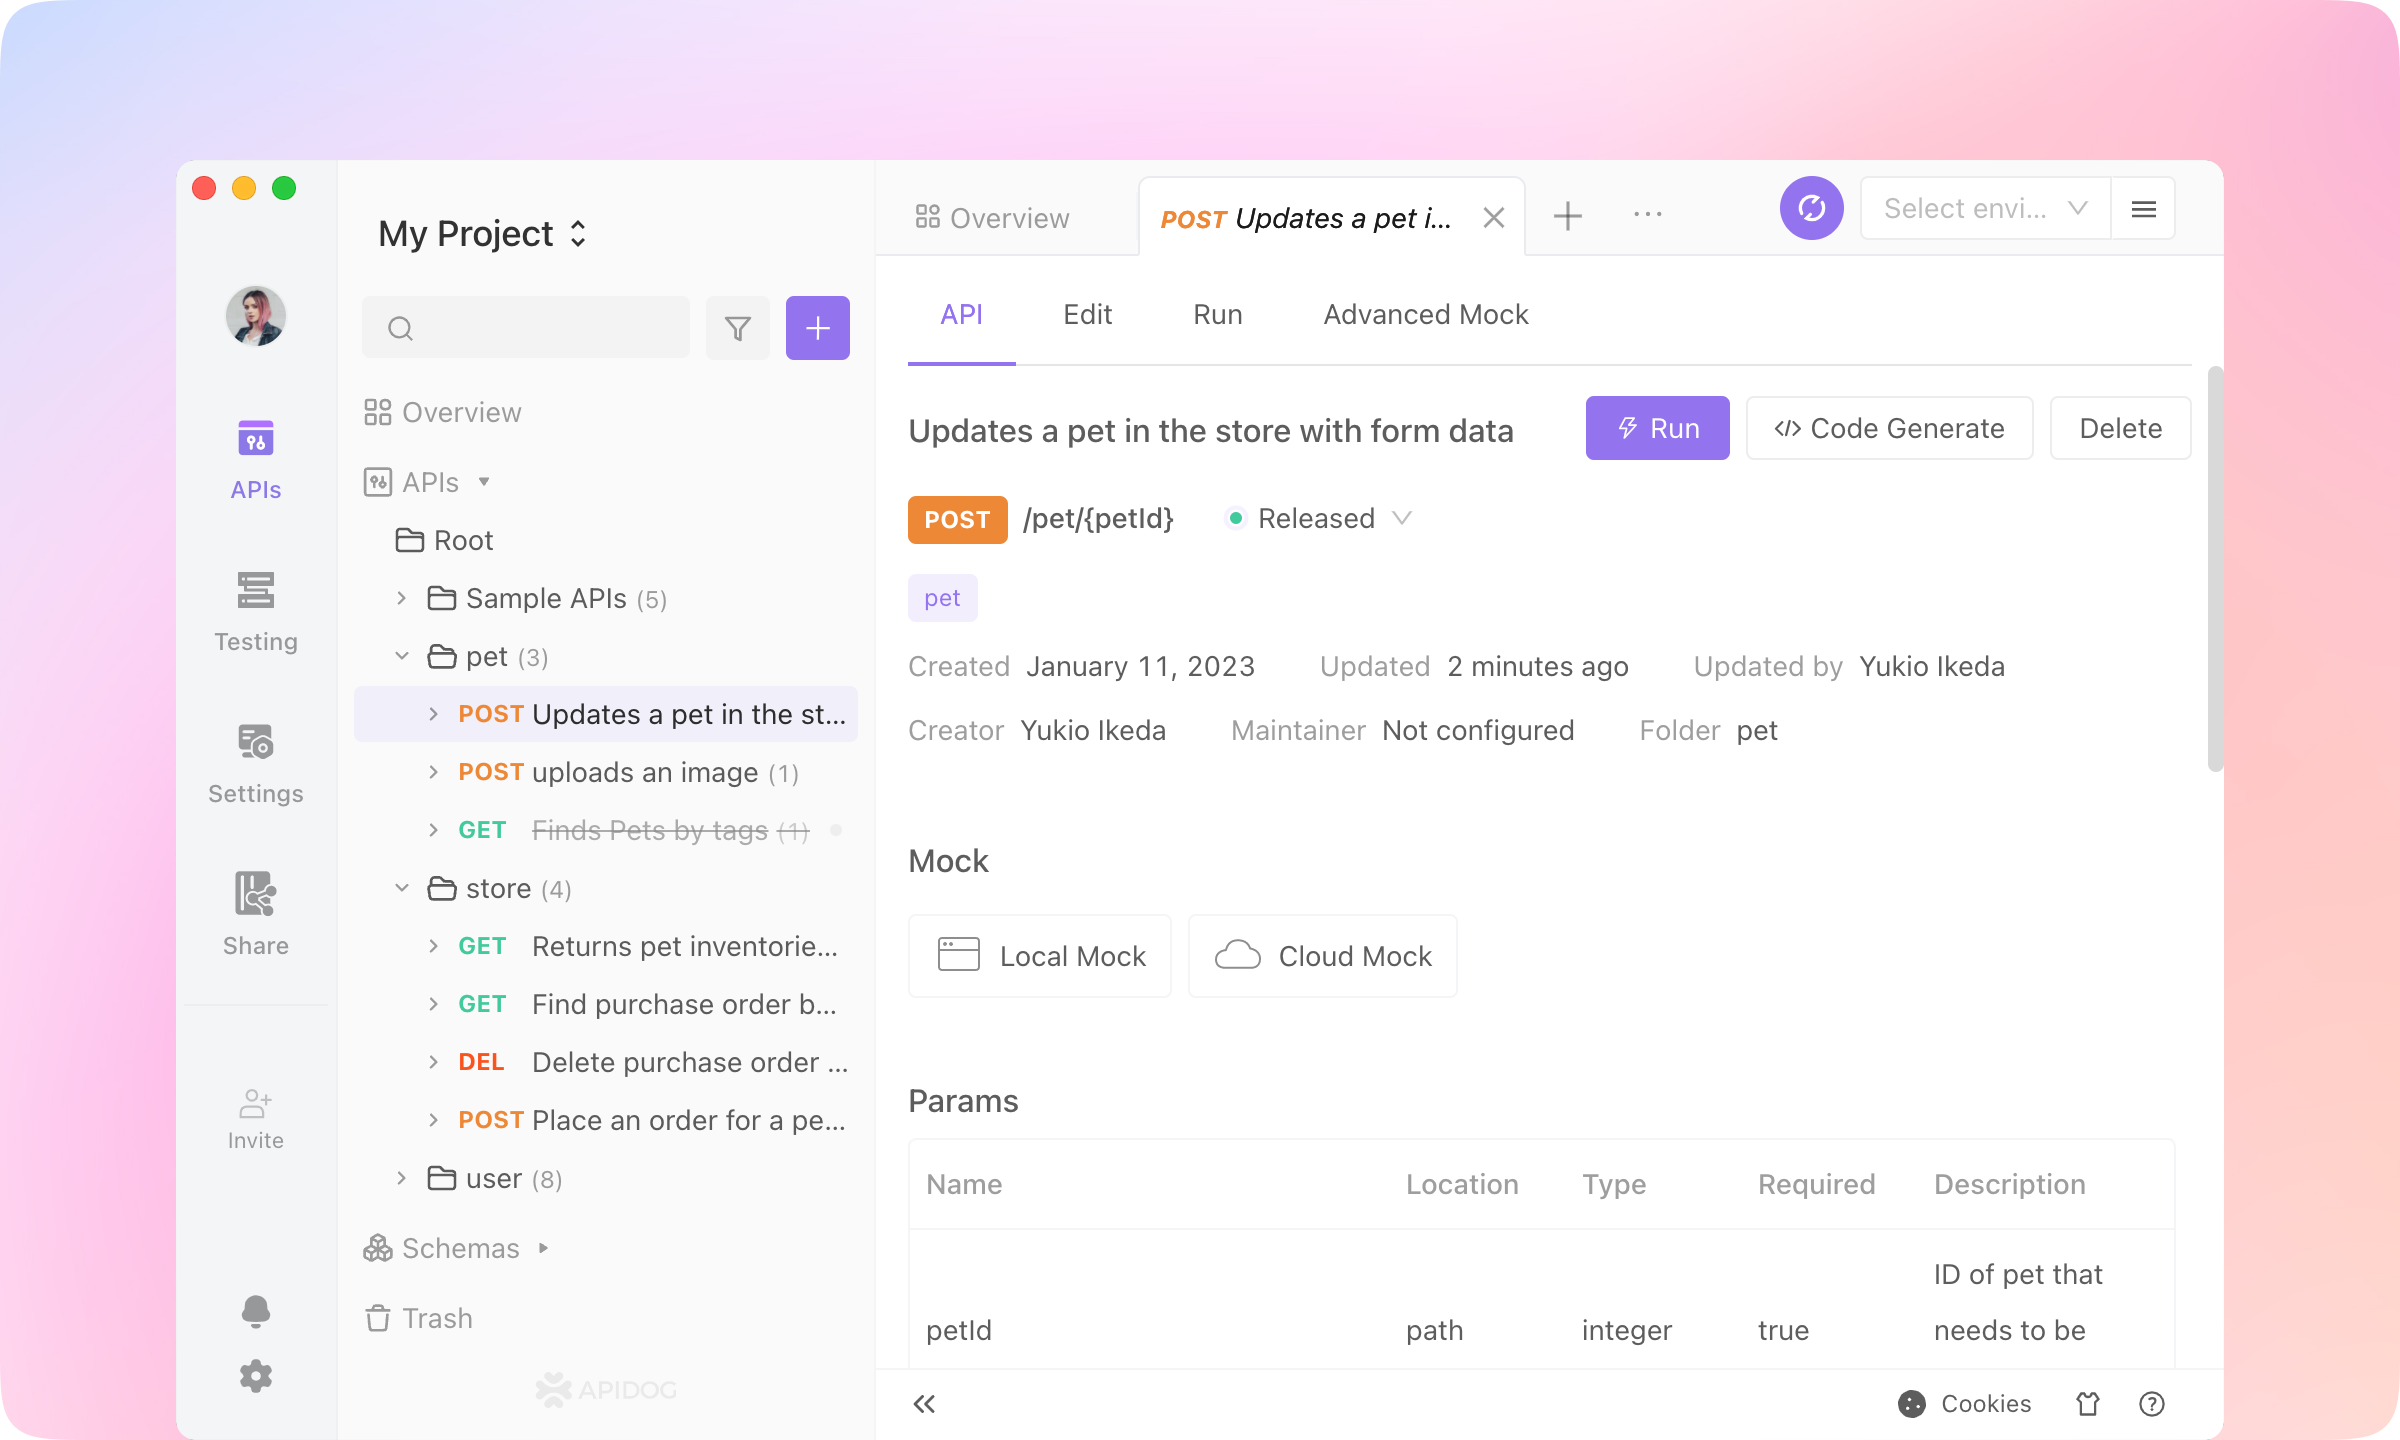
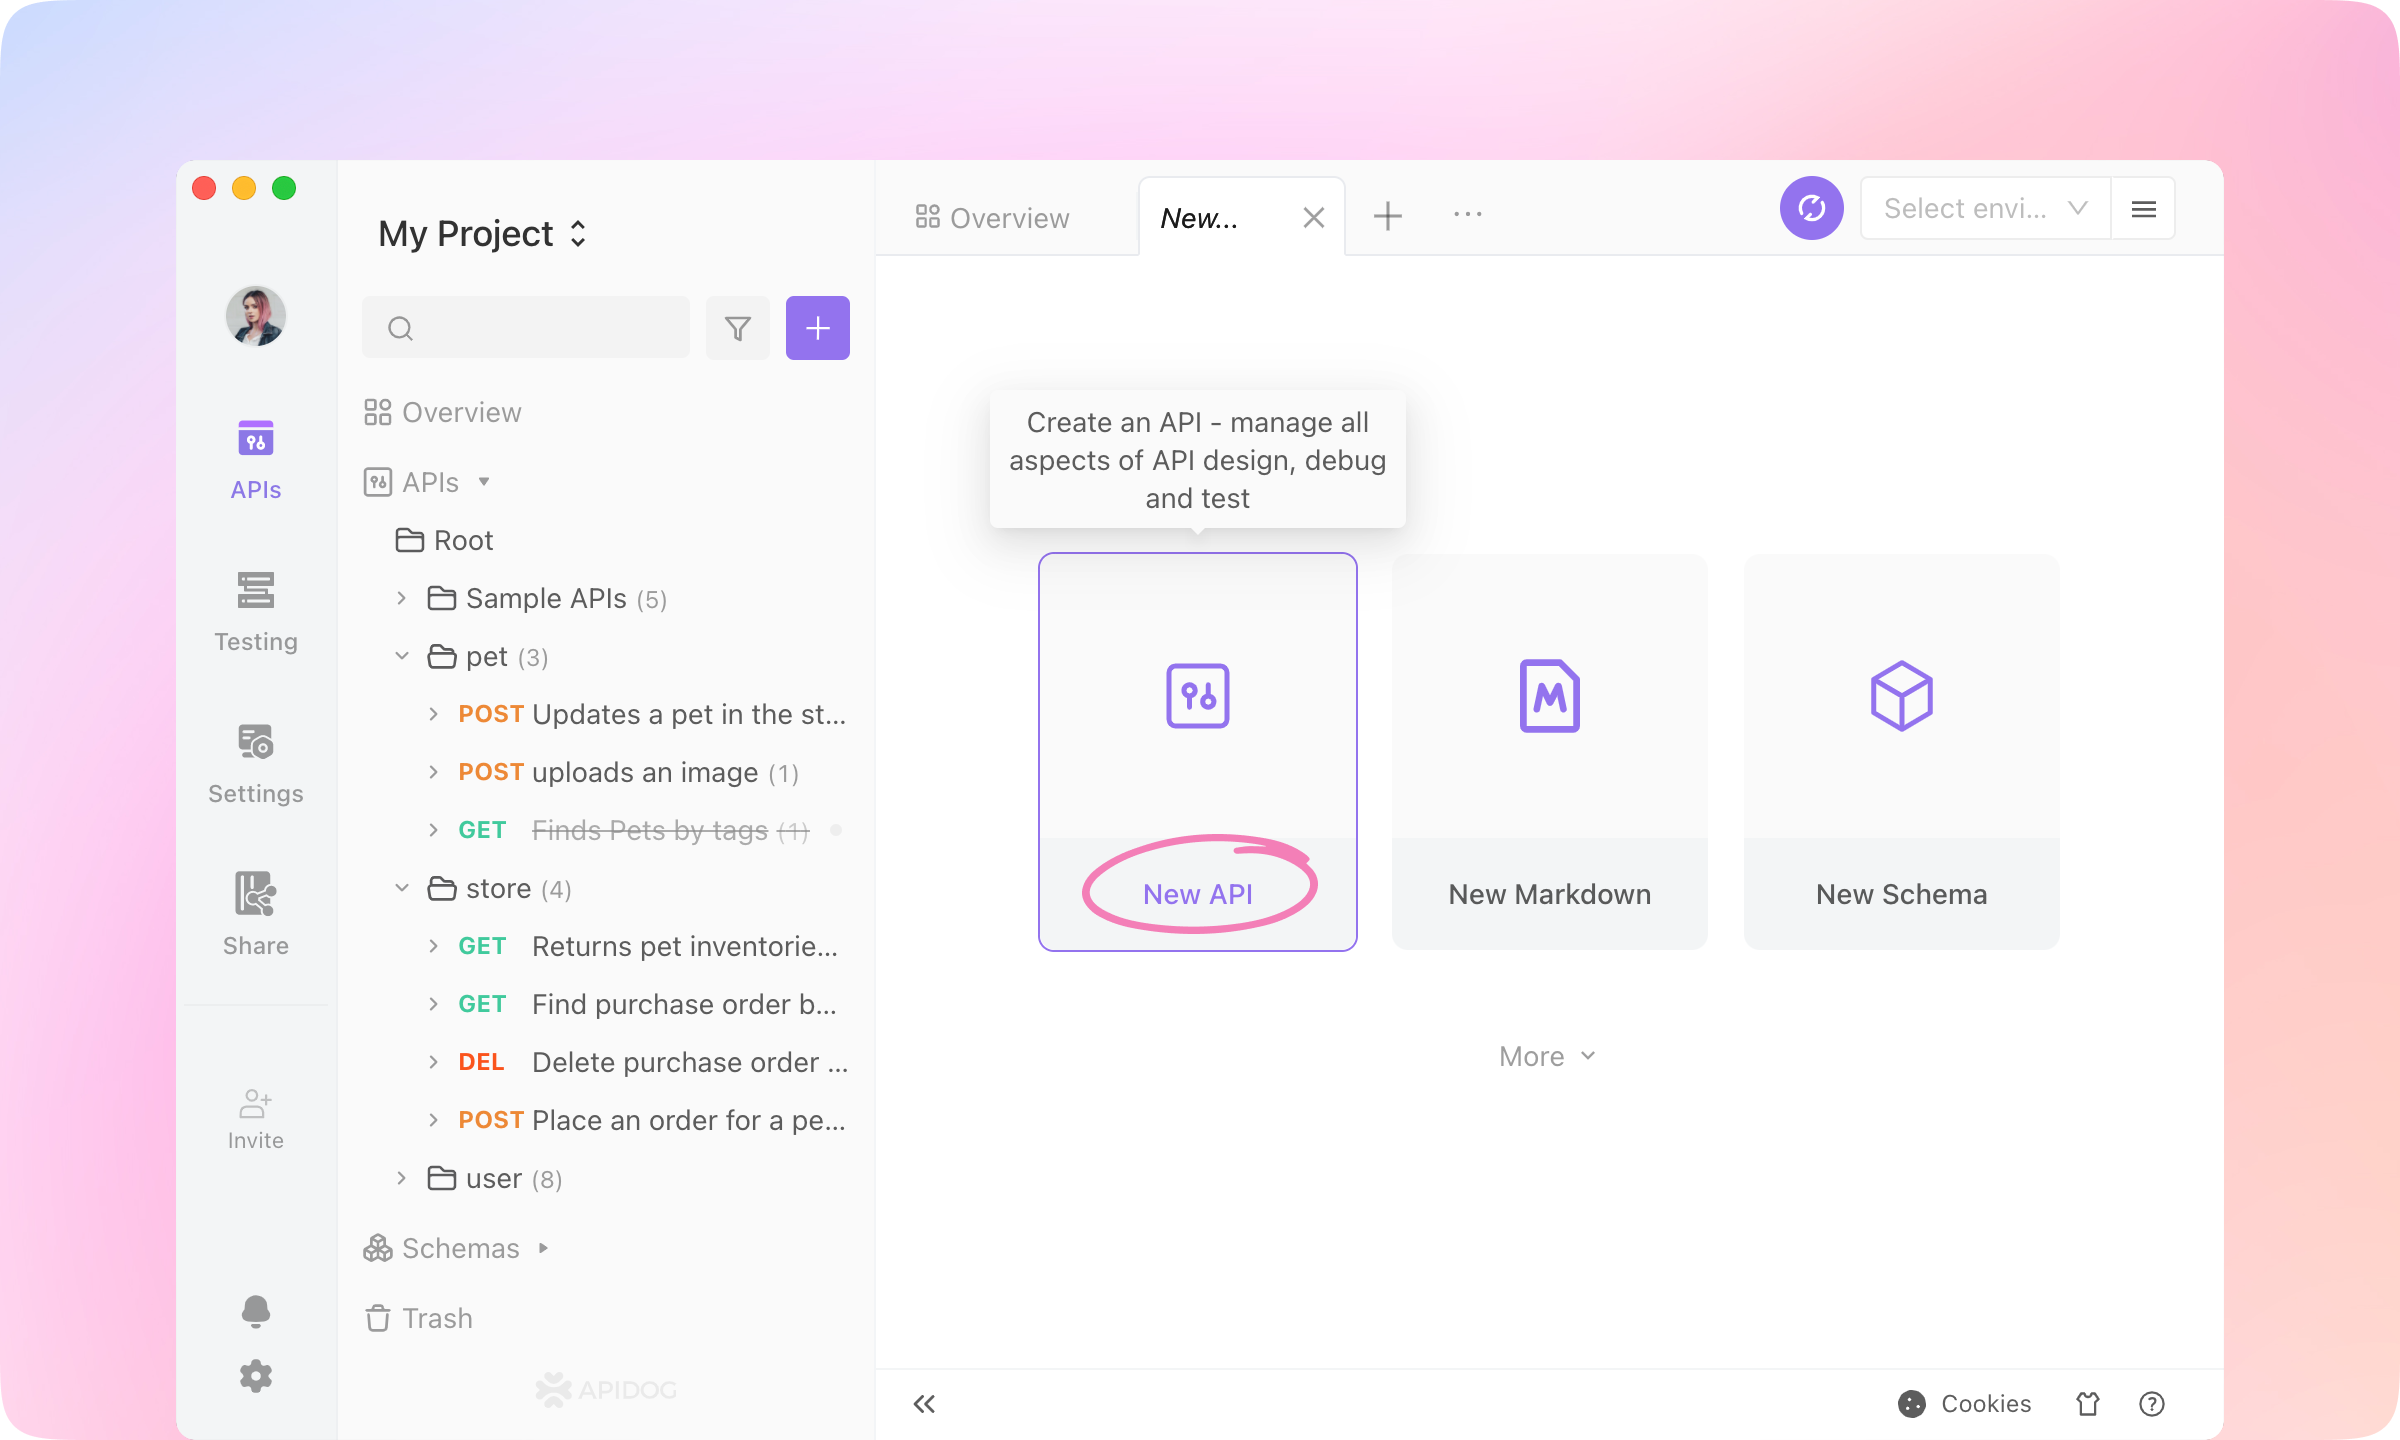
API designers can use Apidog to specify APIs in an intuitive interface.1.
Start a new tab and click New API to create an endpoint.
2.
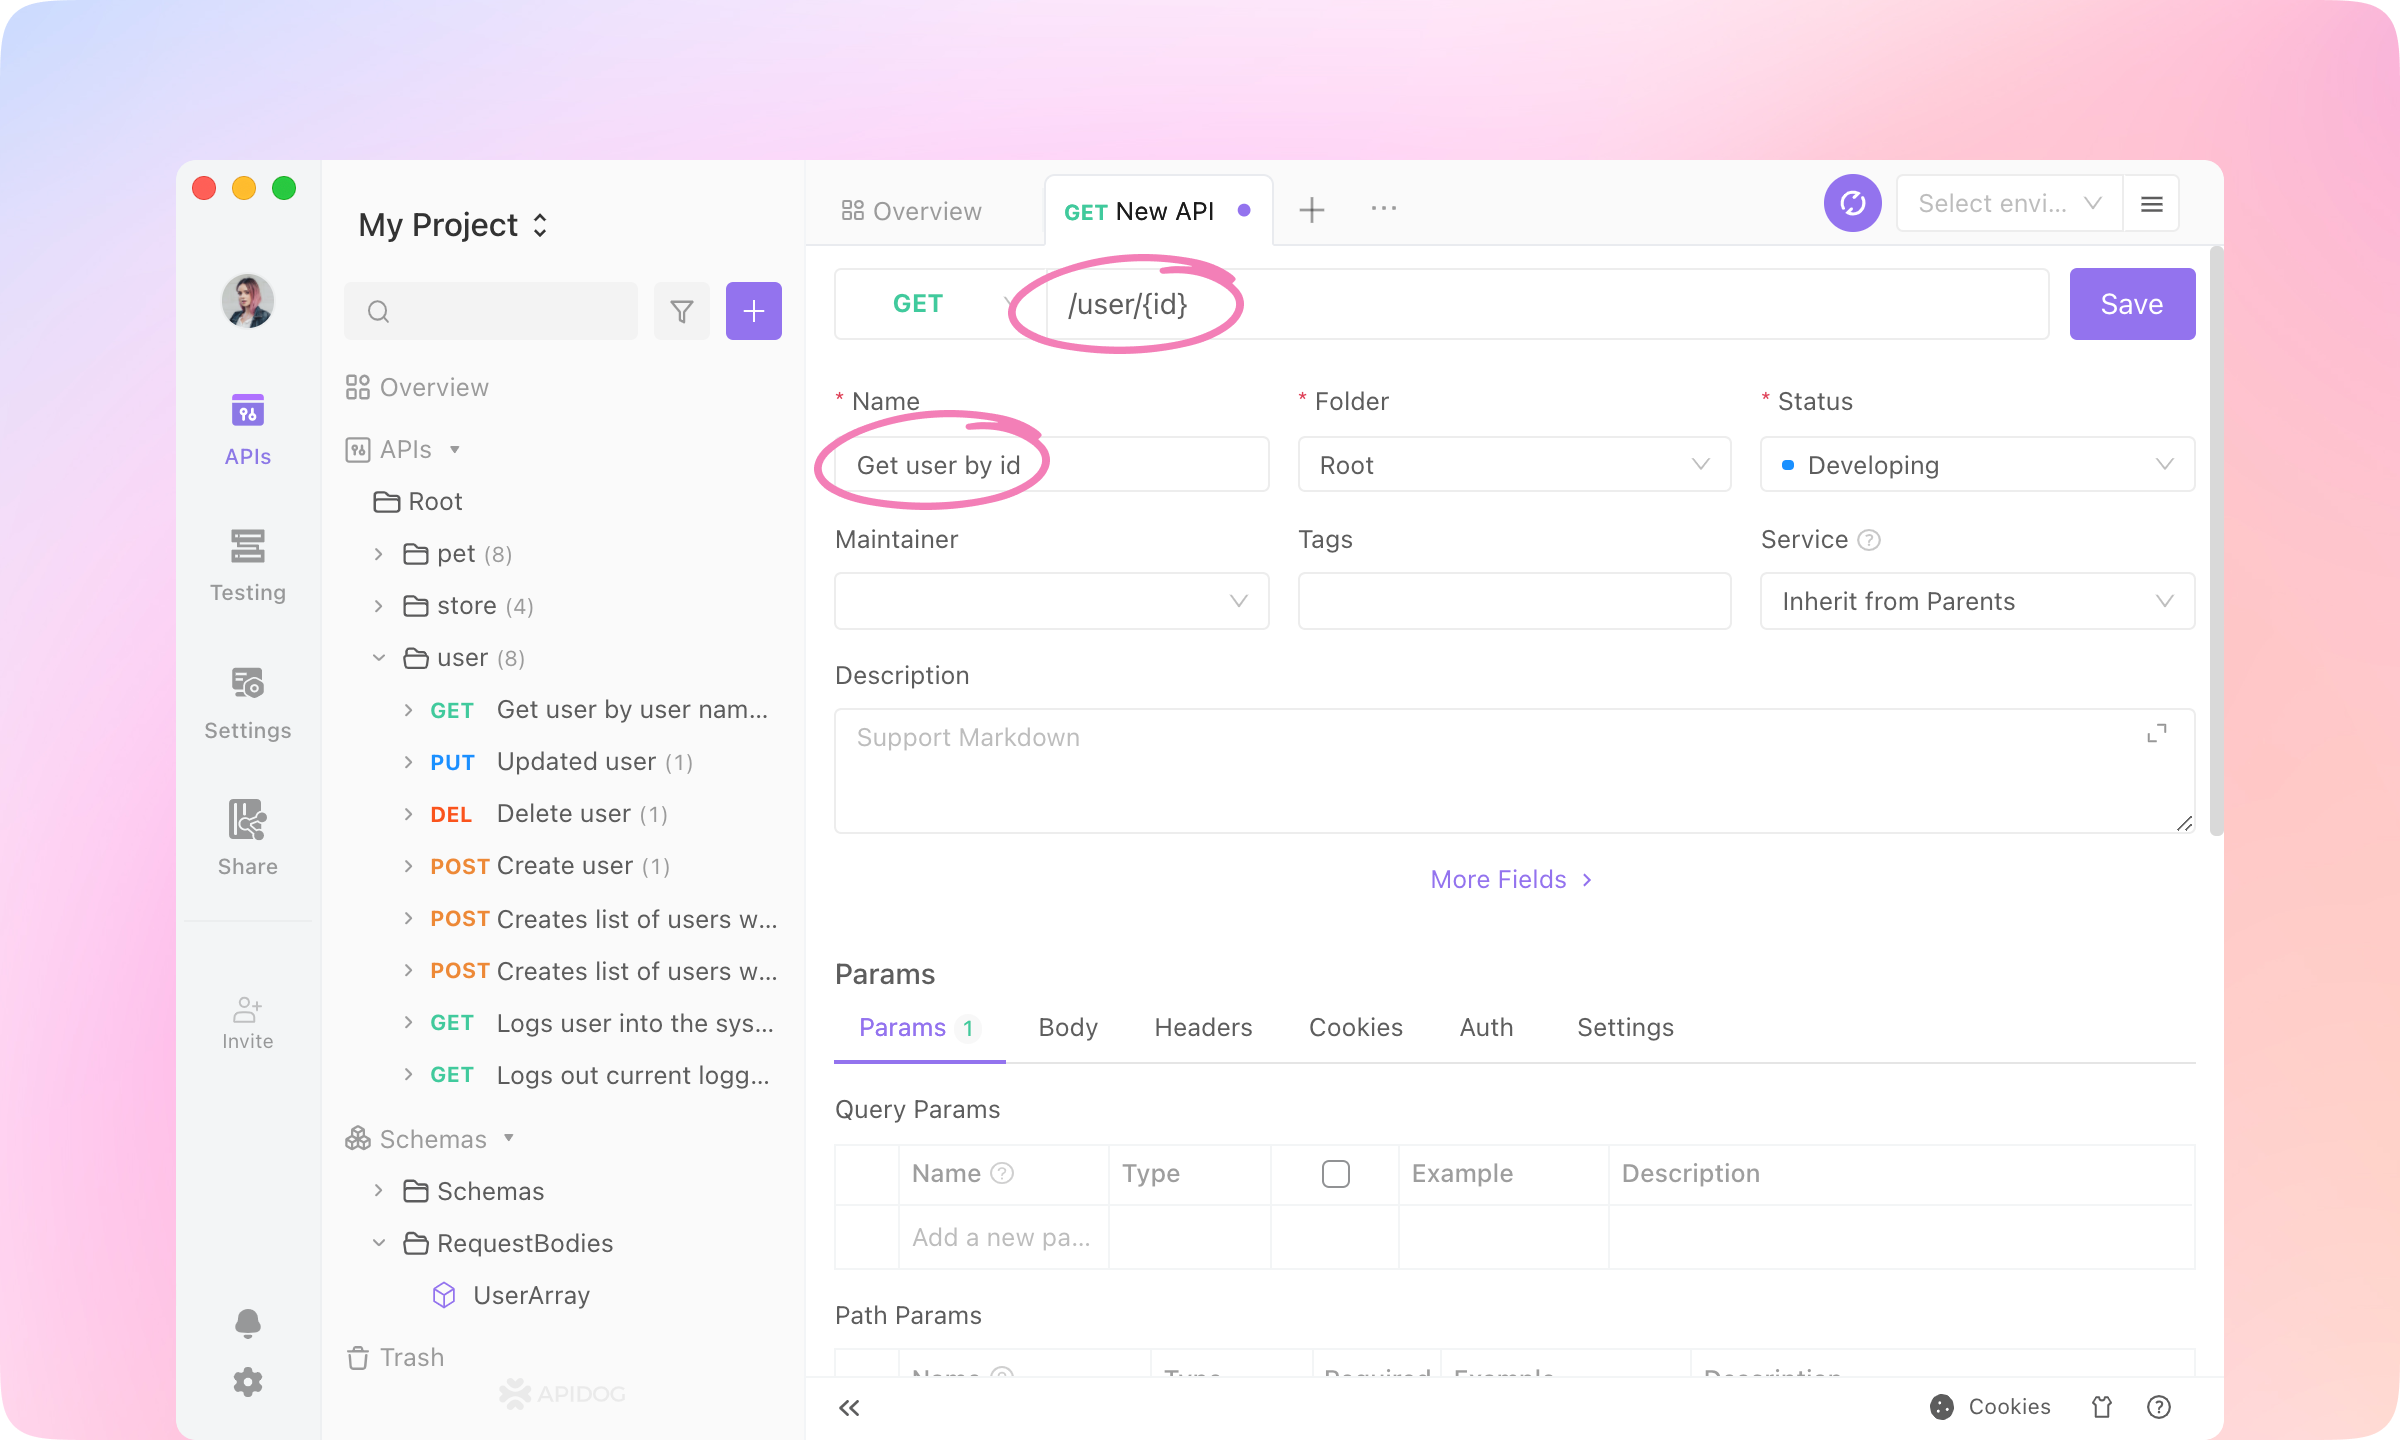
Now we're going to specify an API for querying user information by id. So you can enter these fields into the API. 3.
This API has no query params or body params. You'll see 'id' recognized as a path param. Now the Request part is finished.
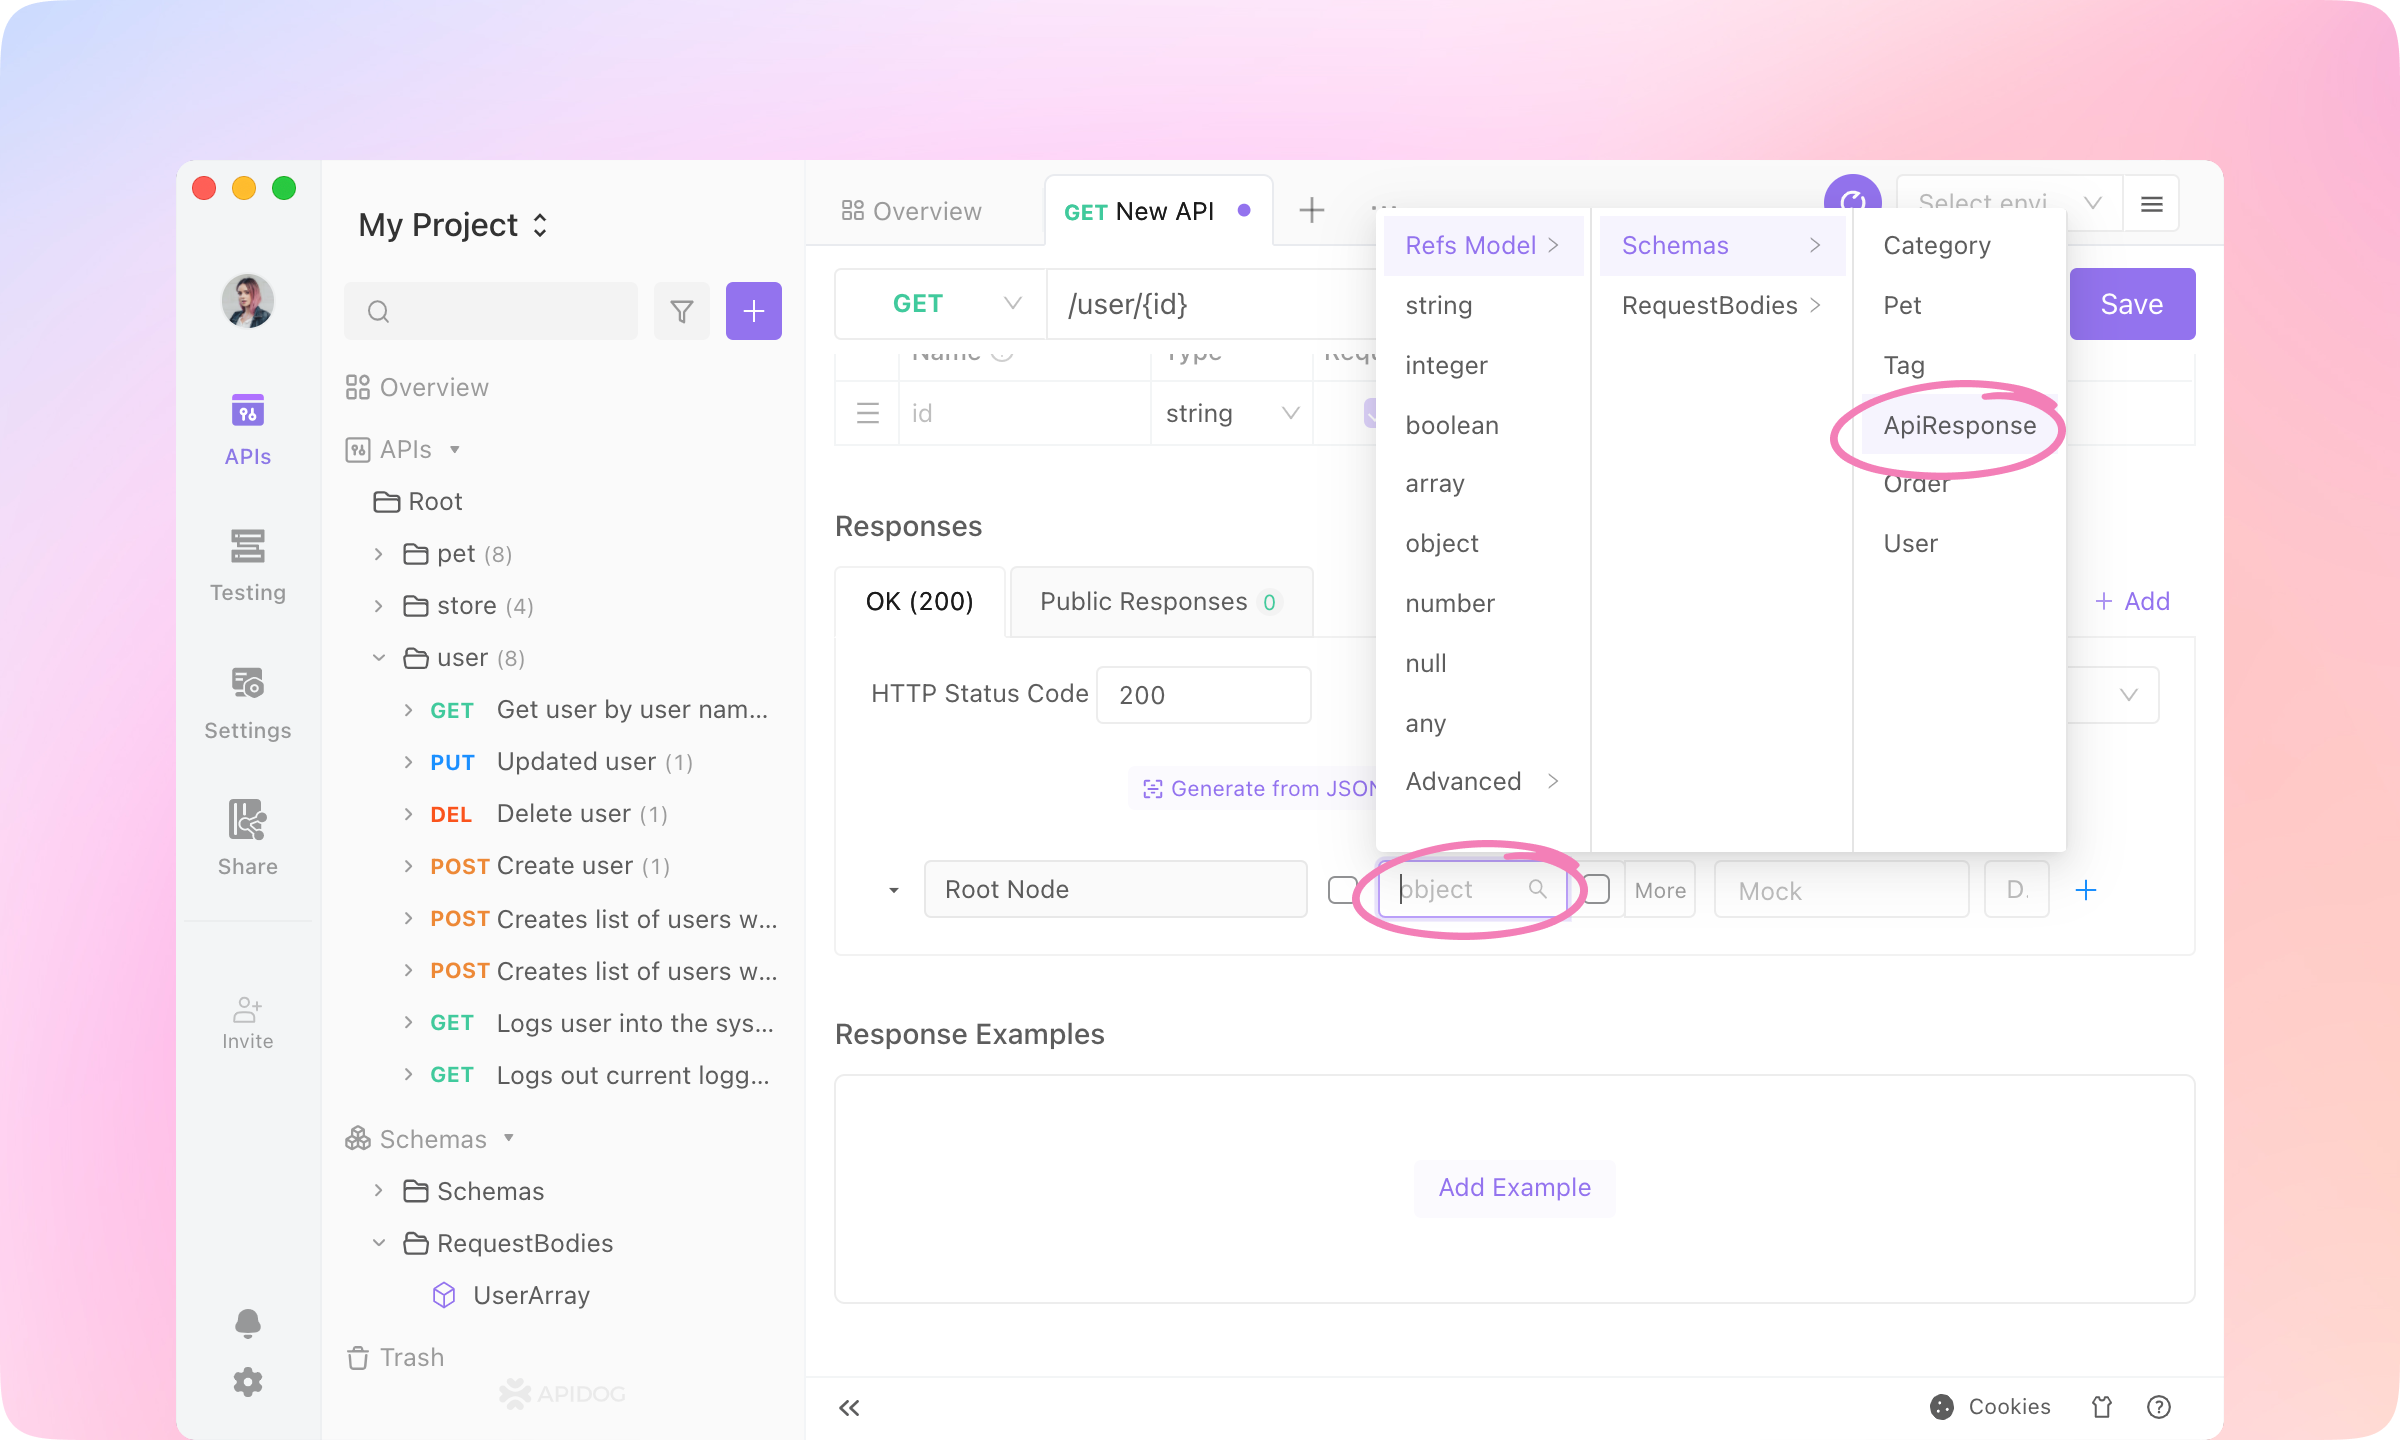
4.
Roll to the Responses part. In the 'OK(200)' response, change the field type of the root node to 'Refs Model - Schemas - ApiResponse'.
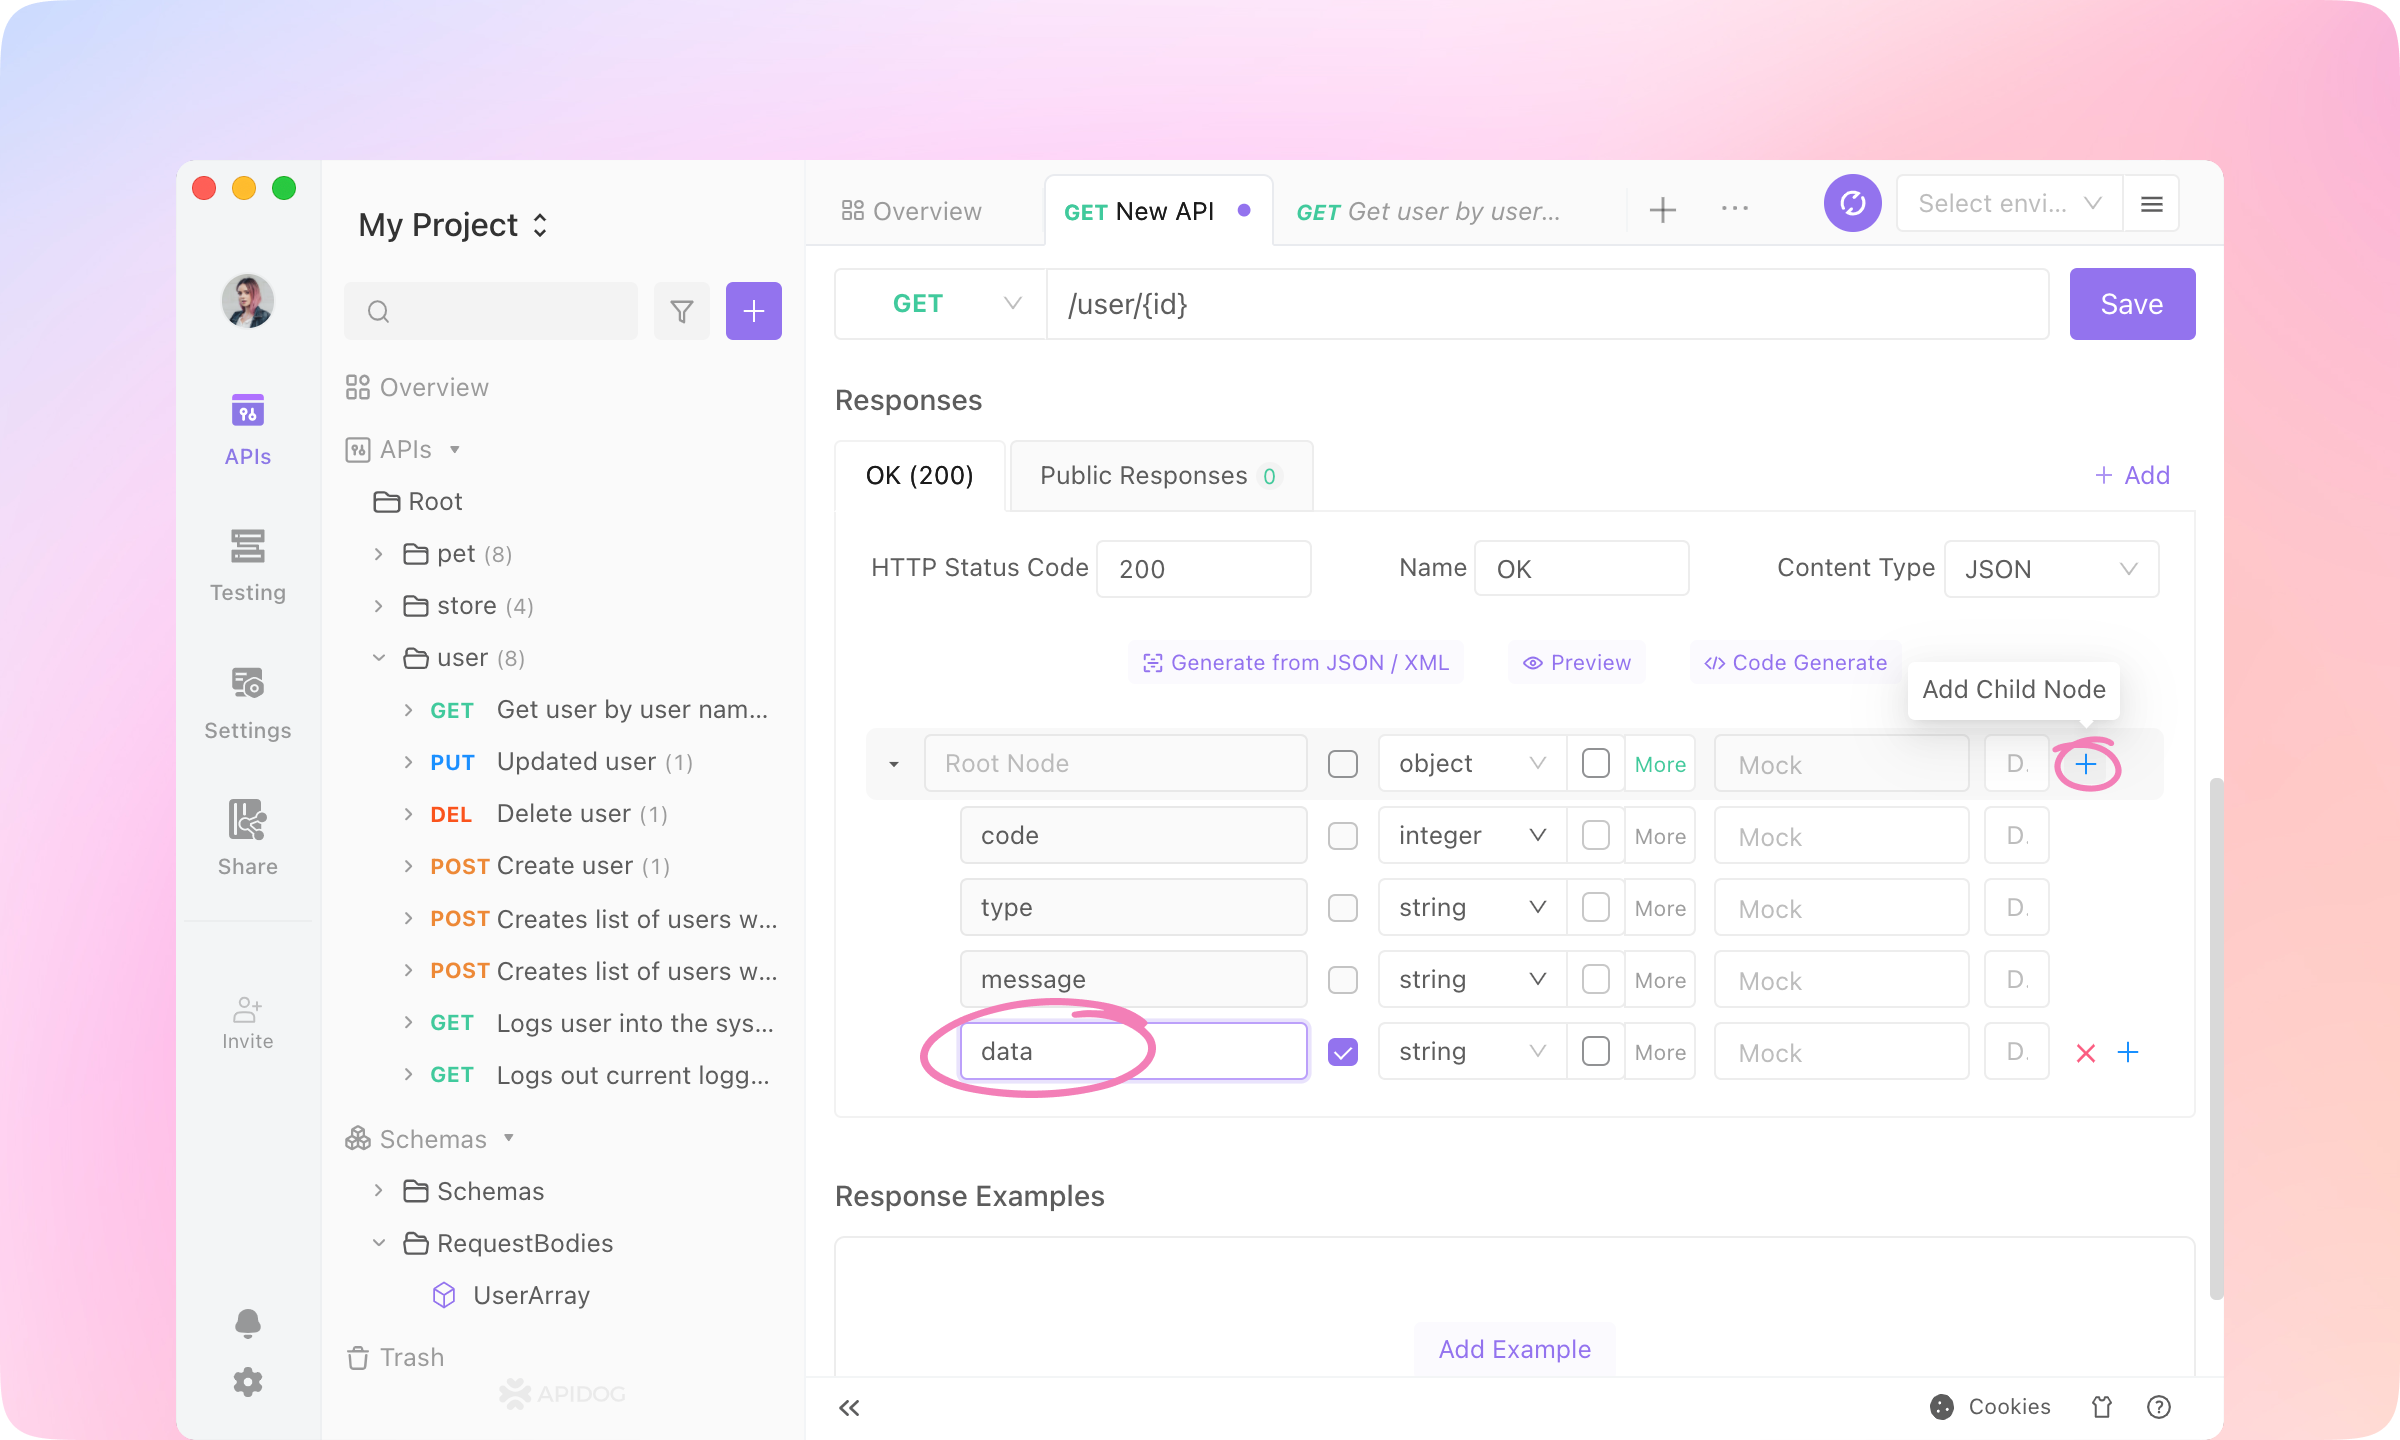
5.
Now this API has a general JSON structure like the following. Each API has a different 'data' field, so add a child node to the root node and name it 'data'.
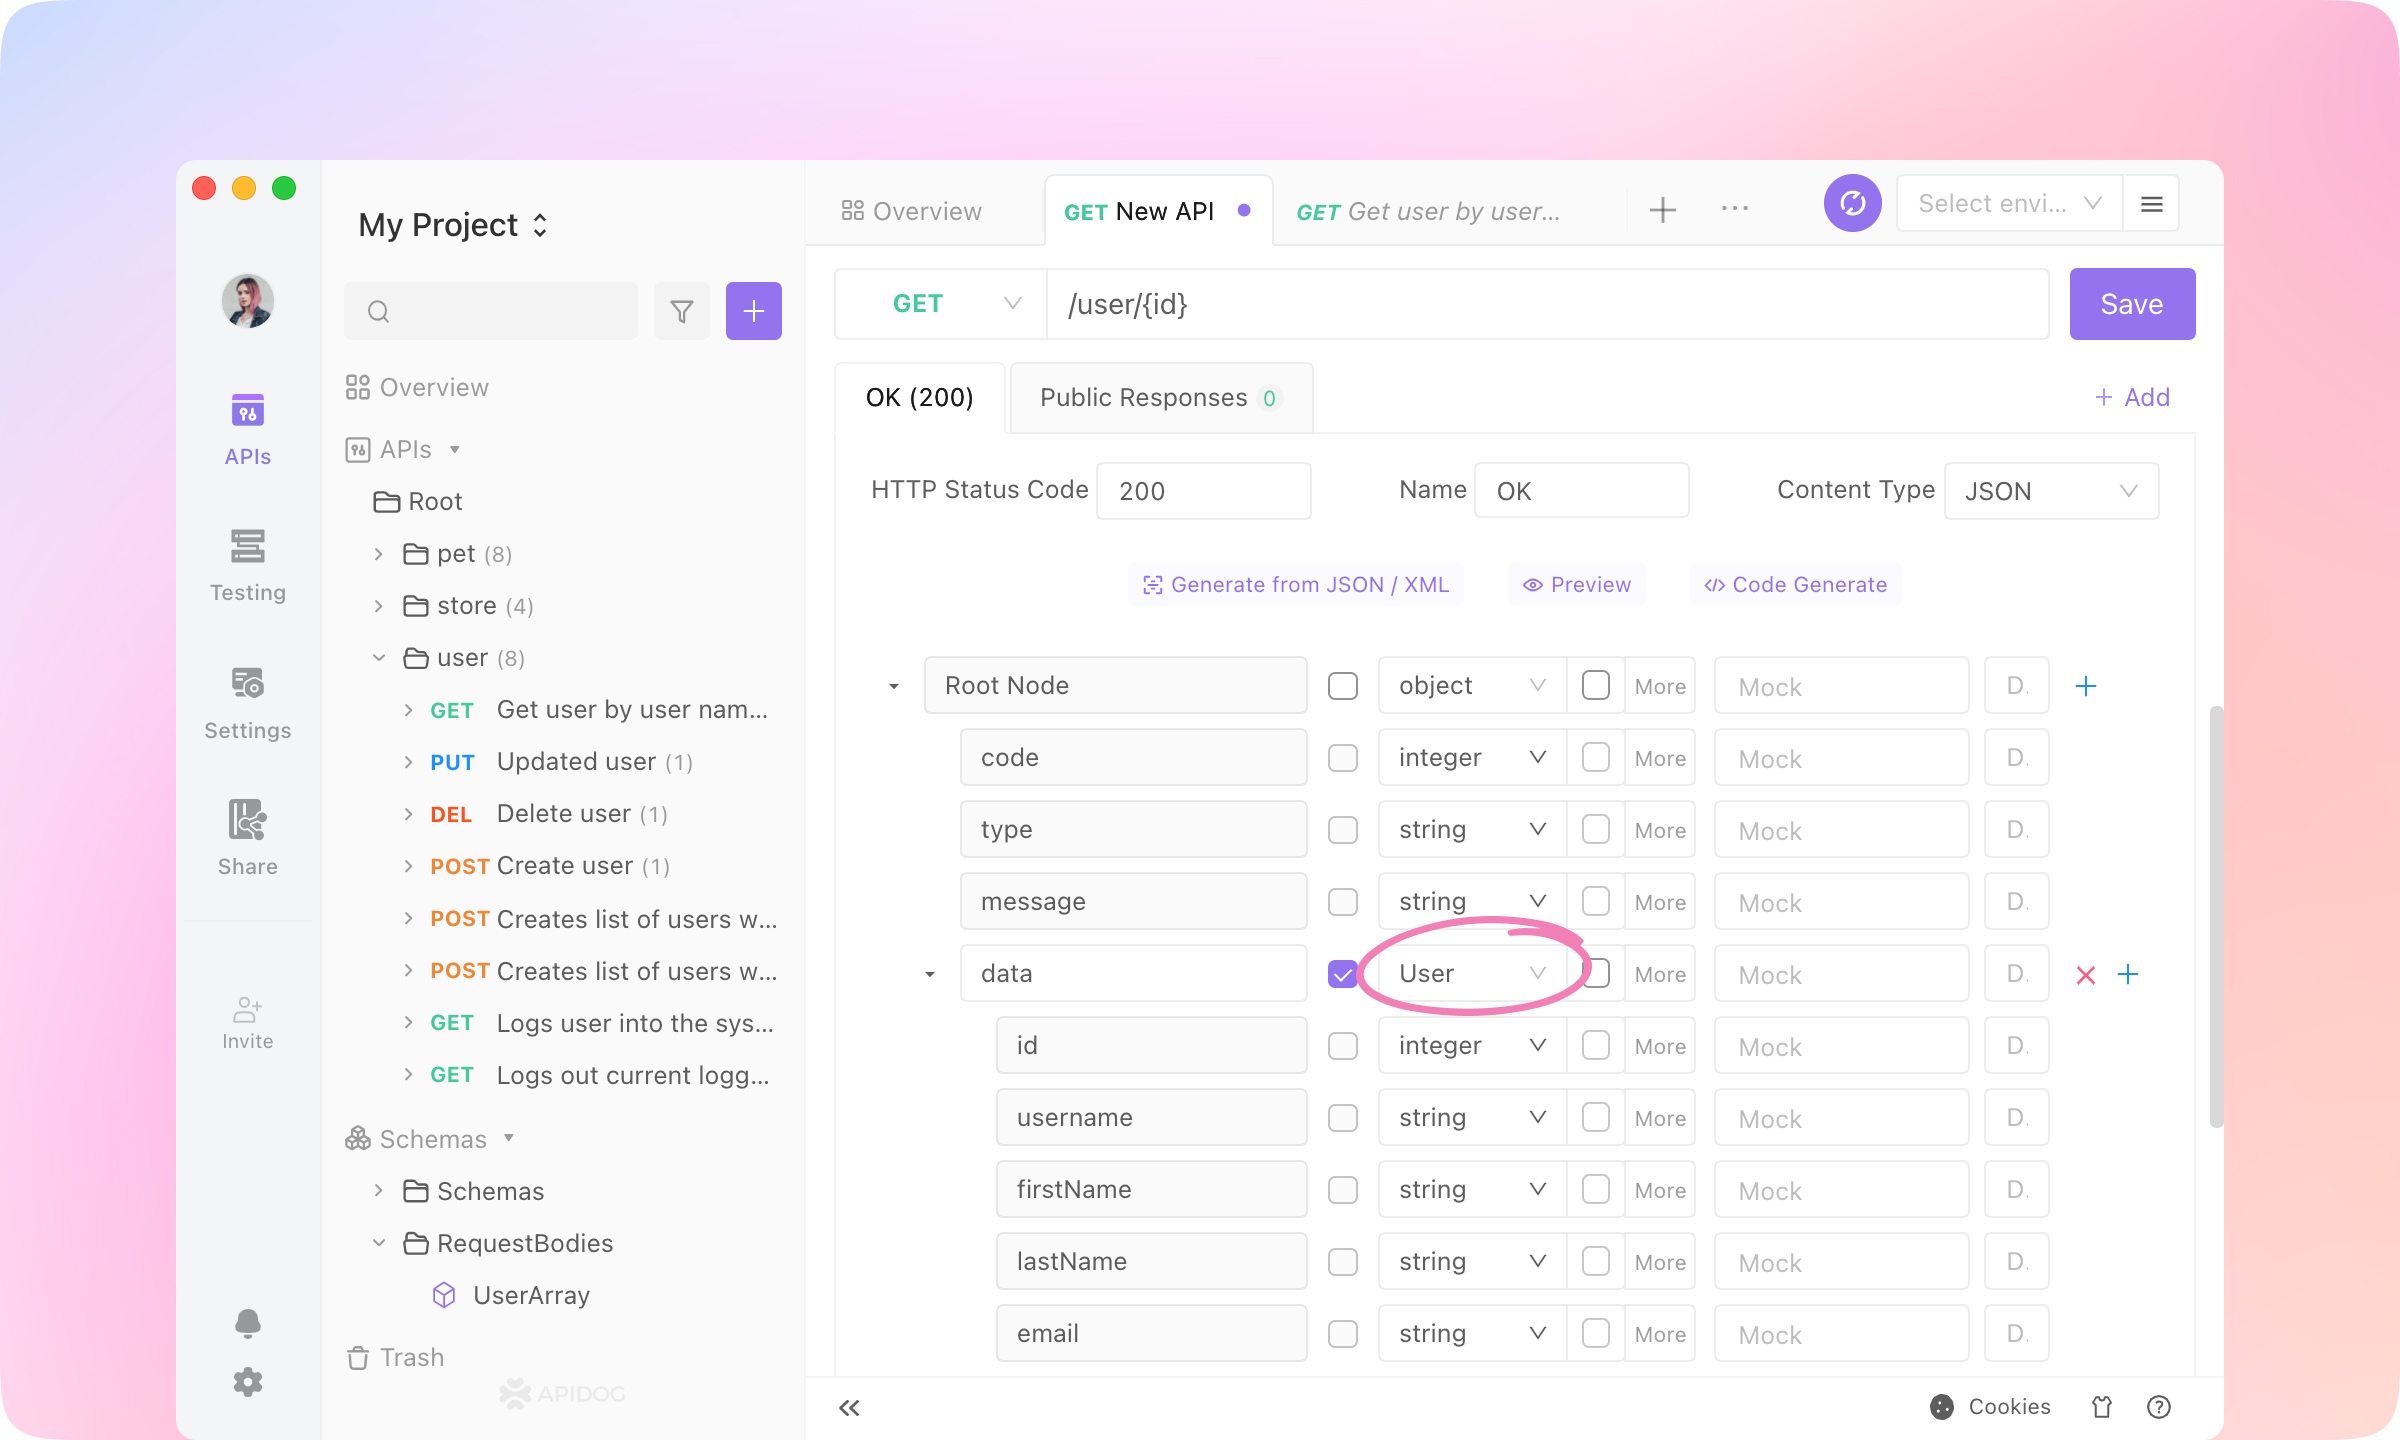
6.
Change the field type of the 'data' node to 'Refs Model' - 'Schemas' - 'User'.
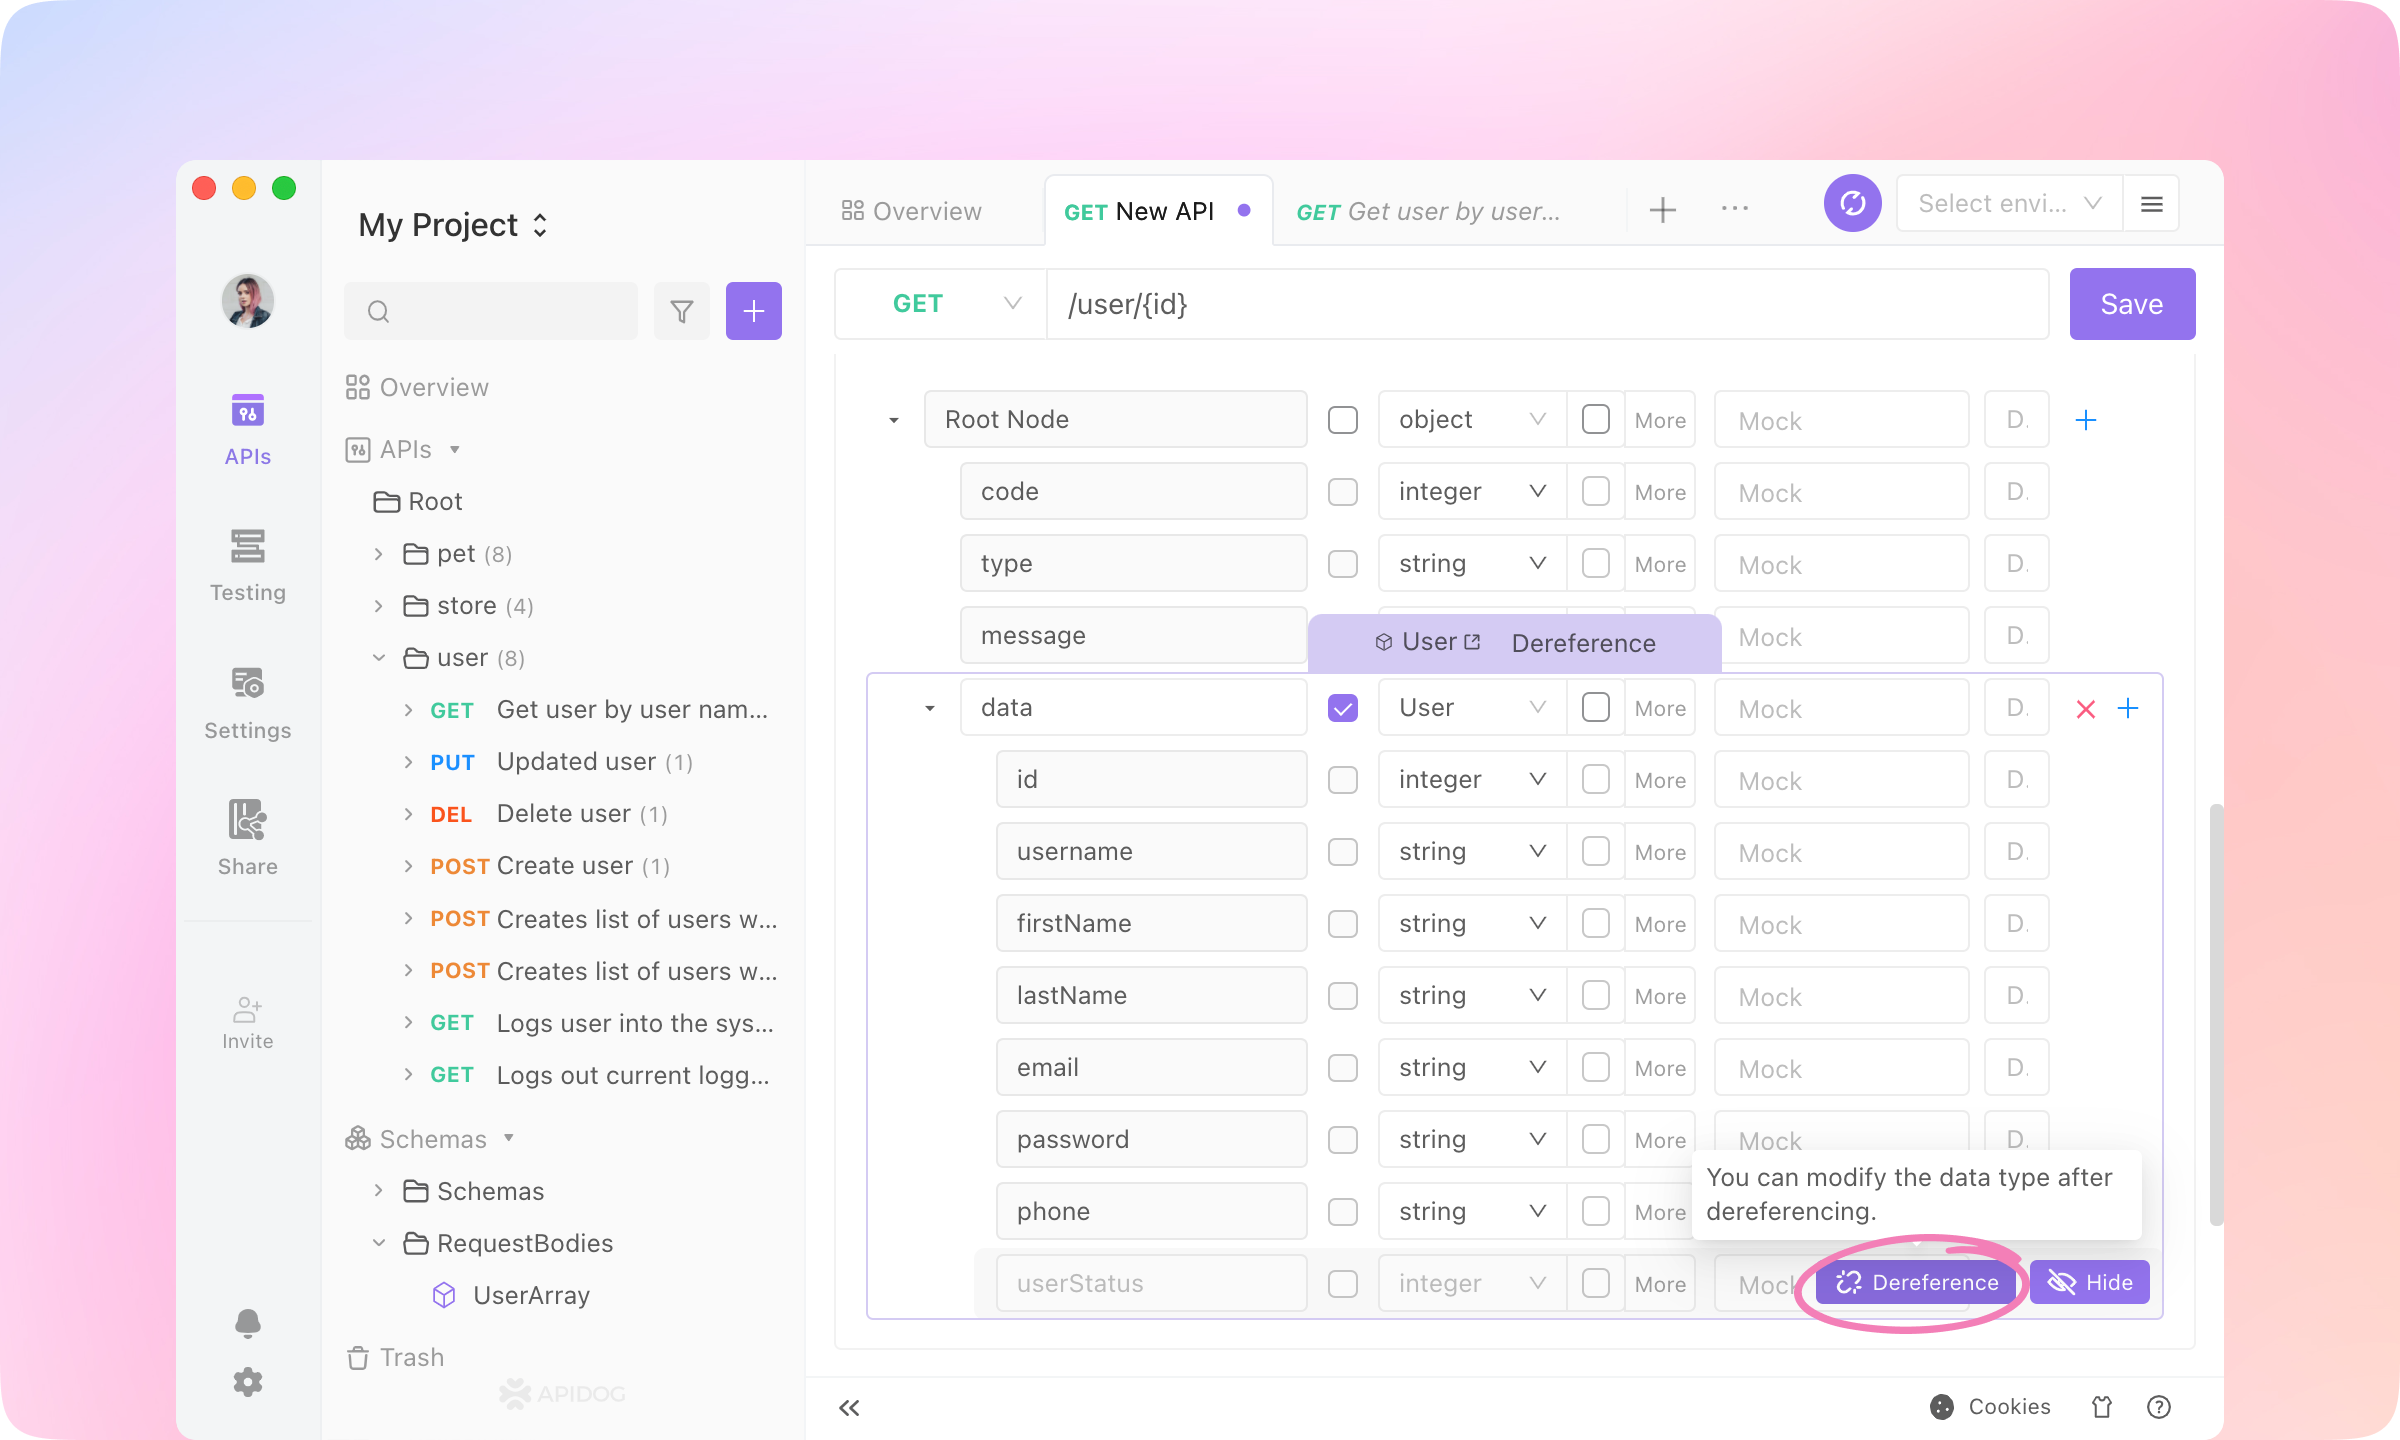
7.
Now the response structure is specified well. If you need to edit the 'data' structure, you can dereference the schema or dereference a field to edit.
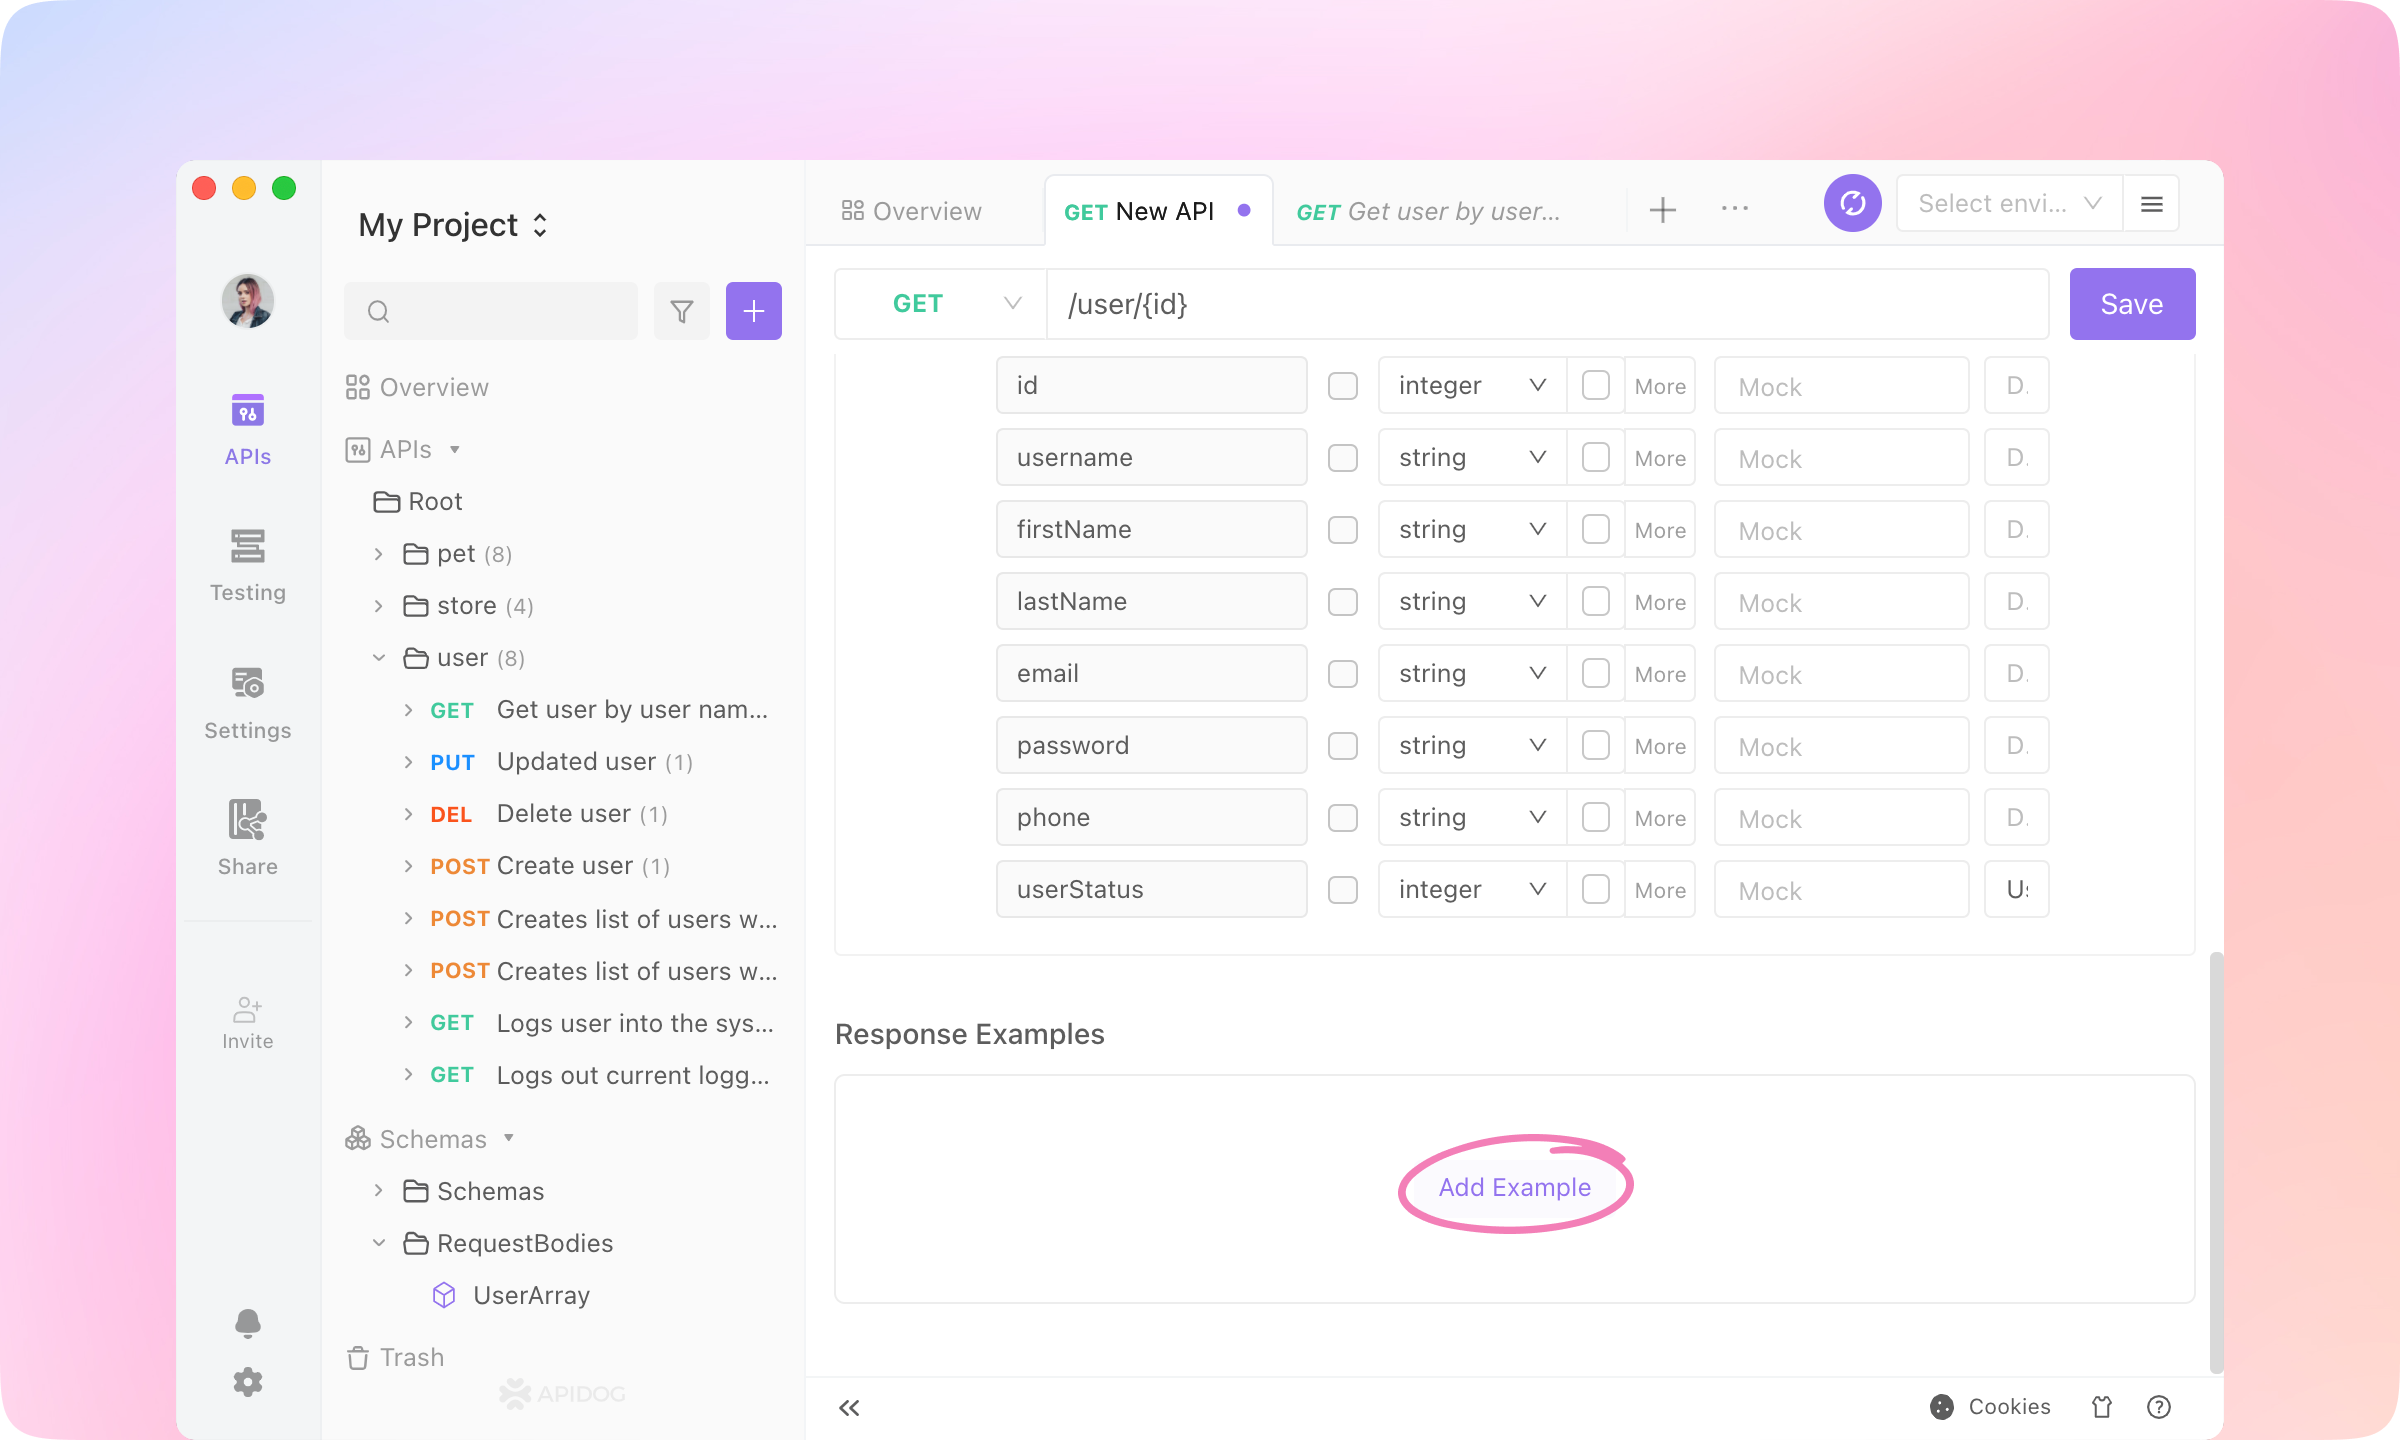
Learn more about Data Schema here. 8.
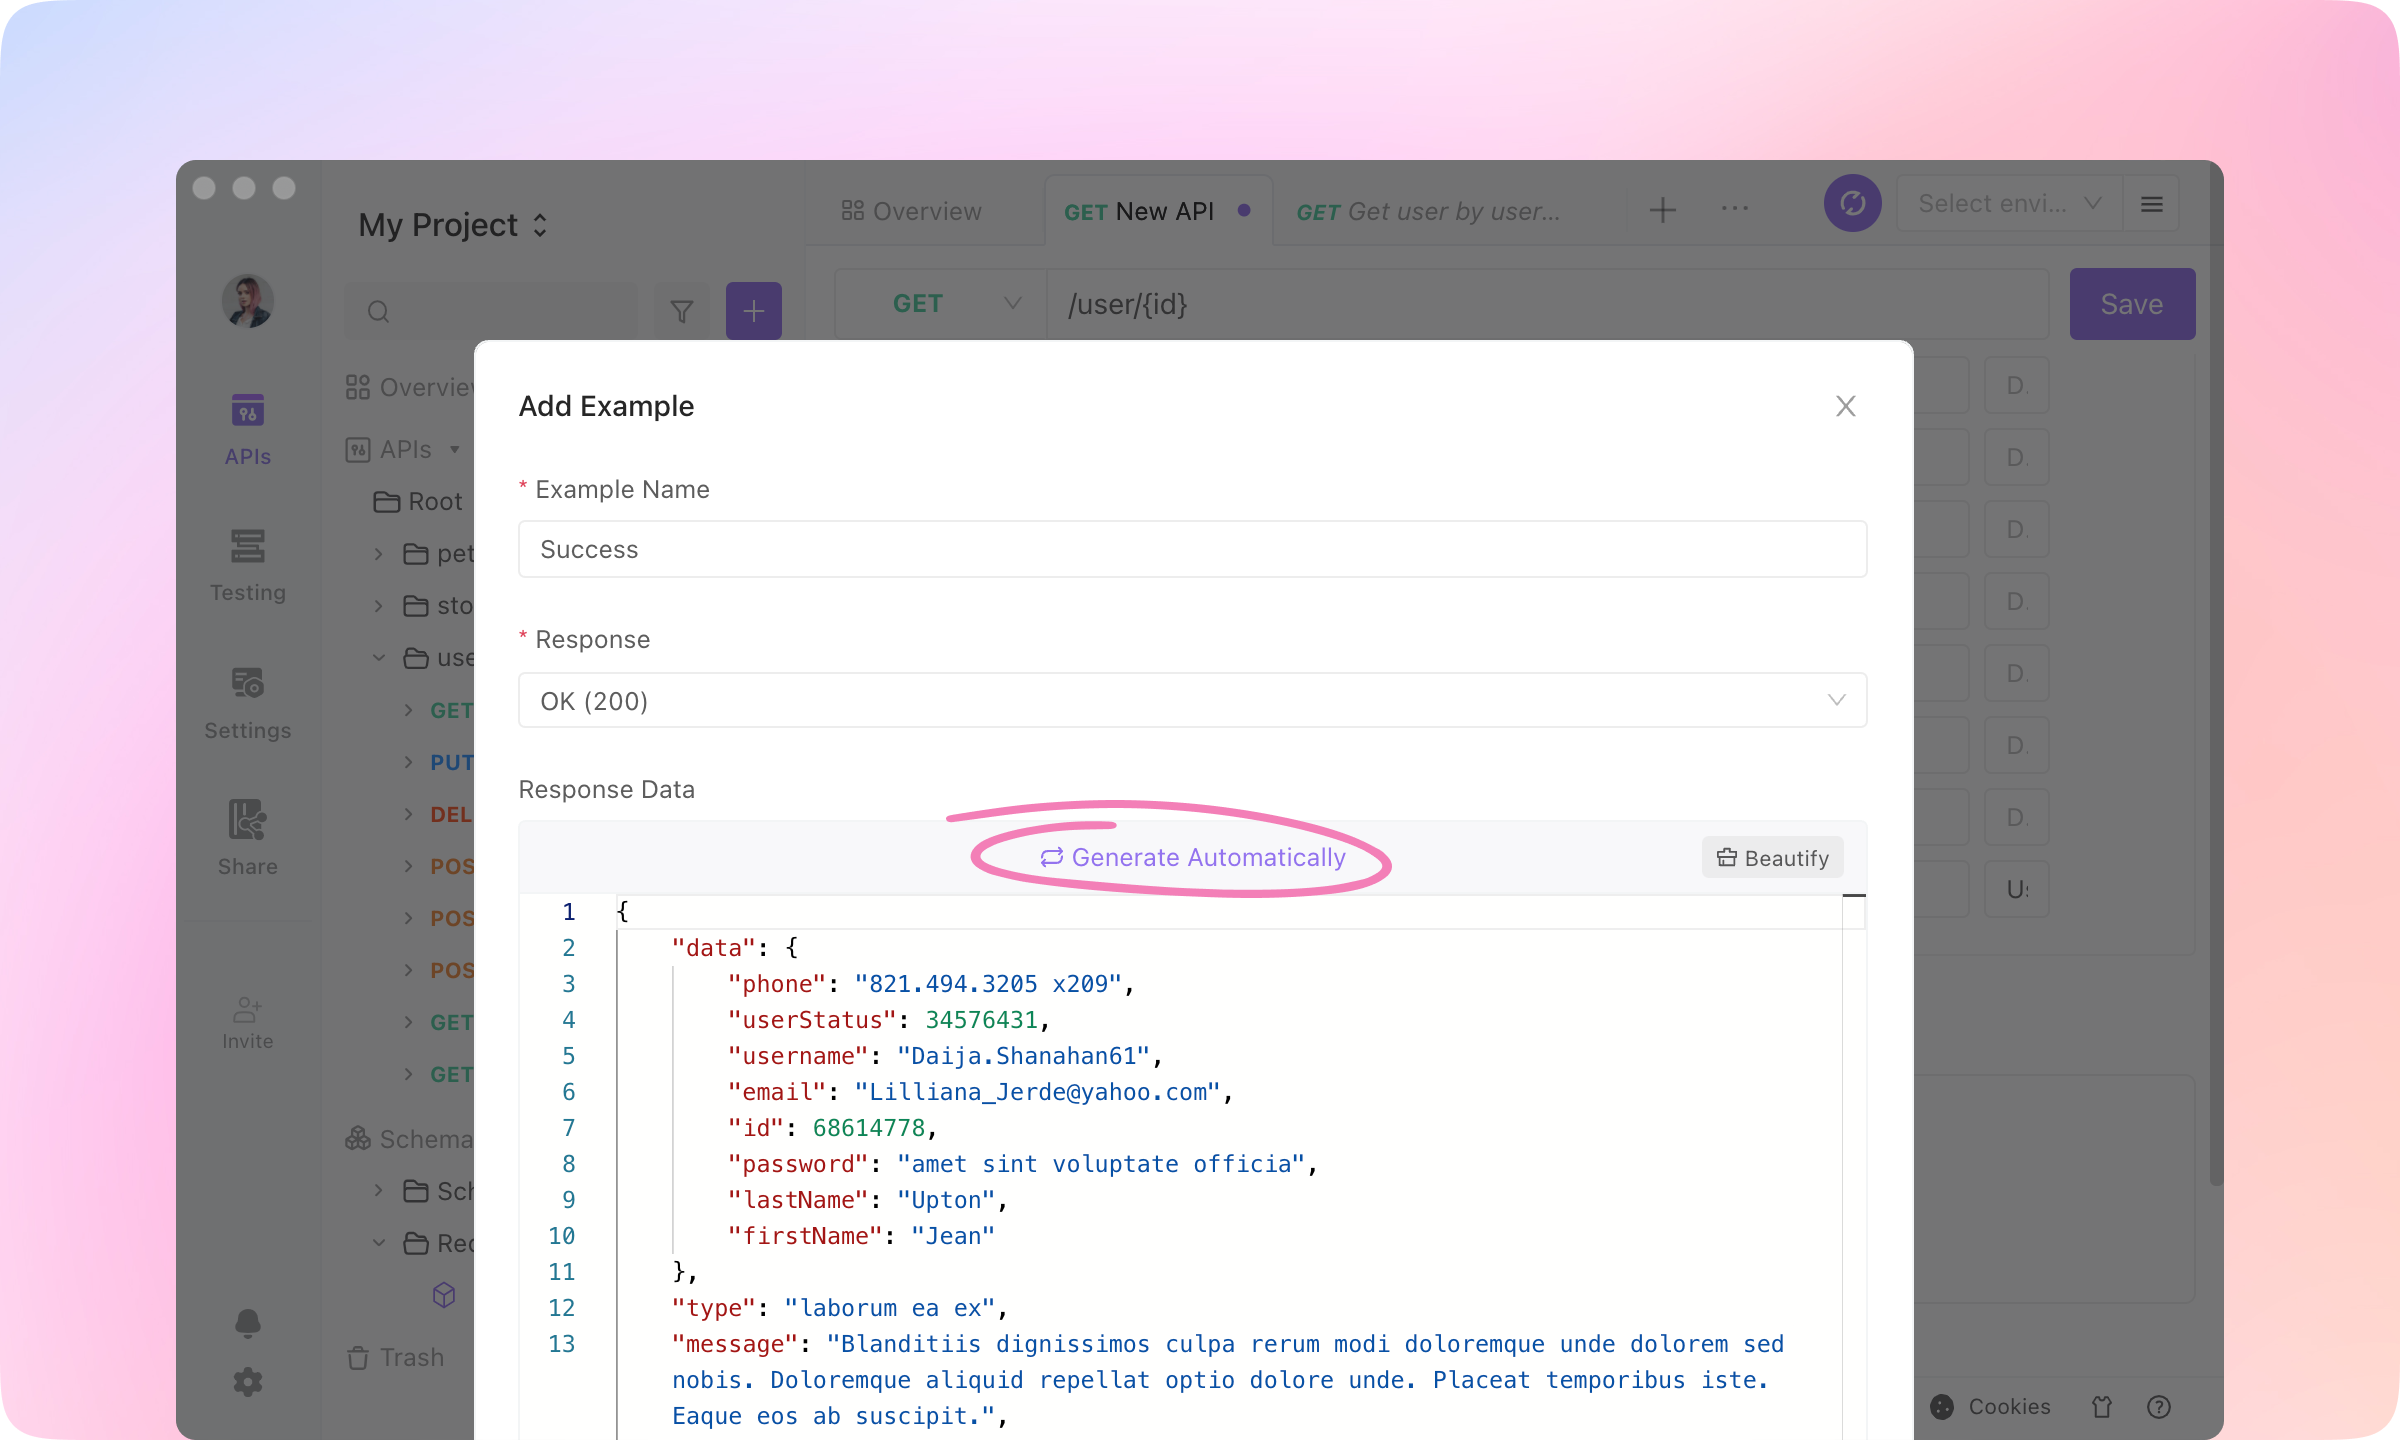
Roll to the Response Examples part. Click Add Example.
9.
Name the example 'Success'. Now it's the magical part: click Generate Automatically, and the response data will be generated according to the response structure. Click OK to add the example.
10.
Click Save to finish the API specification. You'll get a well-designed API.
Back-end Developers: API Developing & Debugging#
Different teams adopt different development approaches. Some teams adopt API-first, and some teams adopt code-first. Regardless of which method your team uses, back-end developers can use Apidog to assist in the development and debugging of the API.Generate Code#
1.
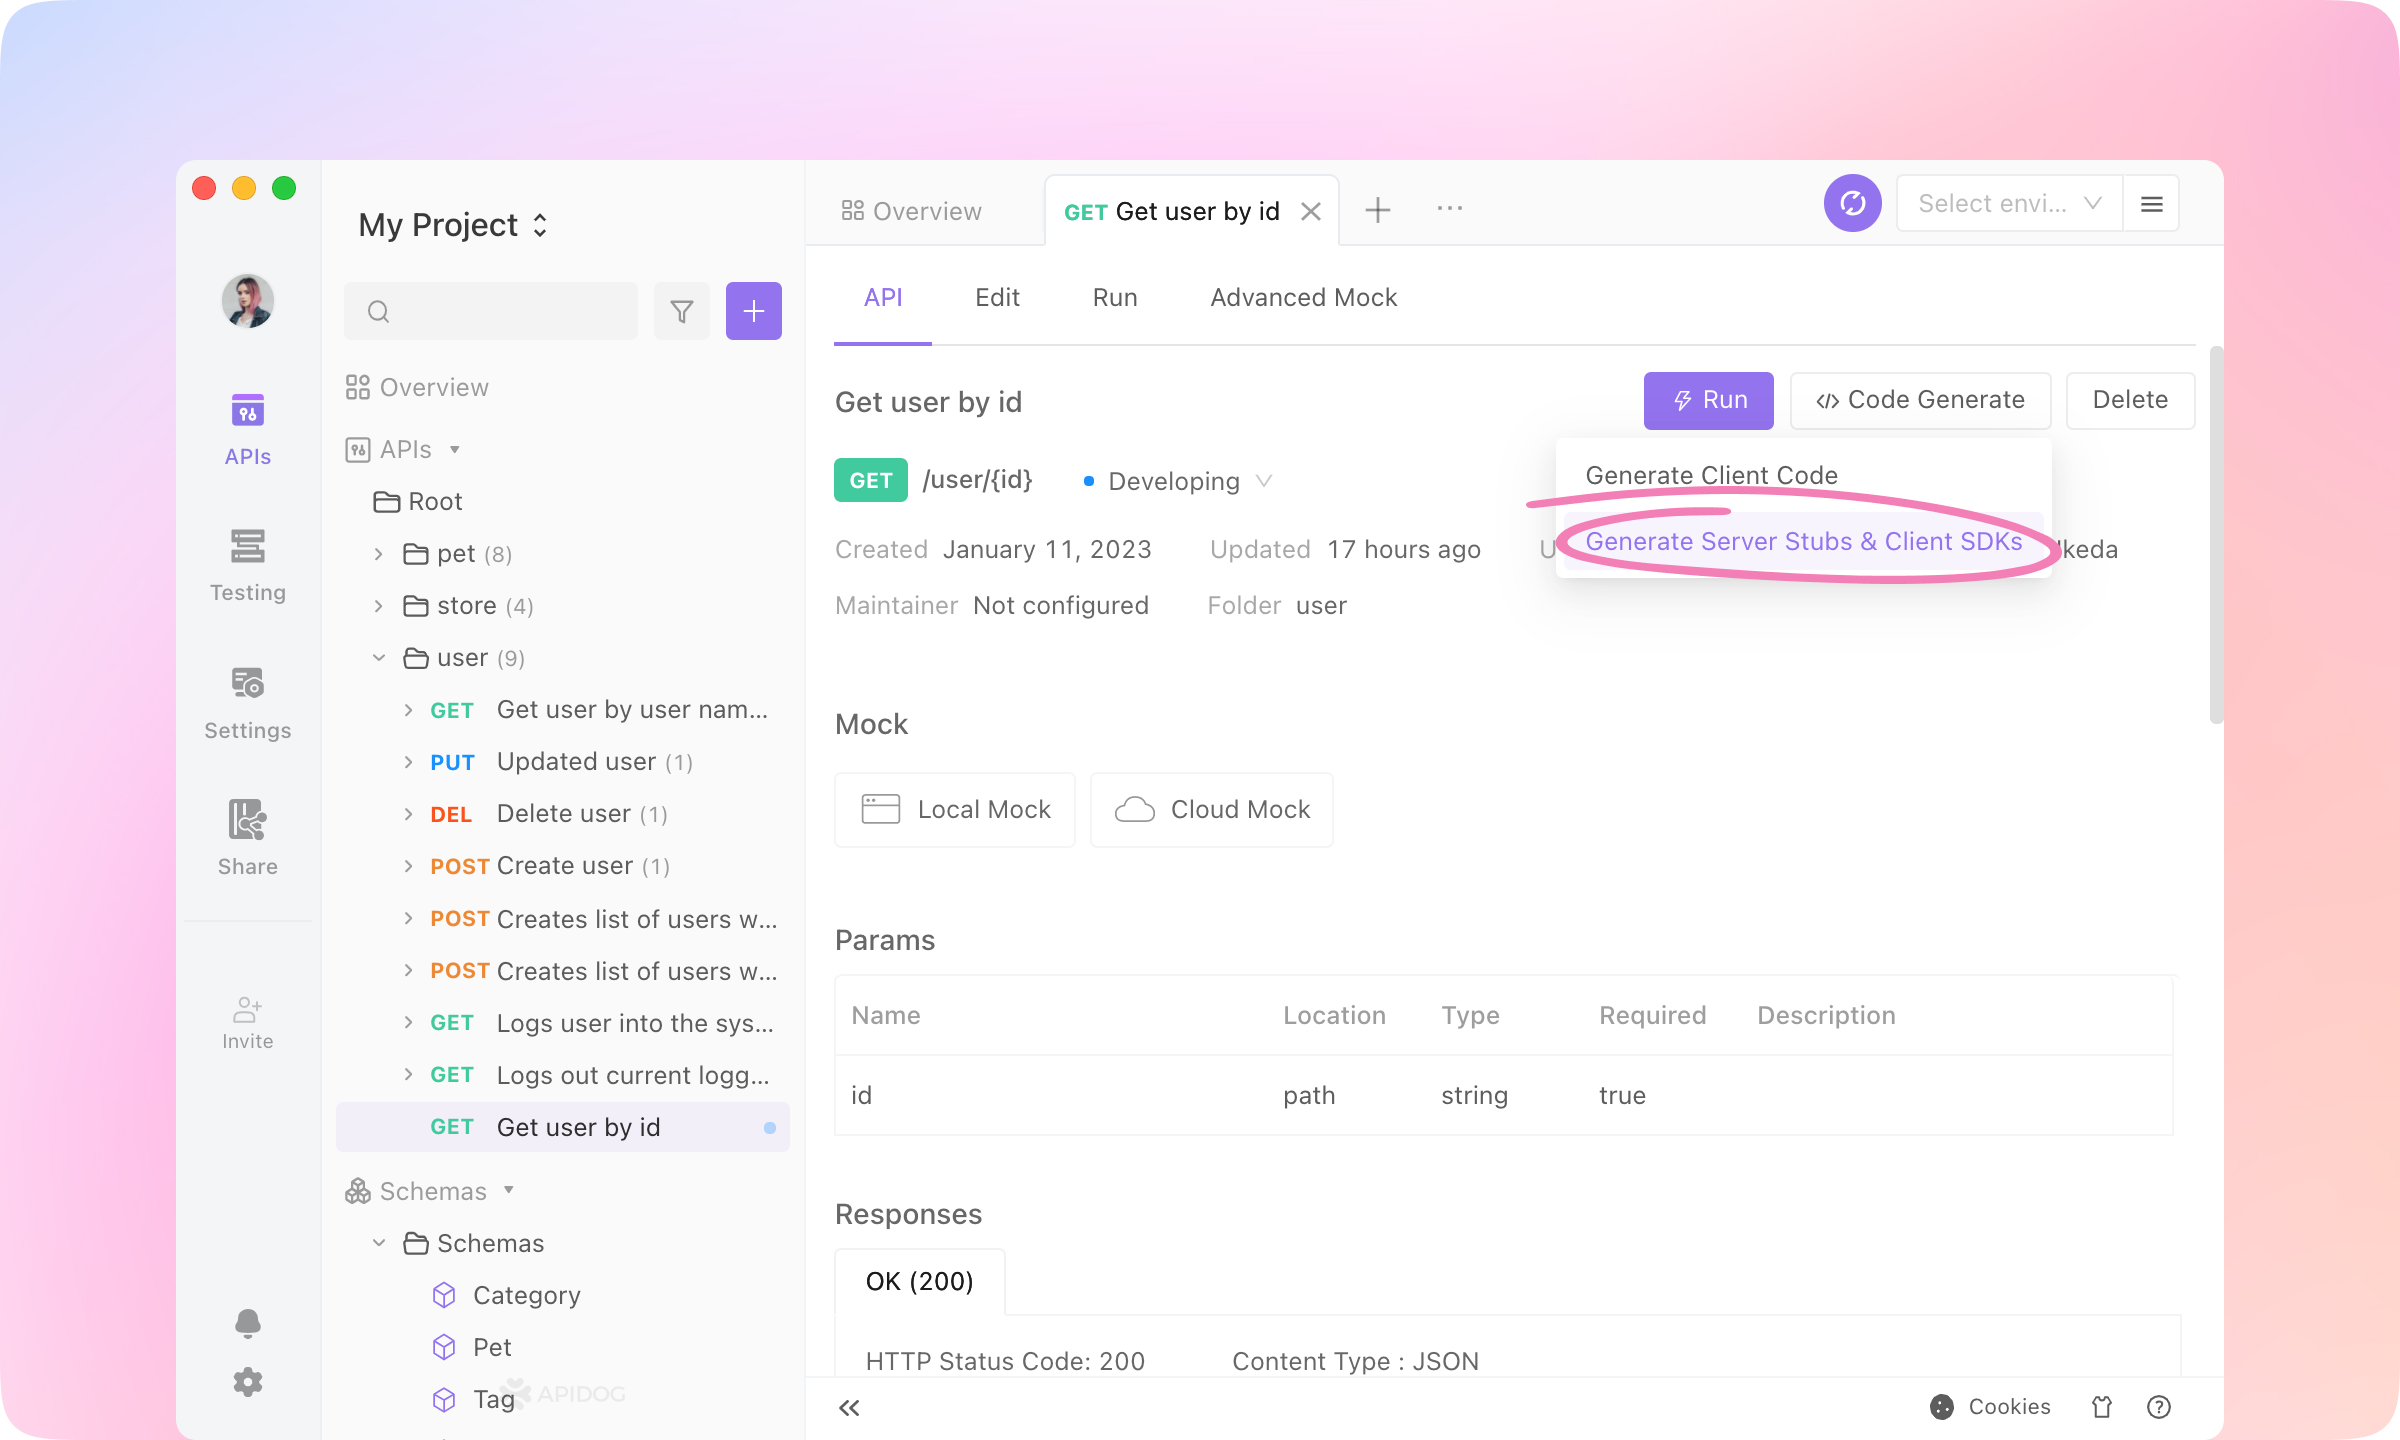
While APIs are specified, server stubs and client SDKs can be generated easily. Just click Generate Code on the API page and select Generate Server Stubs & Client SDKs.
2.
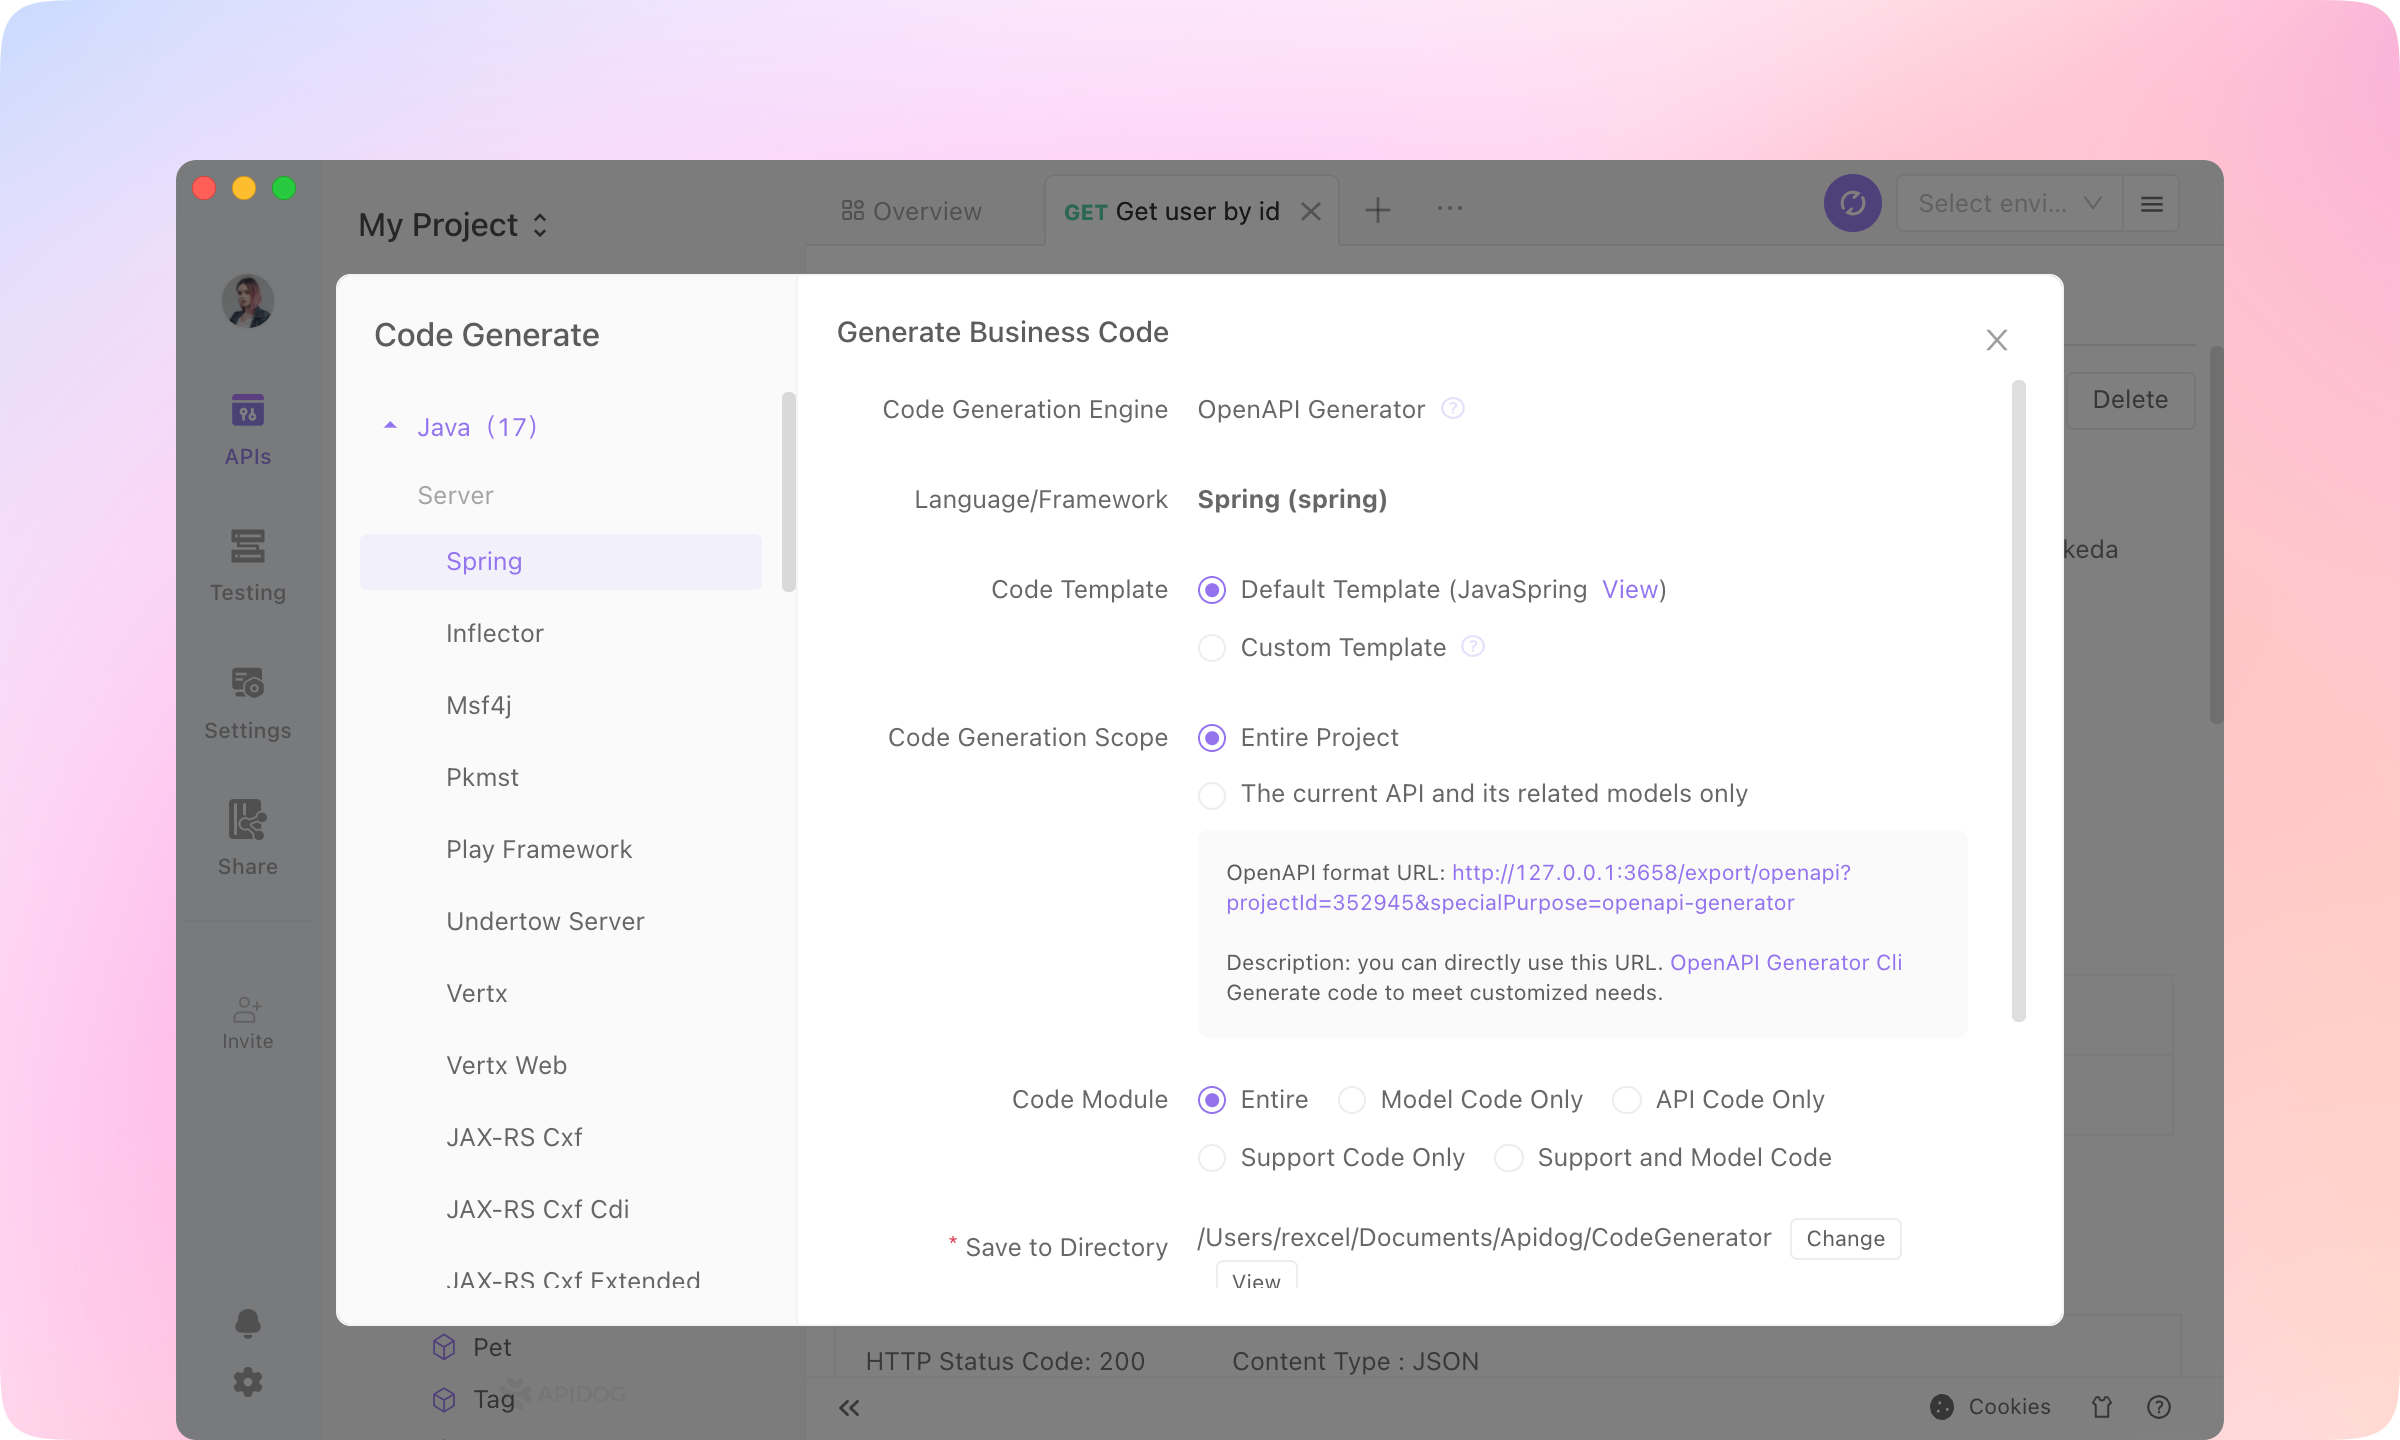
Using the OpenAPI Generator engine, server stubs and client SDKs in tens of languages can be generated.
Learn more about Code Generation here. Run the API#
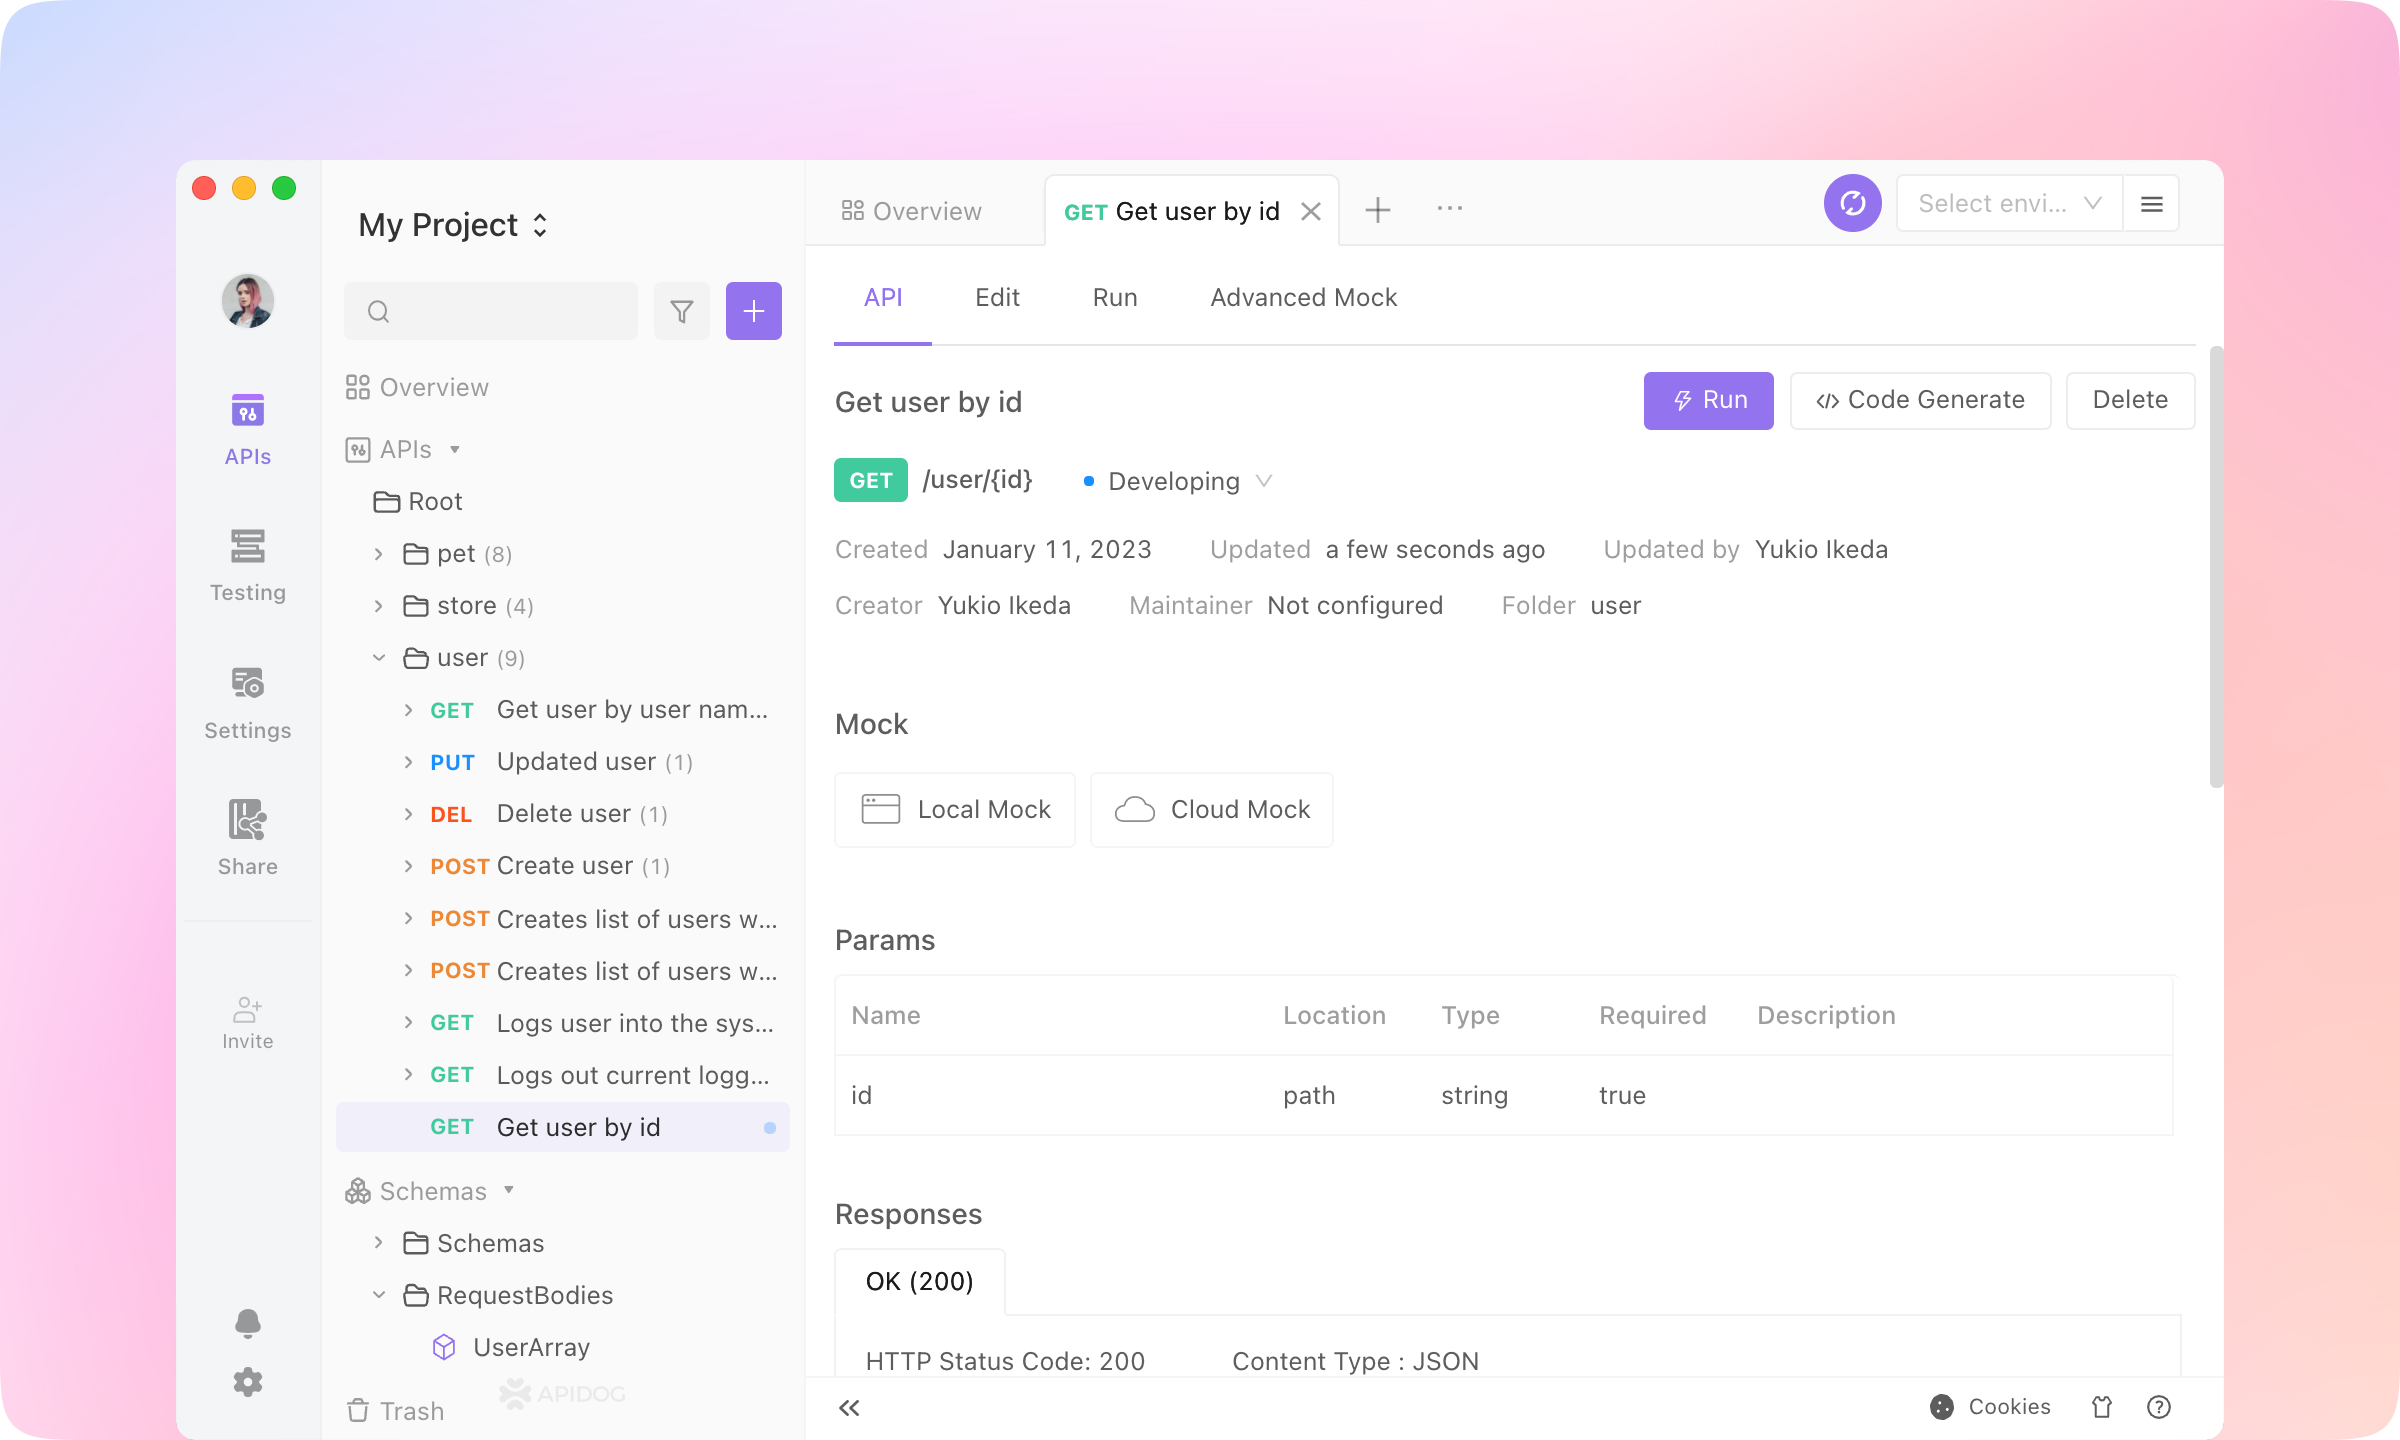
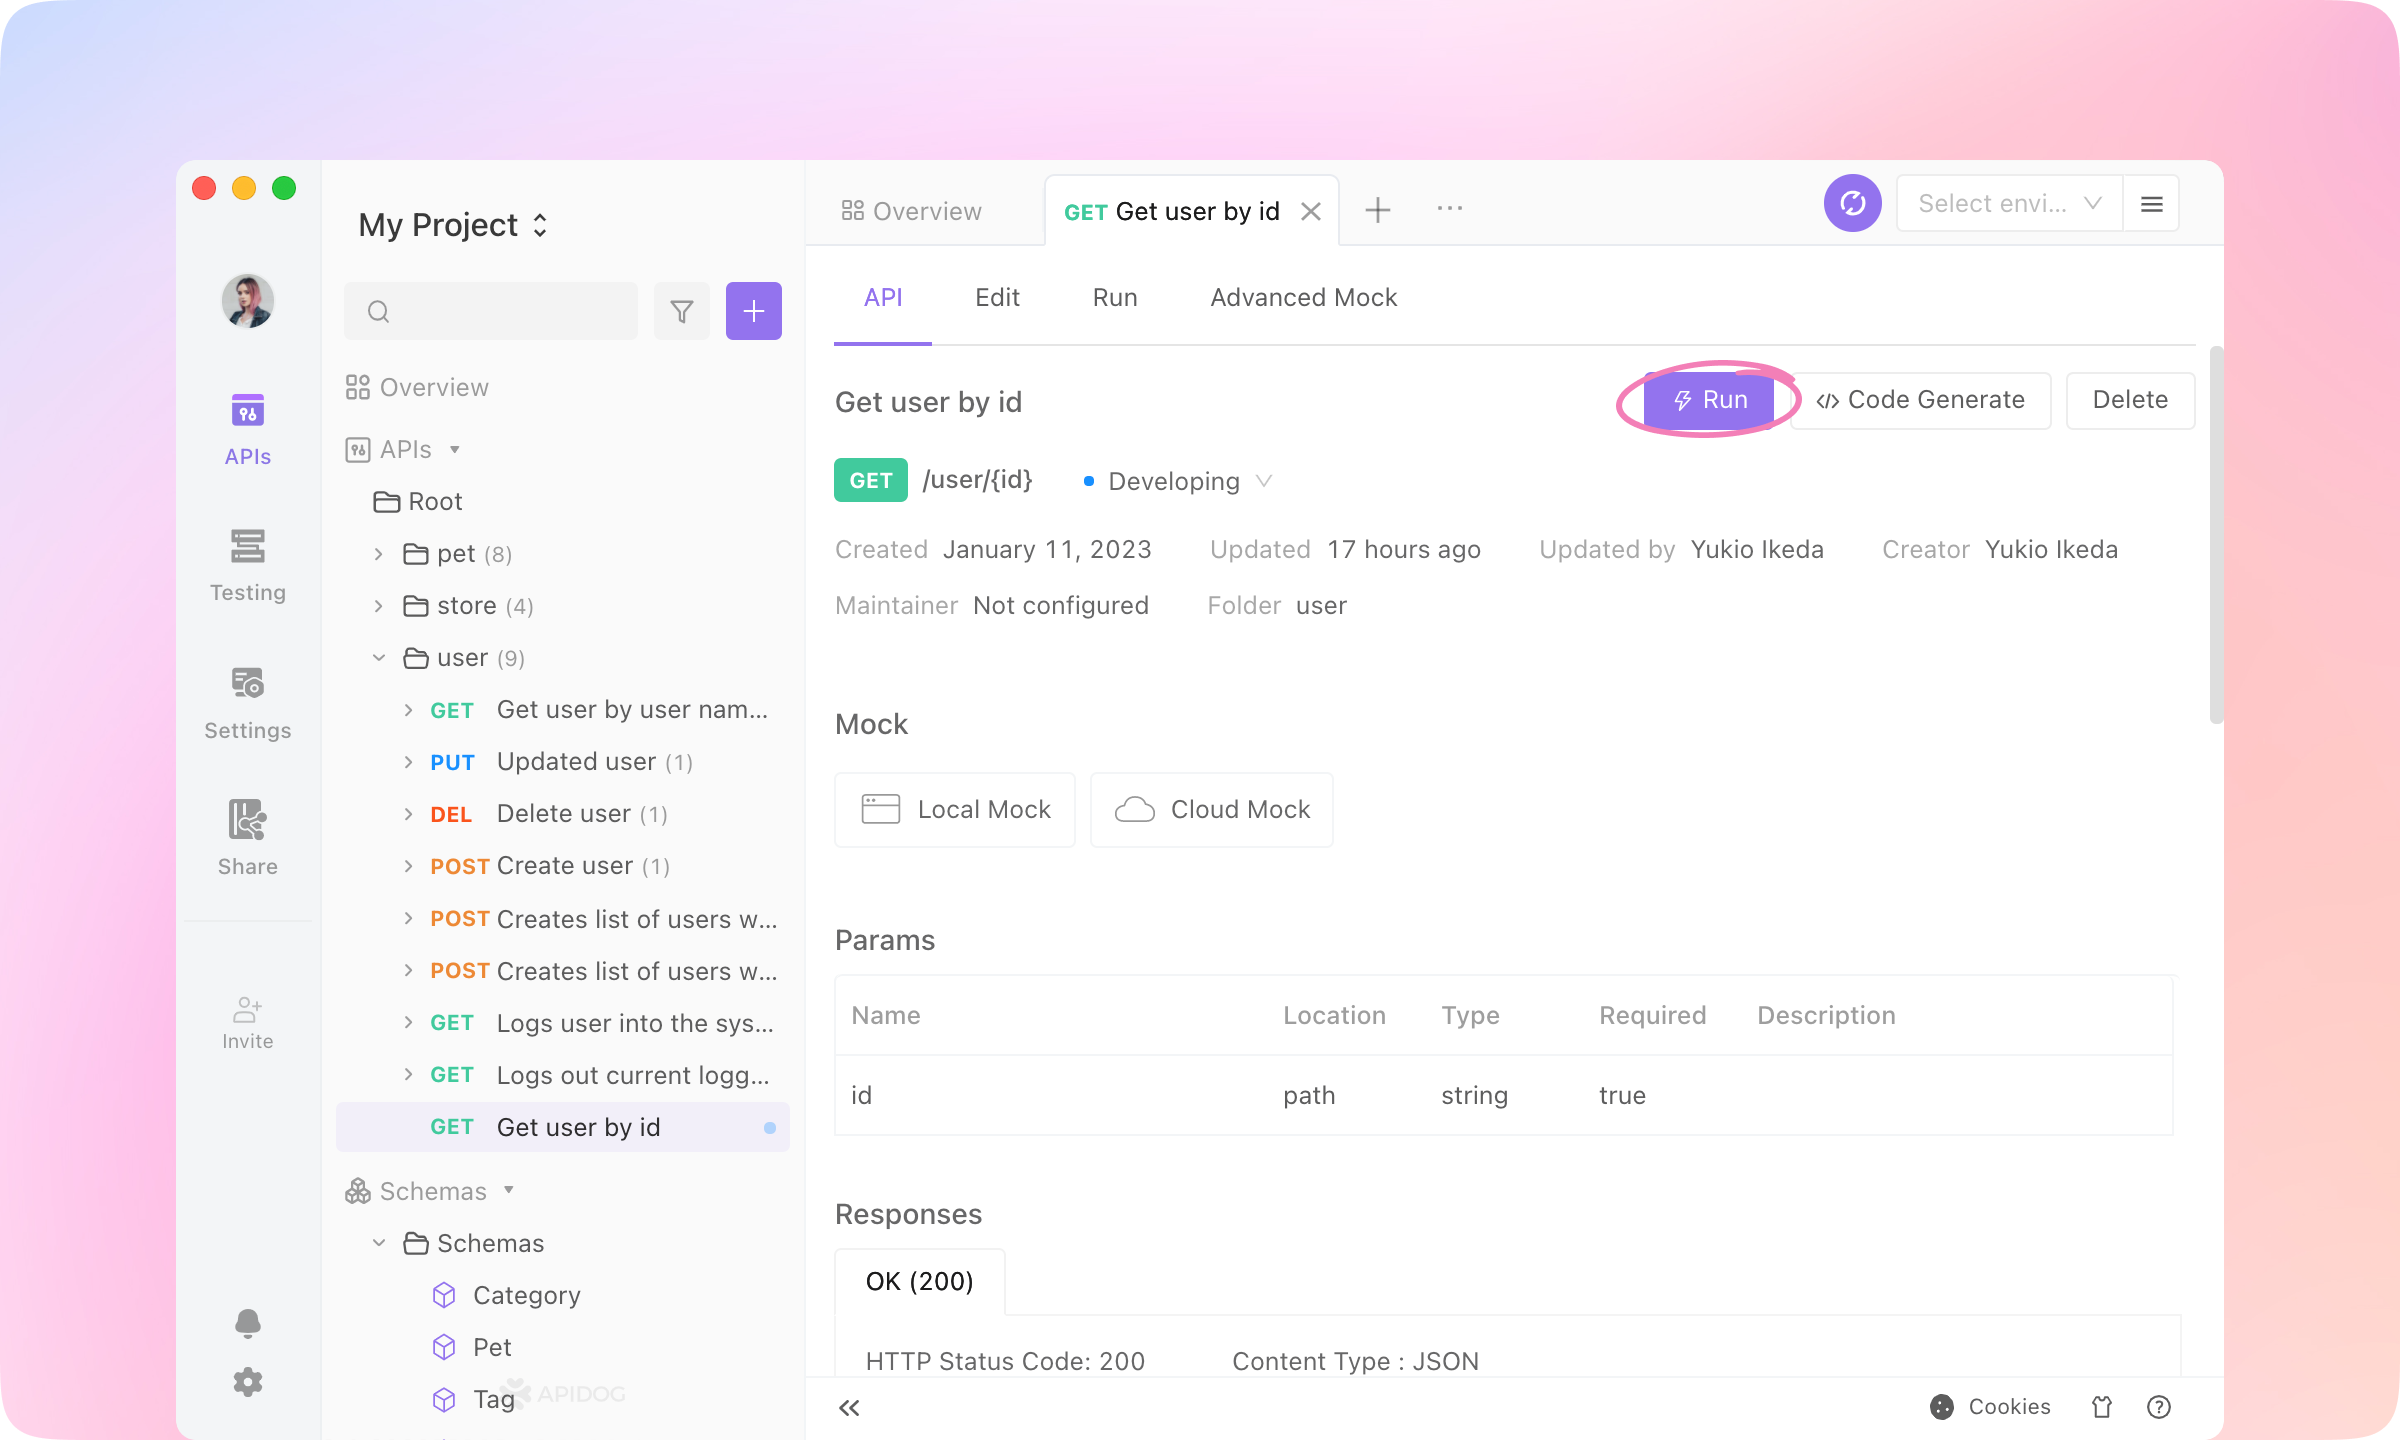
After API development is completed, the back-end often needs to debug whether the API can give the correct output under different input parameters. Using Apidog makes it easy to debug each API and ensure that they are running normally.1.
In the API page we just created, click the Run button to enter the Run tab.
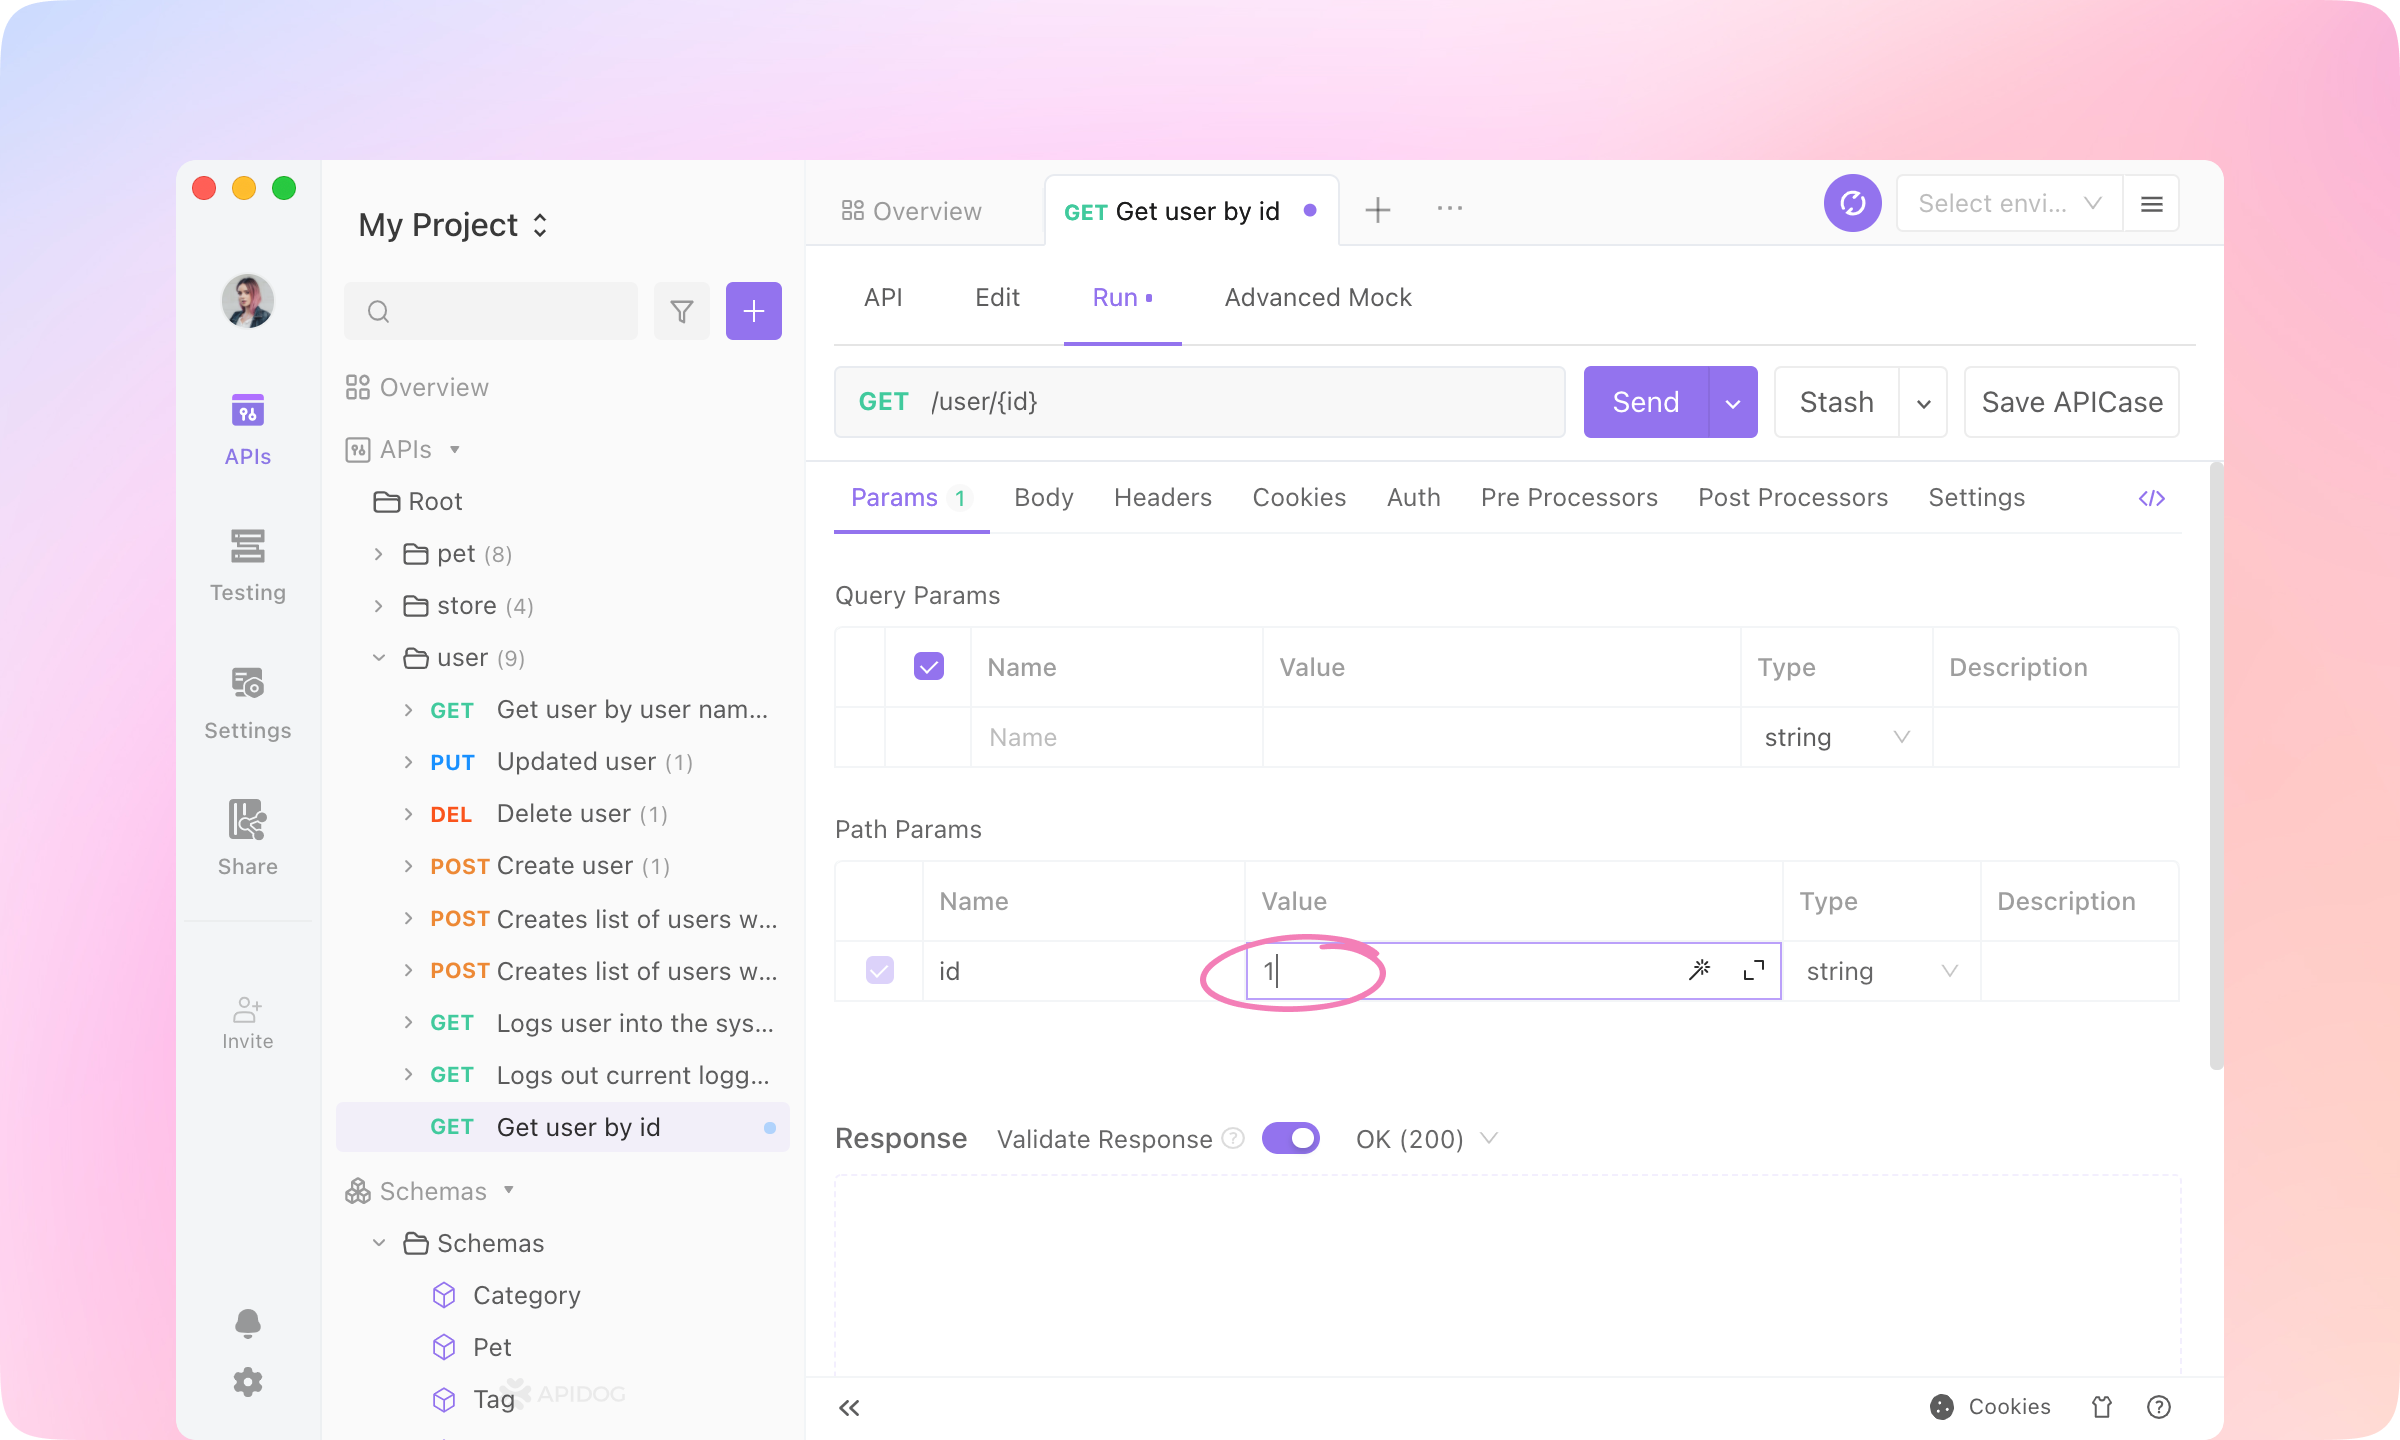
2.
Enter '1' to the 'id' param. In the request URL to be sent, {id} will be replaced by the value '1'.
3.
Click the Manage Environments button at the top right.
4.
Switch to 'Test Env', and paste the following URL into the 'Default Server' service. Then save the environment.
https://mock.apidog.com/m1/352945-0-default
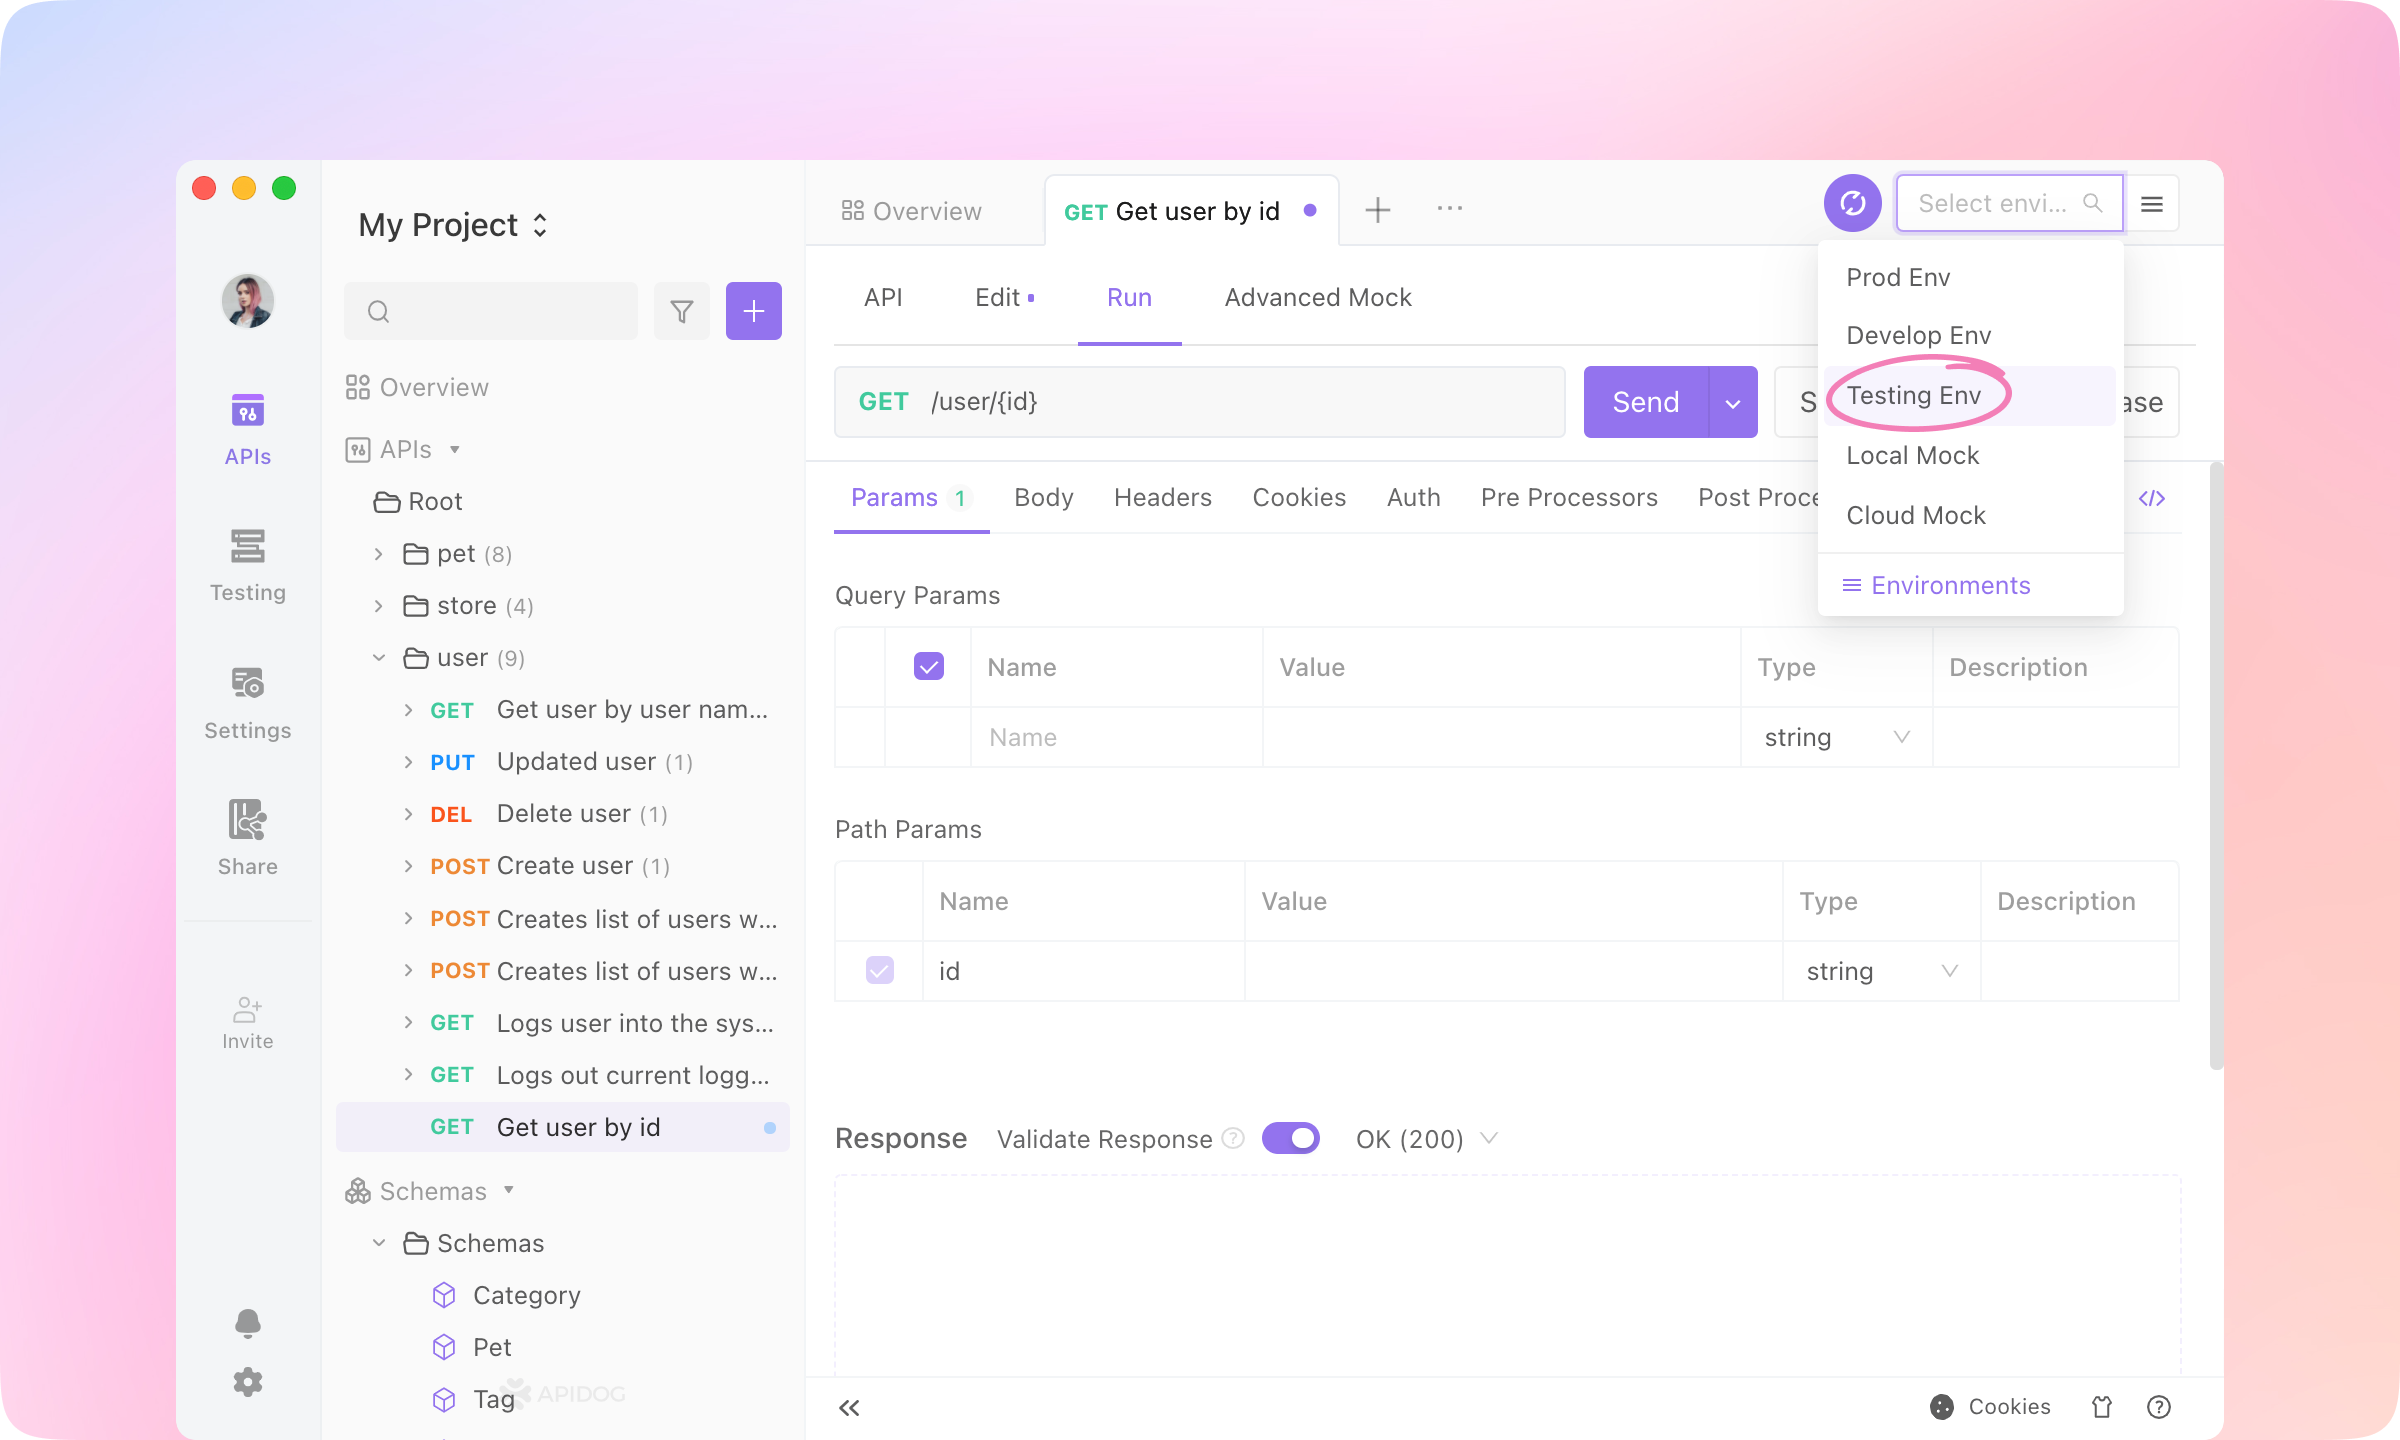
Learn more about Environment Management here. 5.
Select the 'Testing Env' so that all the requests will be sent with the base URL just configured in the front.
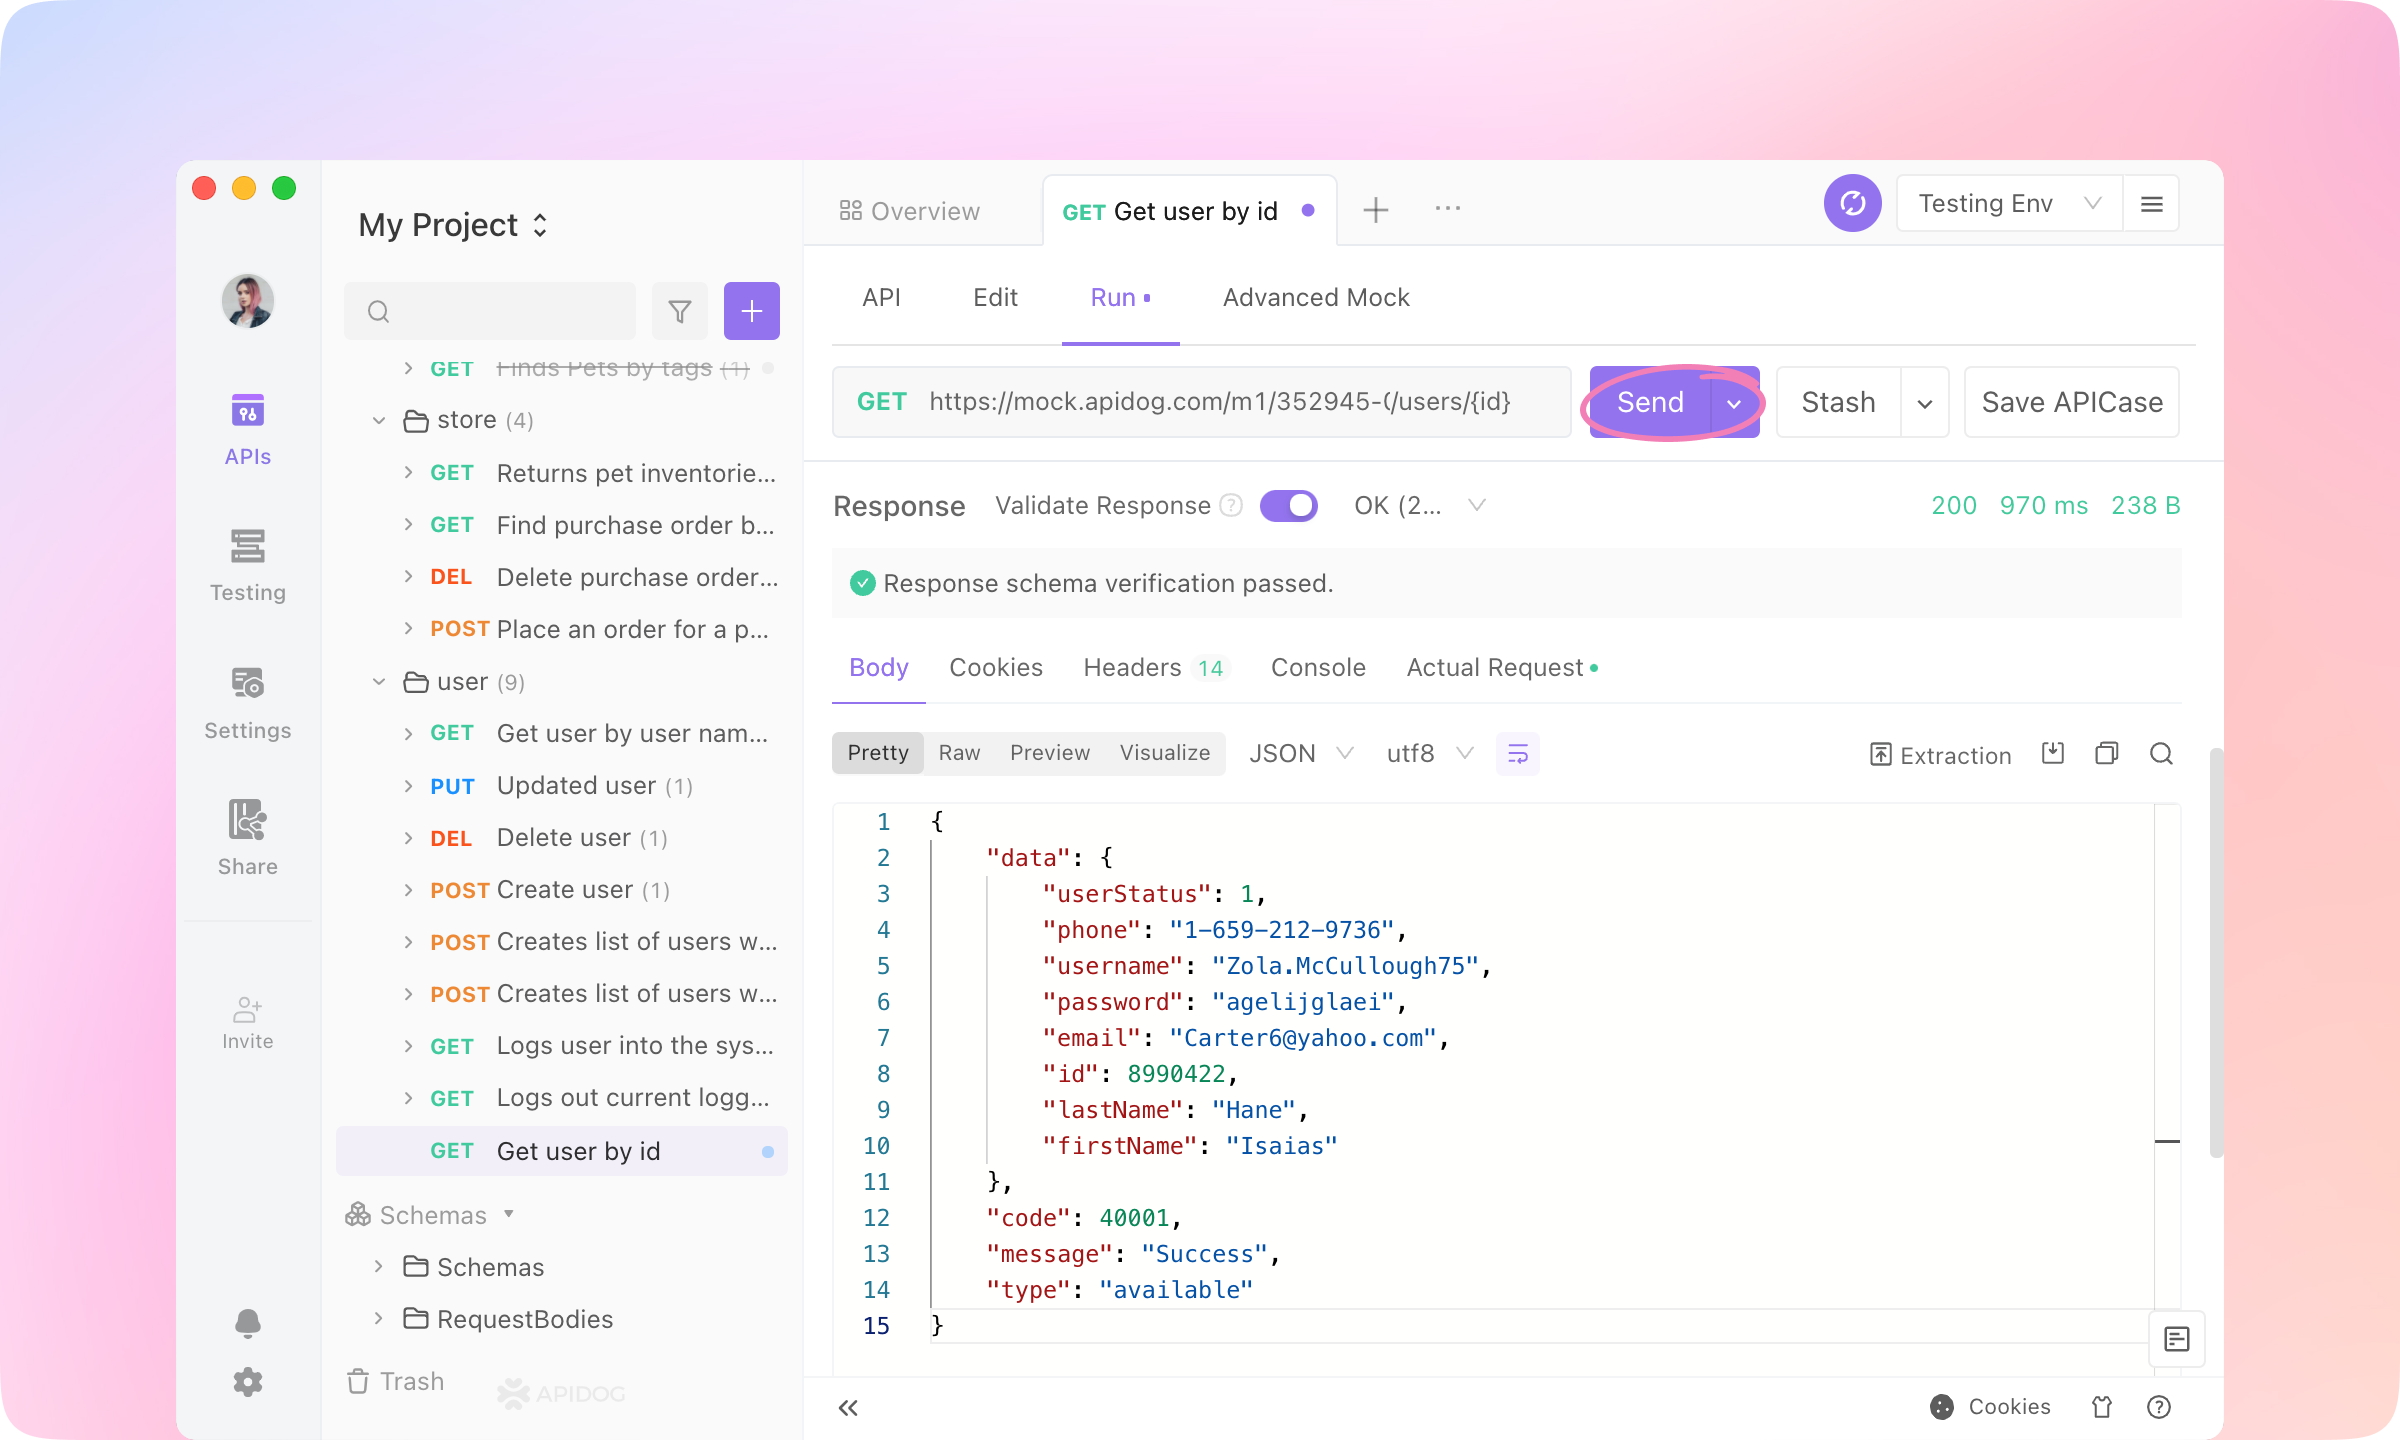
6.
Click Send to send the request. The response of the API will be displayed below.
Debugging#
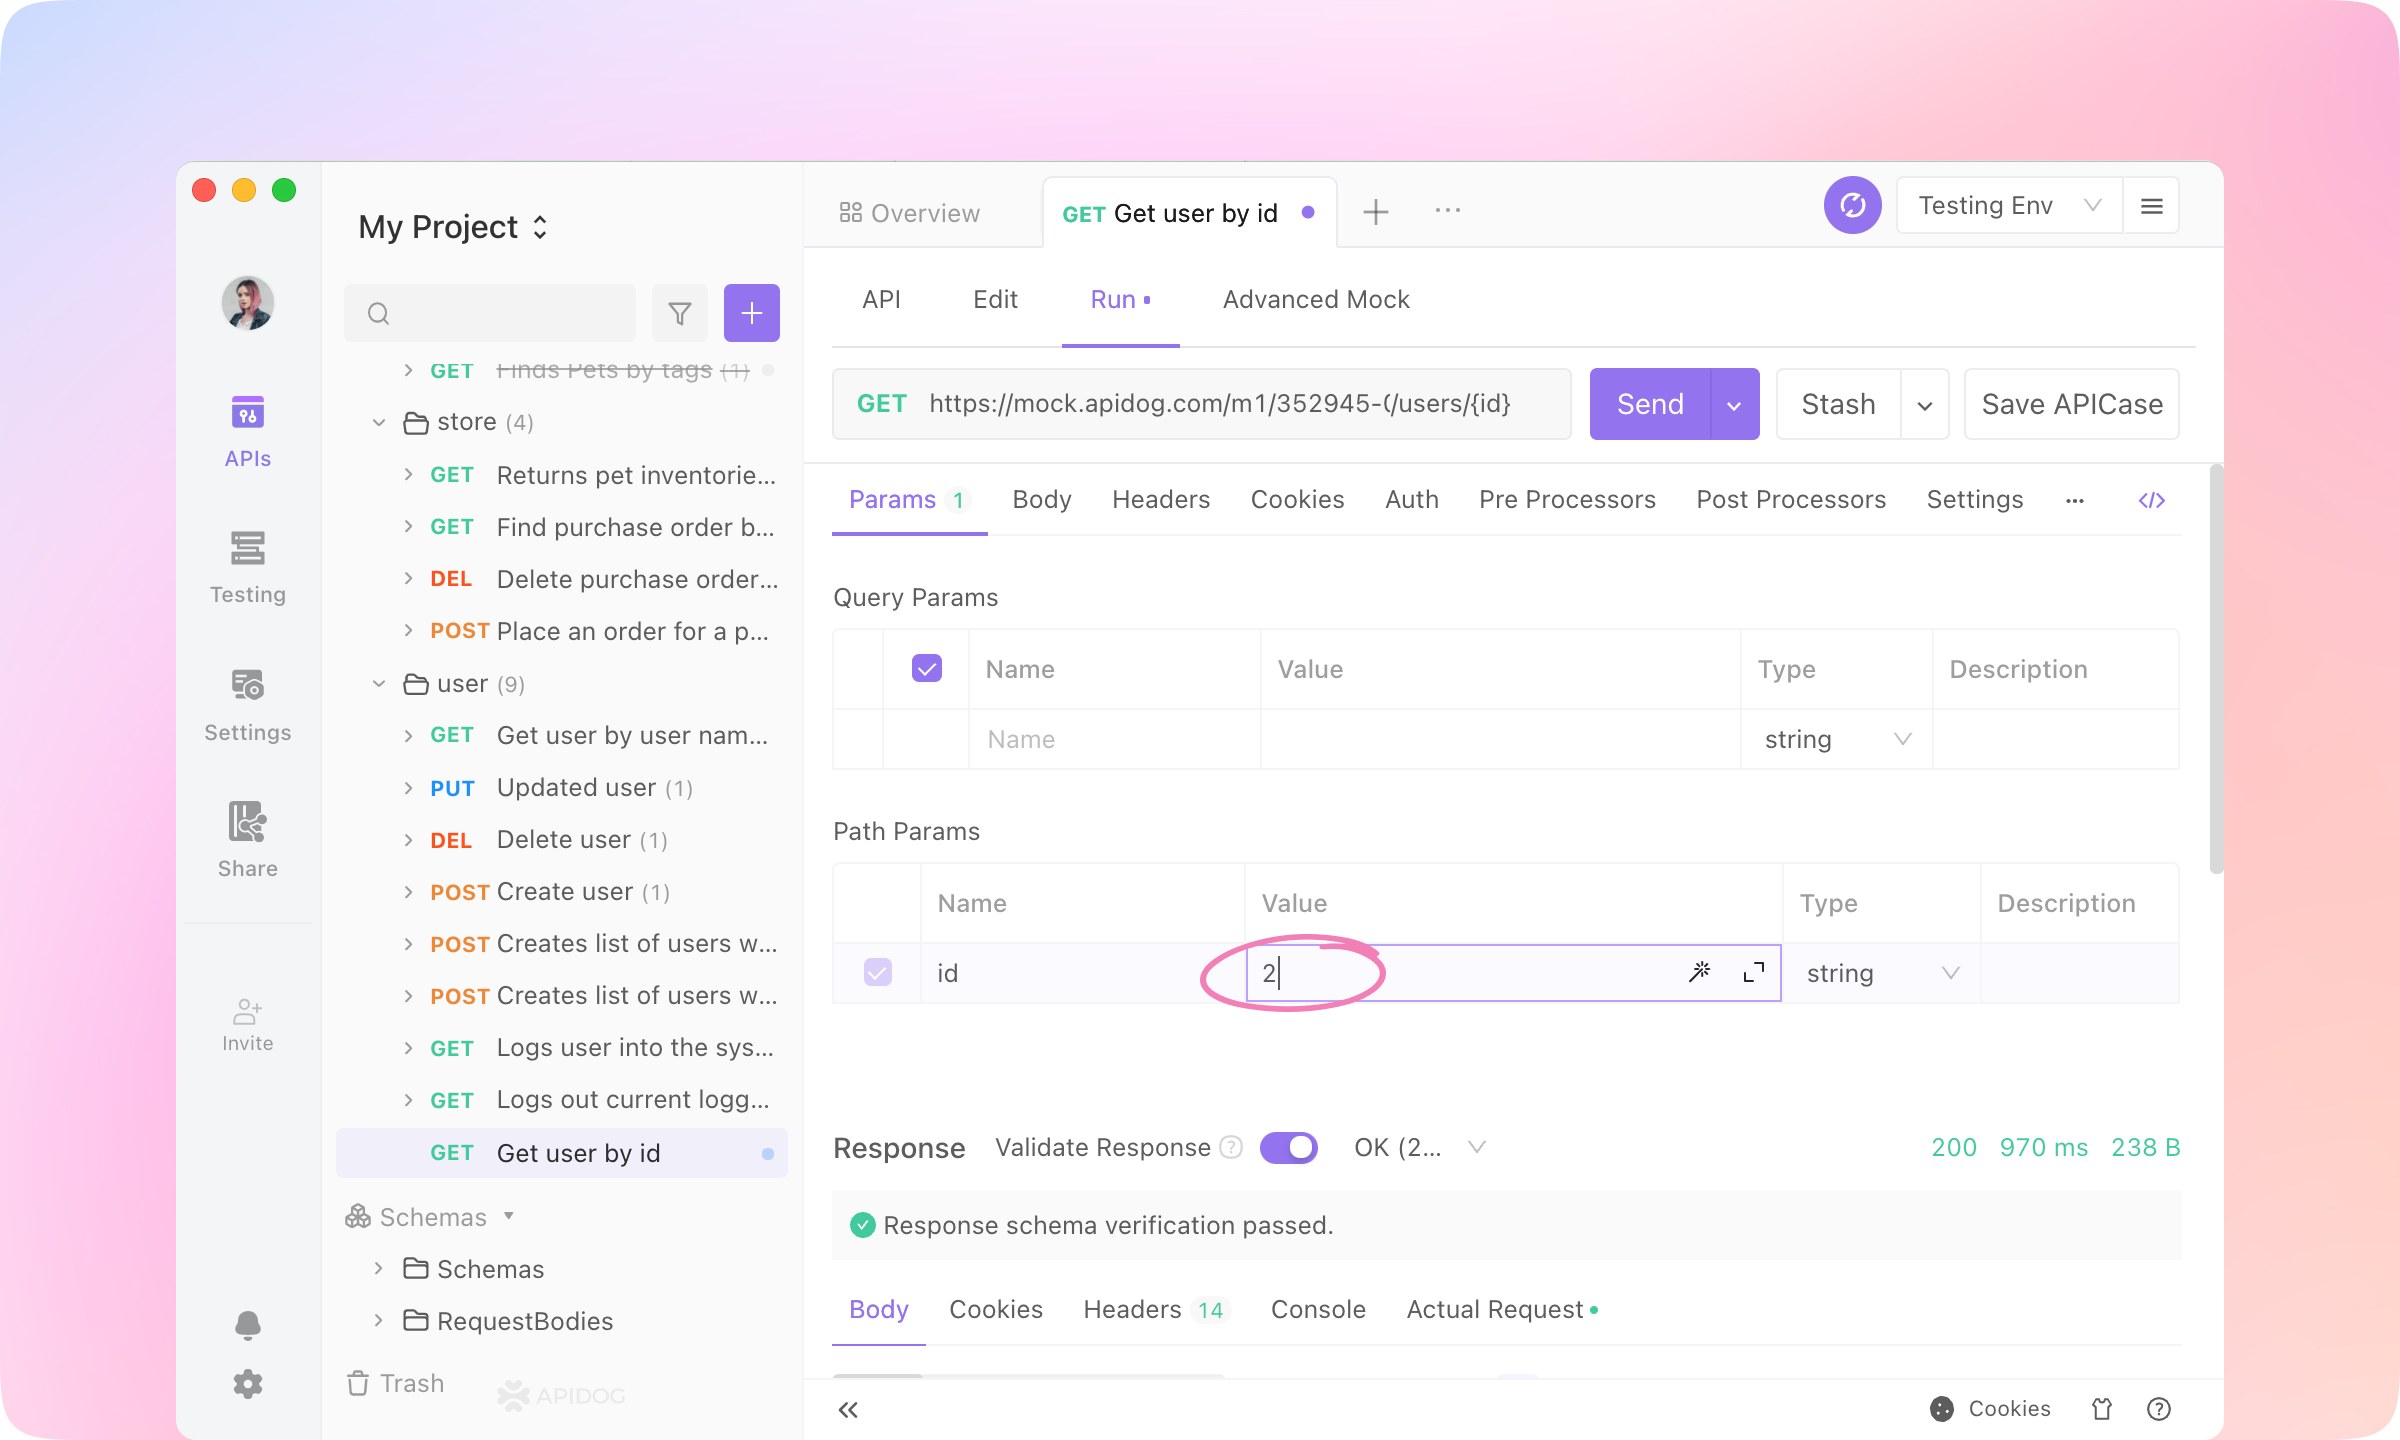
After the API is developed, the back-end needs to test whether it can return the expected data and whether the API has implemented the correct business logic.1.
Set the value of the path param to '2', and Send the request.
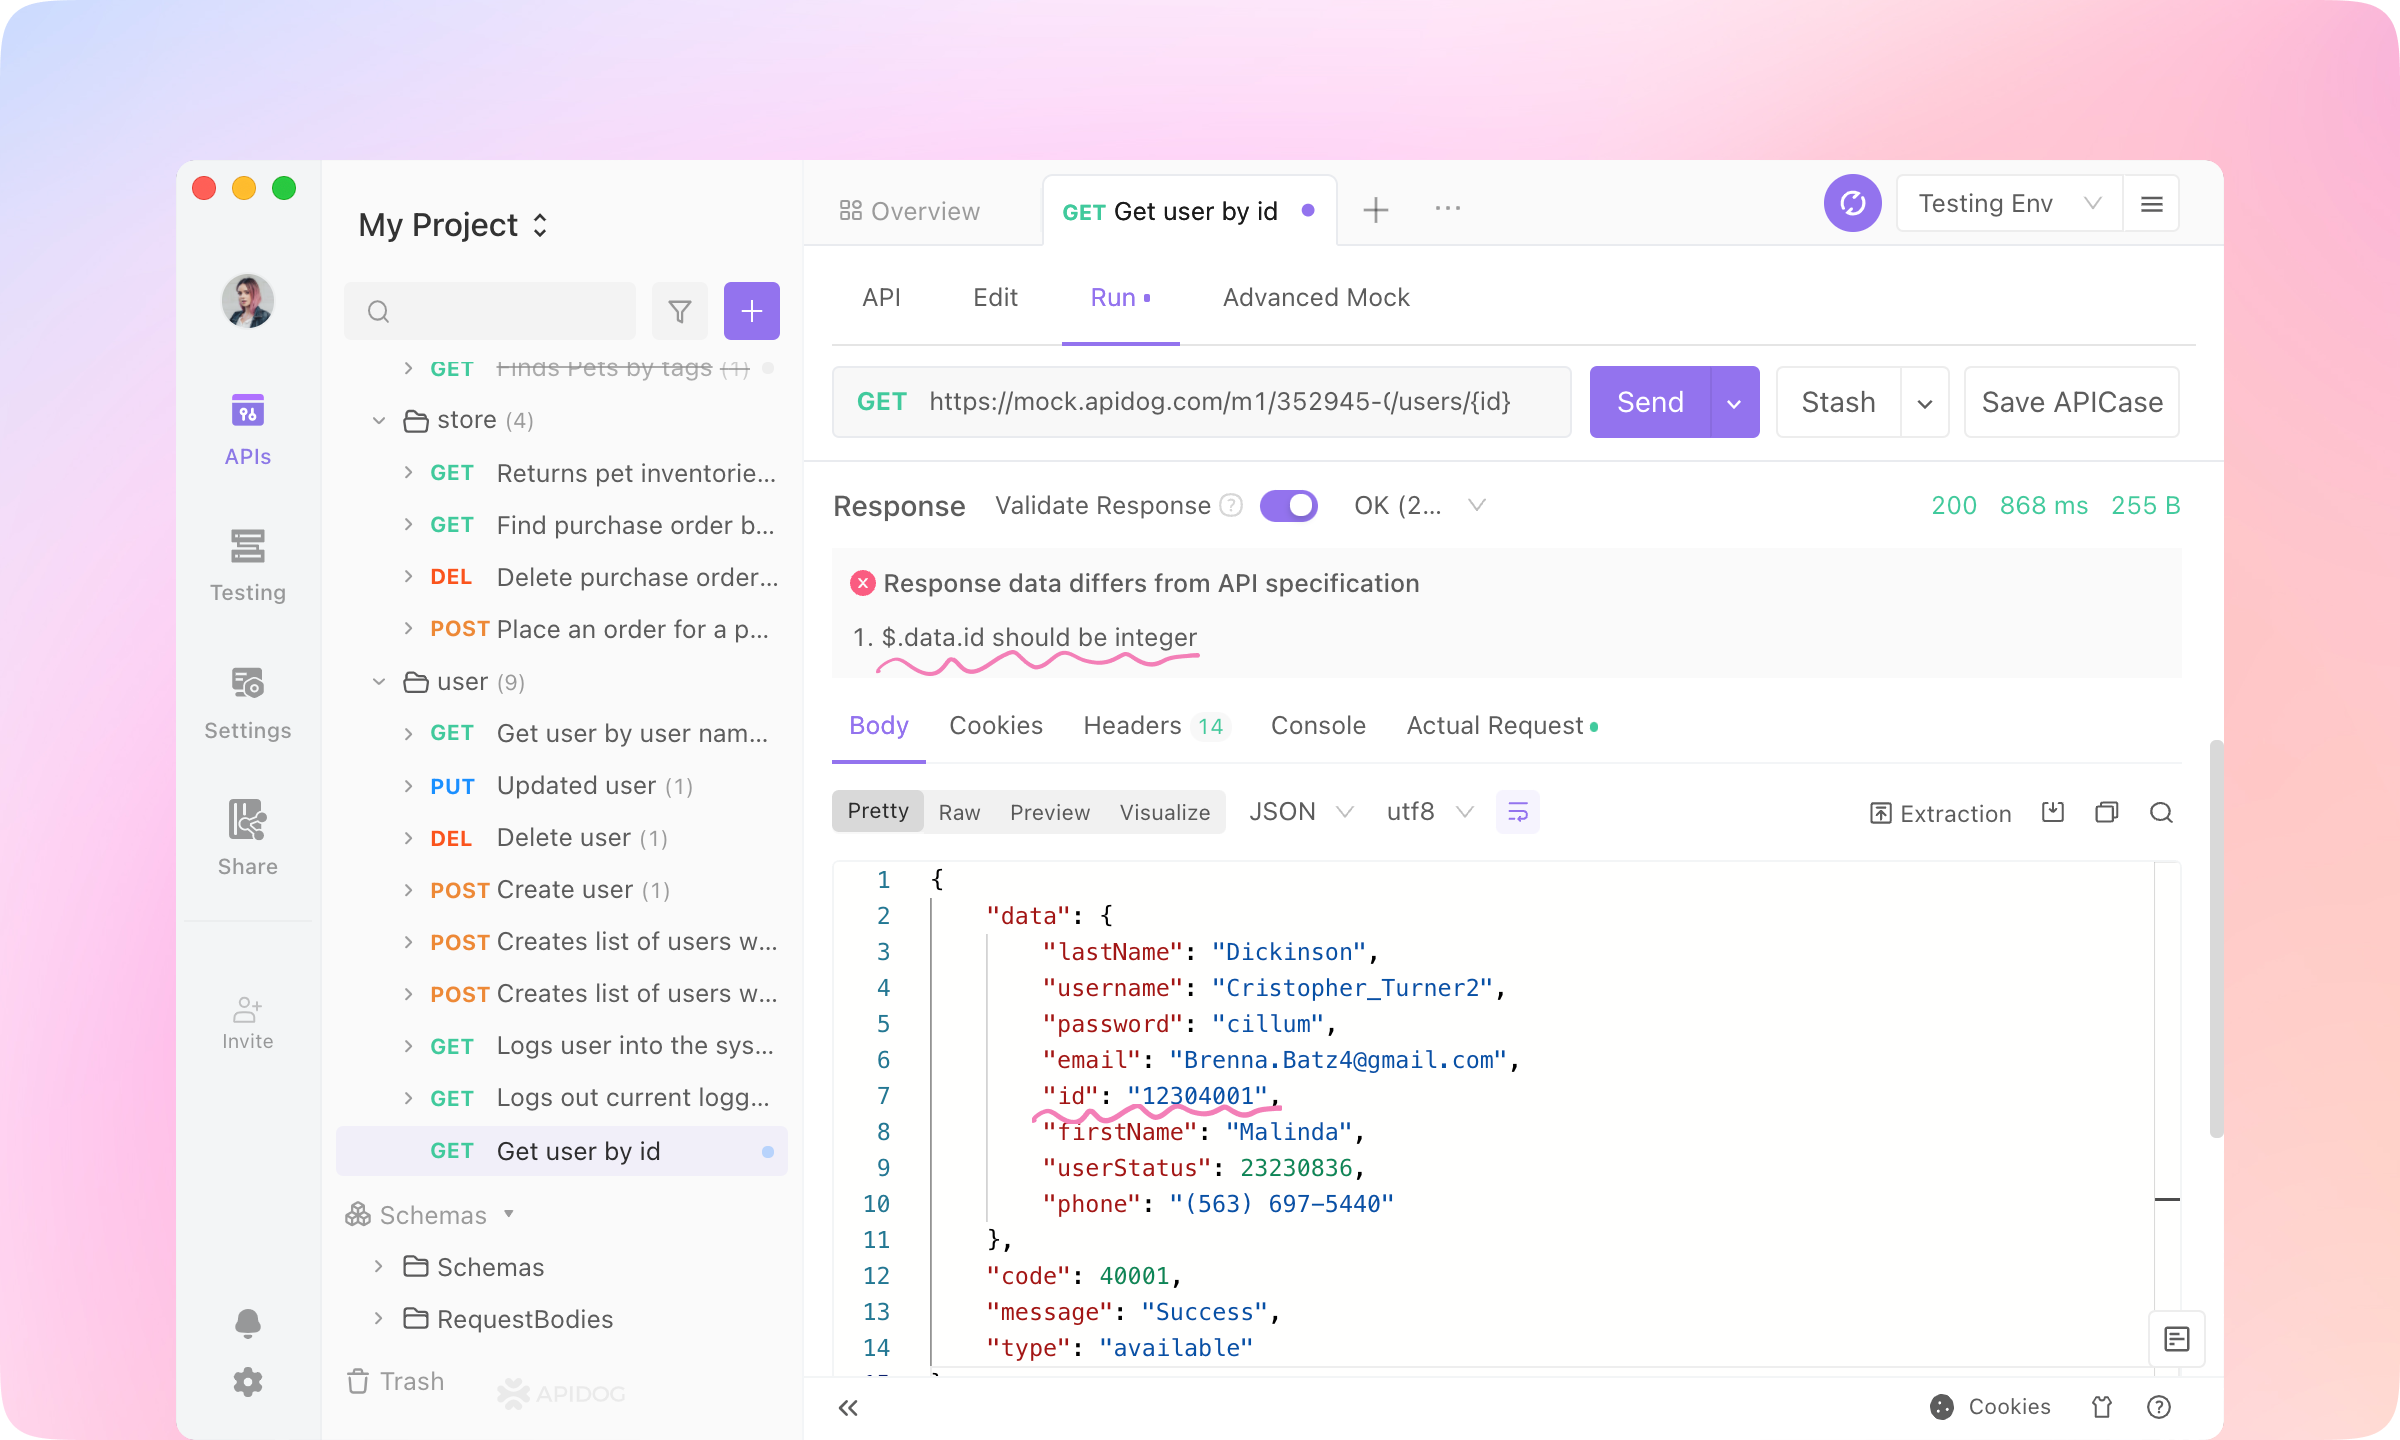
2.
You'll see an alert '🚫Response data differs from API specification: .data.idshouldbeinteger′.Thatisbecausethe.data.id is specified as an integer, but the $.data.id in the actual response is a string.
3.
Apidog automatically verifies whether the API definition and actual response are consistent. Issues such as incorrect data types, undefined enumerated values, missing required fields, and so on will be automatically detected. The back-end can easily discover problems in the response data.
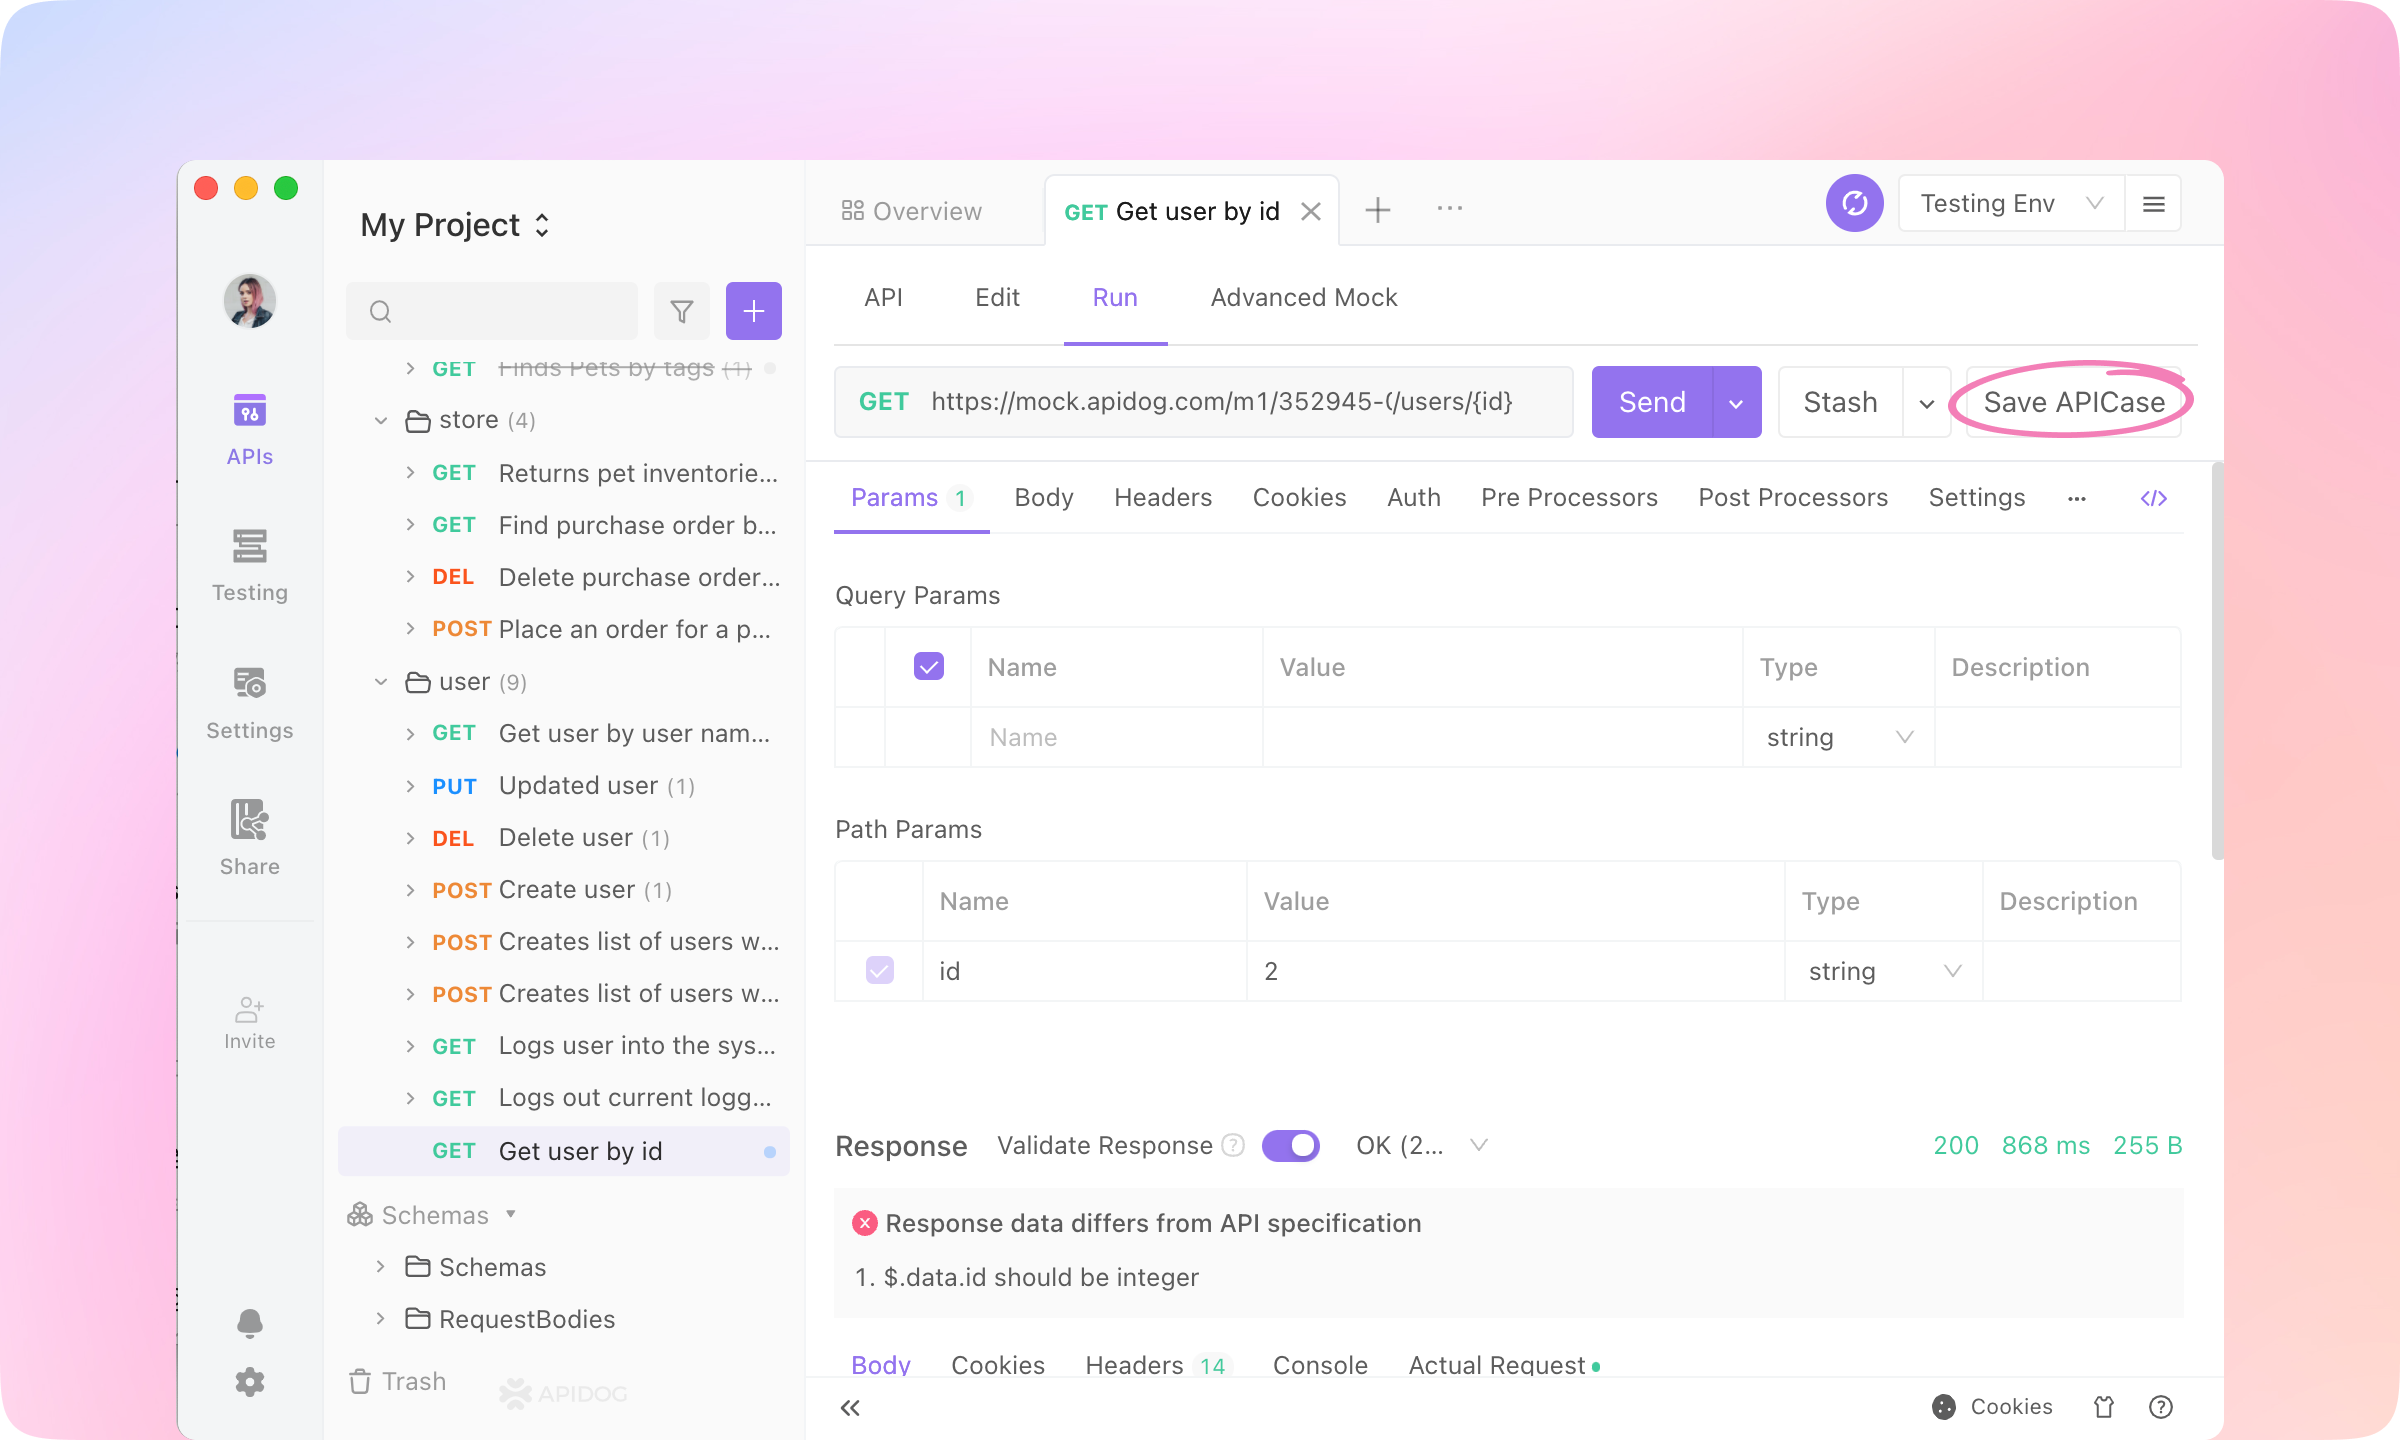
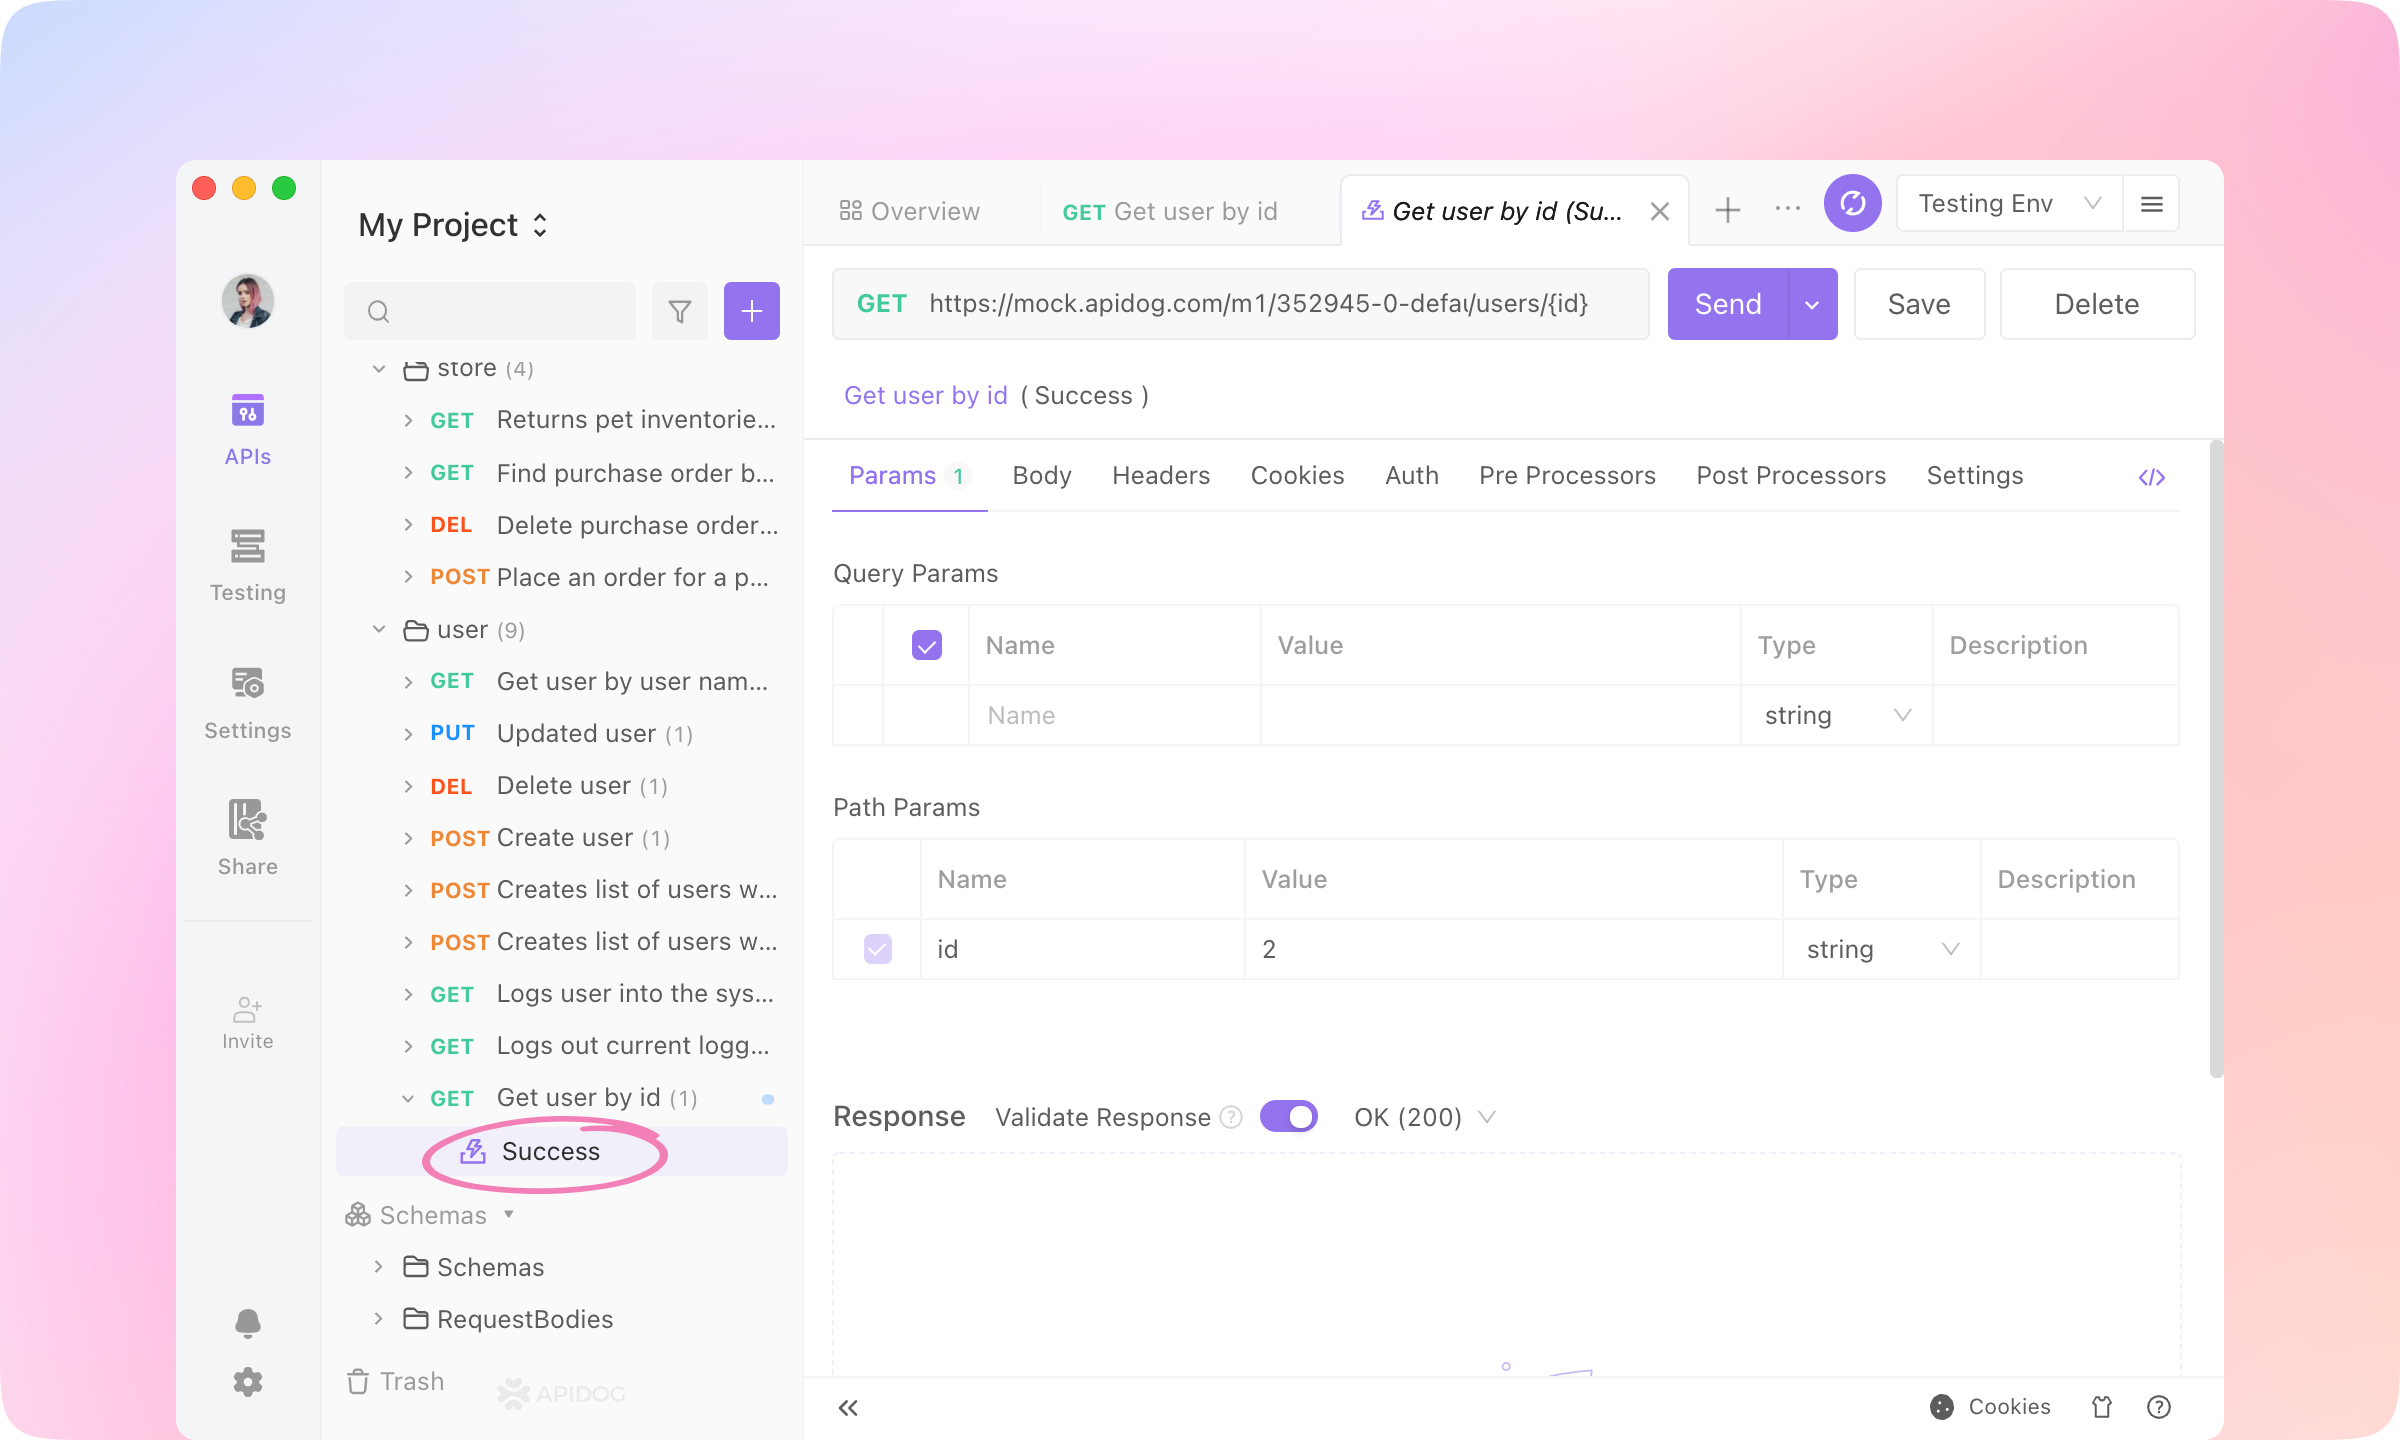
4.
Click Save APICase to save the request. The requests will be saved as children of the API and can be referenced in the testing module.
Use Variables#
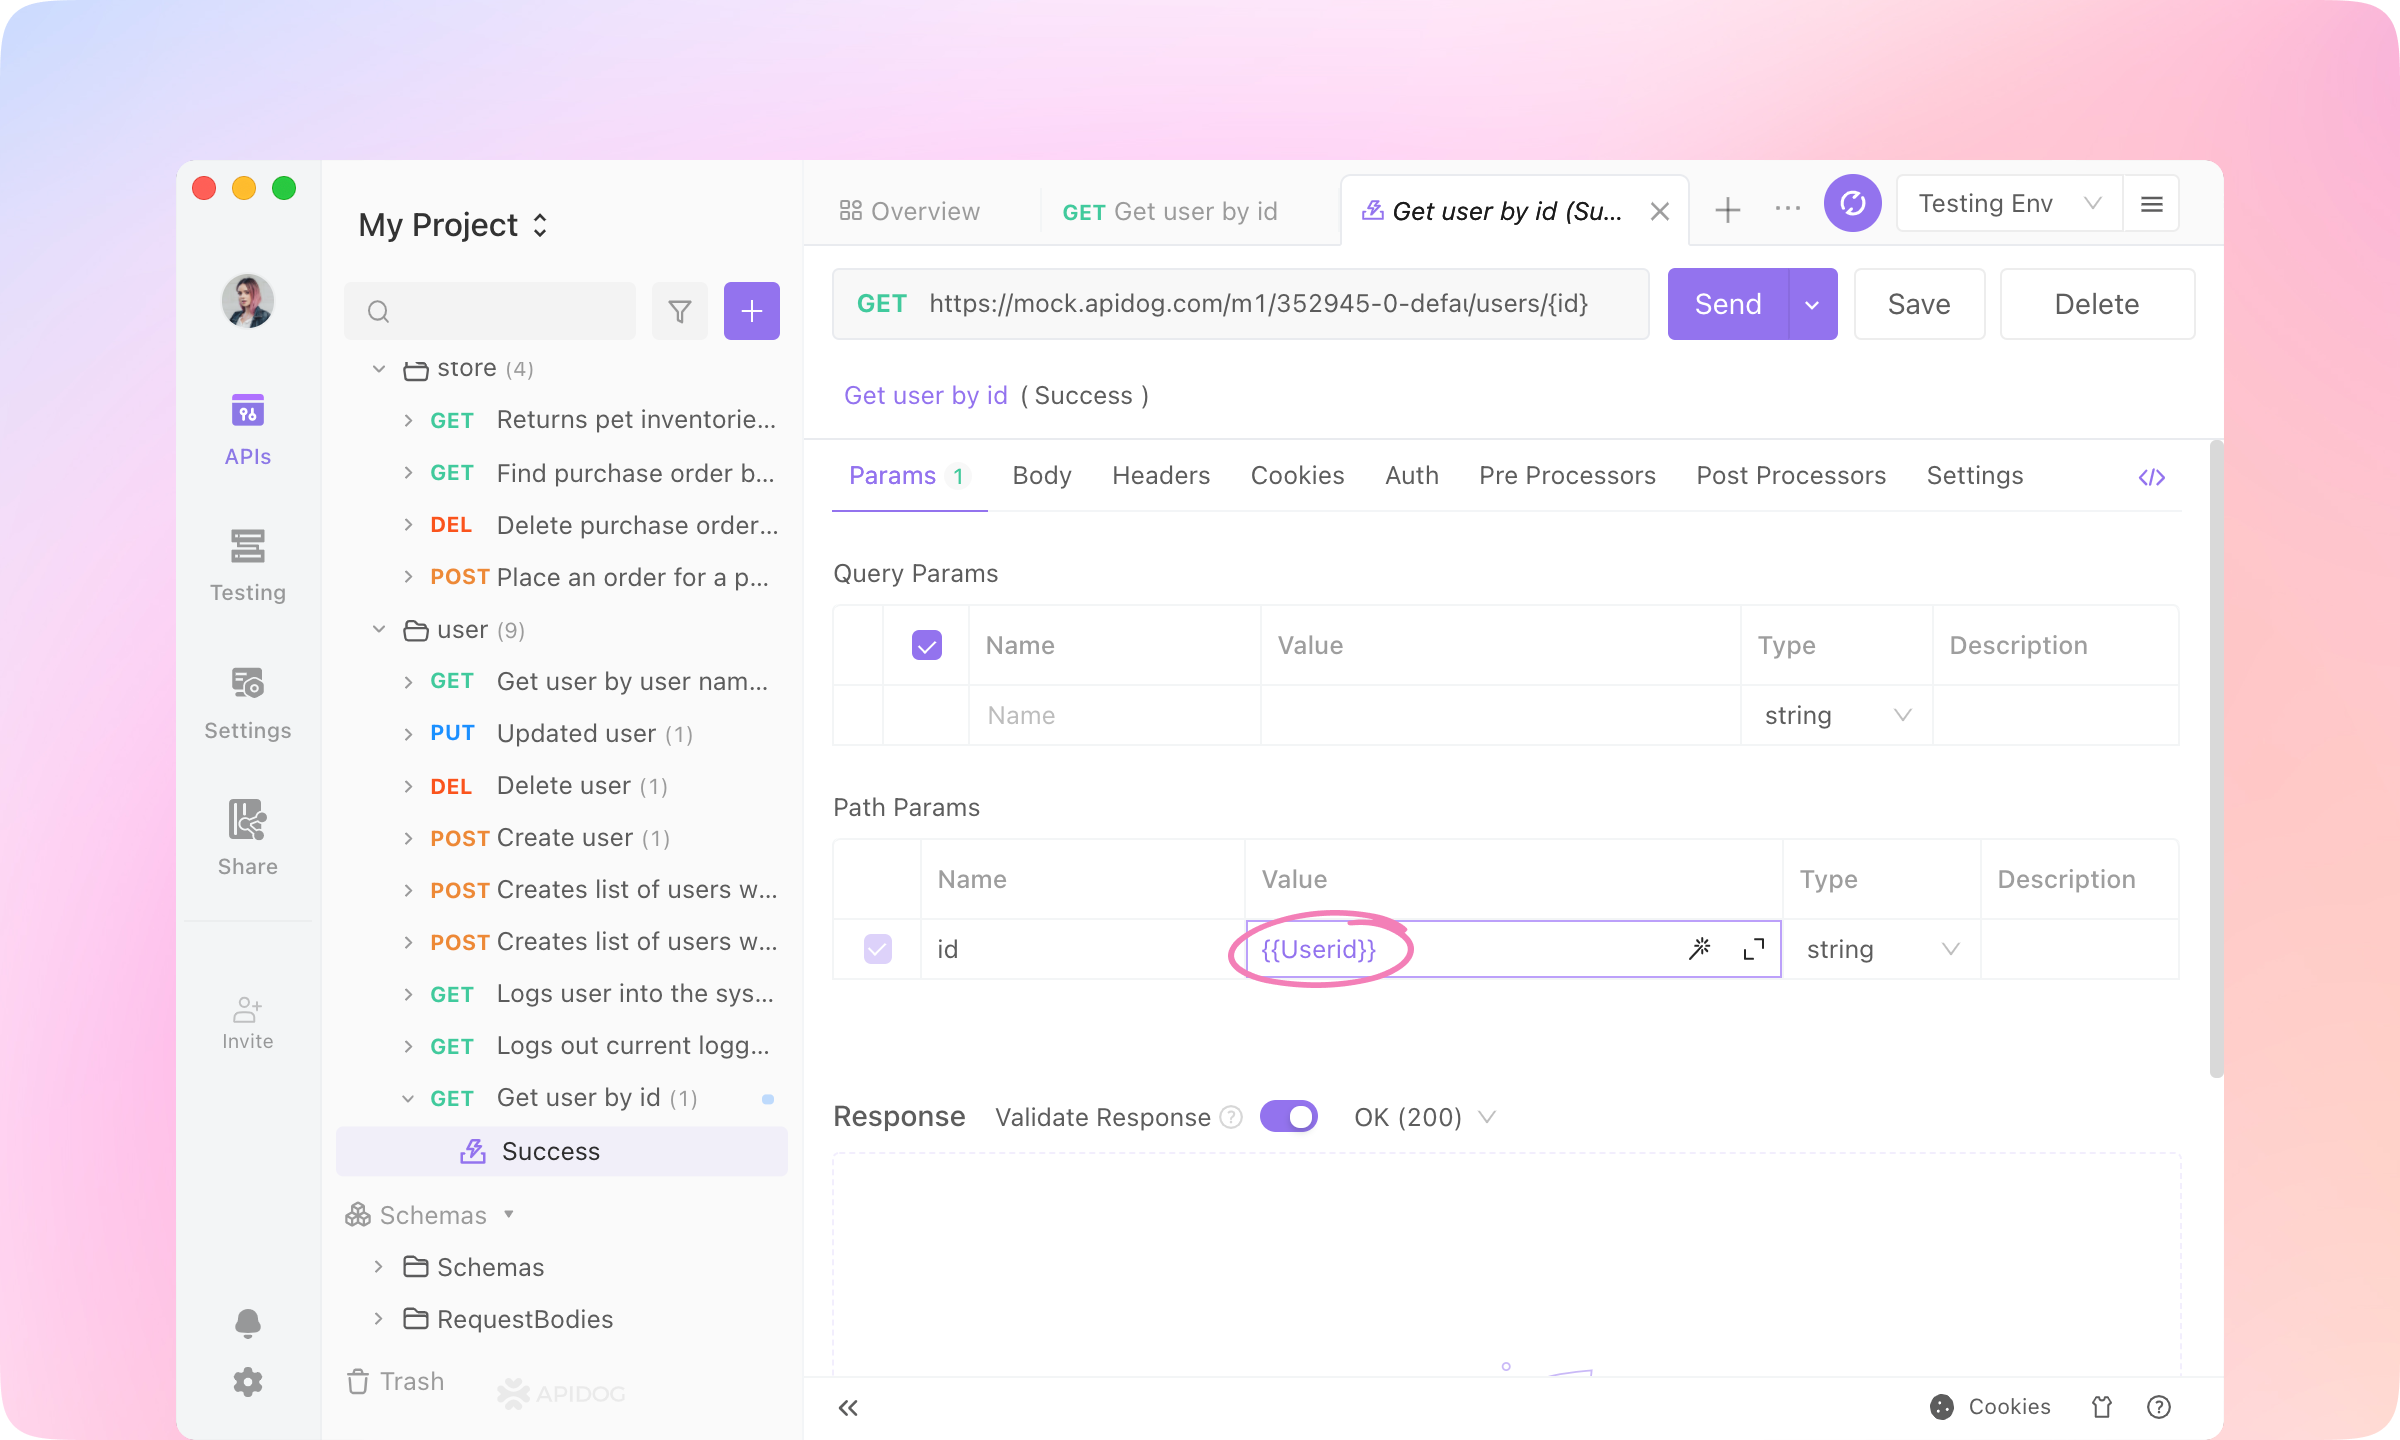
In Apidog, variables are used to store values that can be reused across requests.Environment variables are specific to an environment, meaning that they are only accessible when a particular environment is selected. Global variables, on the other hand, are accessible across all environments.You can define environment variables in the "Manage Environments" section of Apidog, and reference them in your requests using double curly braces notation, for example {{variableName}}.1.
Fill the path param 'id' with {{Userid}}.
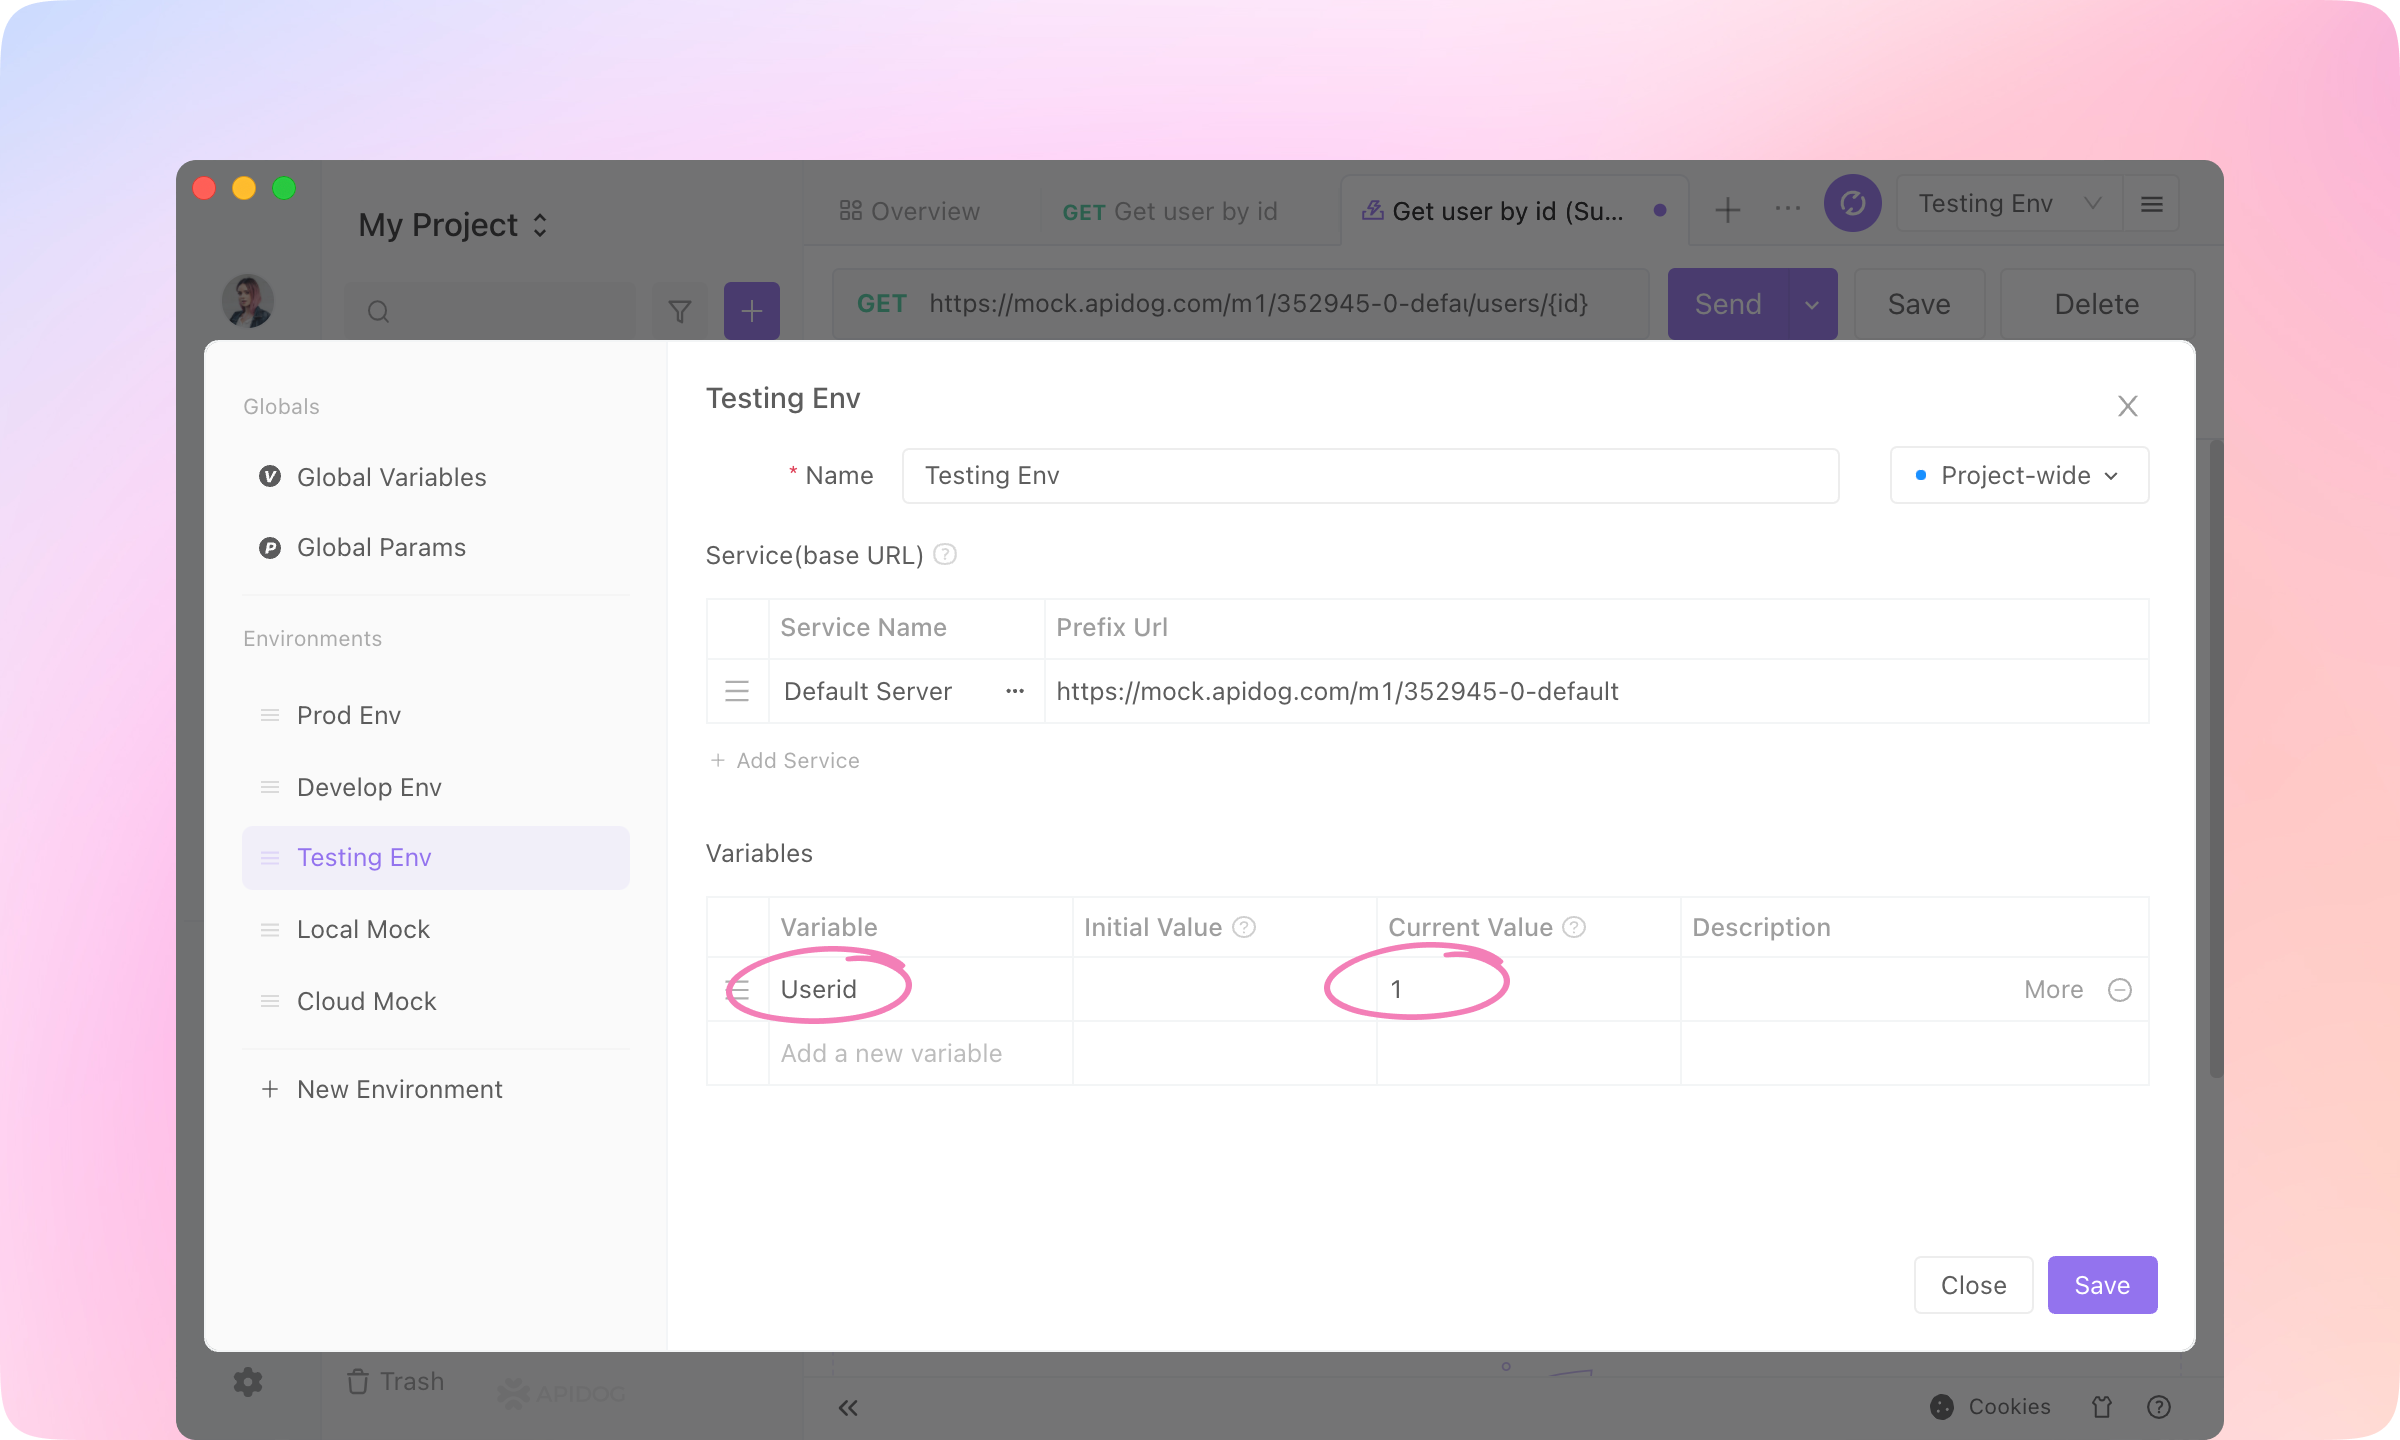
2.
Click Environment Management. Add a new variable named Userid, and fill the Current Value with '1'. Save the Variable.
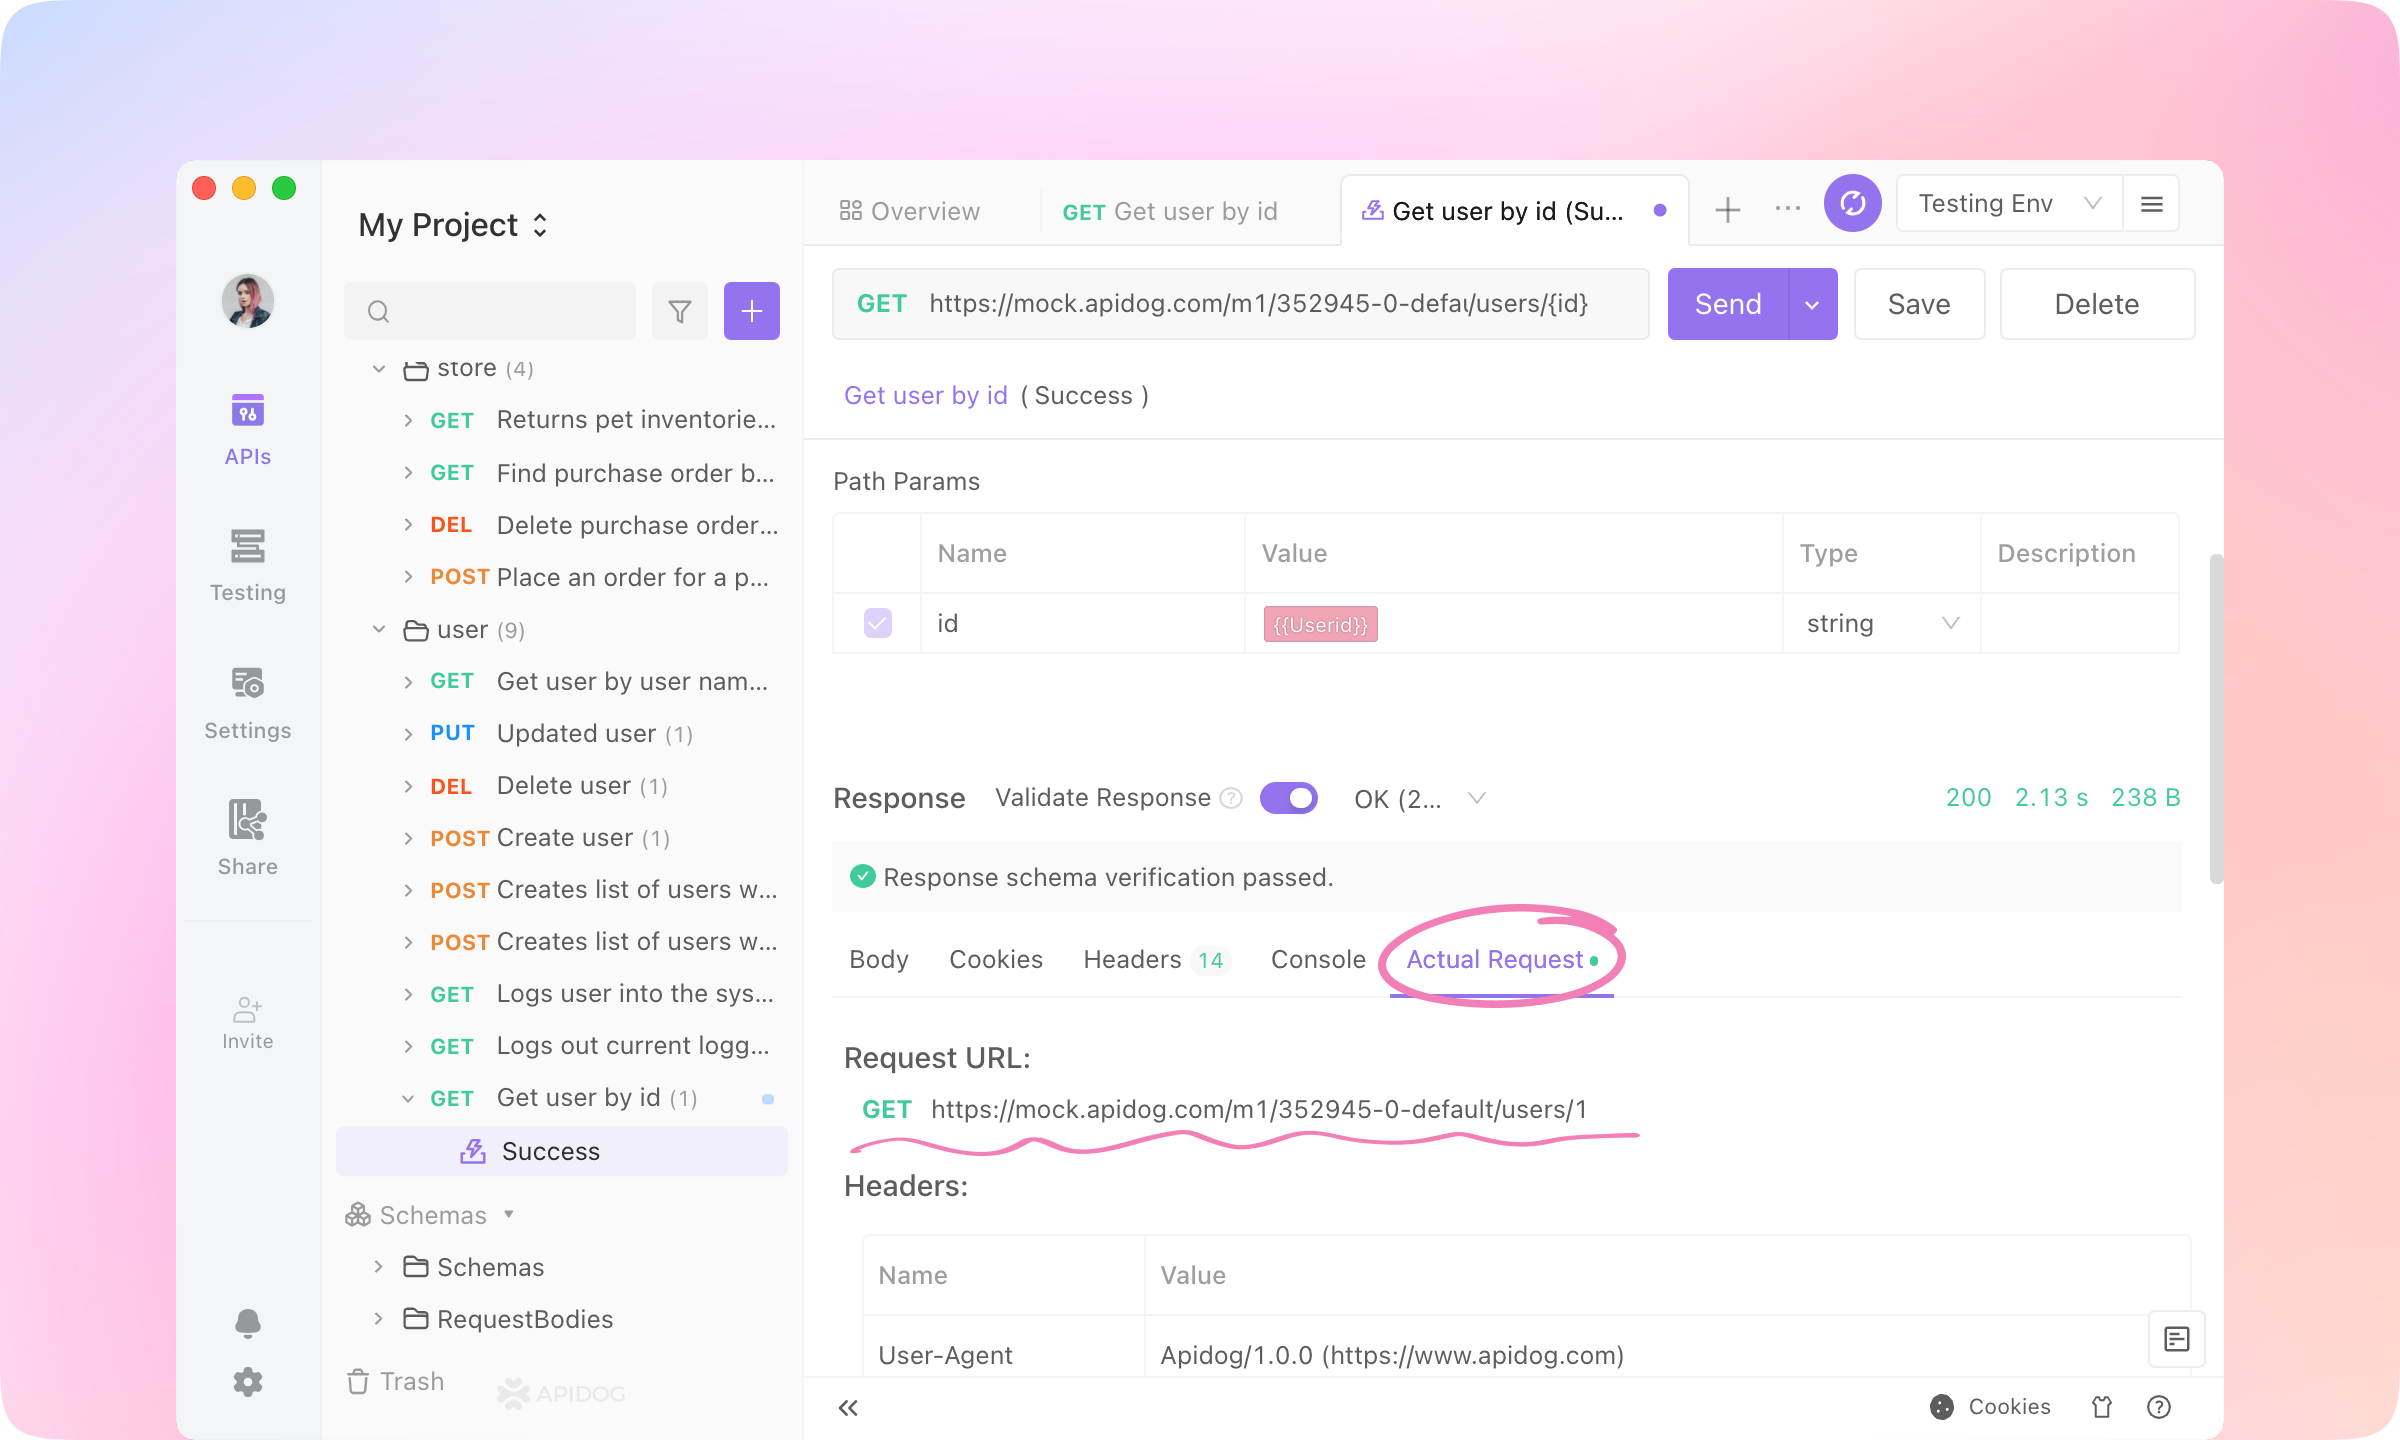
3.
Send the request. Click Response - Actual Request to see the request URL, and you'll find the {{Userid}} is replaced by the current value.
Learn more about Variables here. Pre Processors#
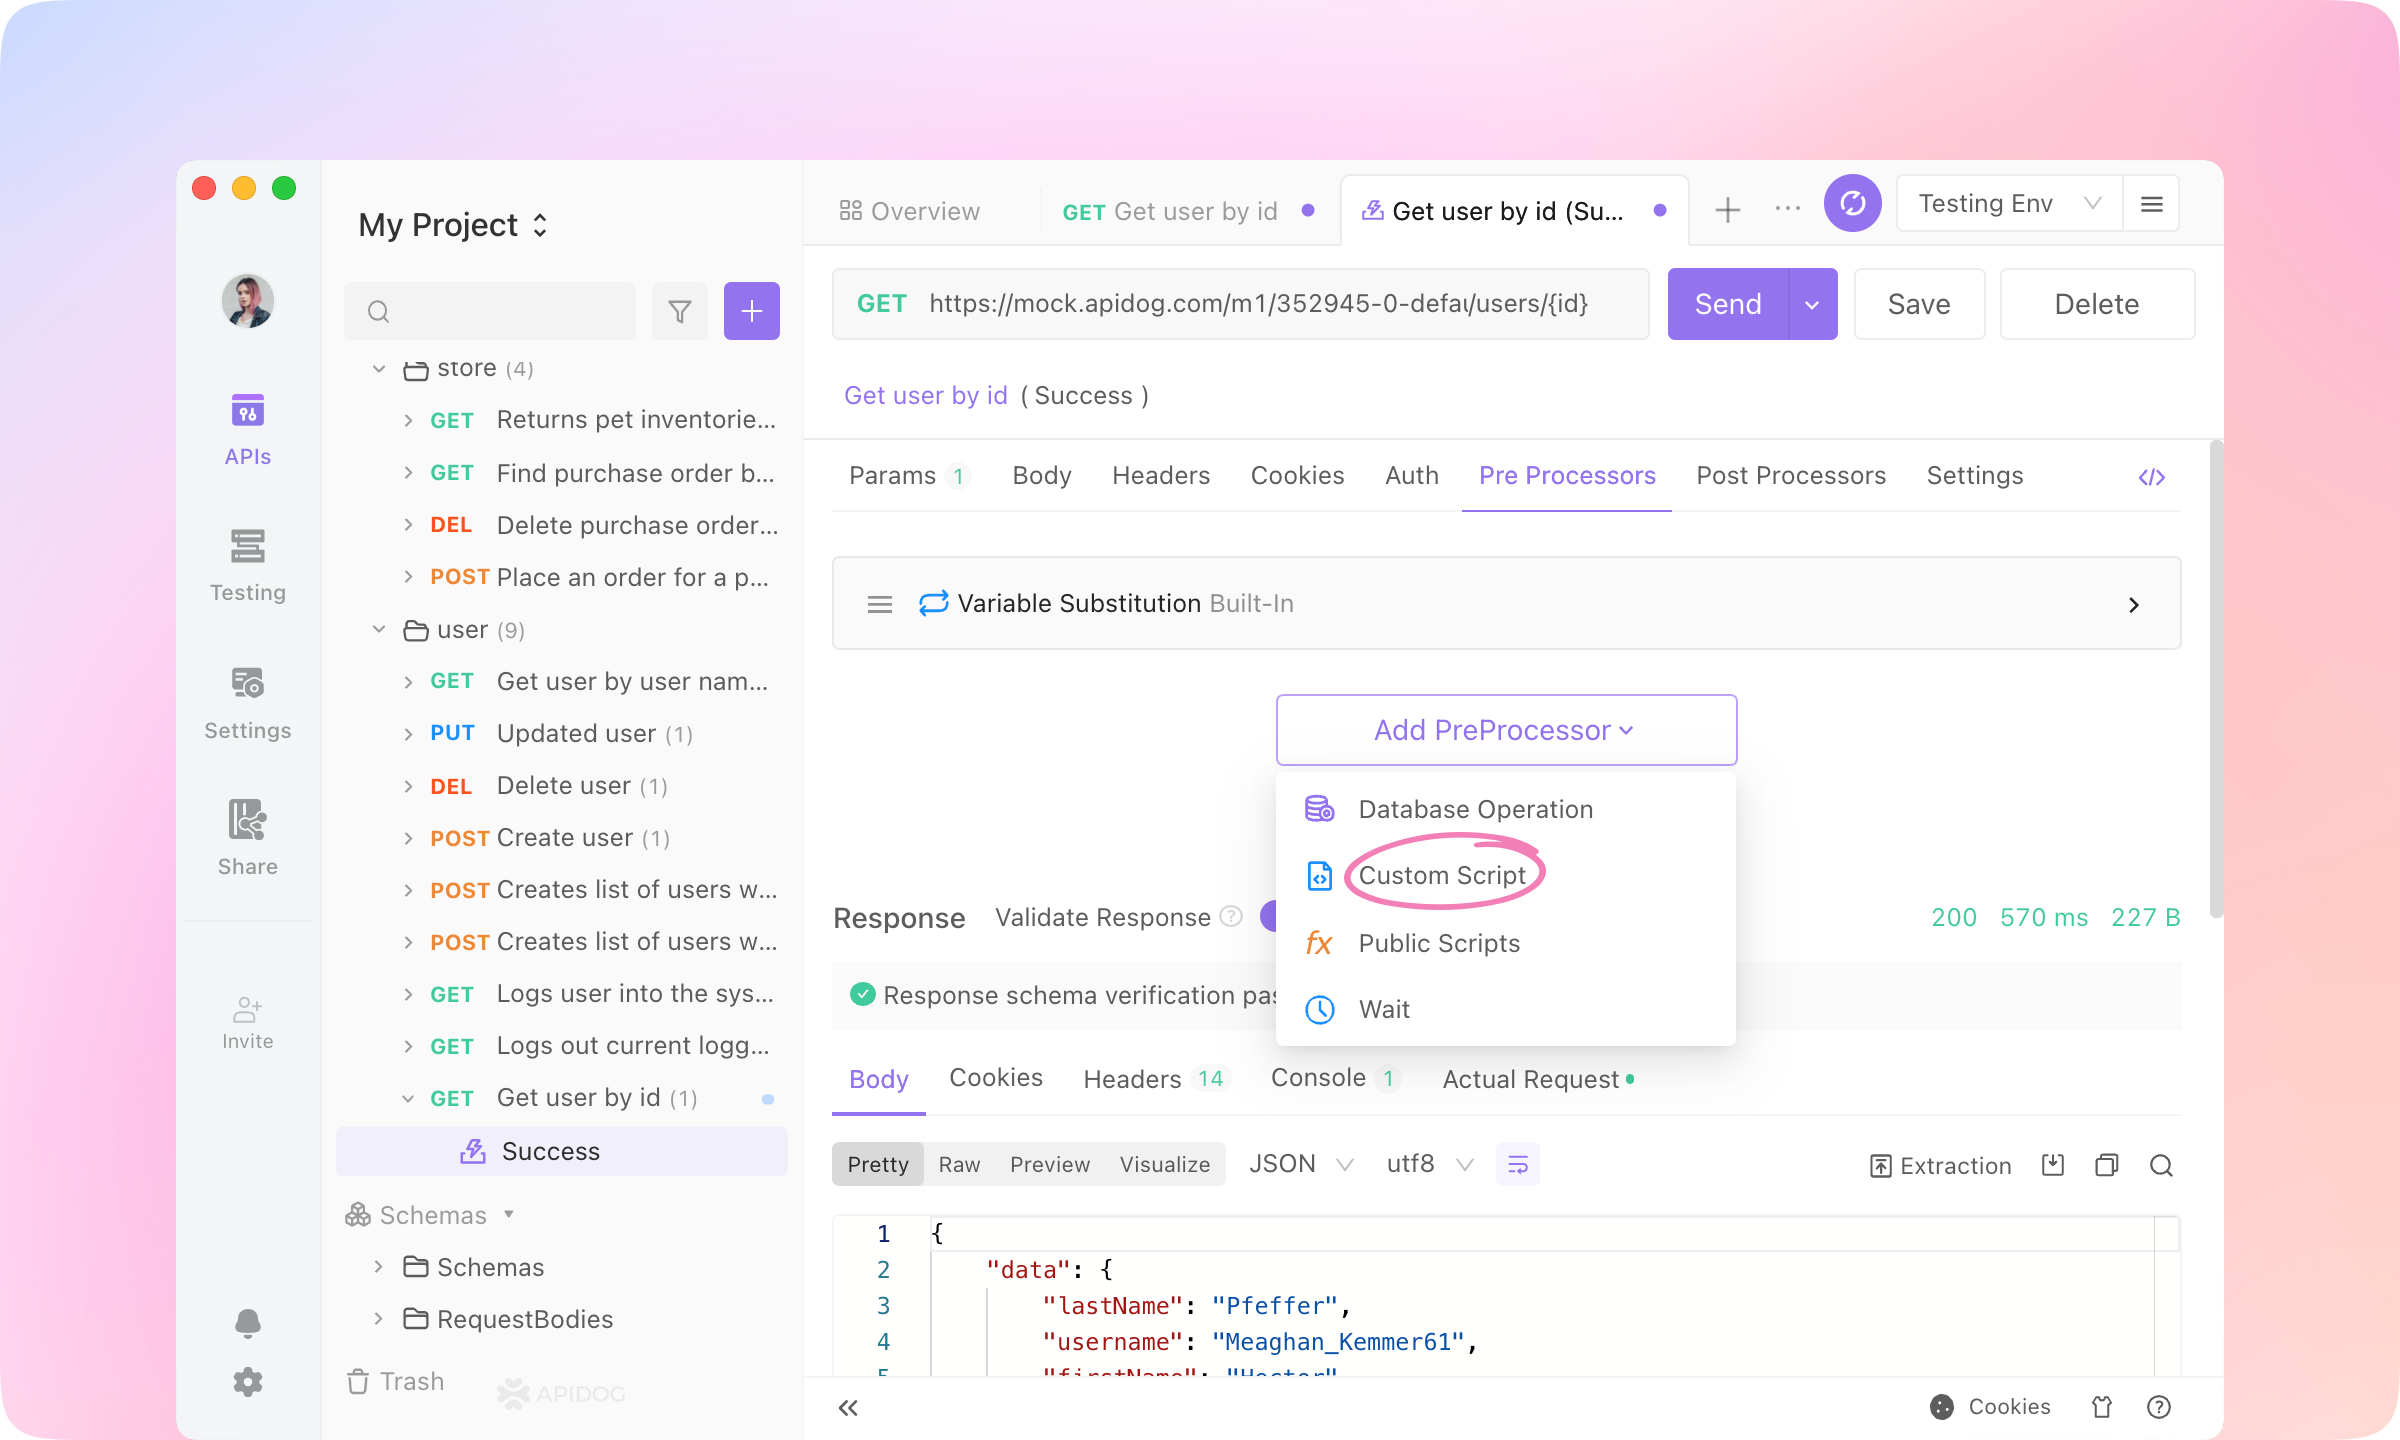
In Apidog, Pre Processors are operations that are executed before a request is sent. They allow you to manipulate the request and environment variables before the request is sent.Pre Processors can be used to:Set or modify variables that are used in the request
Perform data validation or data transformation
Log information or debug data
Make other requests and store the response data in variables
1.
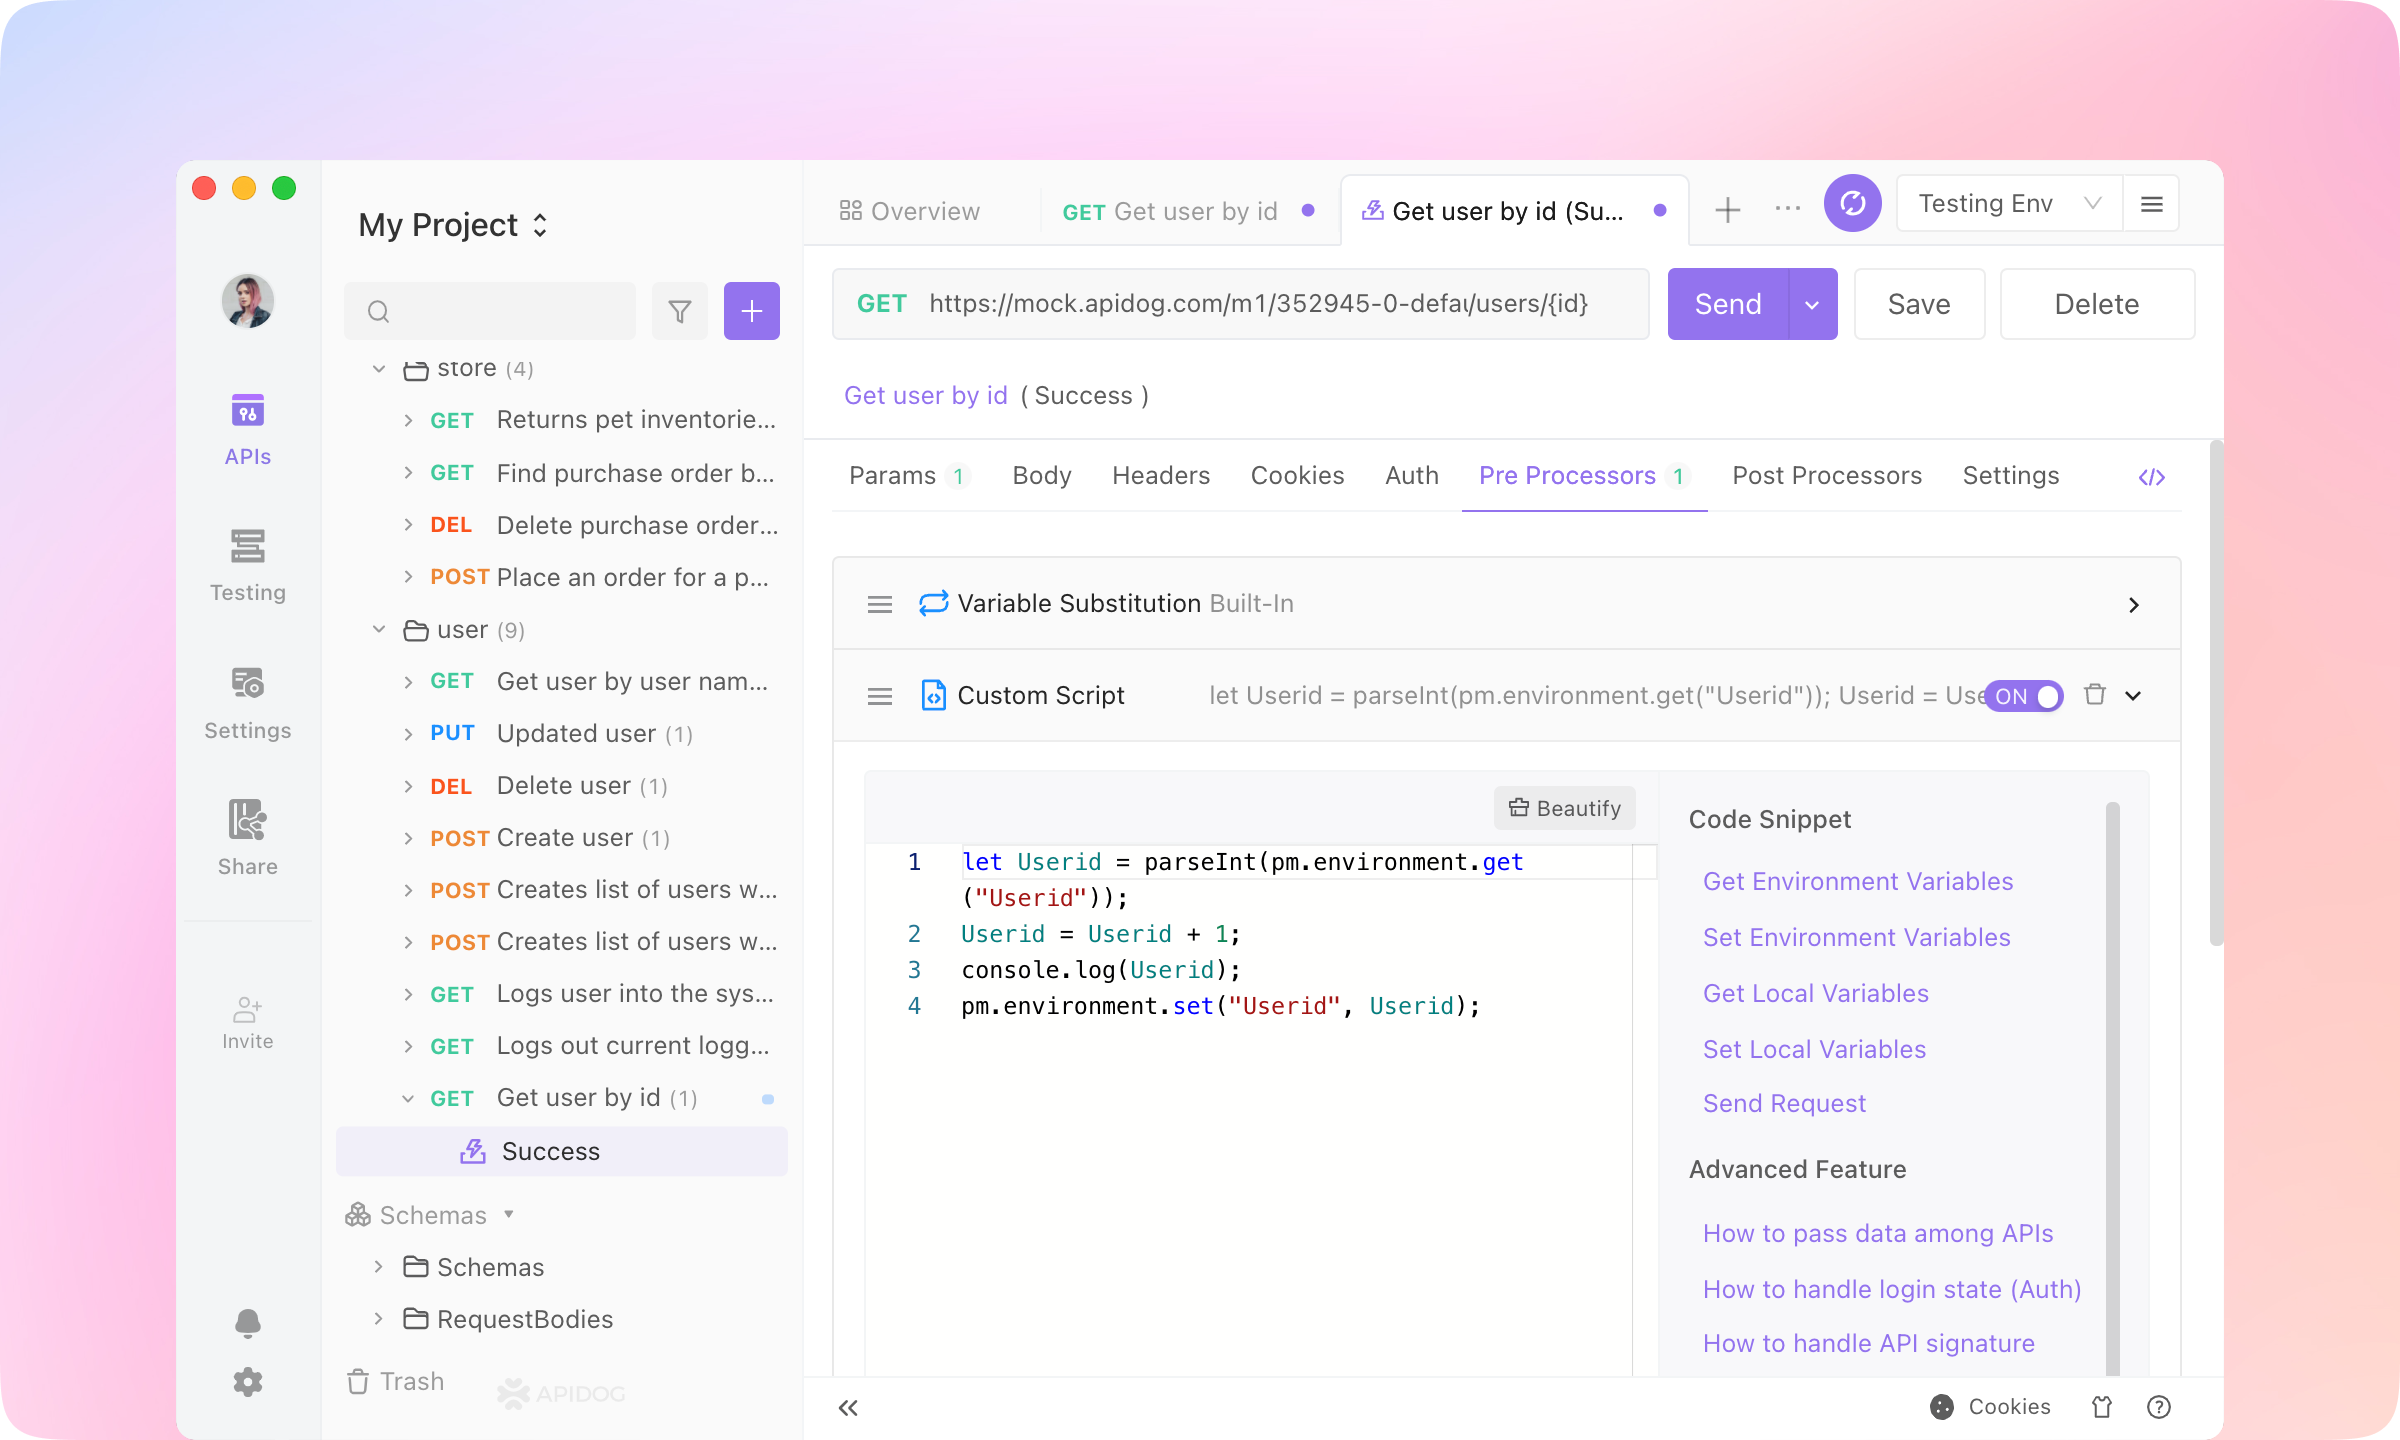
Click the Pre Processors tab, and click the Add PreProcessor button. Add a Custom Script.
2.
Paste the following script into the Custom Script area.
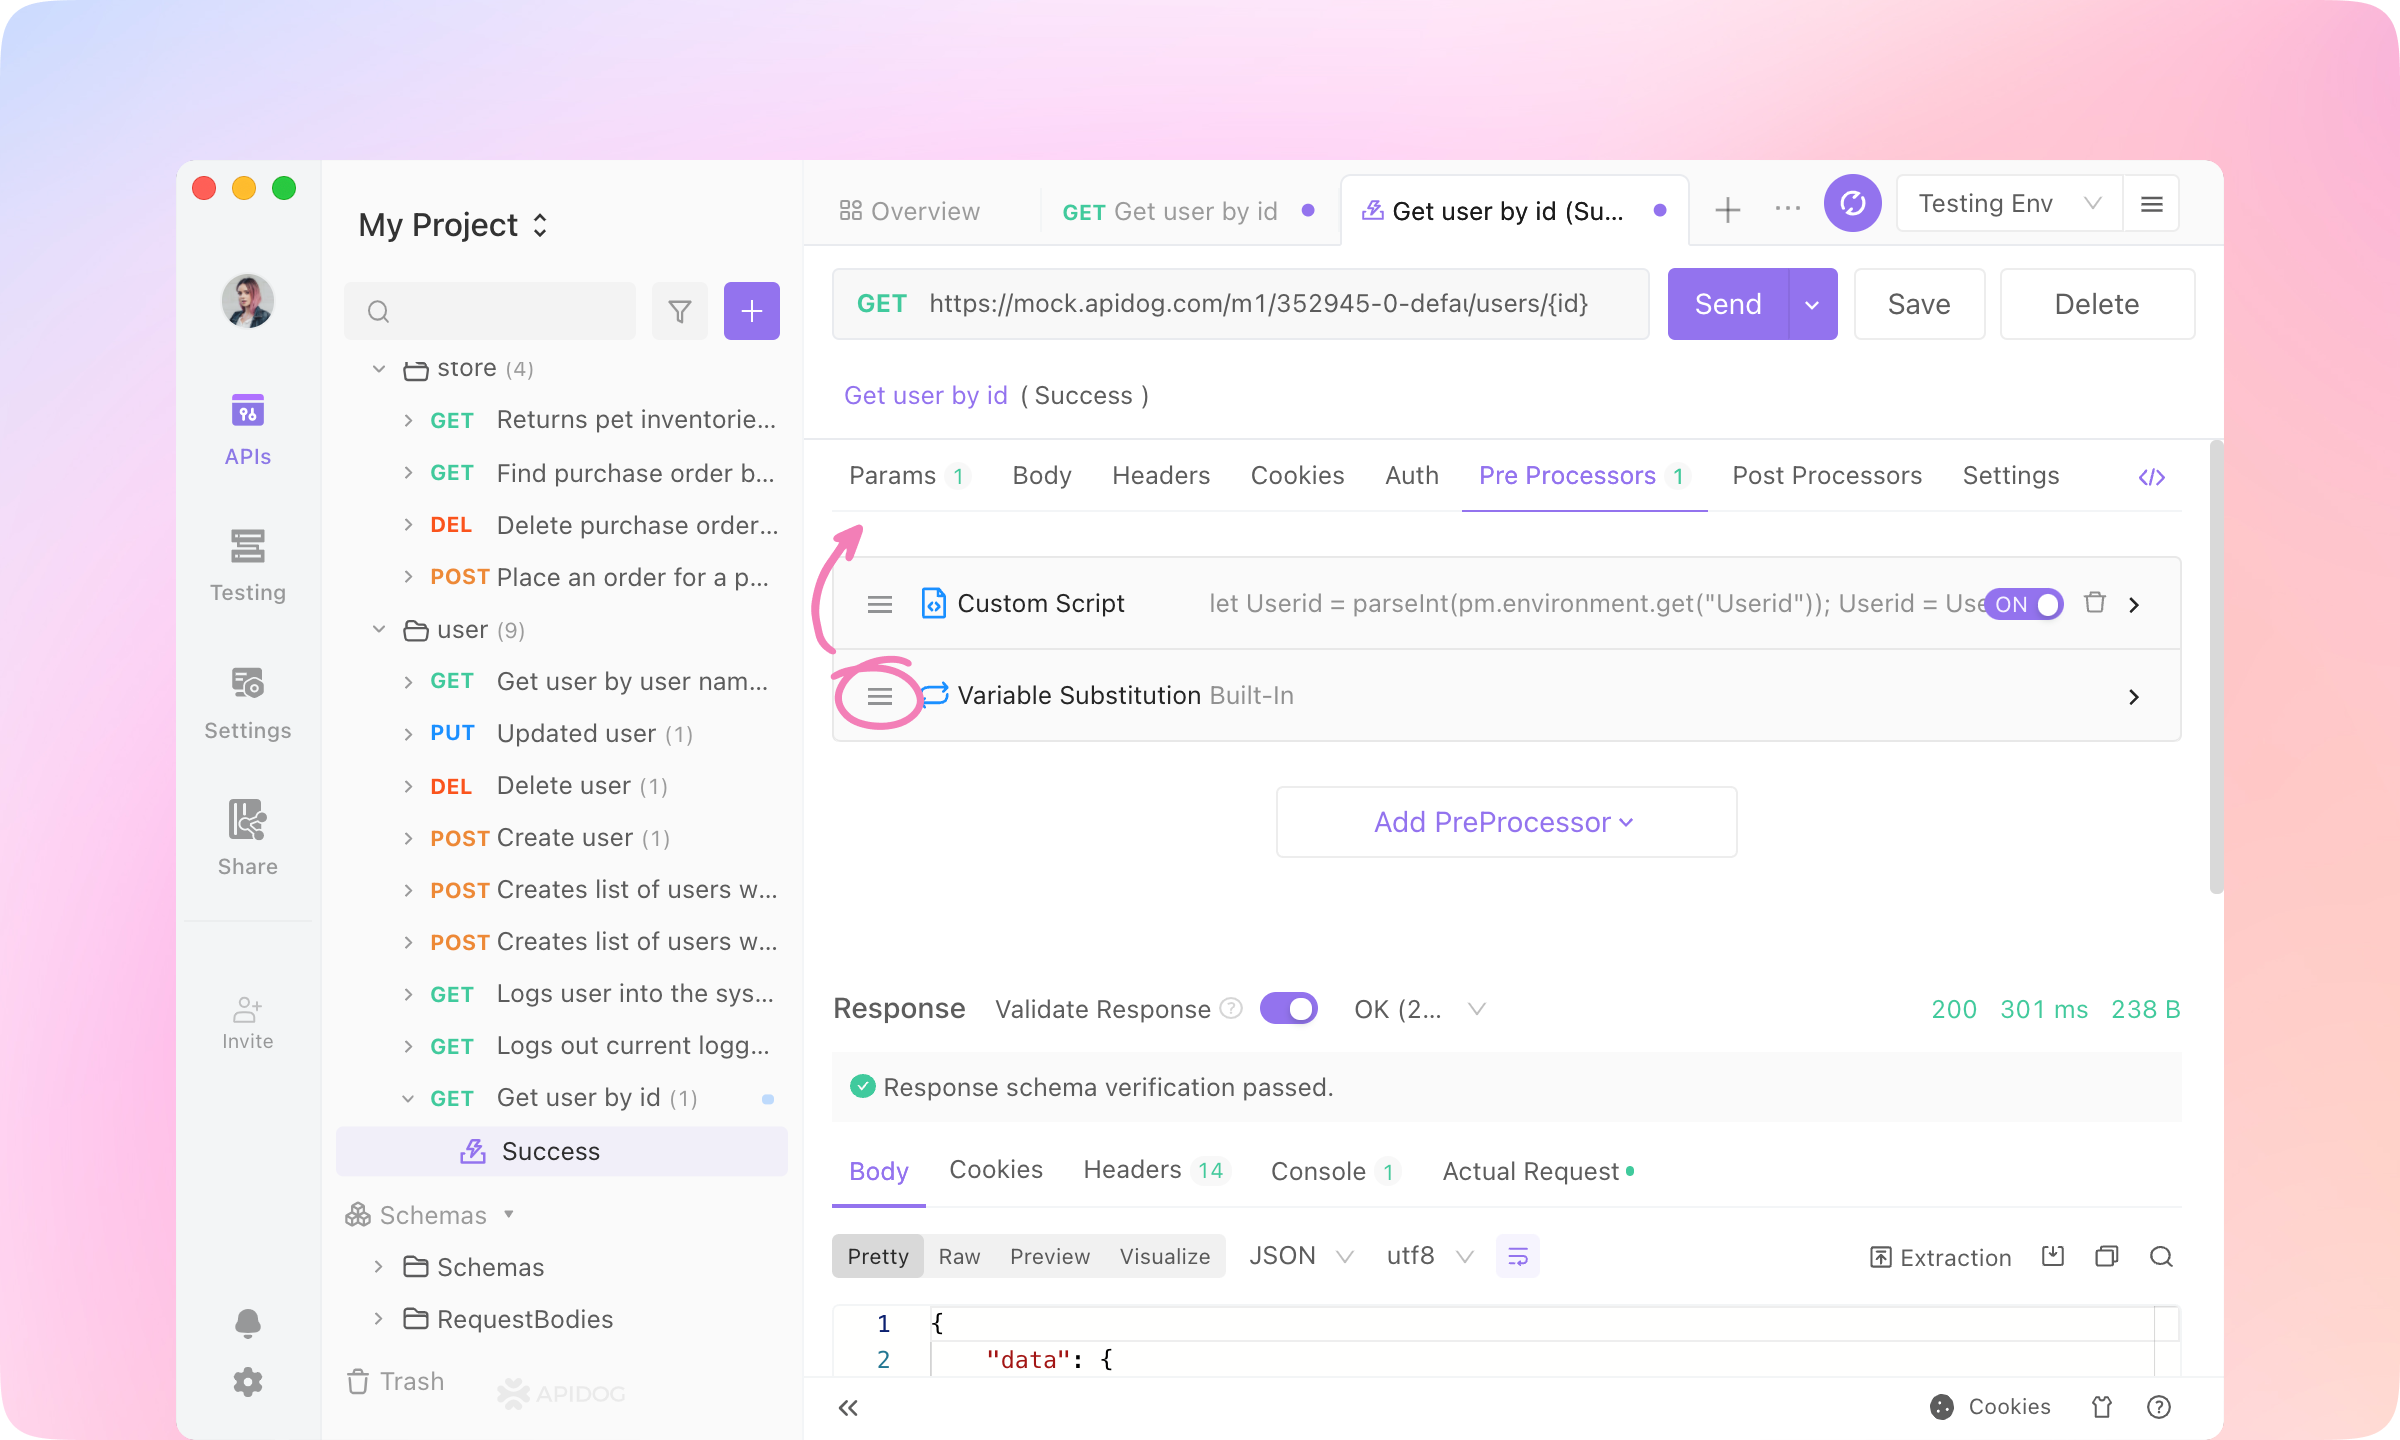
3.
Drag the Custom Script before the Variable Substitution operation. Send the request.
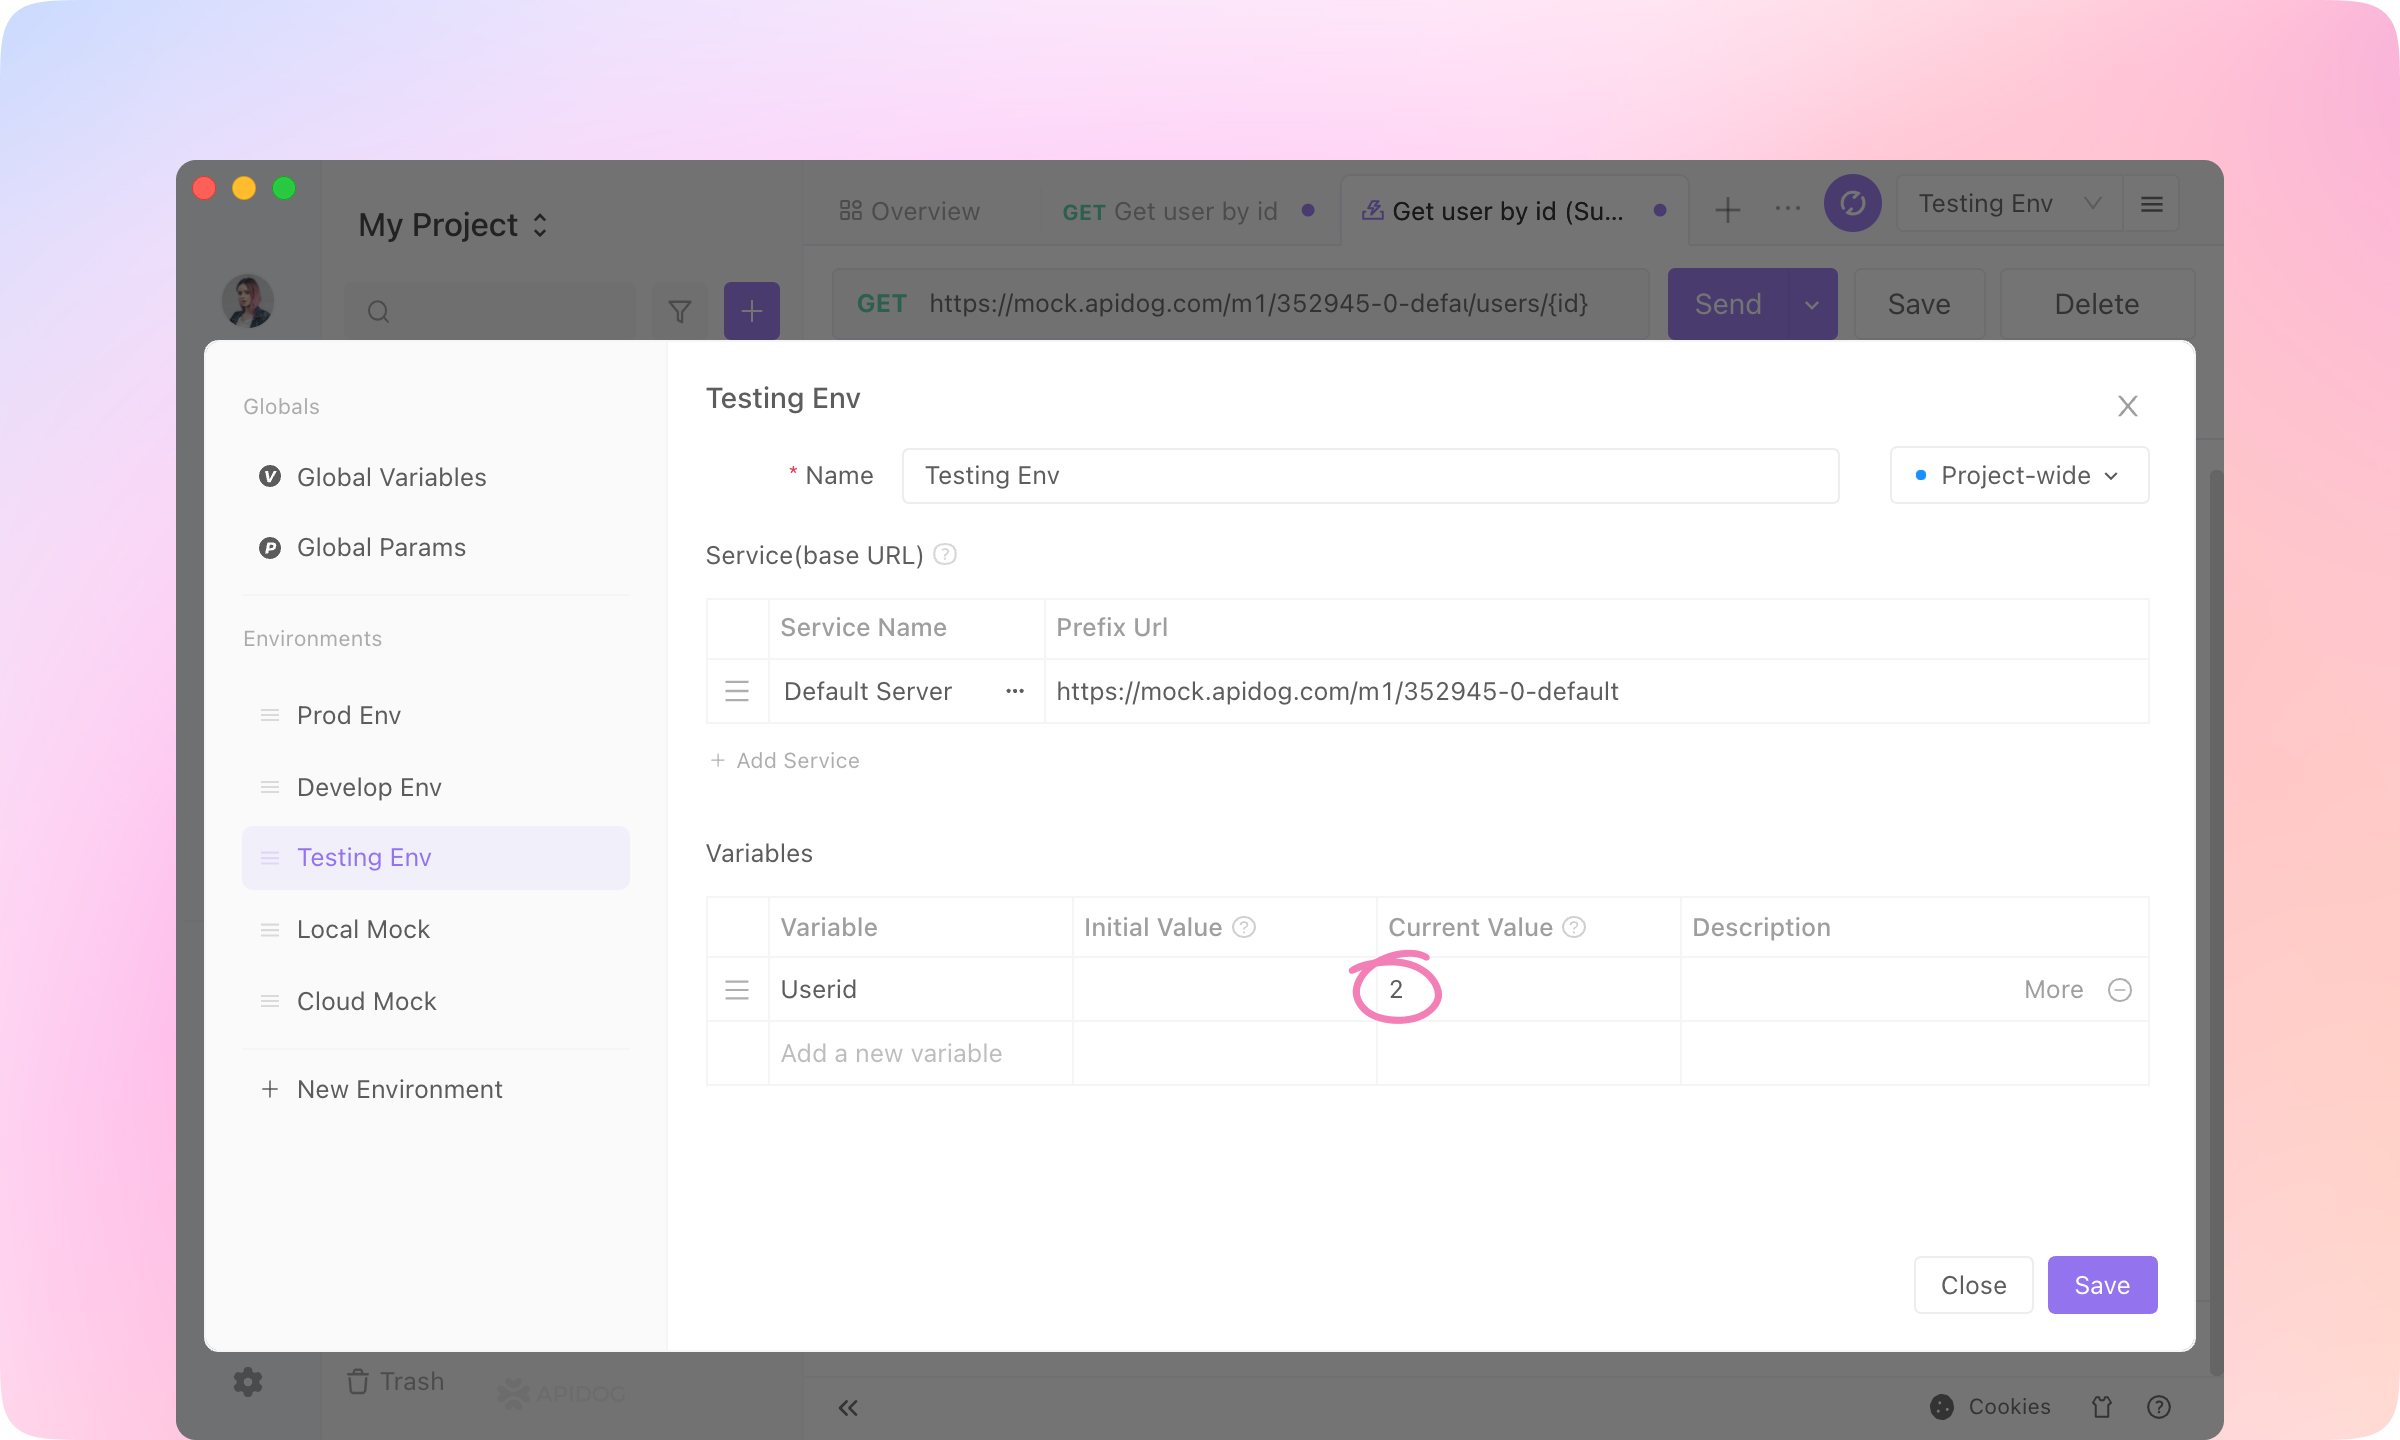
4.
After sending, you'll see the value of {{Userid}} became 2. And if you send the request many times, the {{Userid}} will plus one each time sending.
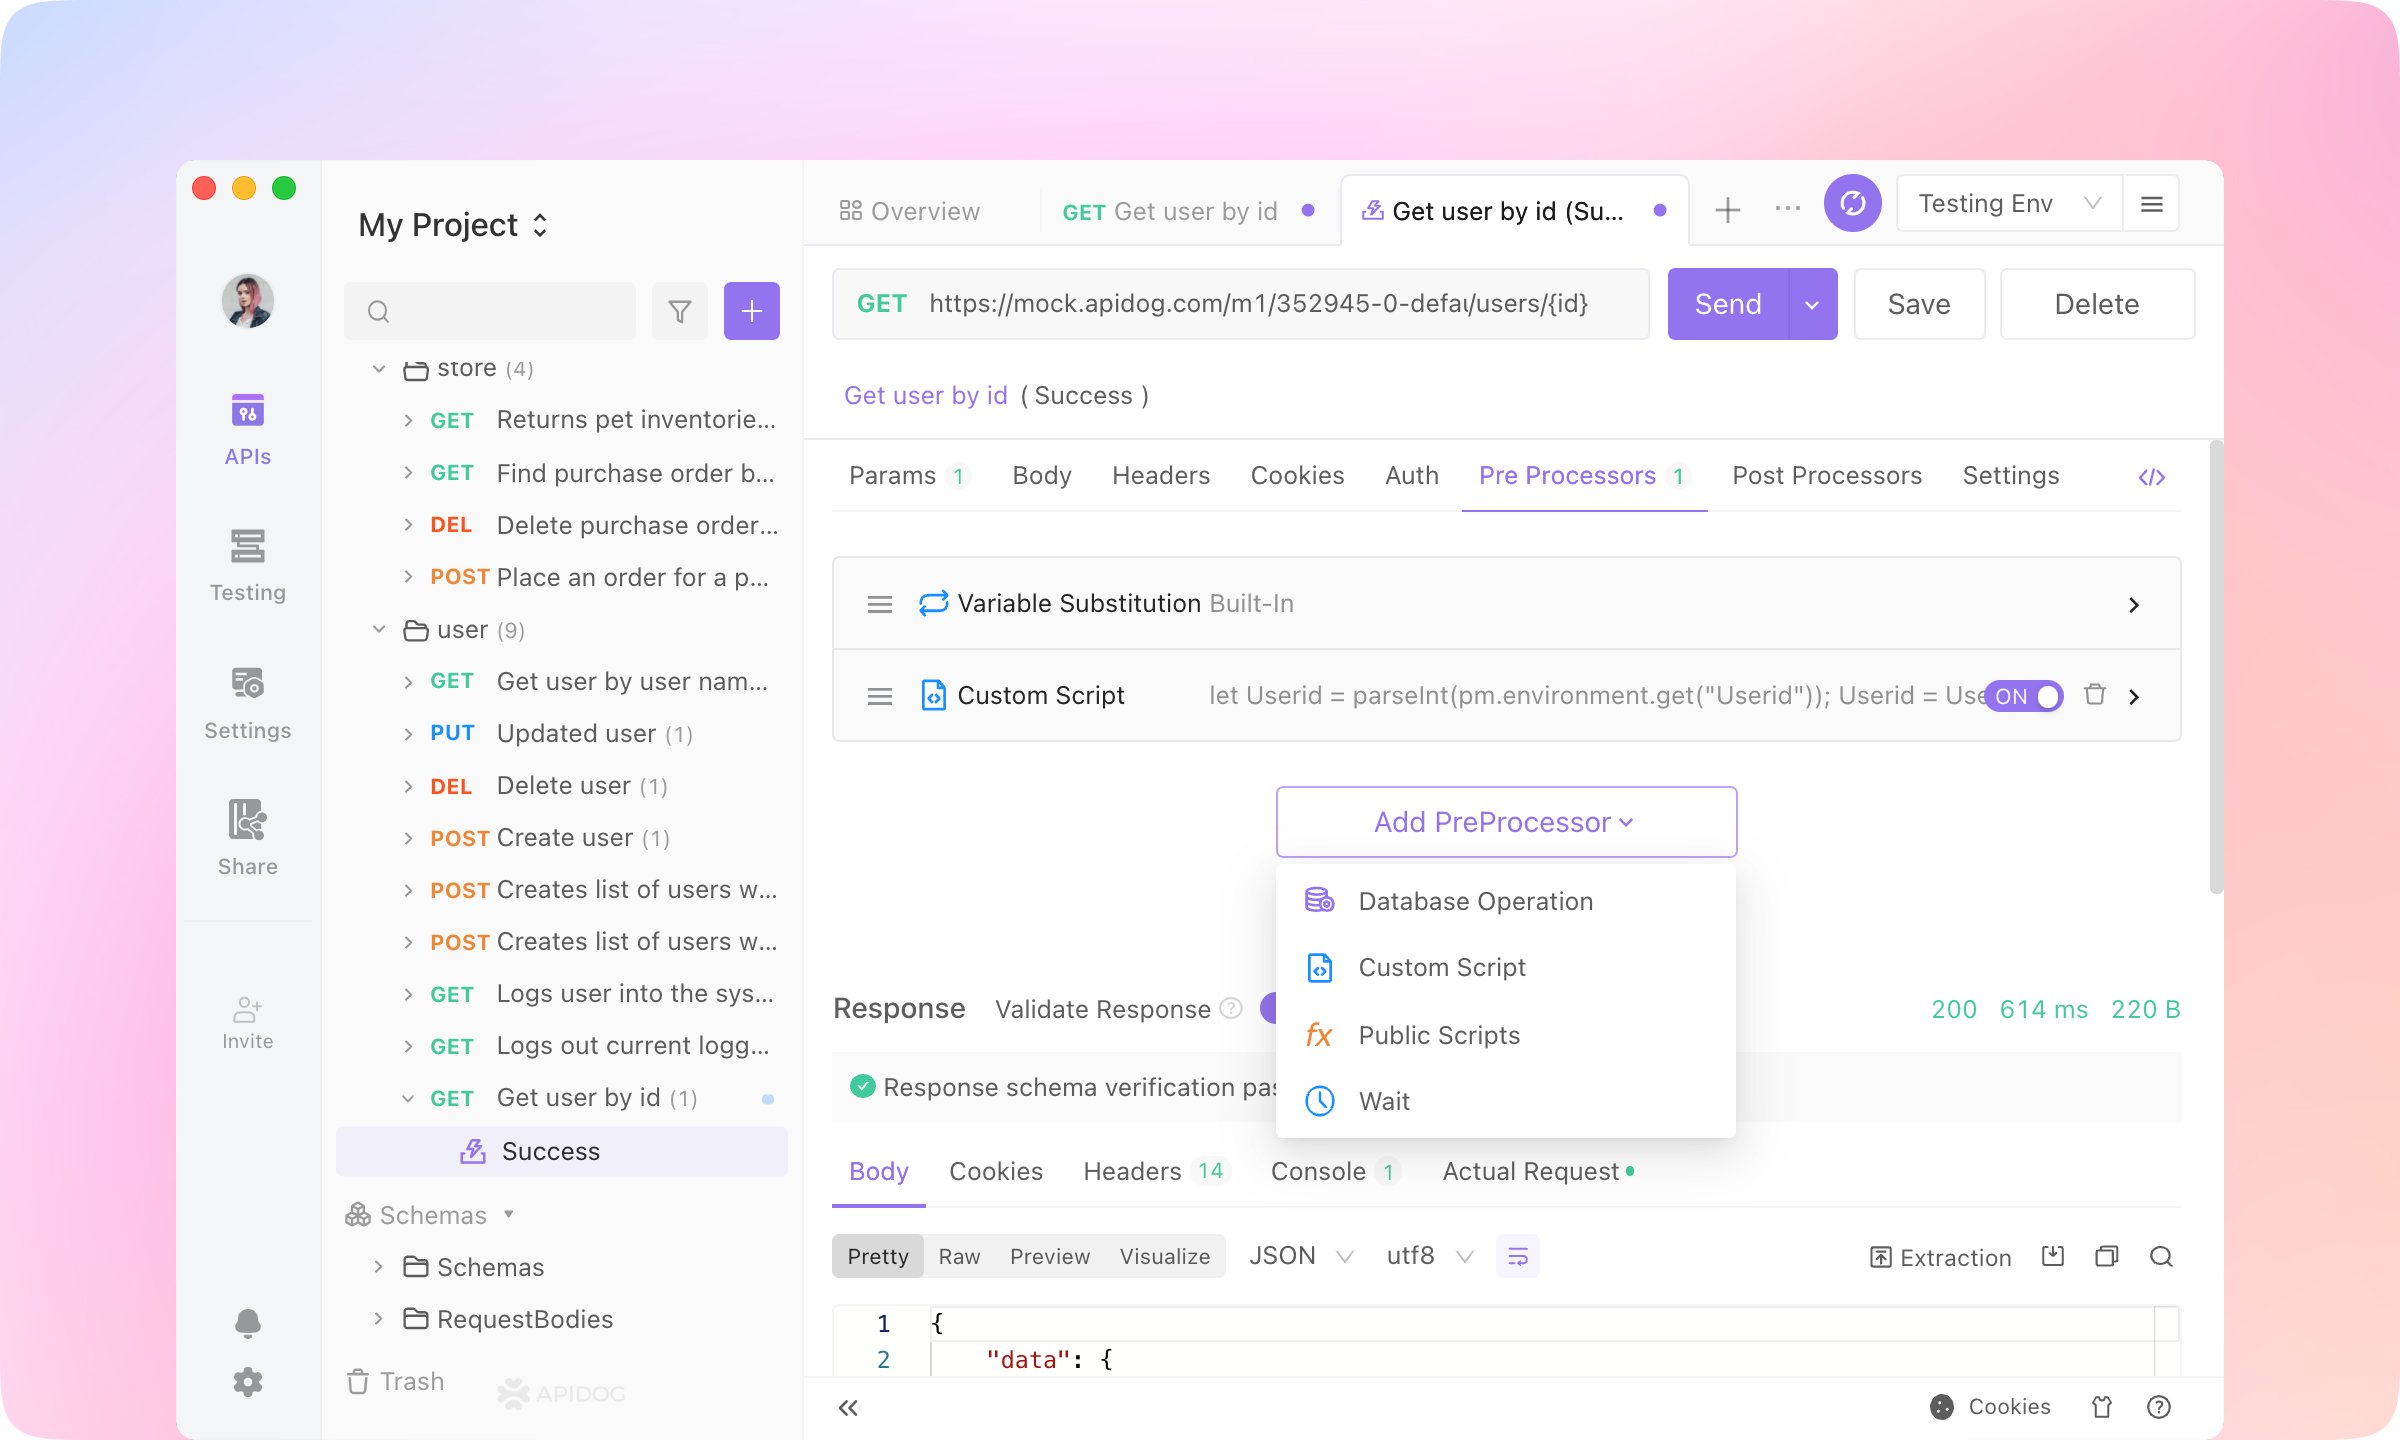
5.
Public Script, Database Operation, and Wait can also be added to Pre Processors.
Learn more about Scripts here. Front-end Developers: API Mocking#
API mocking is a simulated version of an API that is used for testing and development purposes. It allows developers to test their applications or services without relying on a live API, and can be configured to return specific responses to incoming requests.Based on the specified API, Apidog can generate mock data automatically without any configuration. That's very convenient for front-end developers.1.
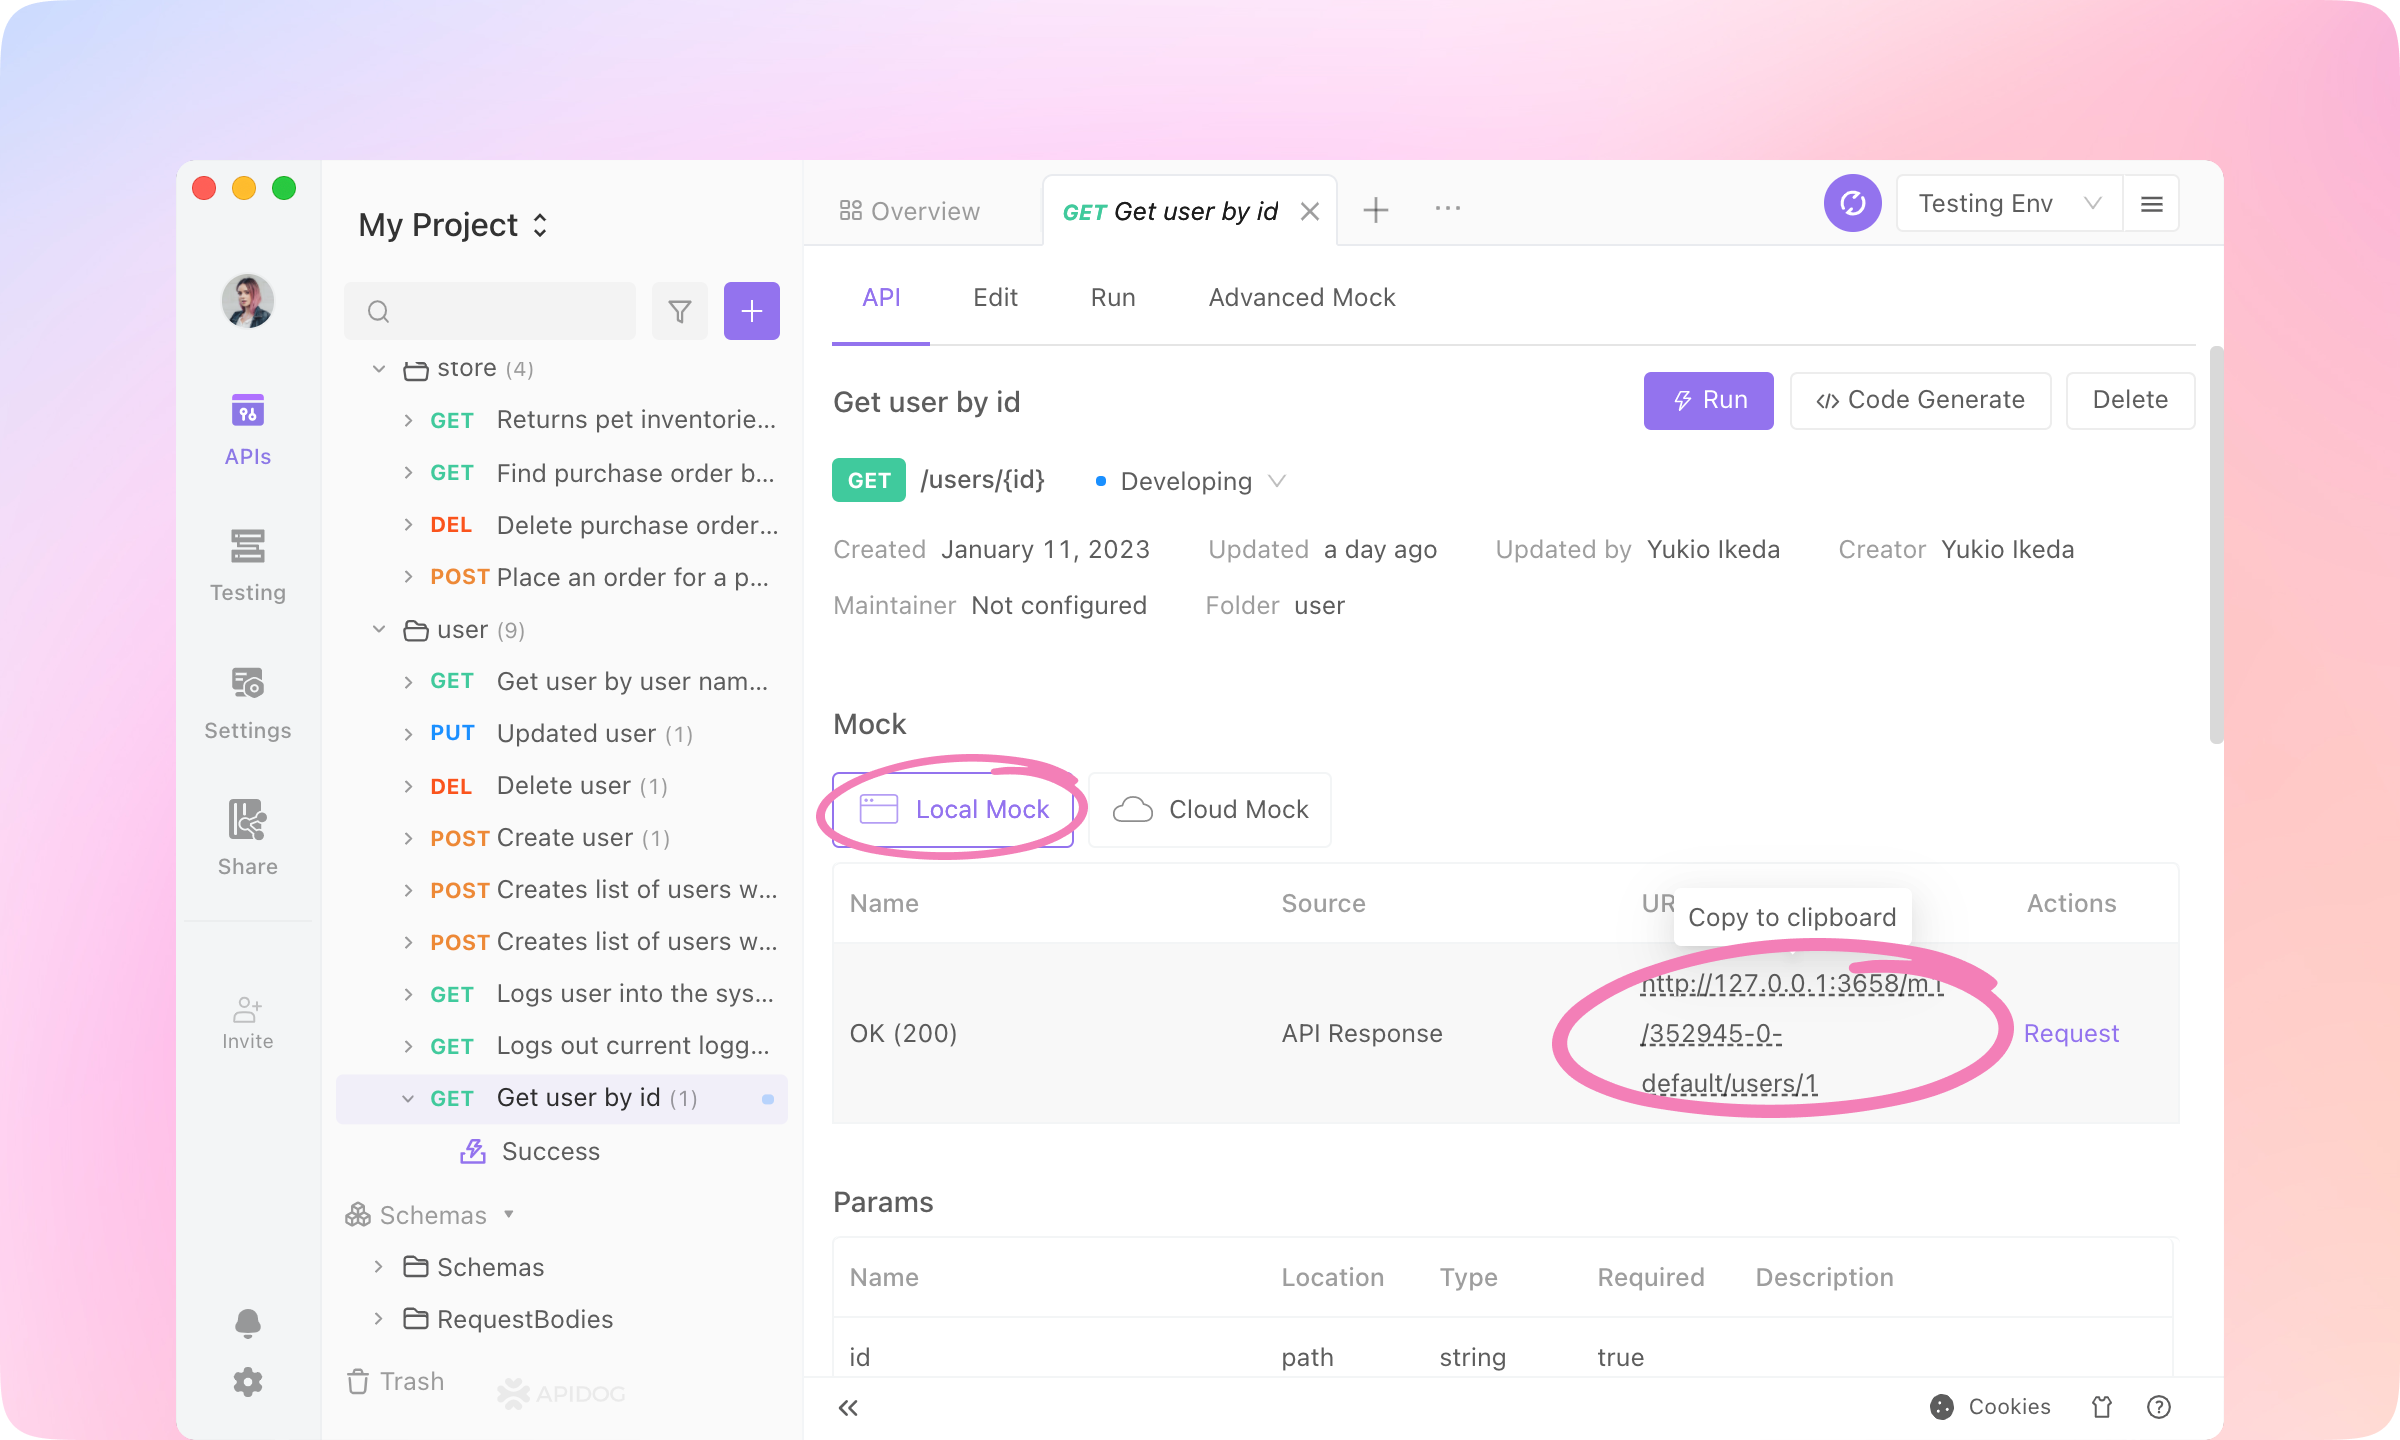
Switch to the API tab and click Local Mock. Click the URL & Params of 'OK(200)' to copy to the clipboard.
2.
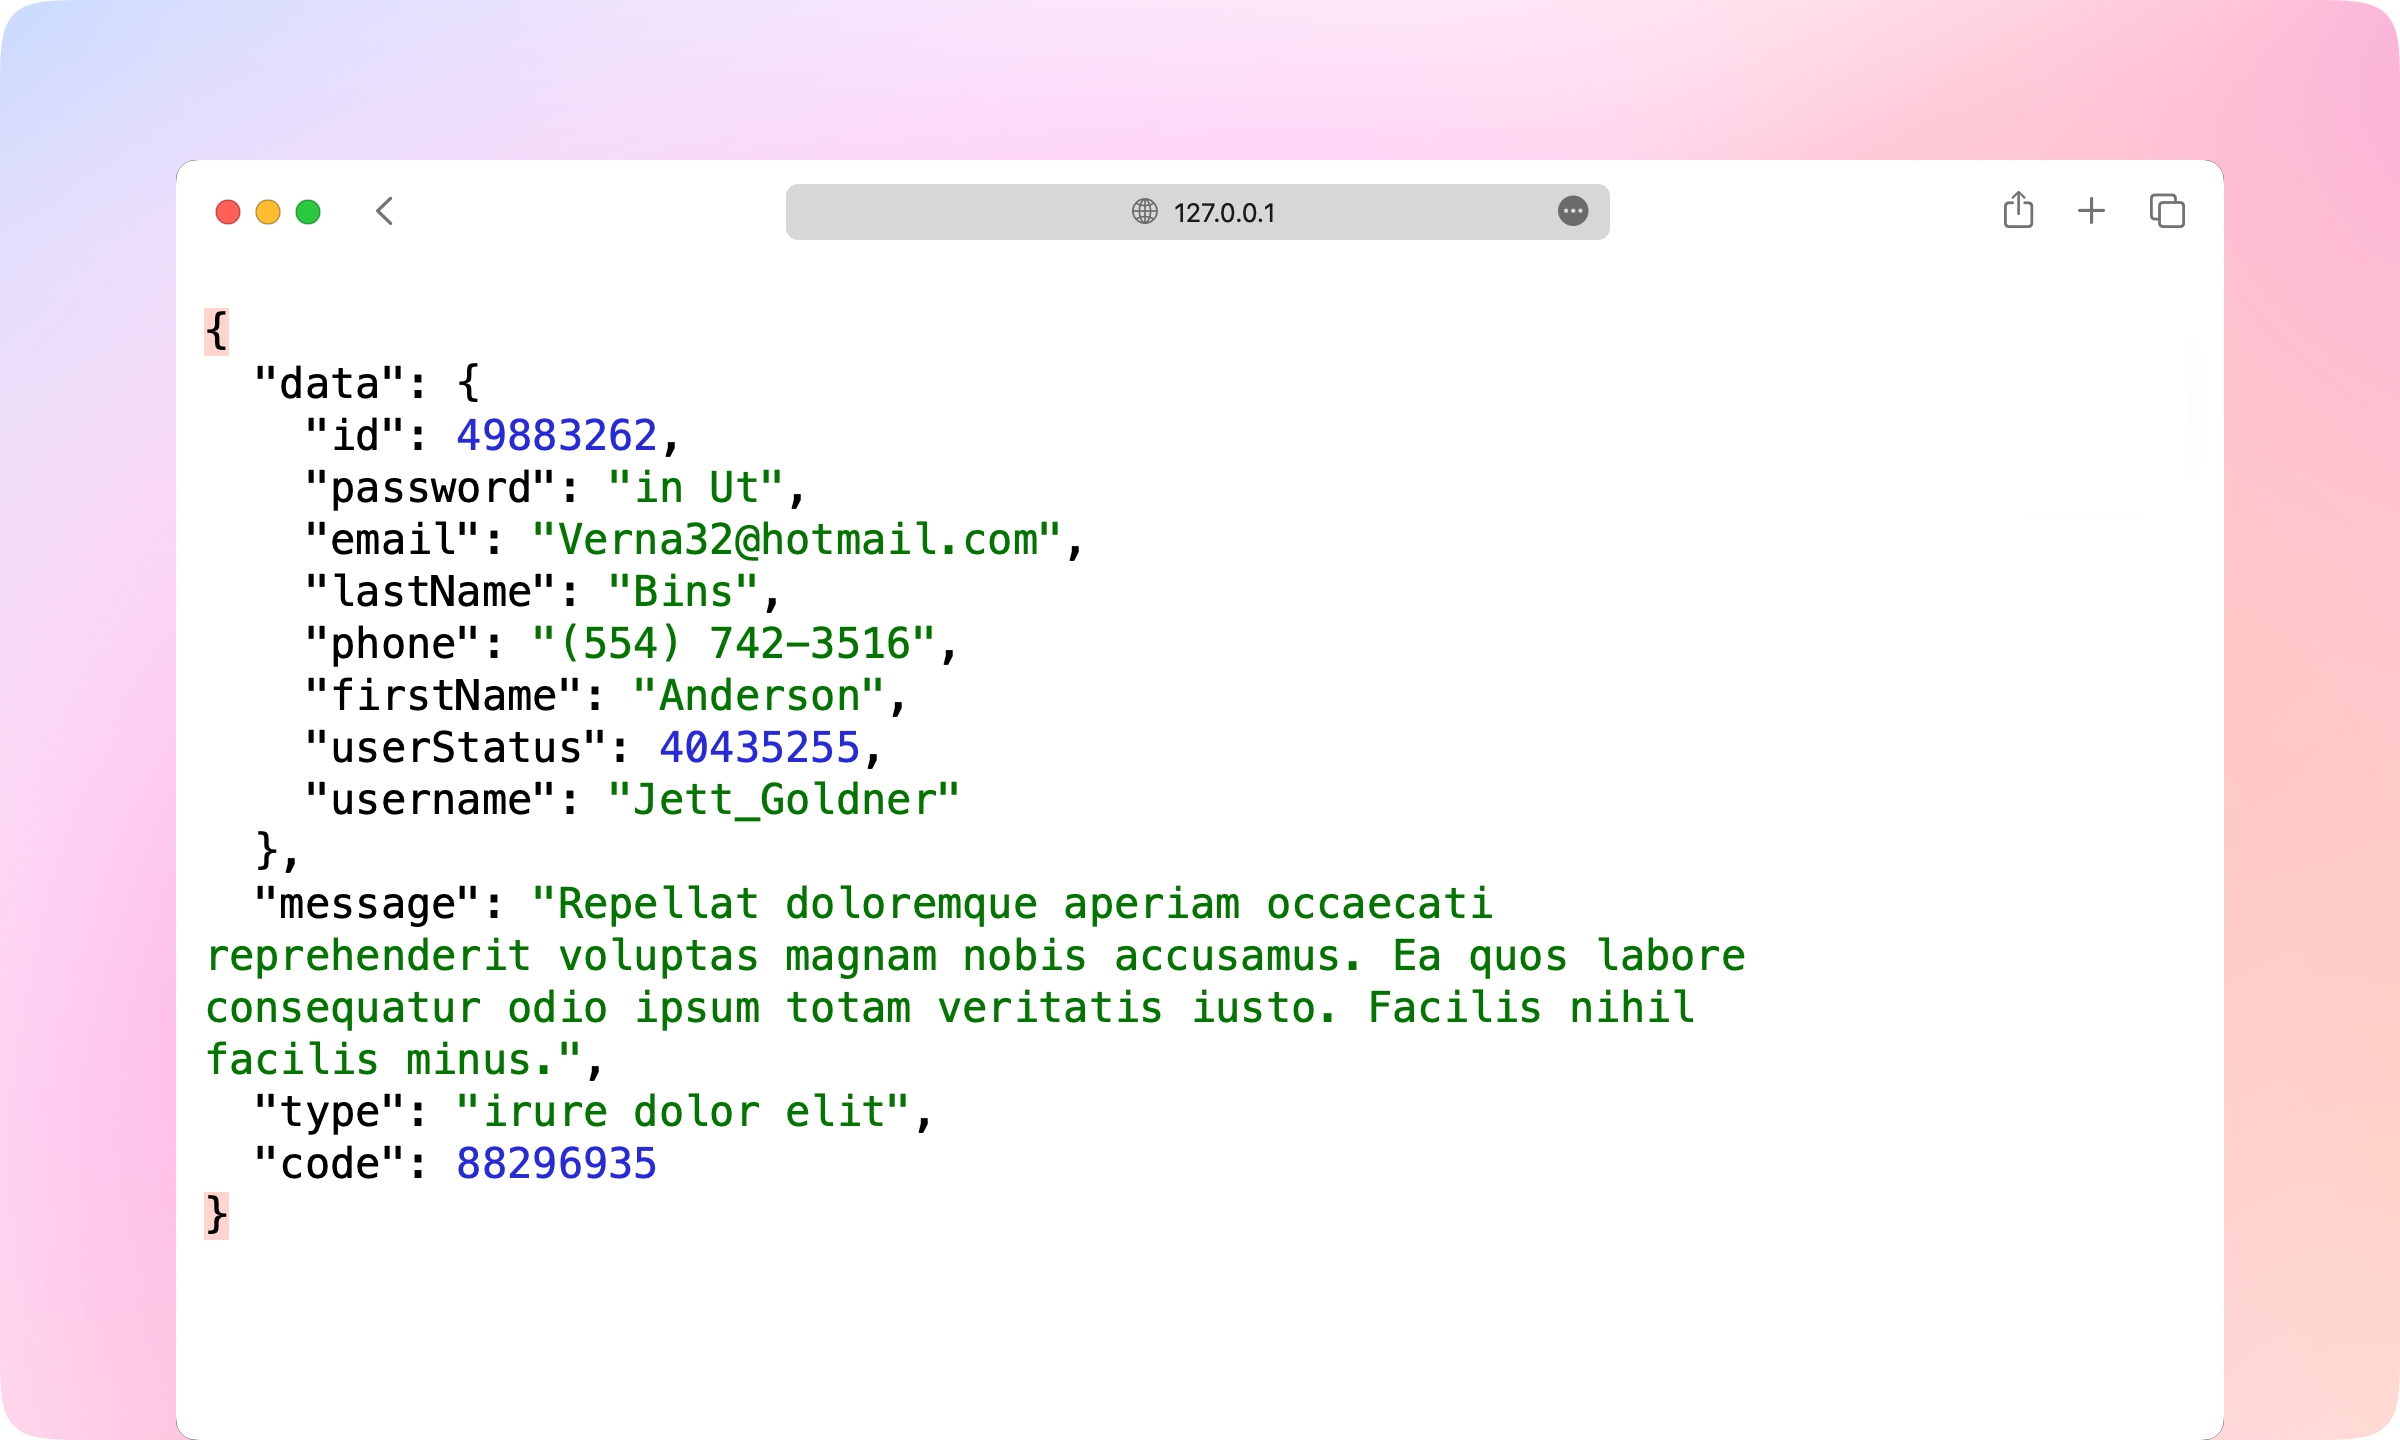
Paste the URL to a browser. And you'll see a generated JSON. The data is dynamic; each time you reload the page, the data will refresh.Especially you'll find the data generated are reasonable according to the name of the node, just like 'email' or 'lastName'. This is the powerful Smart Mock feature of Apidog.
3.
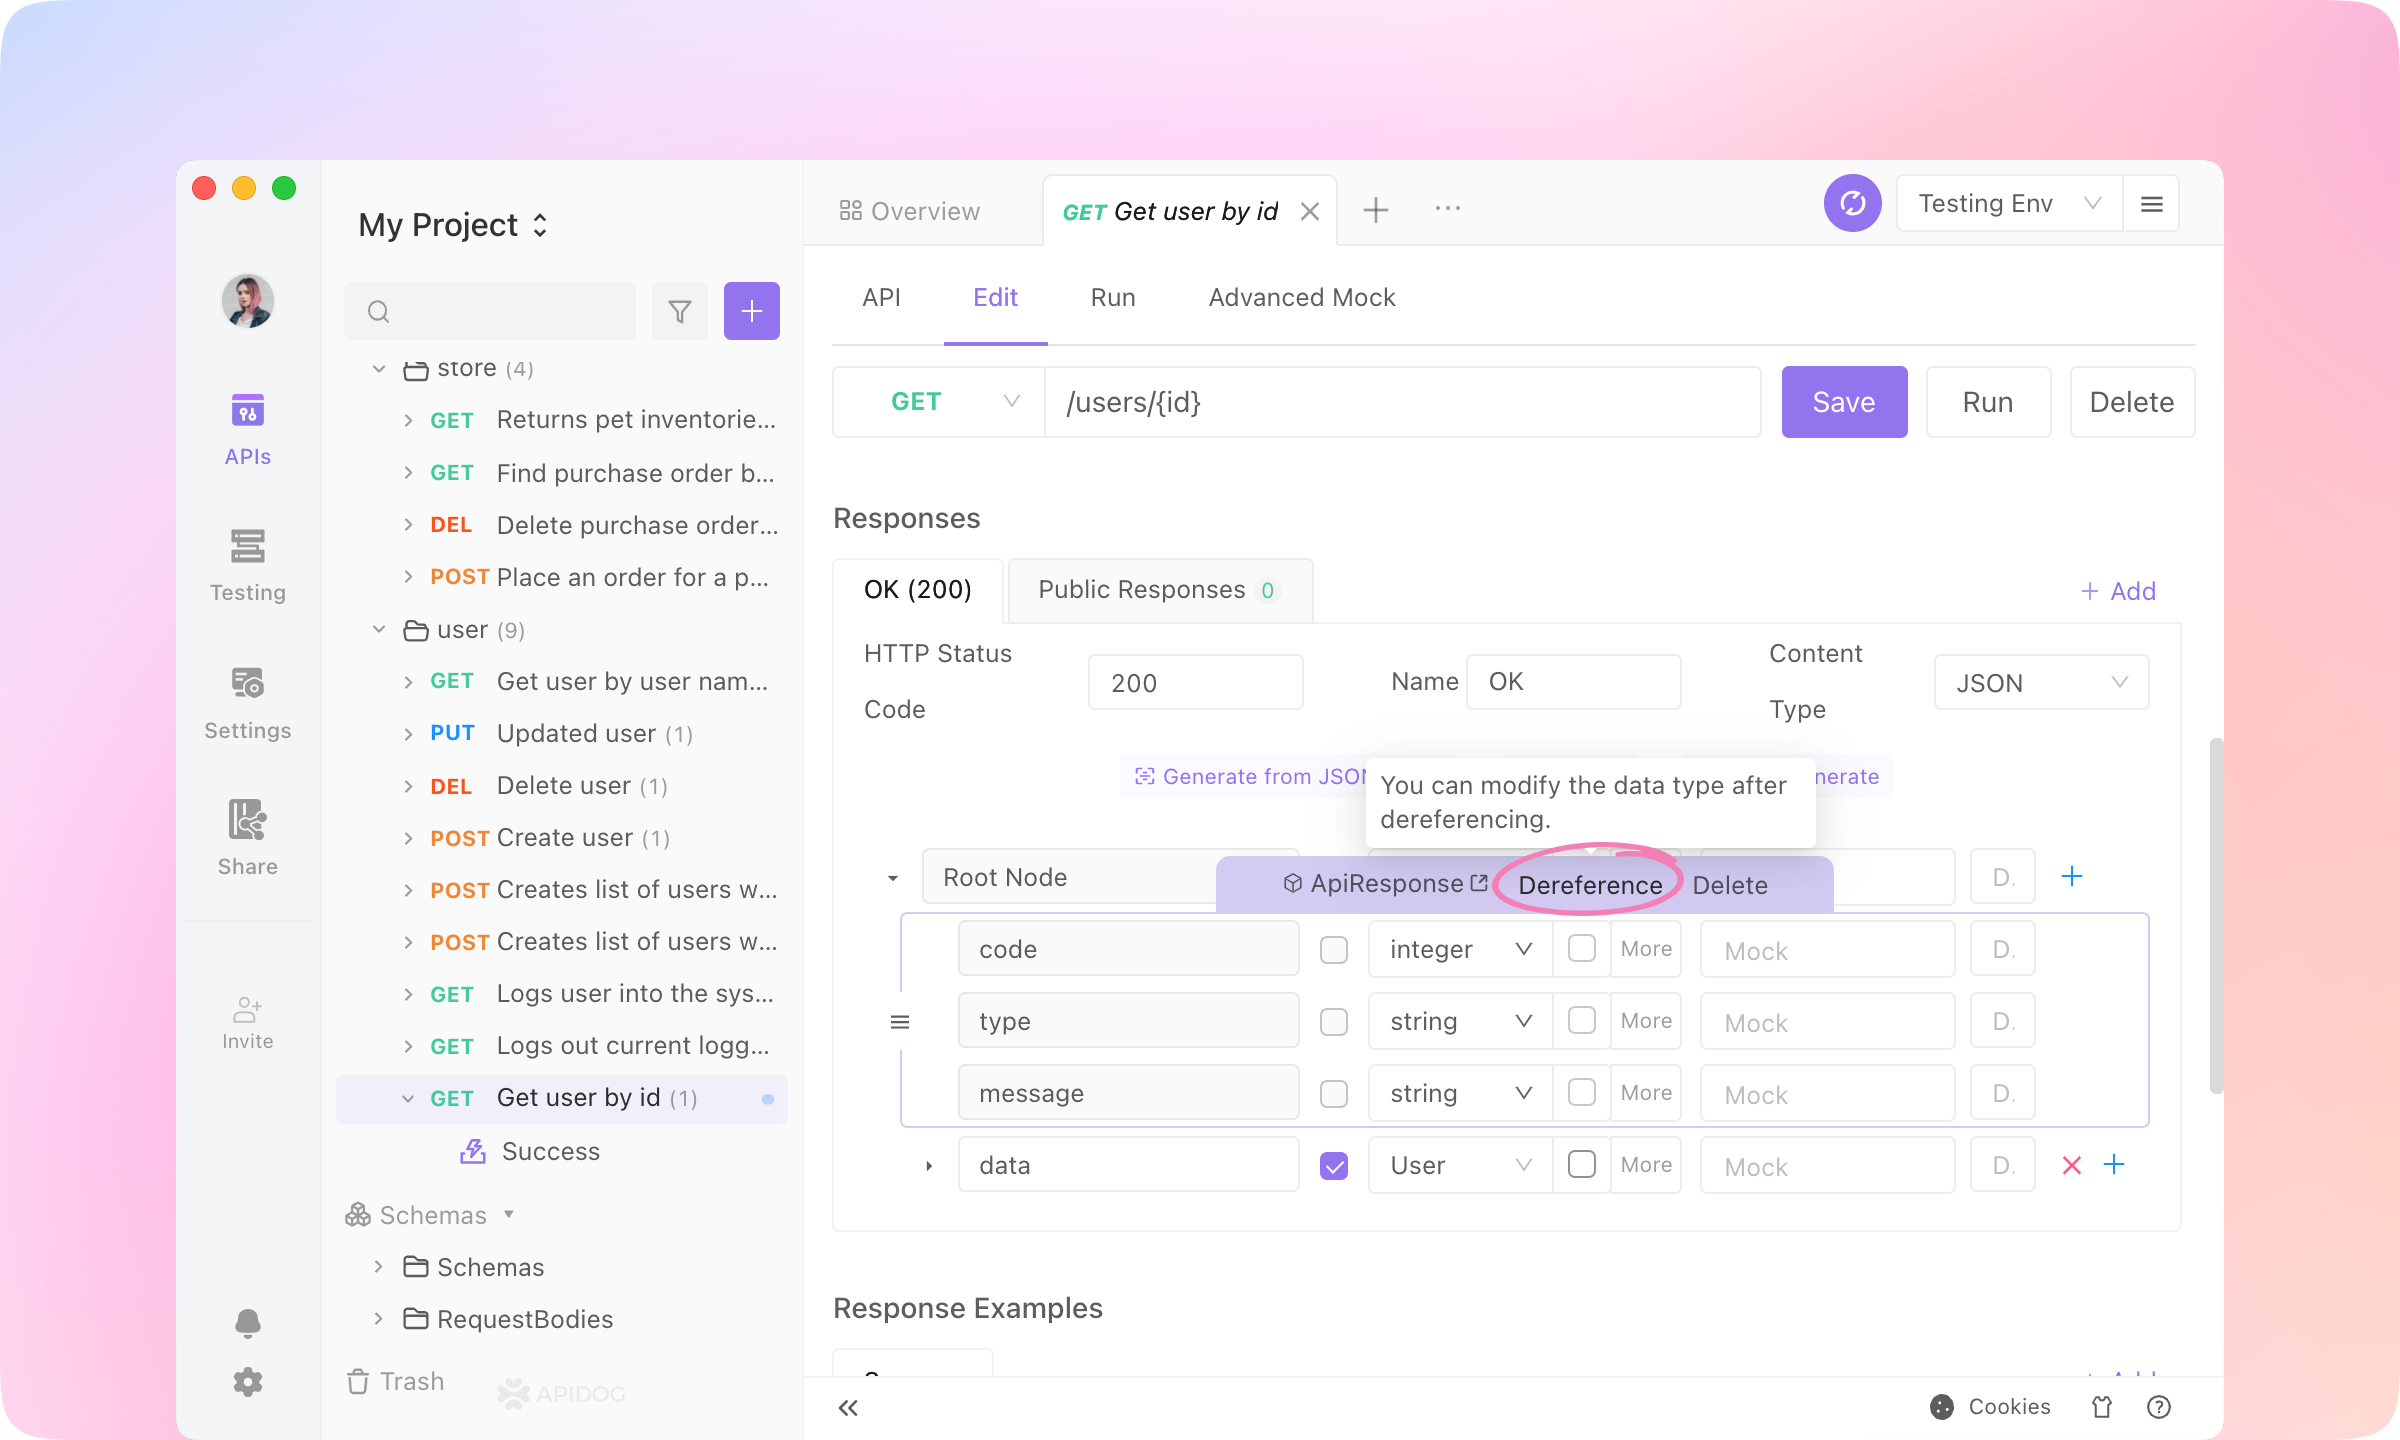
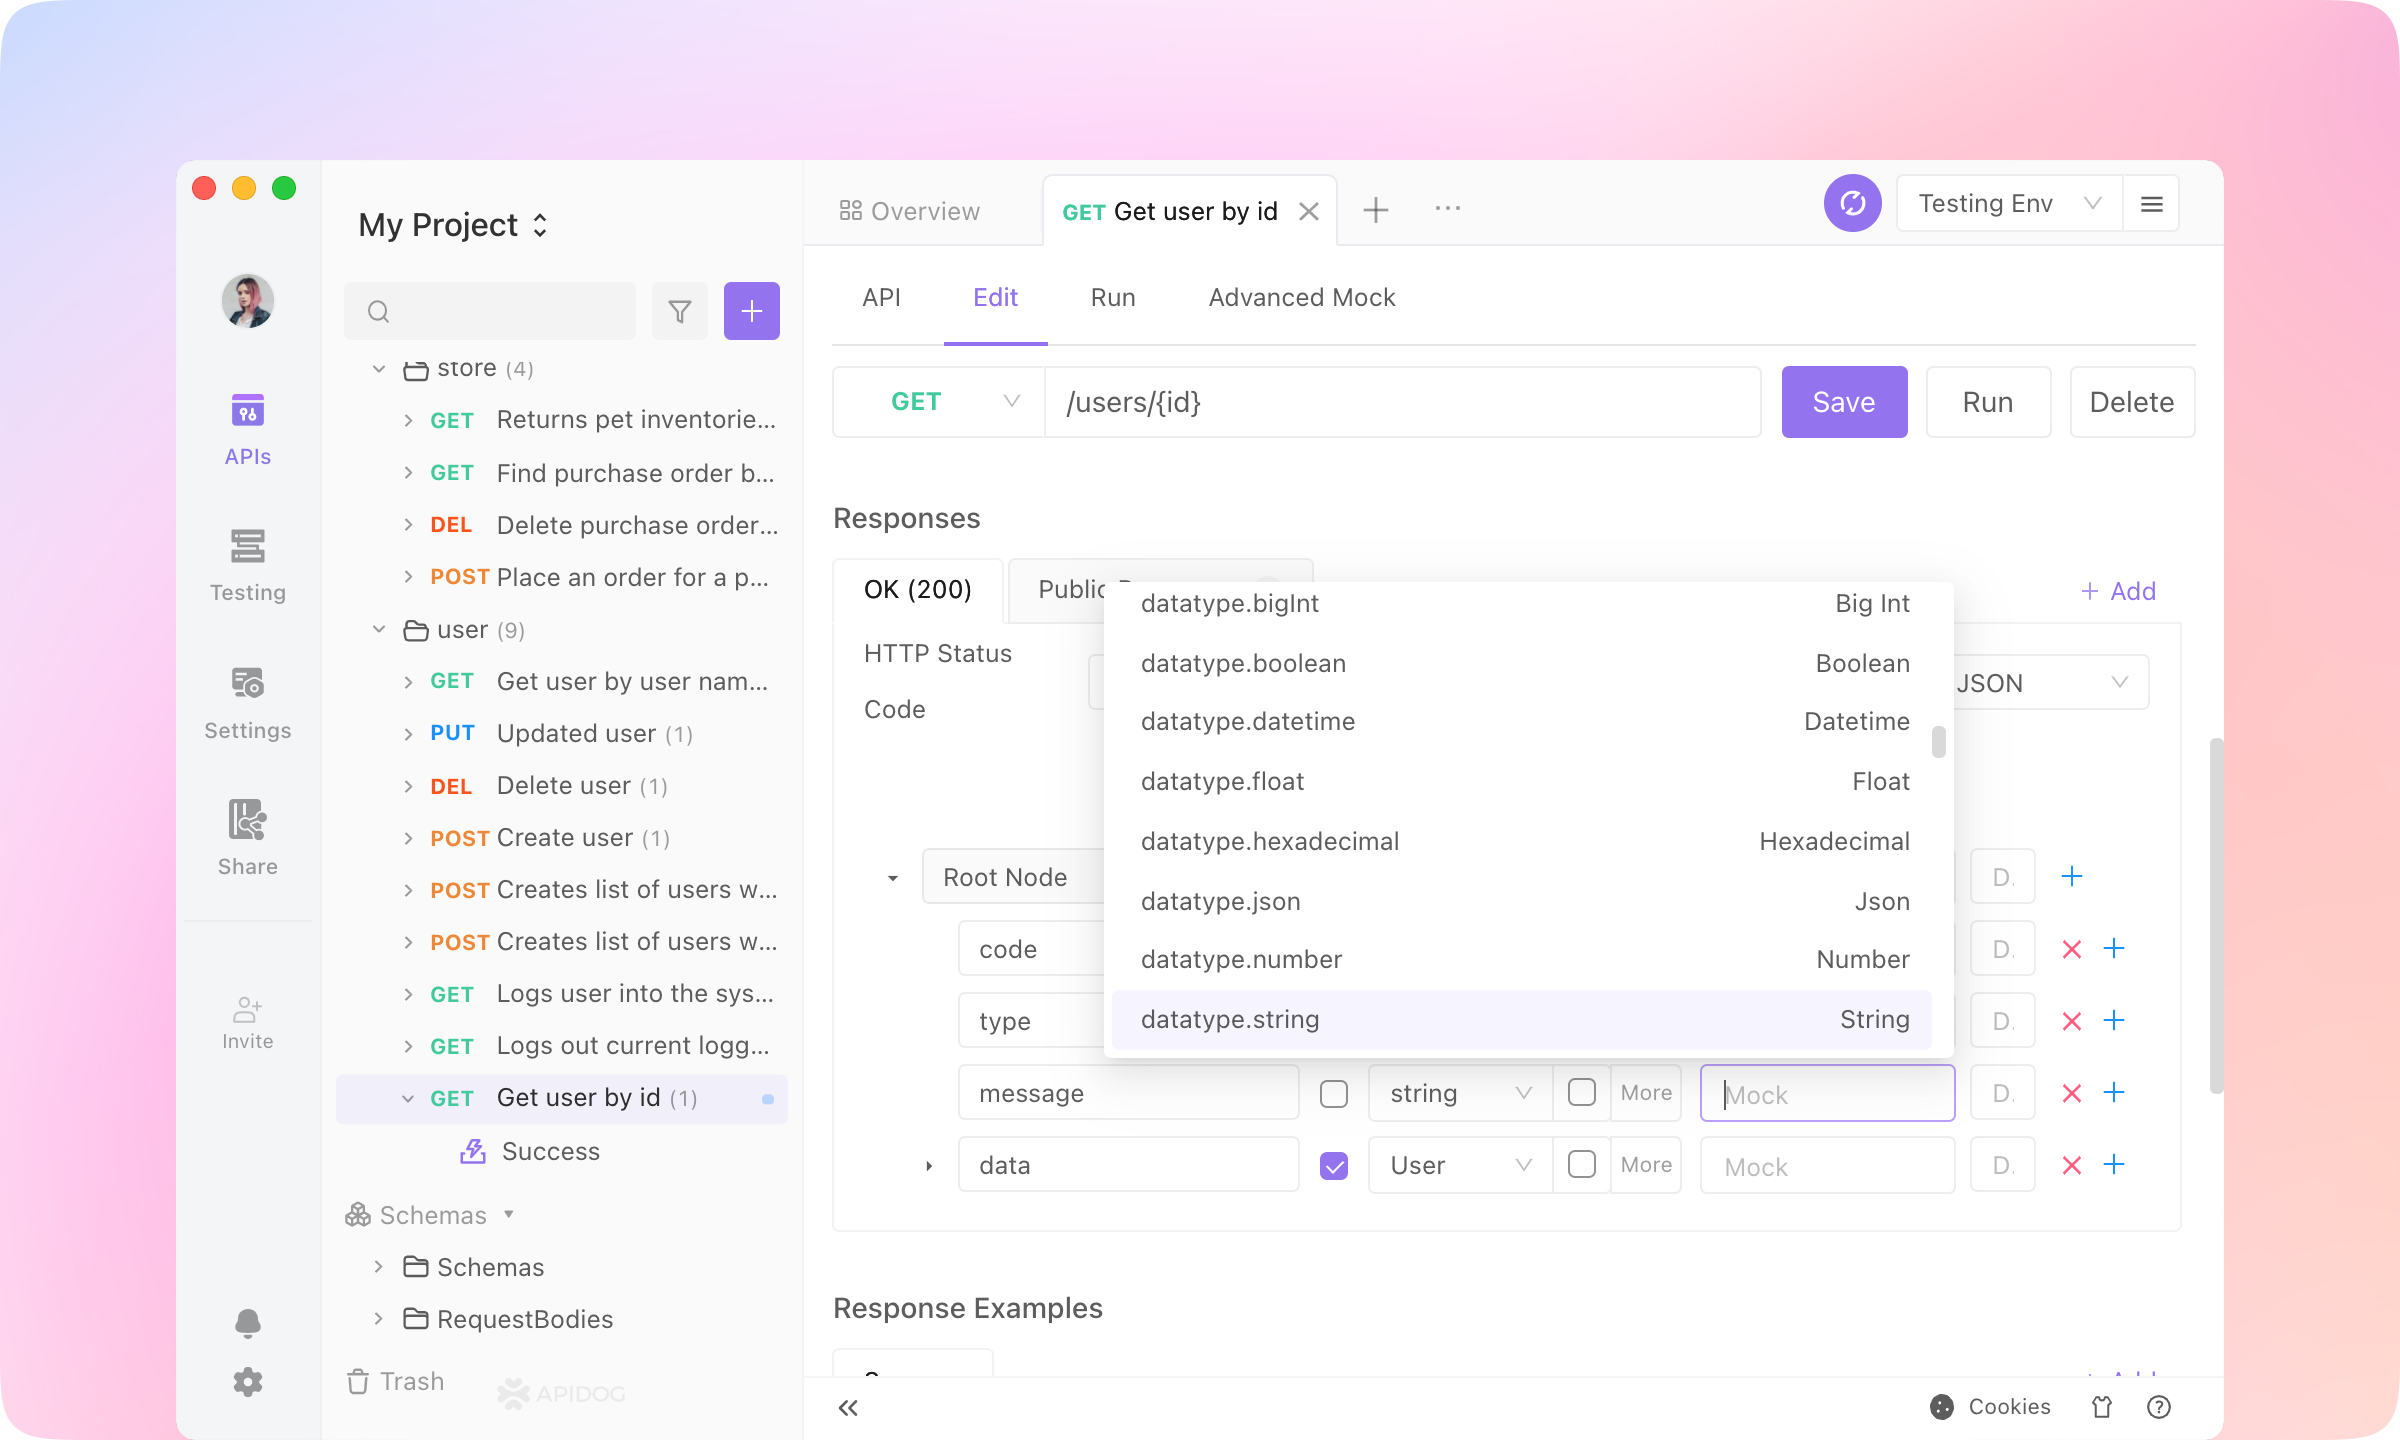
Go to the Edit tab and Dereference the 'ApiResponse' Schema in the Response Part.
4.
Type the Mock value into the nodes, and Save the API. 5.
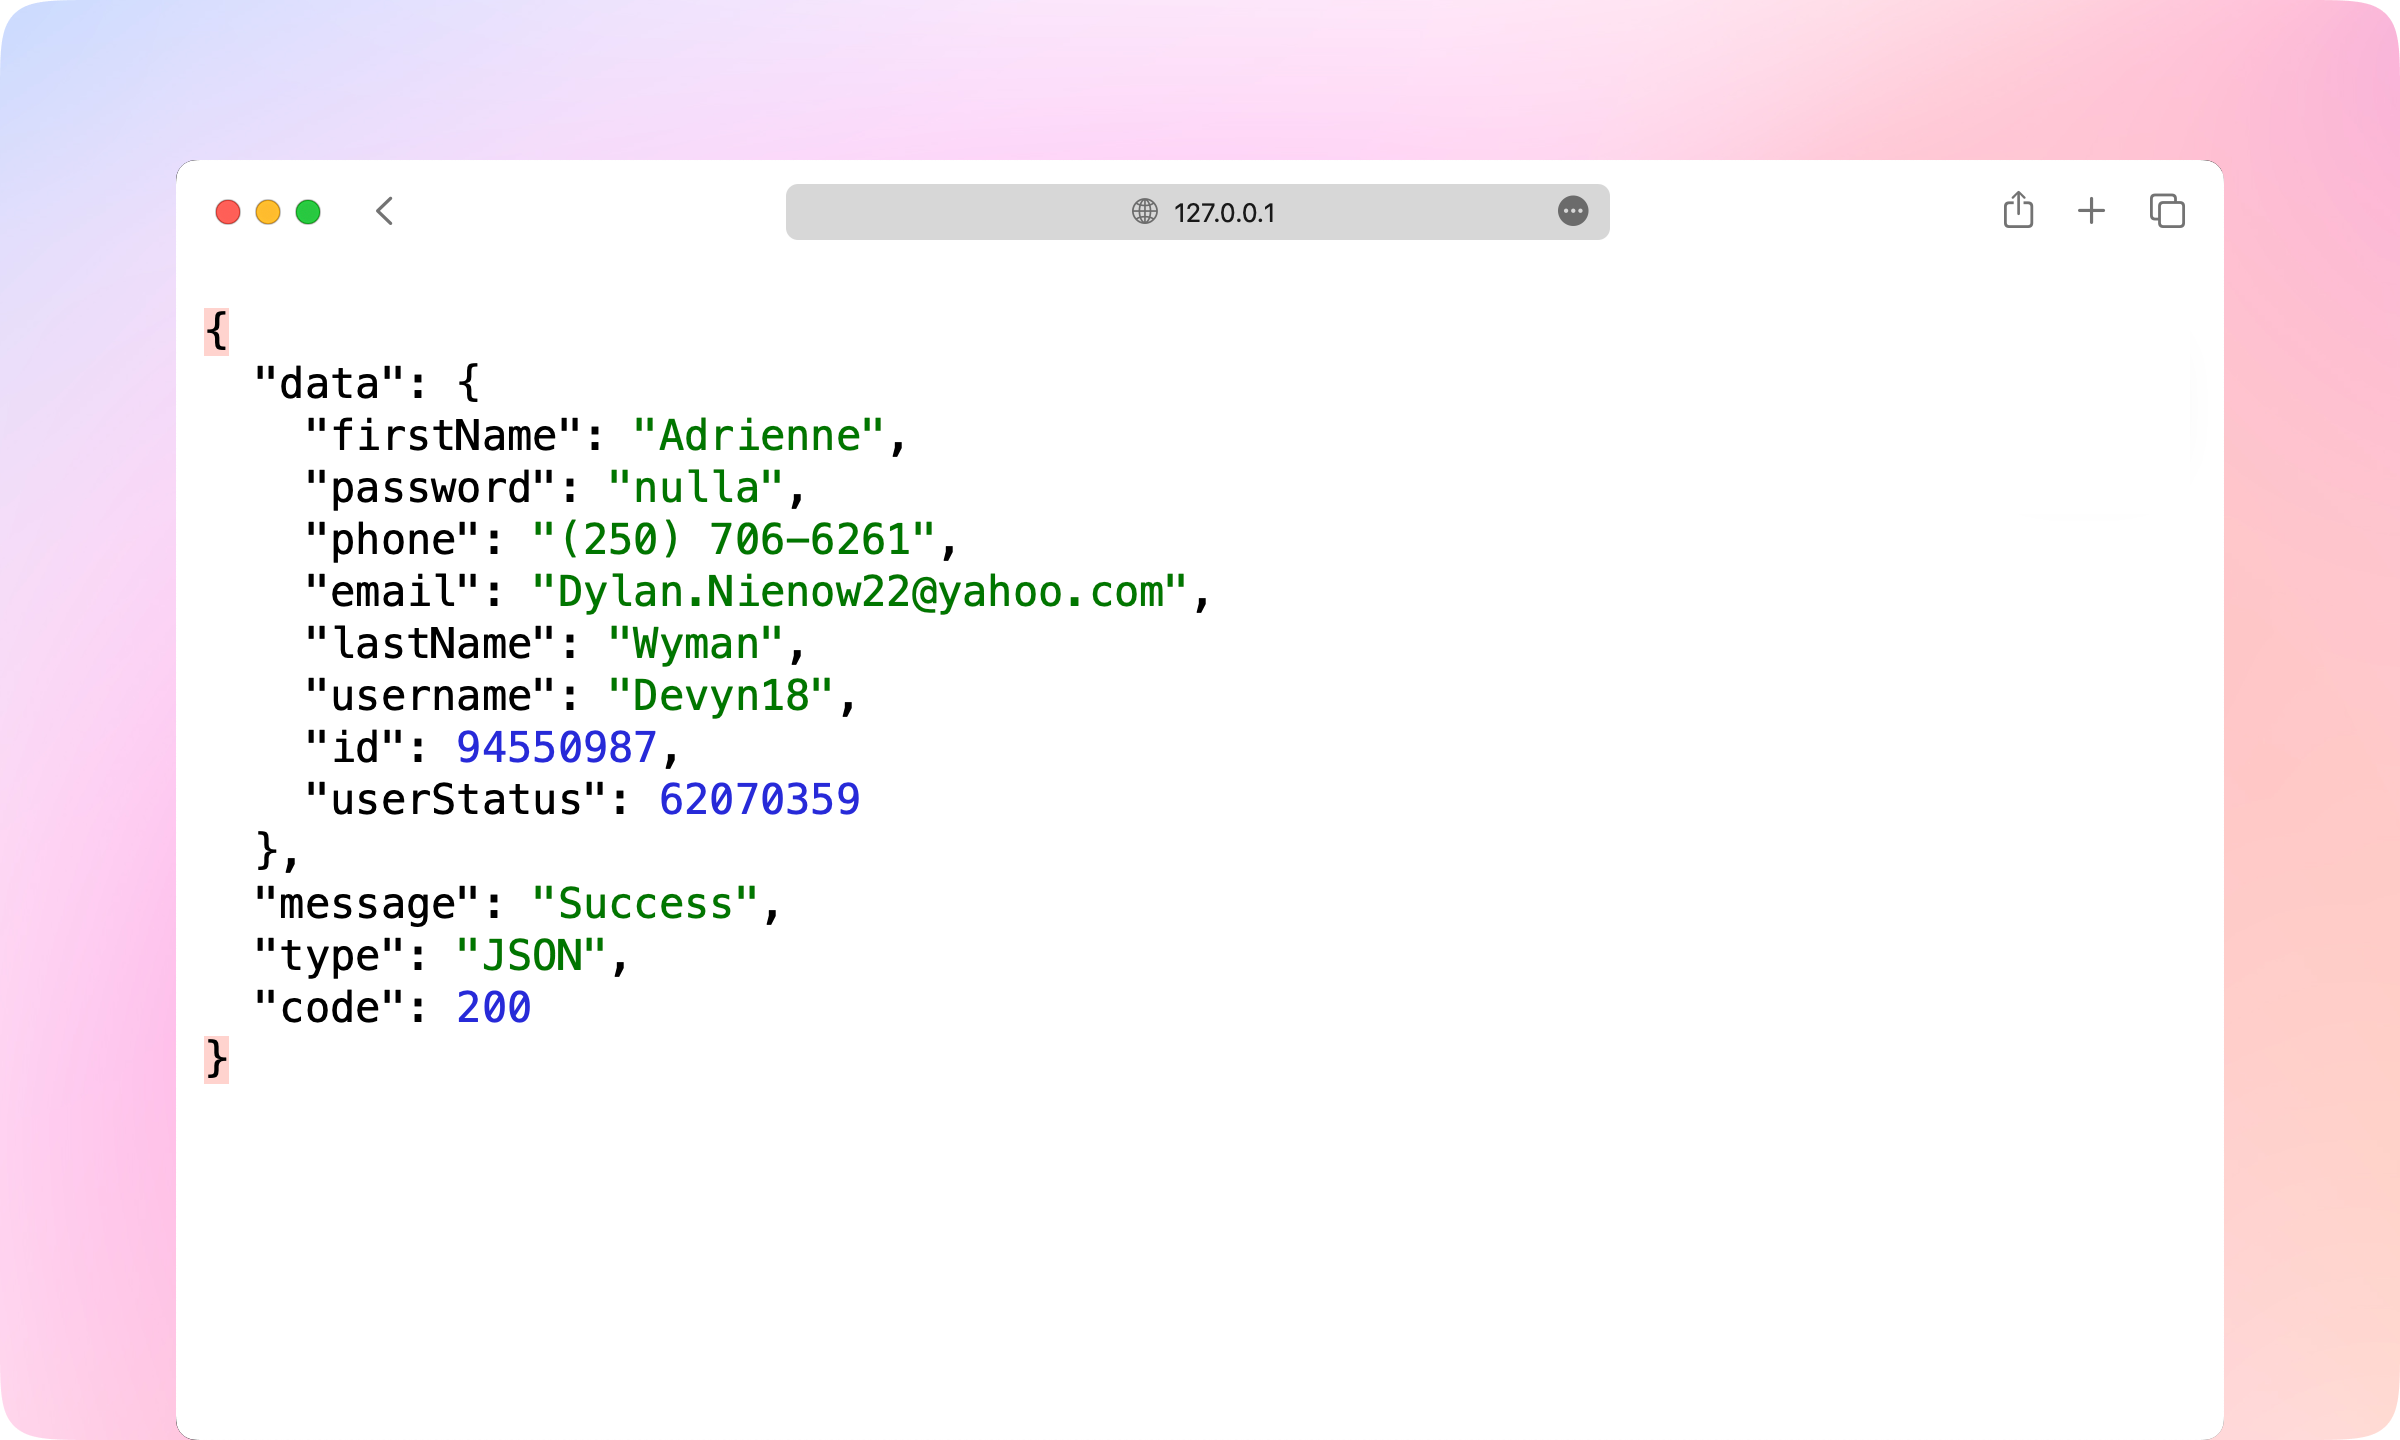
Reload the page in the browser, and you'll find the JSON data refreshed, and the 'code', 'type', and 'message' fields are generated according to your settings. Now the front-end developer can use the URL to get data in the client they are developing.
6.
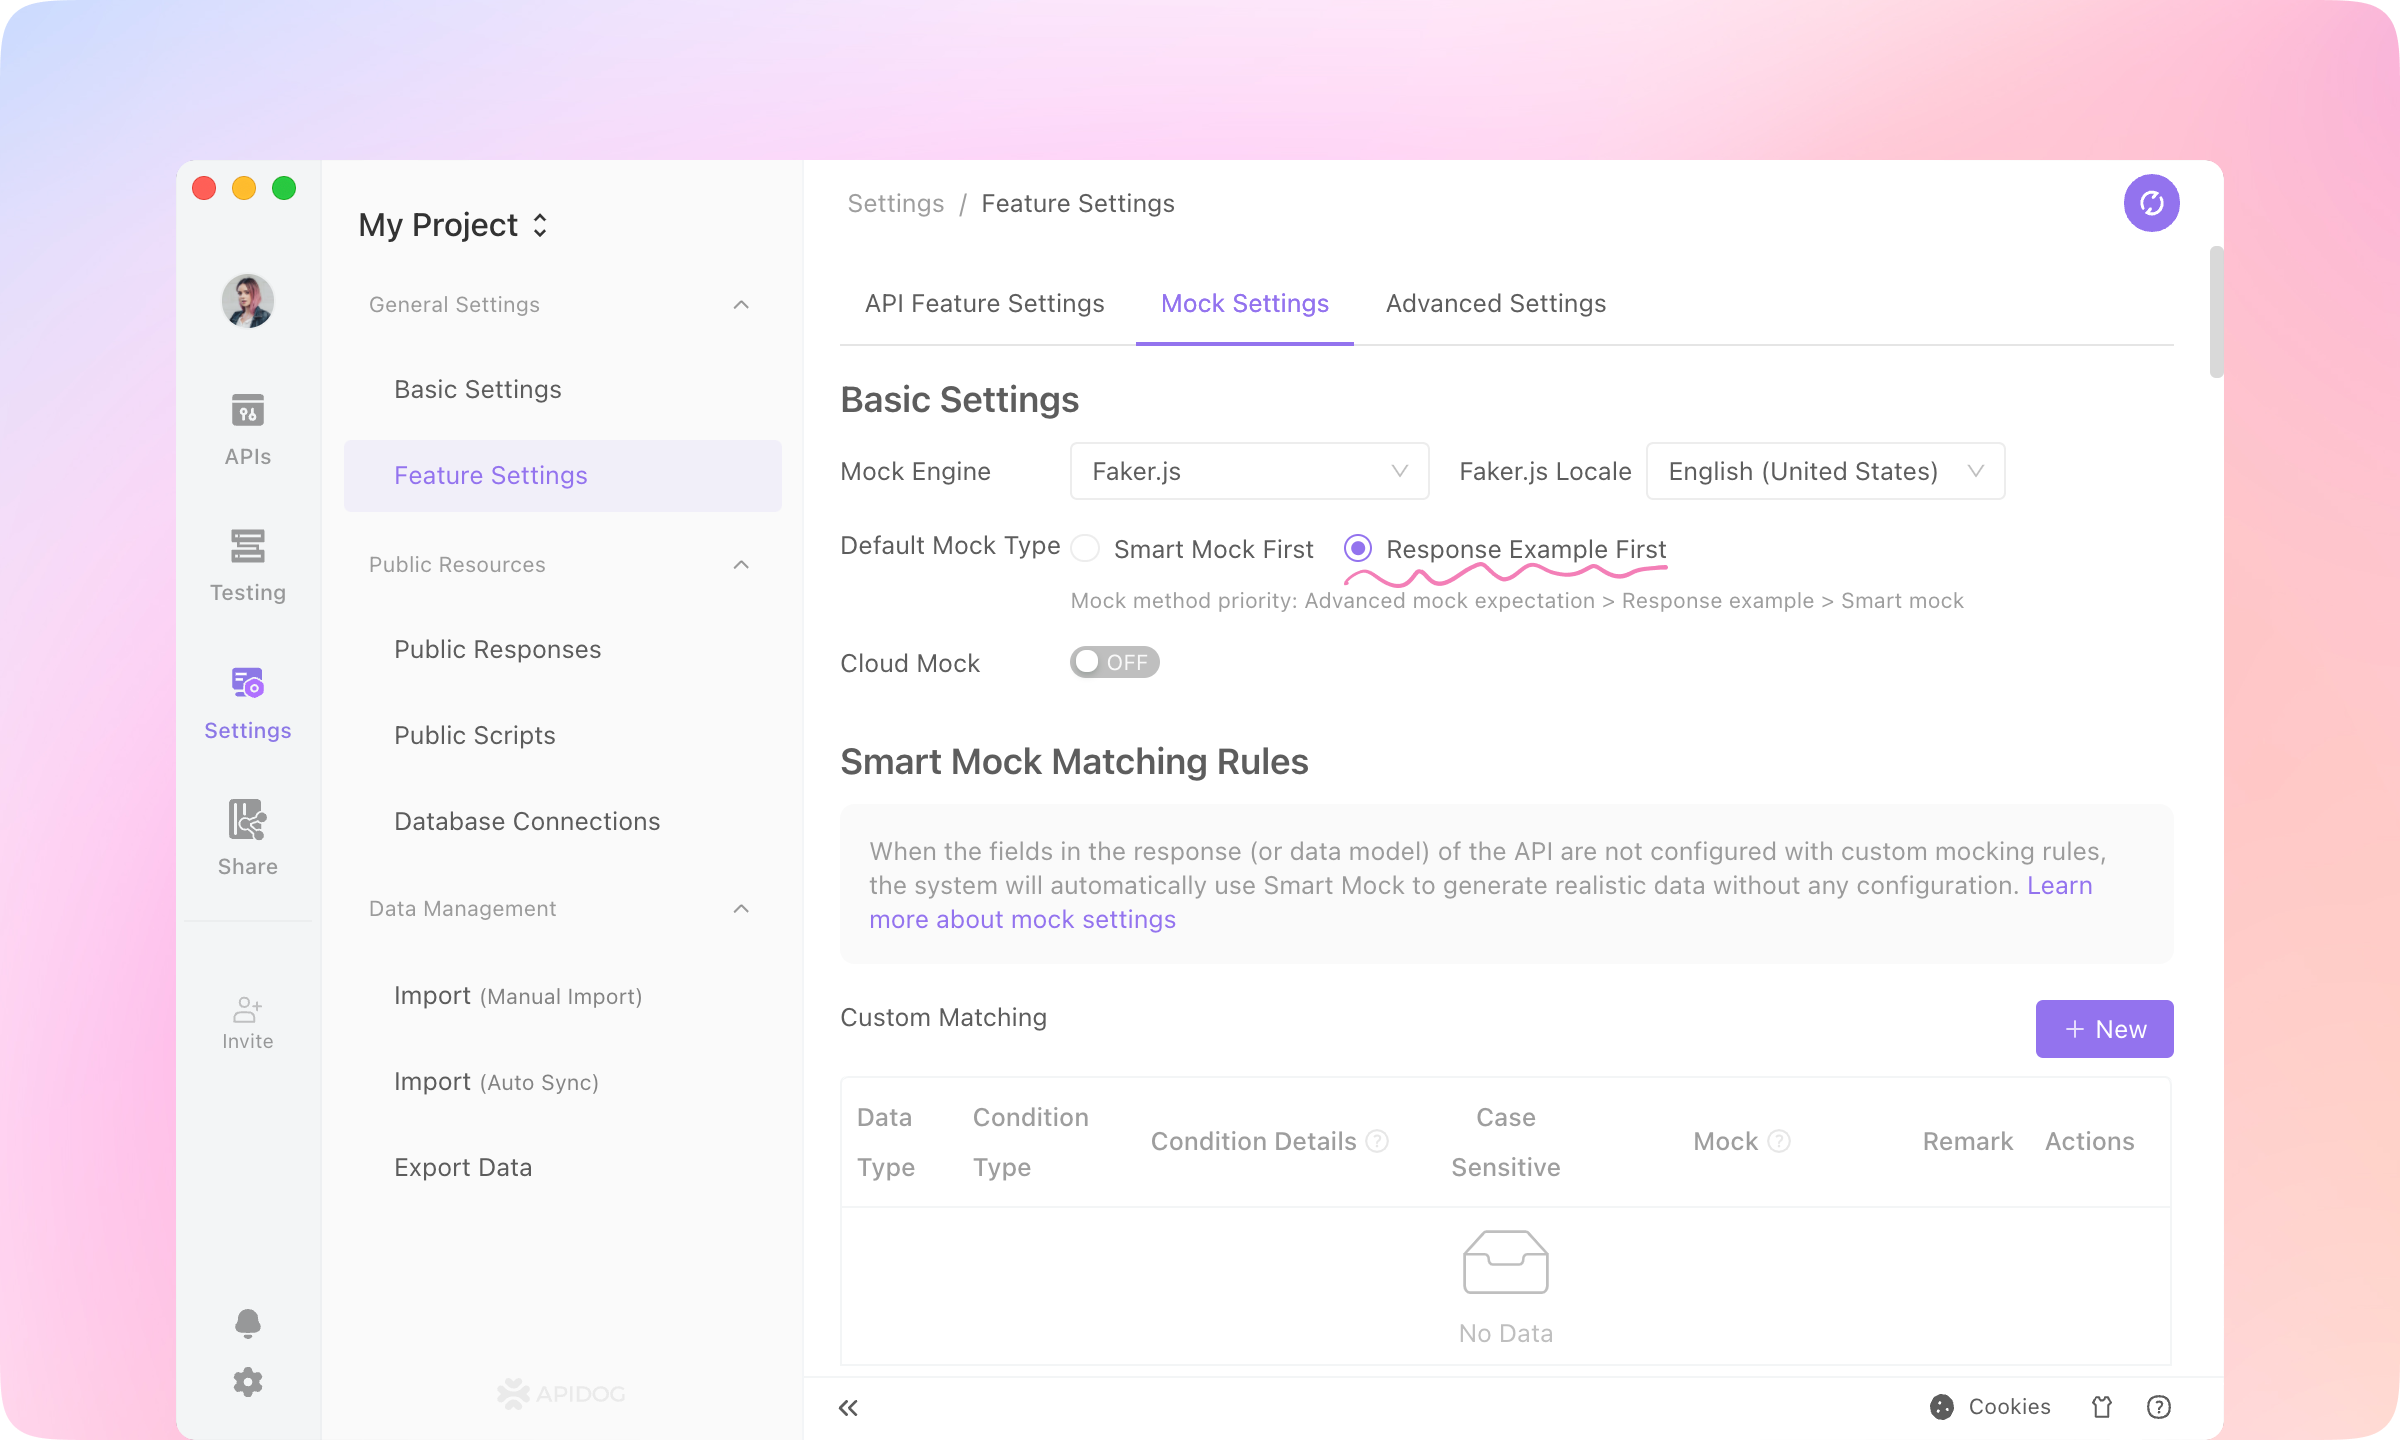
Faker.js is also supported in the mock settings. You can select any Faker.js grammar to generate dynamic mock data.
7.
If you need the mock response to be fixed, go to Settings - Feature Settings - Mock Settings - Default Mock Type, and switch to Response Example First. Then Apidog mock engine will use the API response example as the mock response.
The mocking feature in Apidog also supports cloud mocking, returning different mock responses for different request parameters, using scripts to rewrite mock responses, customizing intelligent mock matching rules, and so on. Learn more about Mocking here. QA Engineers: API Testing#
Apidog's automated testing module allows QA engineers to directly generate test scenarios referring API definitions or API cases. It supports data-driven testing and easily generates dynamic test data. The visual assertion and variable extraction features make writing test cases very simple. Apidog also supports CI/CD.Assertions#
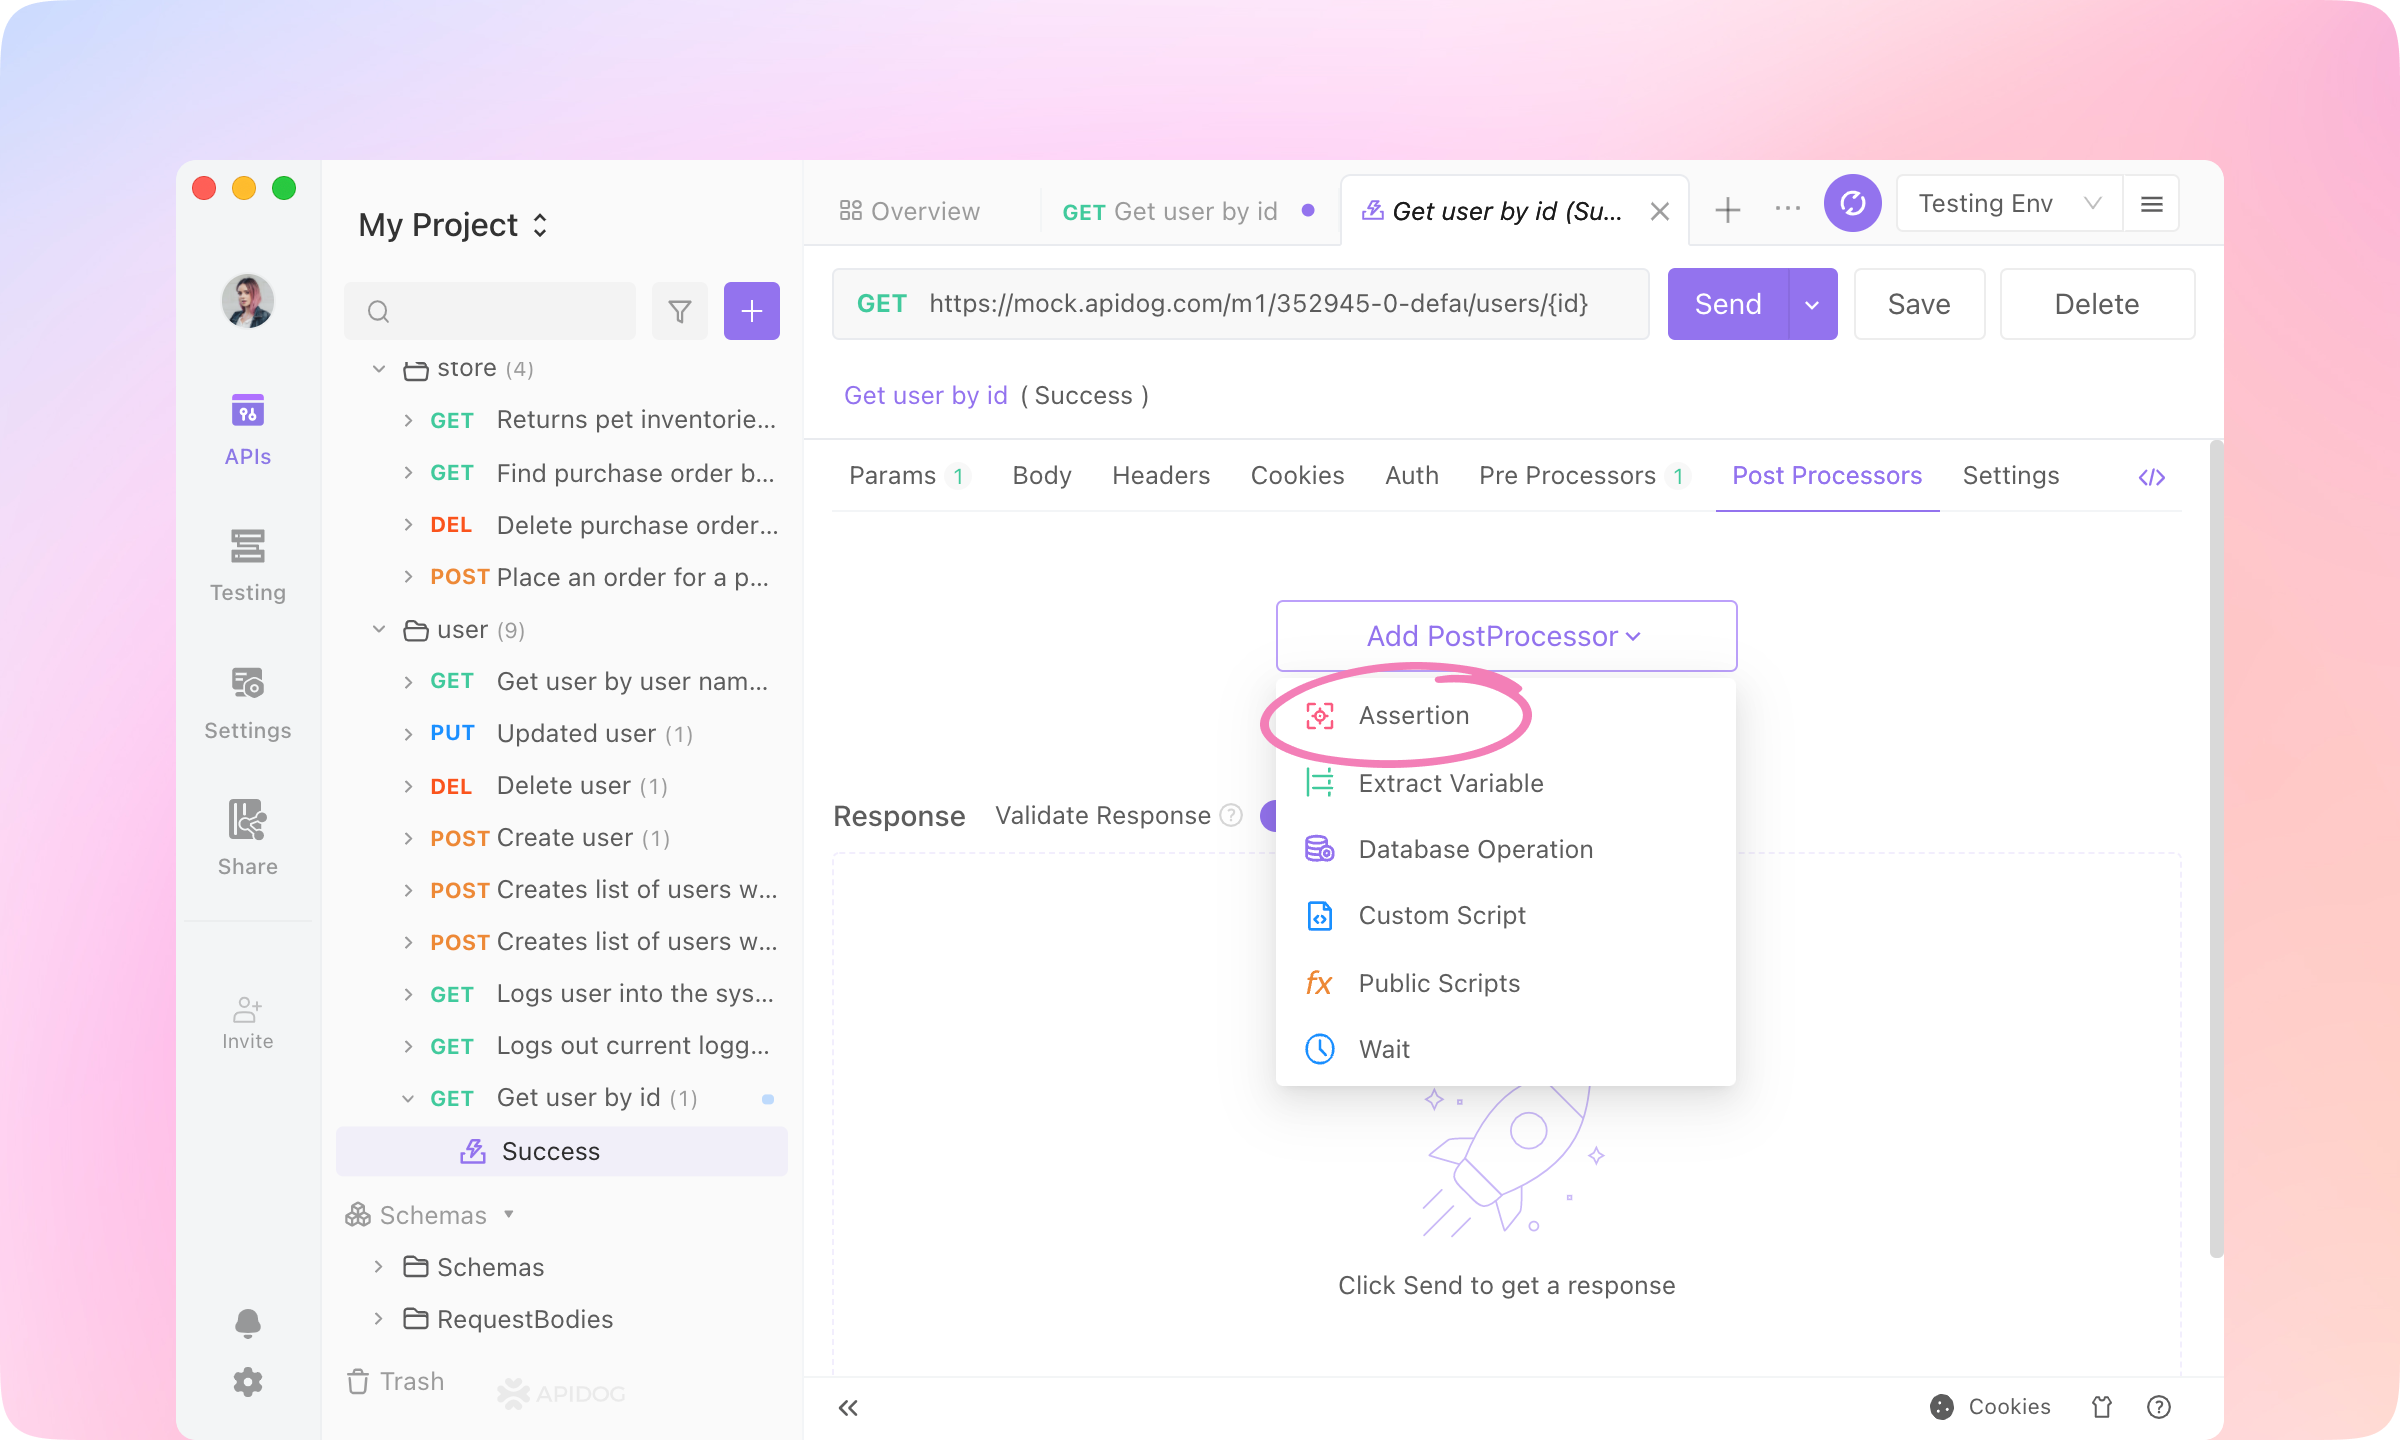
In Apidog, test assertions can be added visually in Post Processors. It also supports adding assertion statements in custom scripts using the Postman SDK.1.
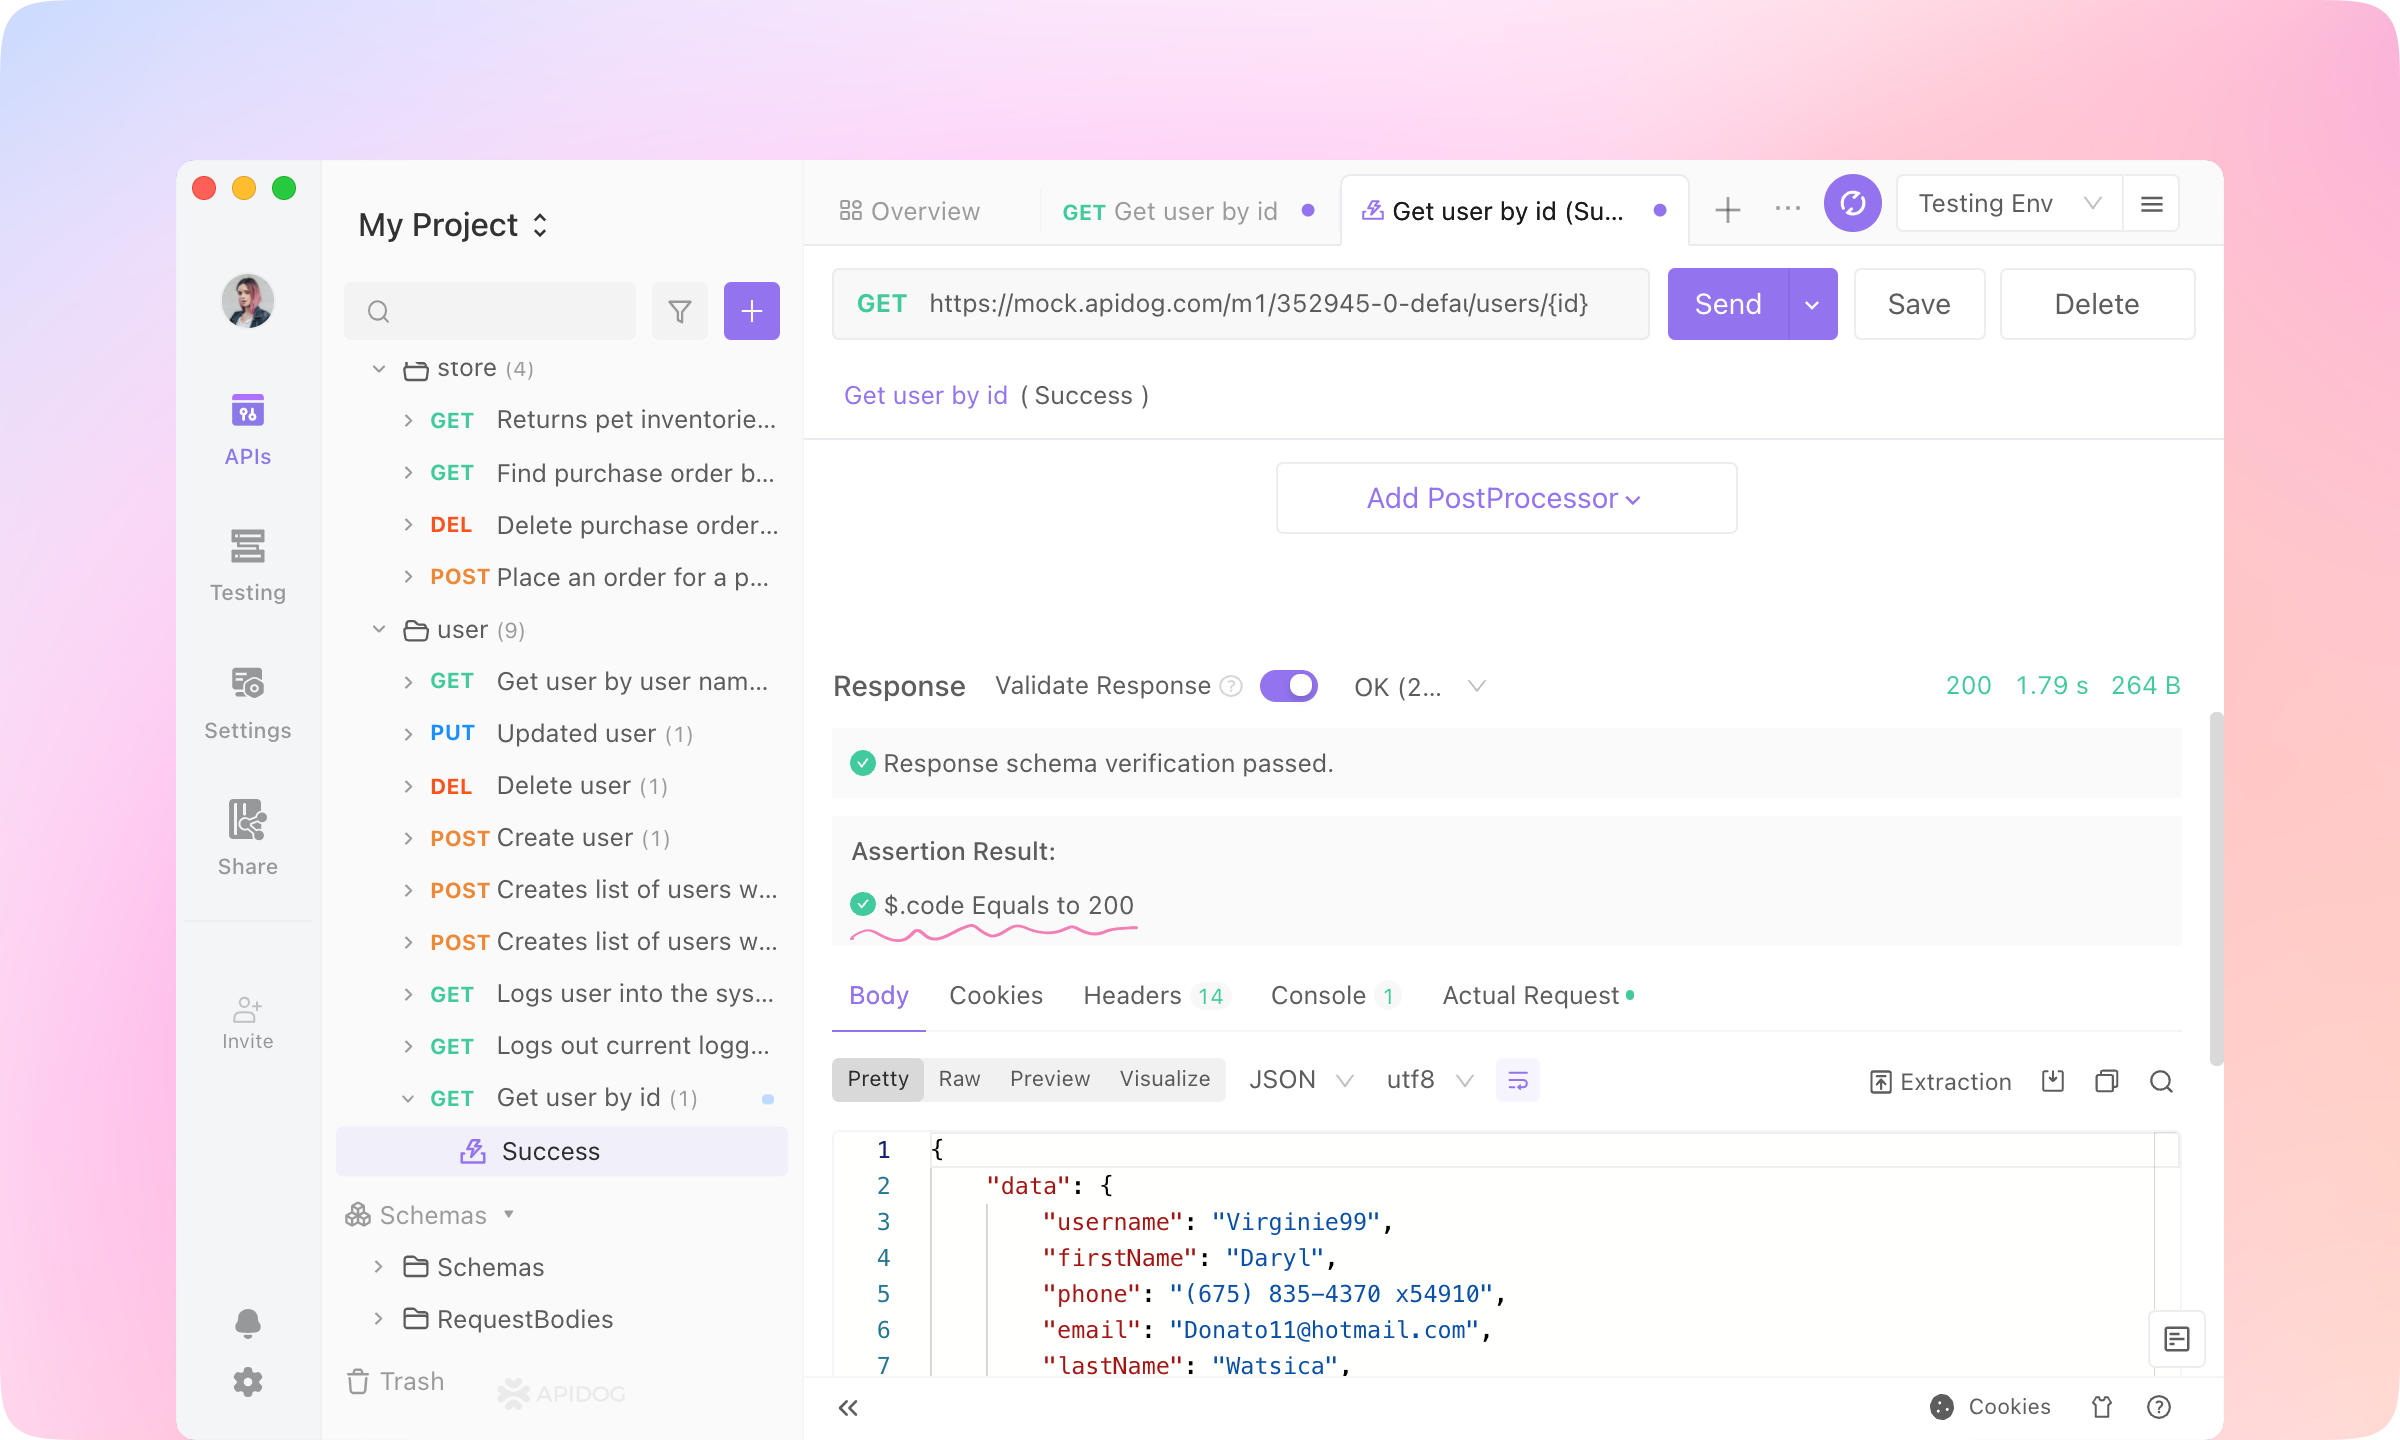
Go to Get user by id - Success, switch to Post Processors and Add PostProcessor - Assertion.
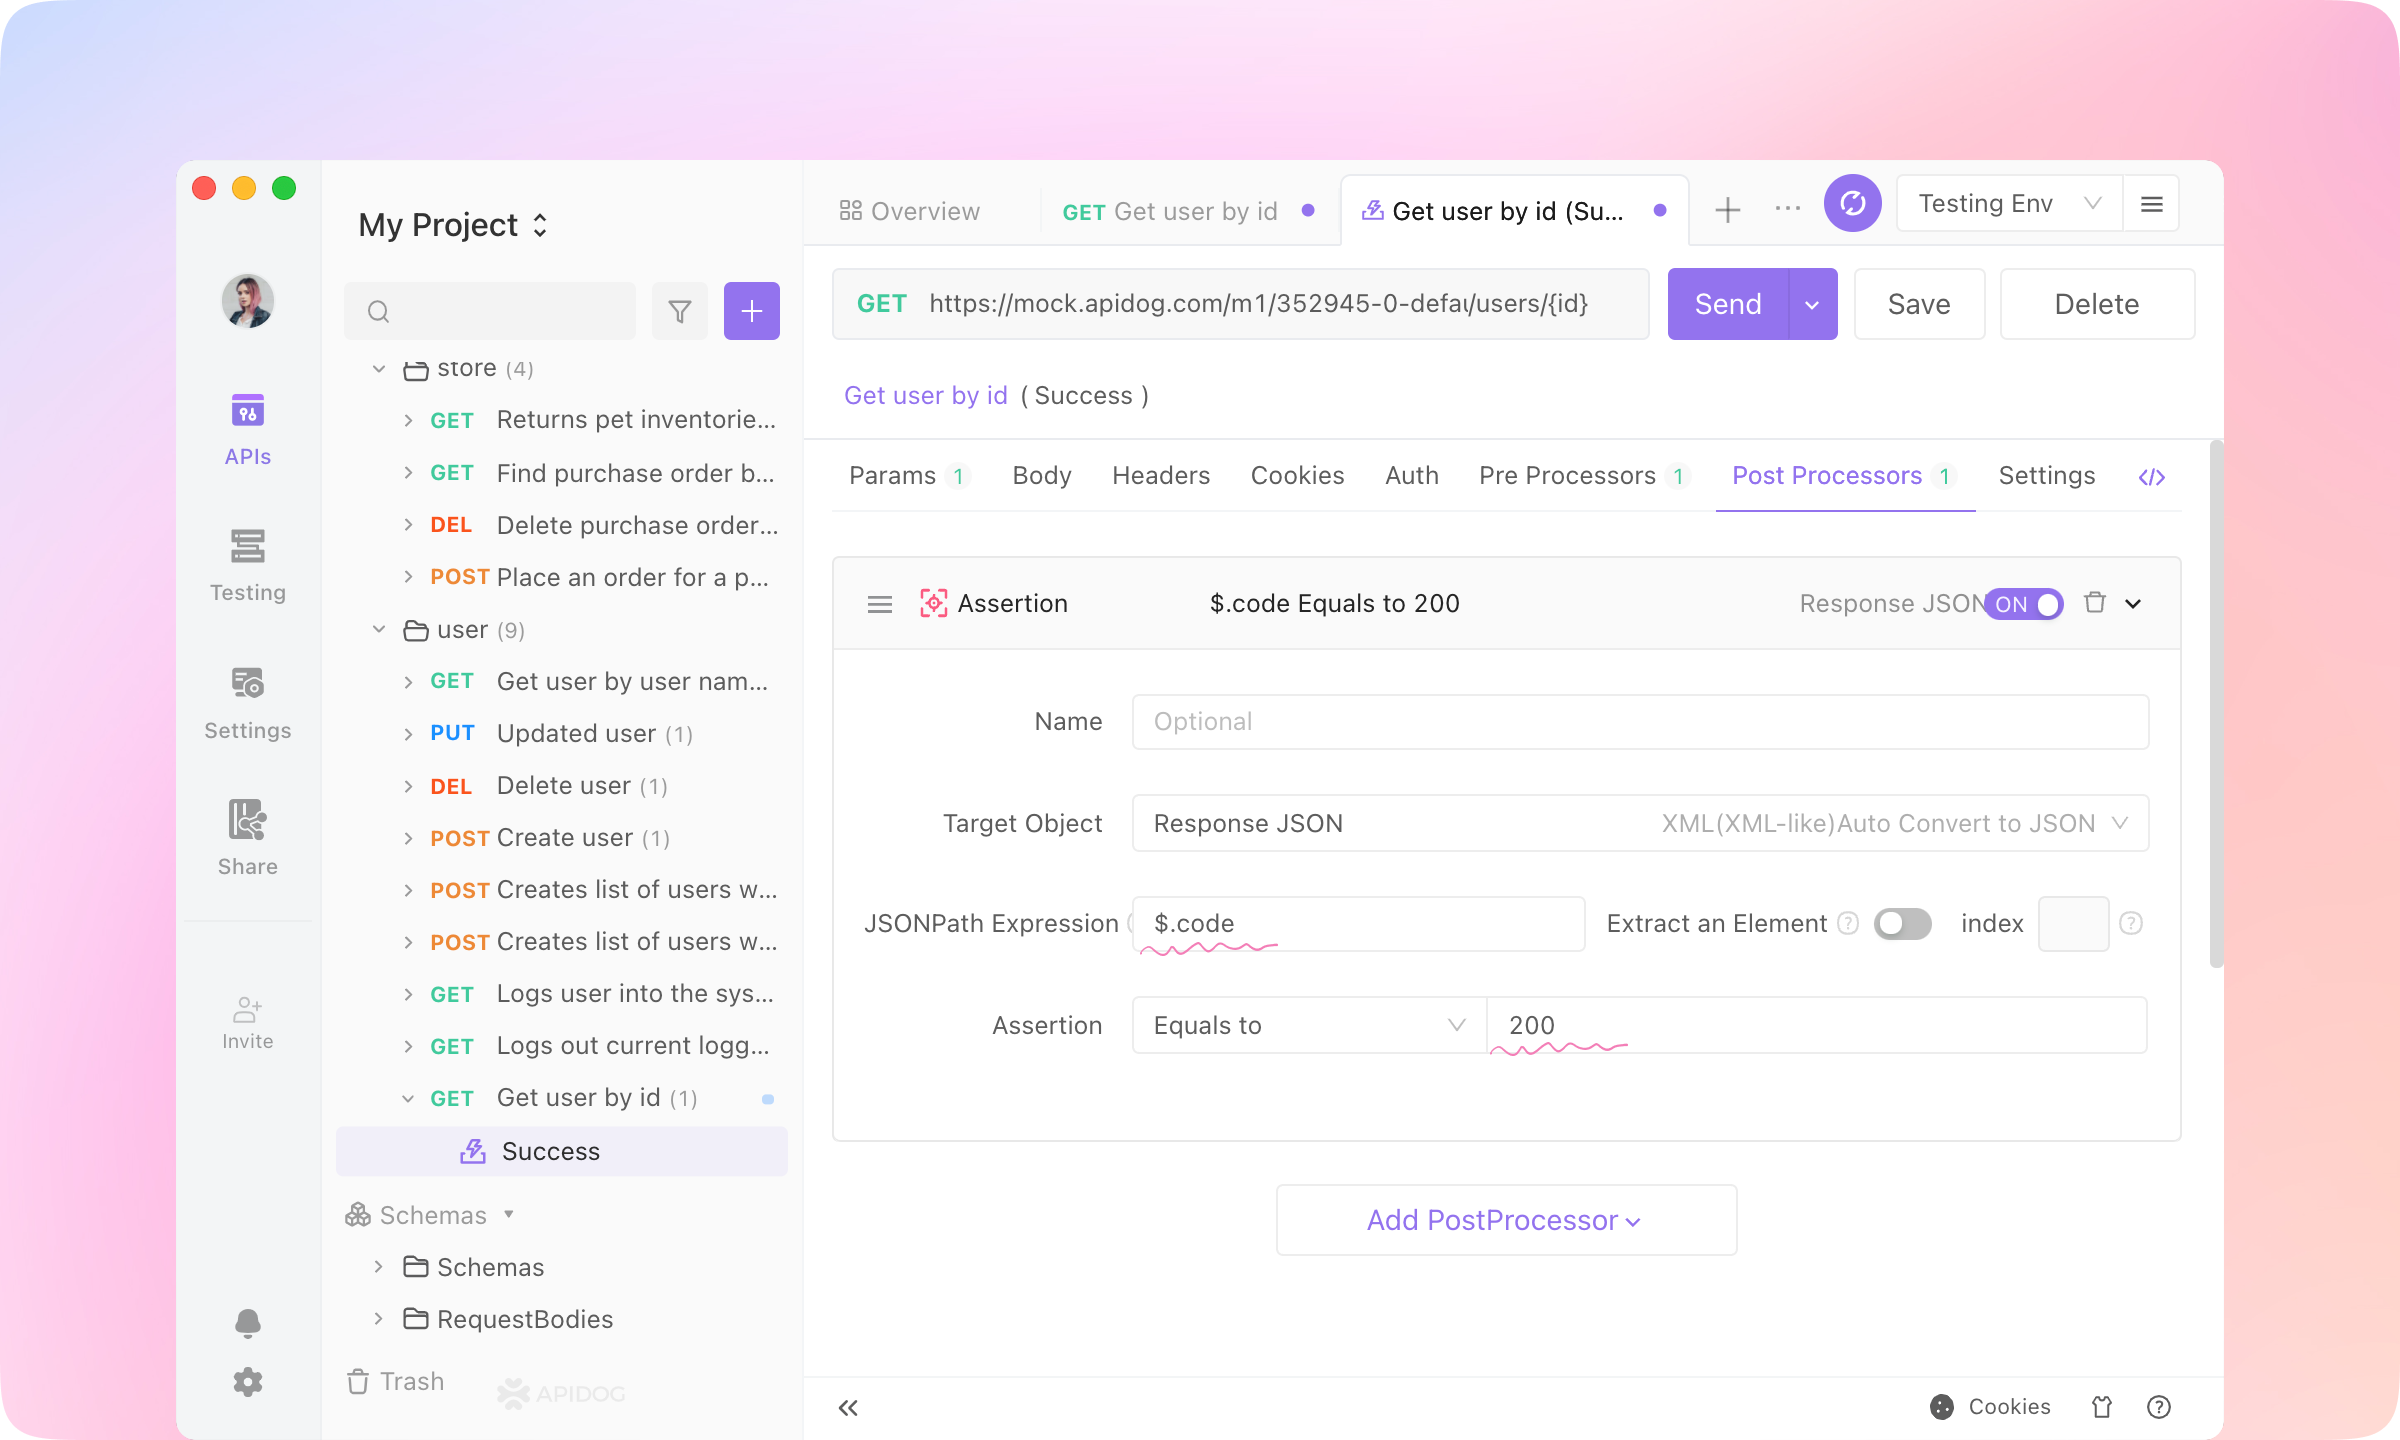
2.
Enter the following assertion parameters into the Assertion. Learn more about JsonPath here. 3.
Send the request, and you'll see the Assertion Result.Apidog will get the value of $.code from the response JSON and compare it with the assertion. If they match, the assertion will pass.
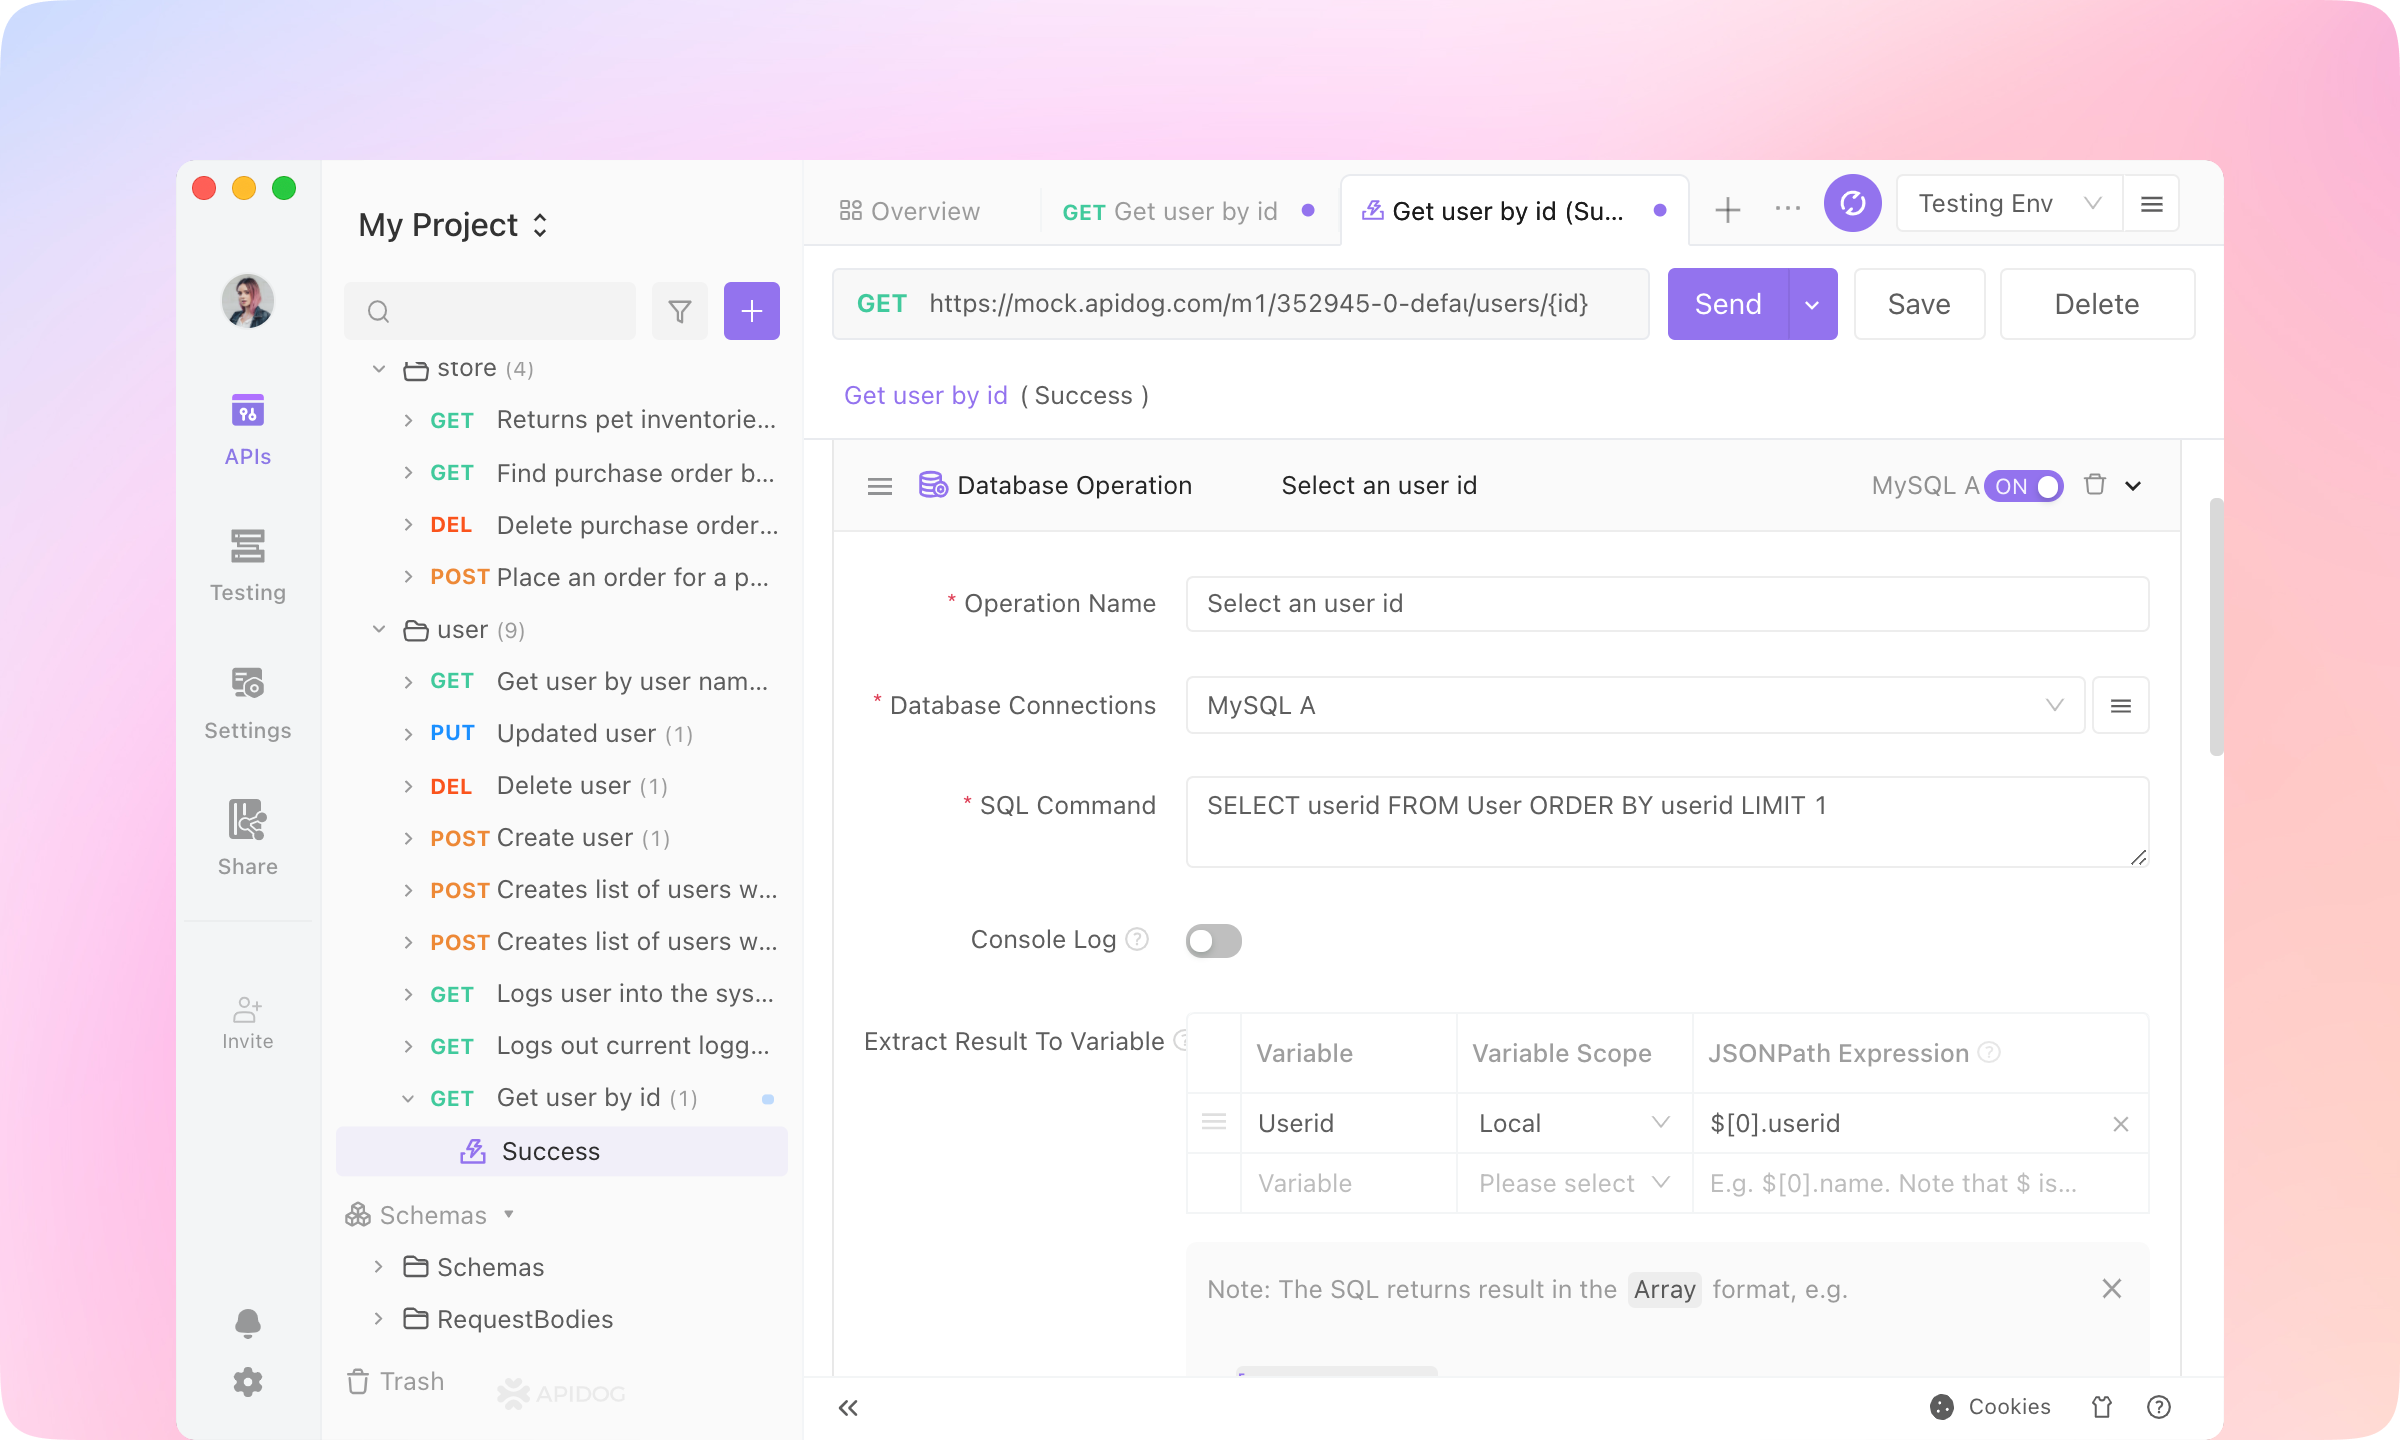
4.
Extract Variable, Custom Script, Public Script, Database Operation, and Wait can also be added to Post Processors.MySQL, SQL Server, Oracle, PostgreSQL, and ClickHouse Database are supported in Apidog. SQL statements can be executed, and the SELECT result can be extracted to variables. Other SQL like INSERT, DELETE, and UPDATE can also be executed.
Learn more about Database Operation here. Test Scenarios#
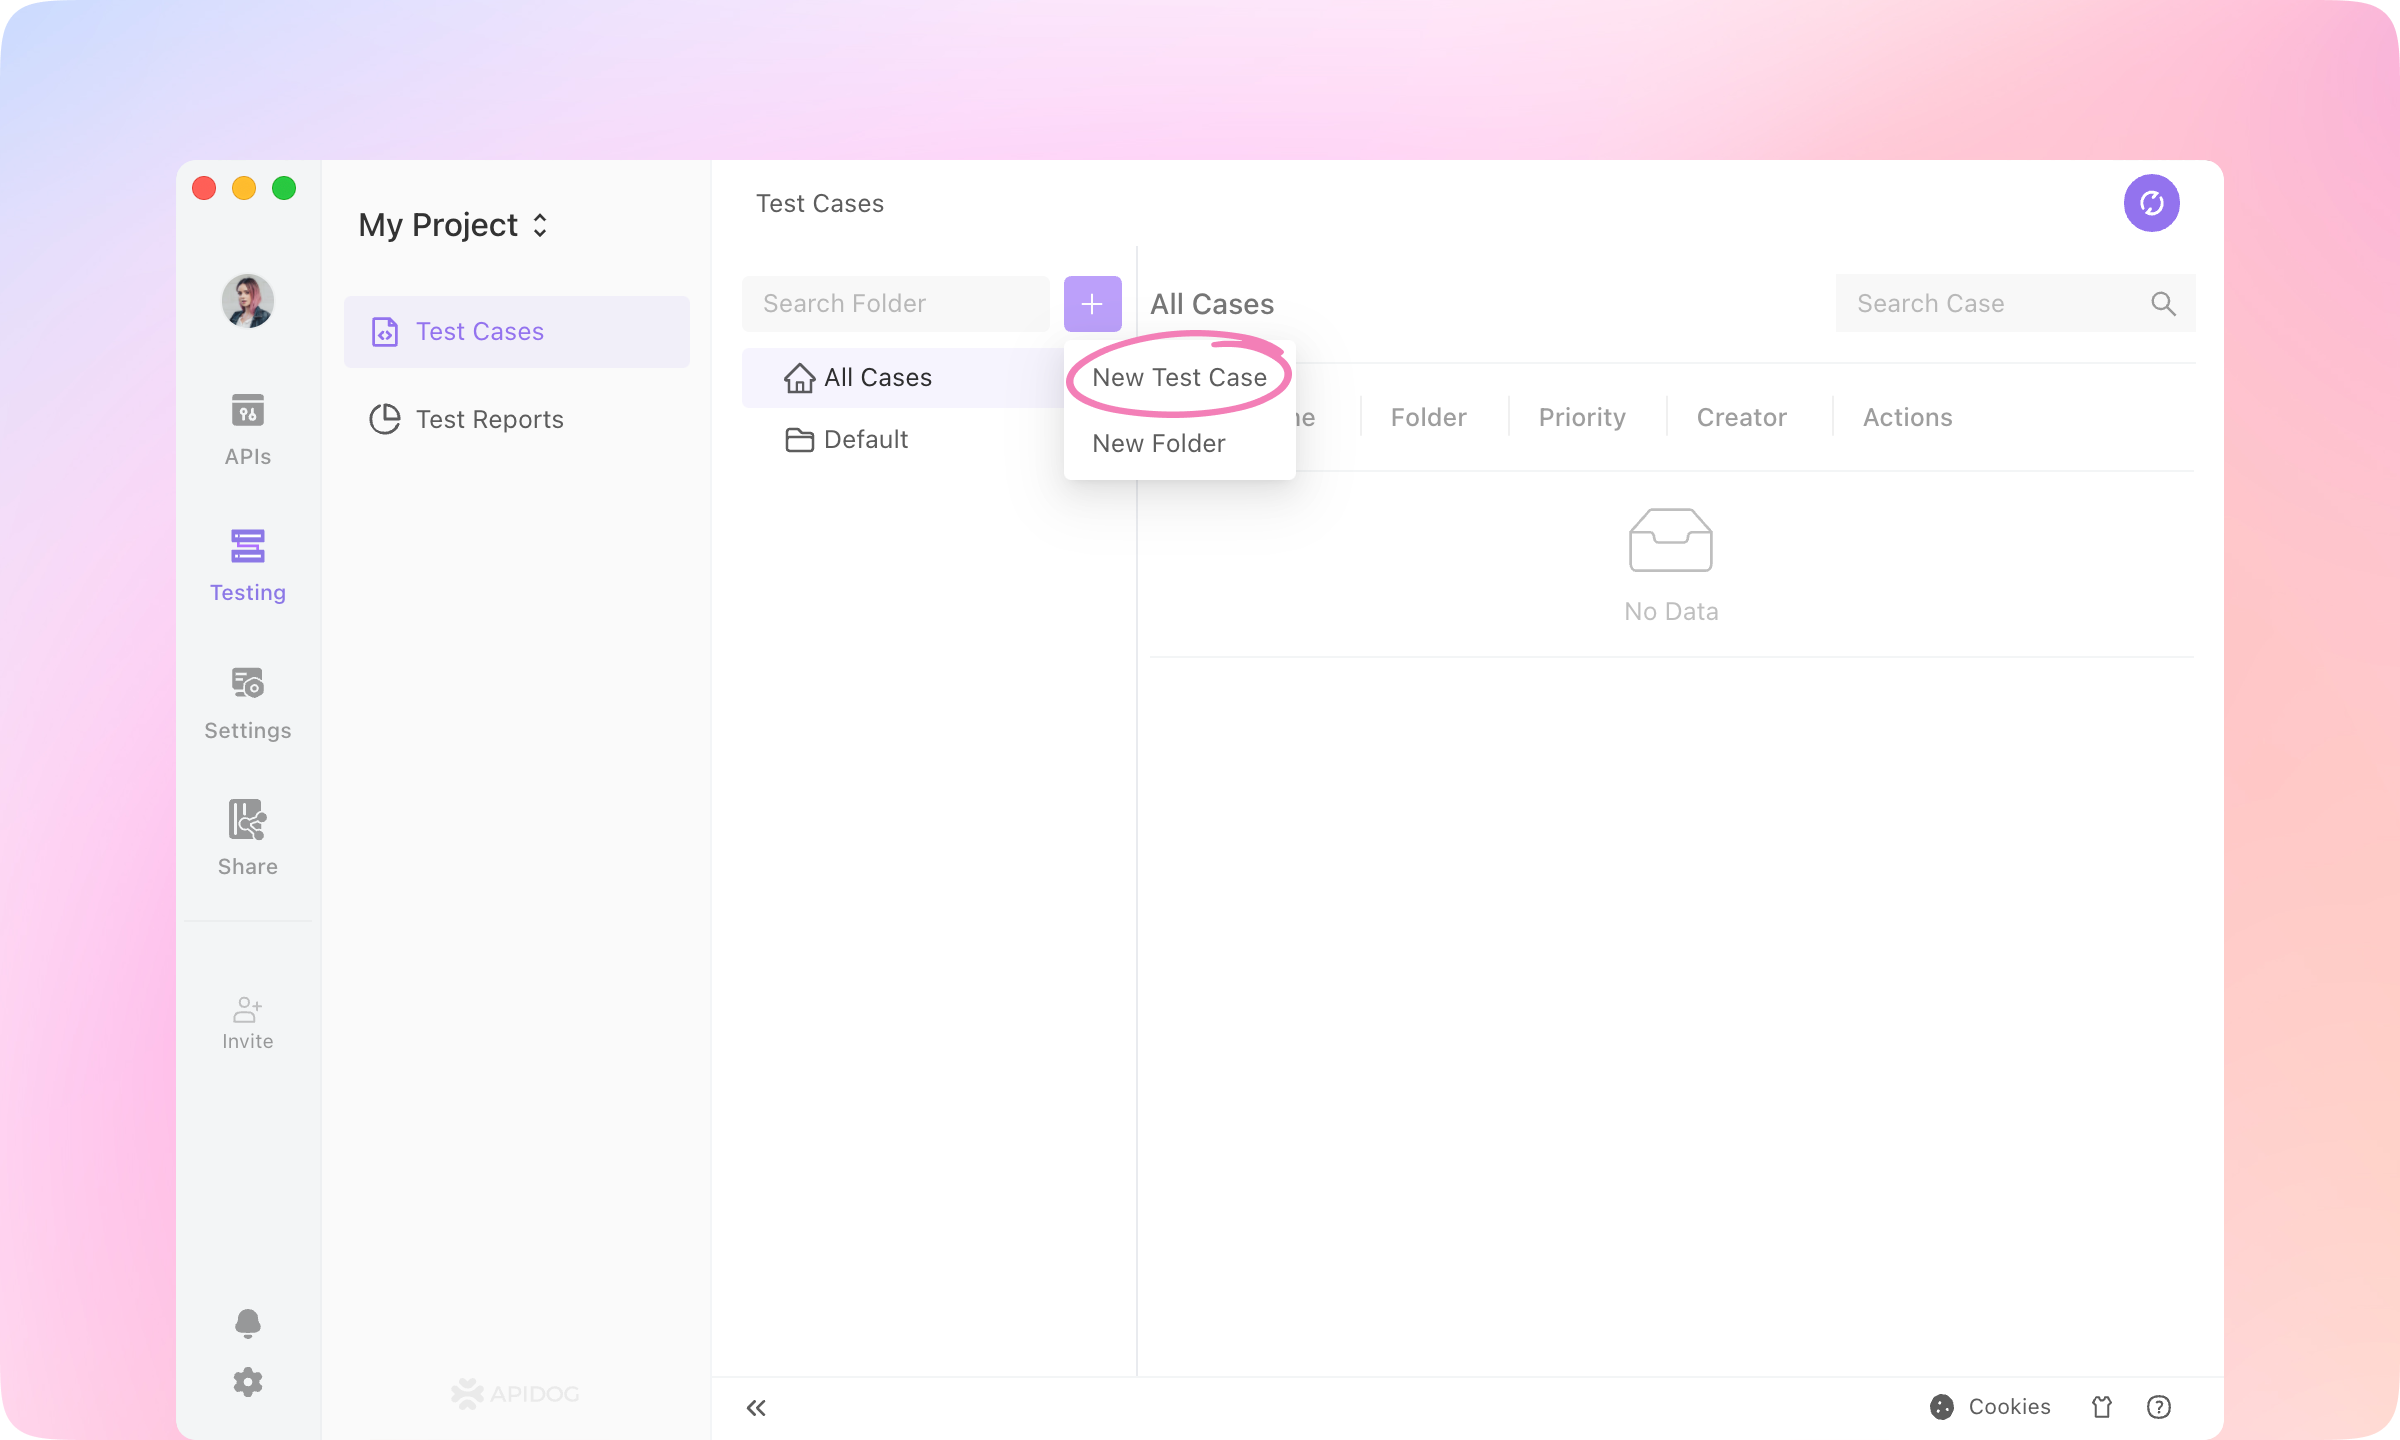
After writing the assertions, multiple API cases can be imported into a single test case, run with one click, and generate a test report.1.
Switch to the Testing module. Create a New Test Case.
2.
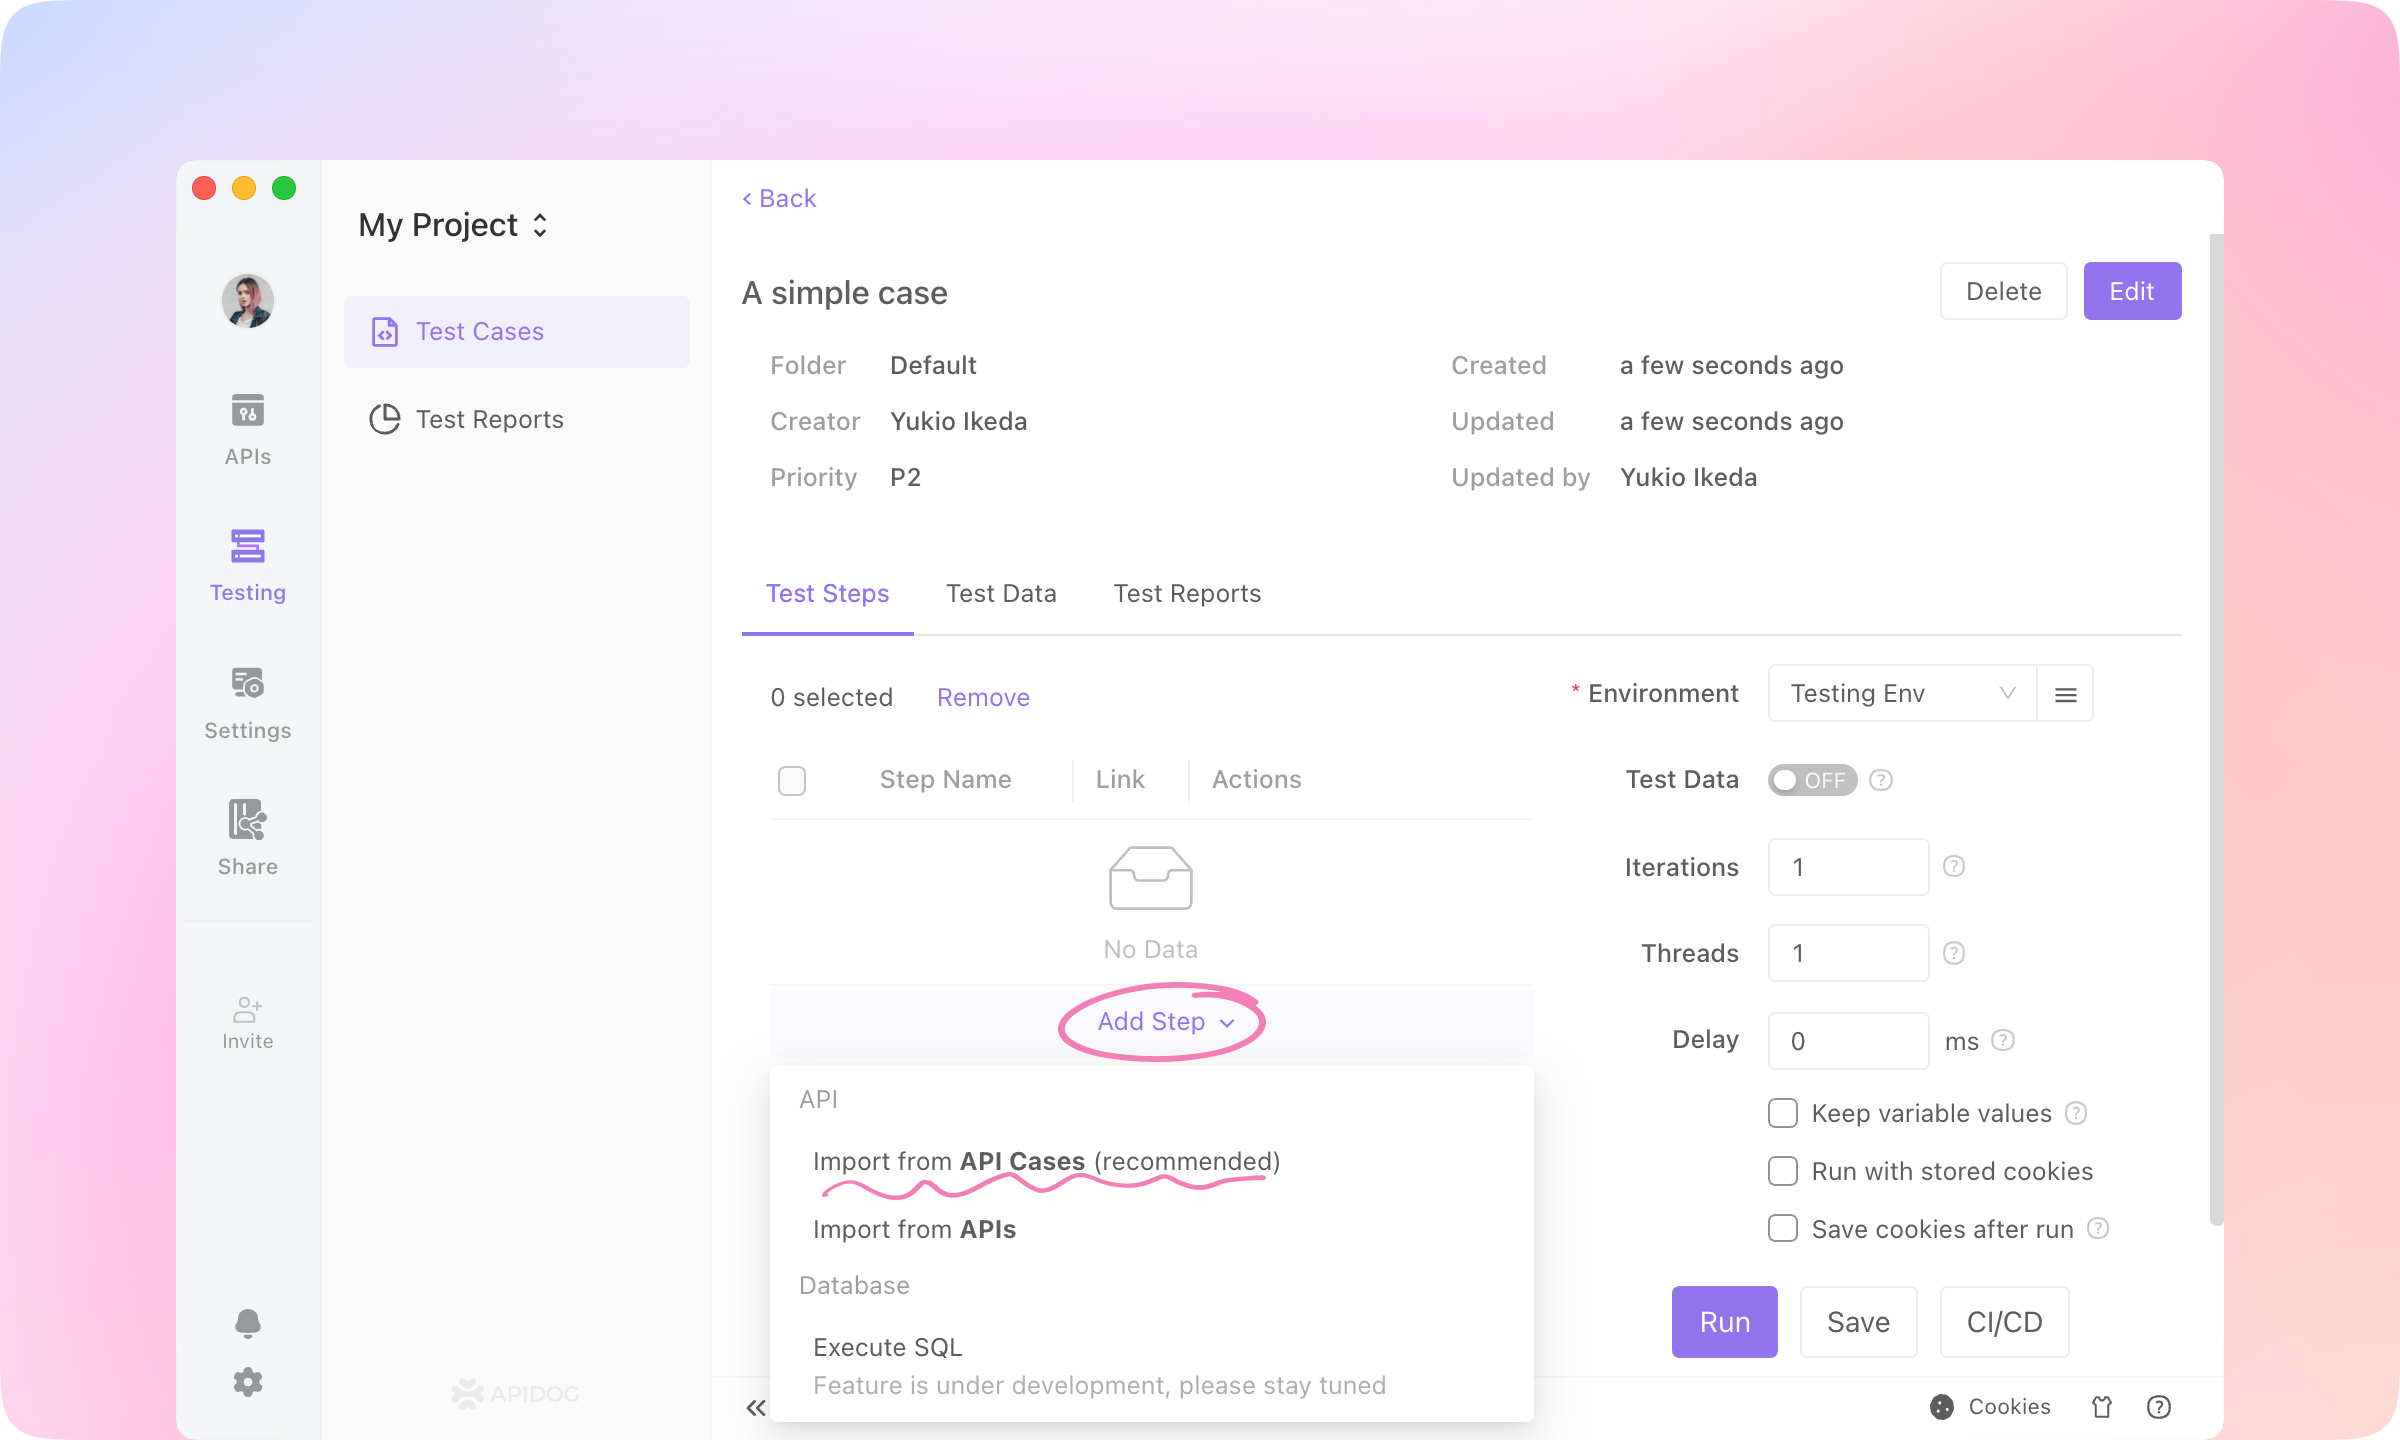
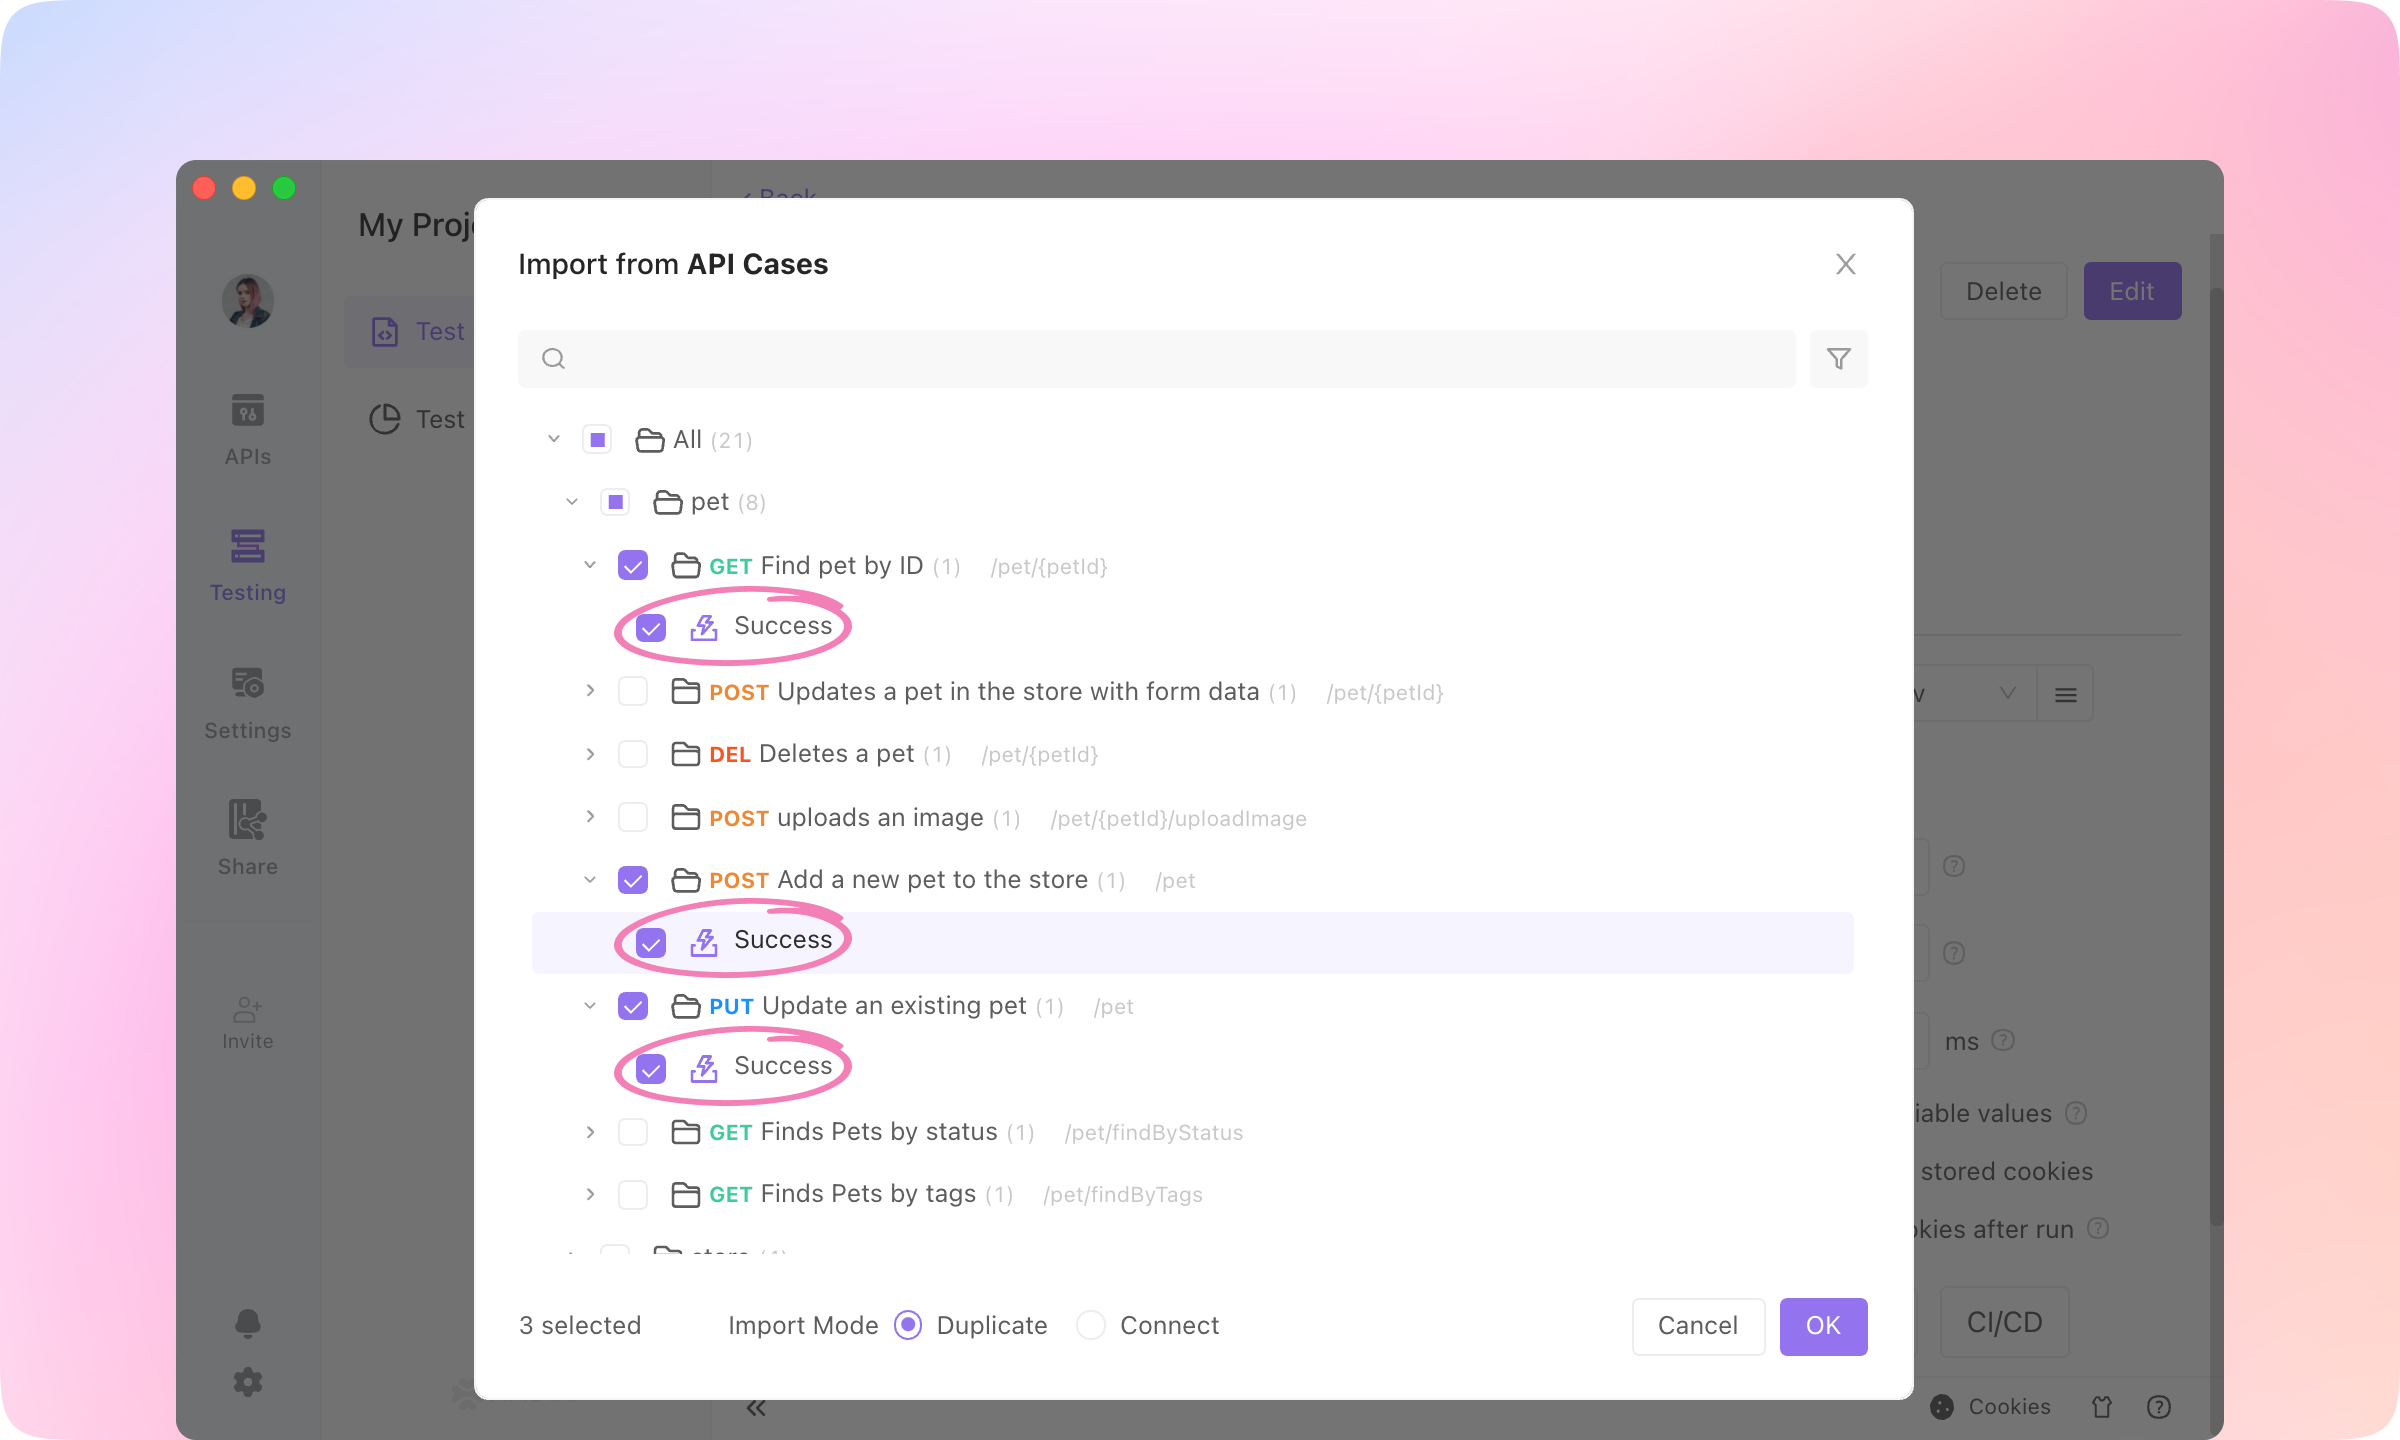
Enter the case. Click Add Step and select Import from API Cases.
3.
Select API cases to be imported: 'Add a new pet to the store - Success', 'Find pet by ID - Success', 'Update an existing pet - Success'. Click OK to import.
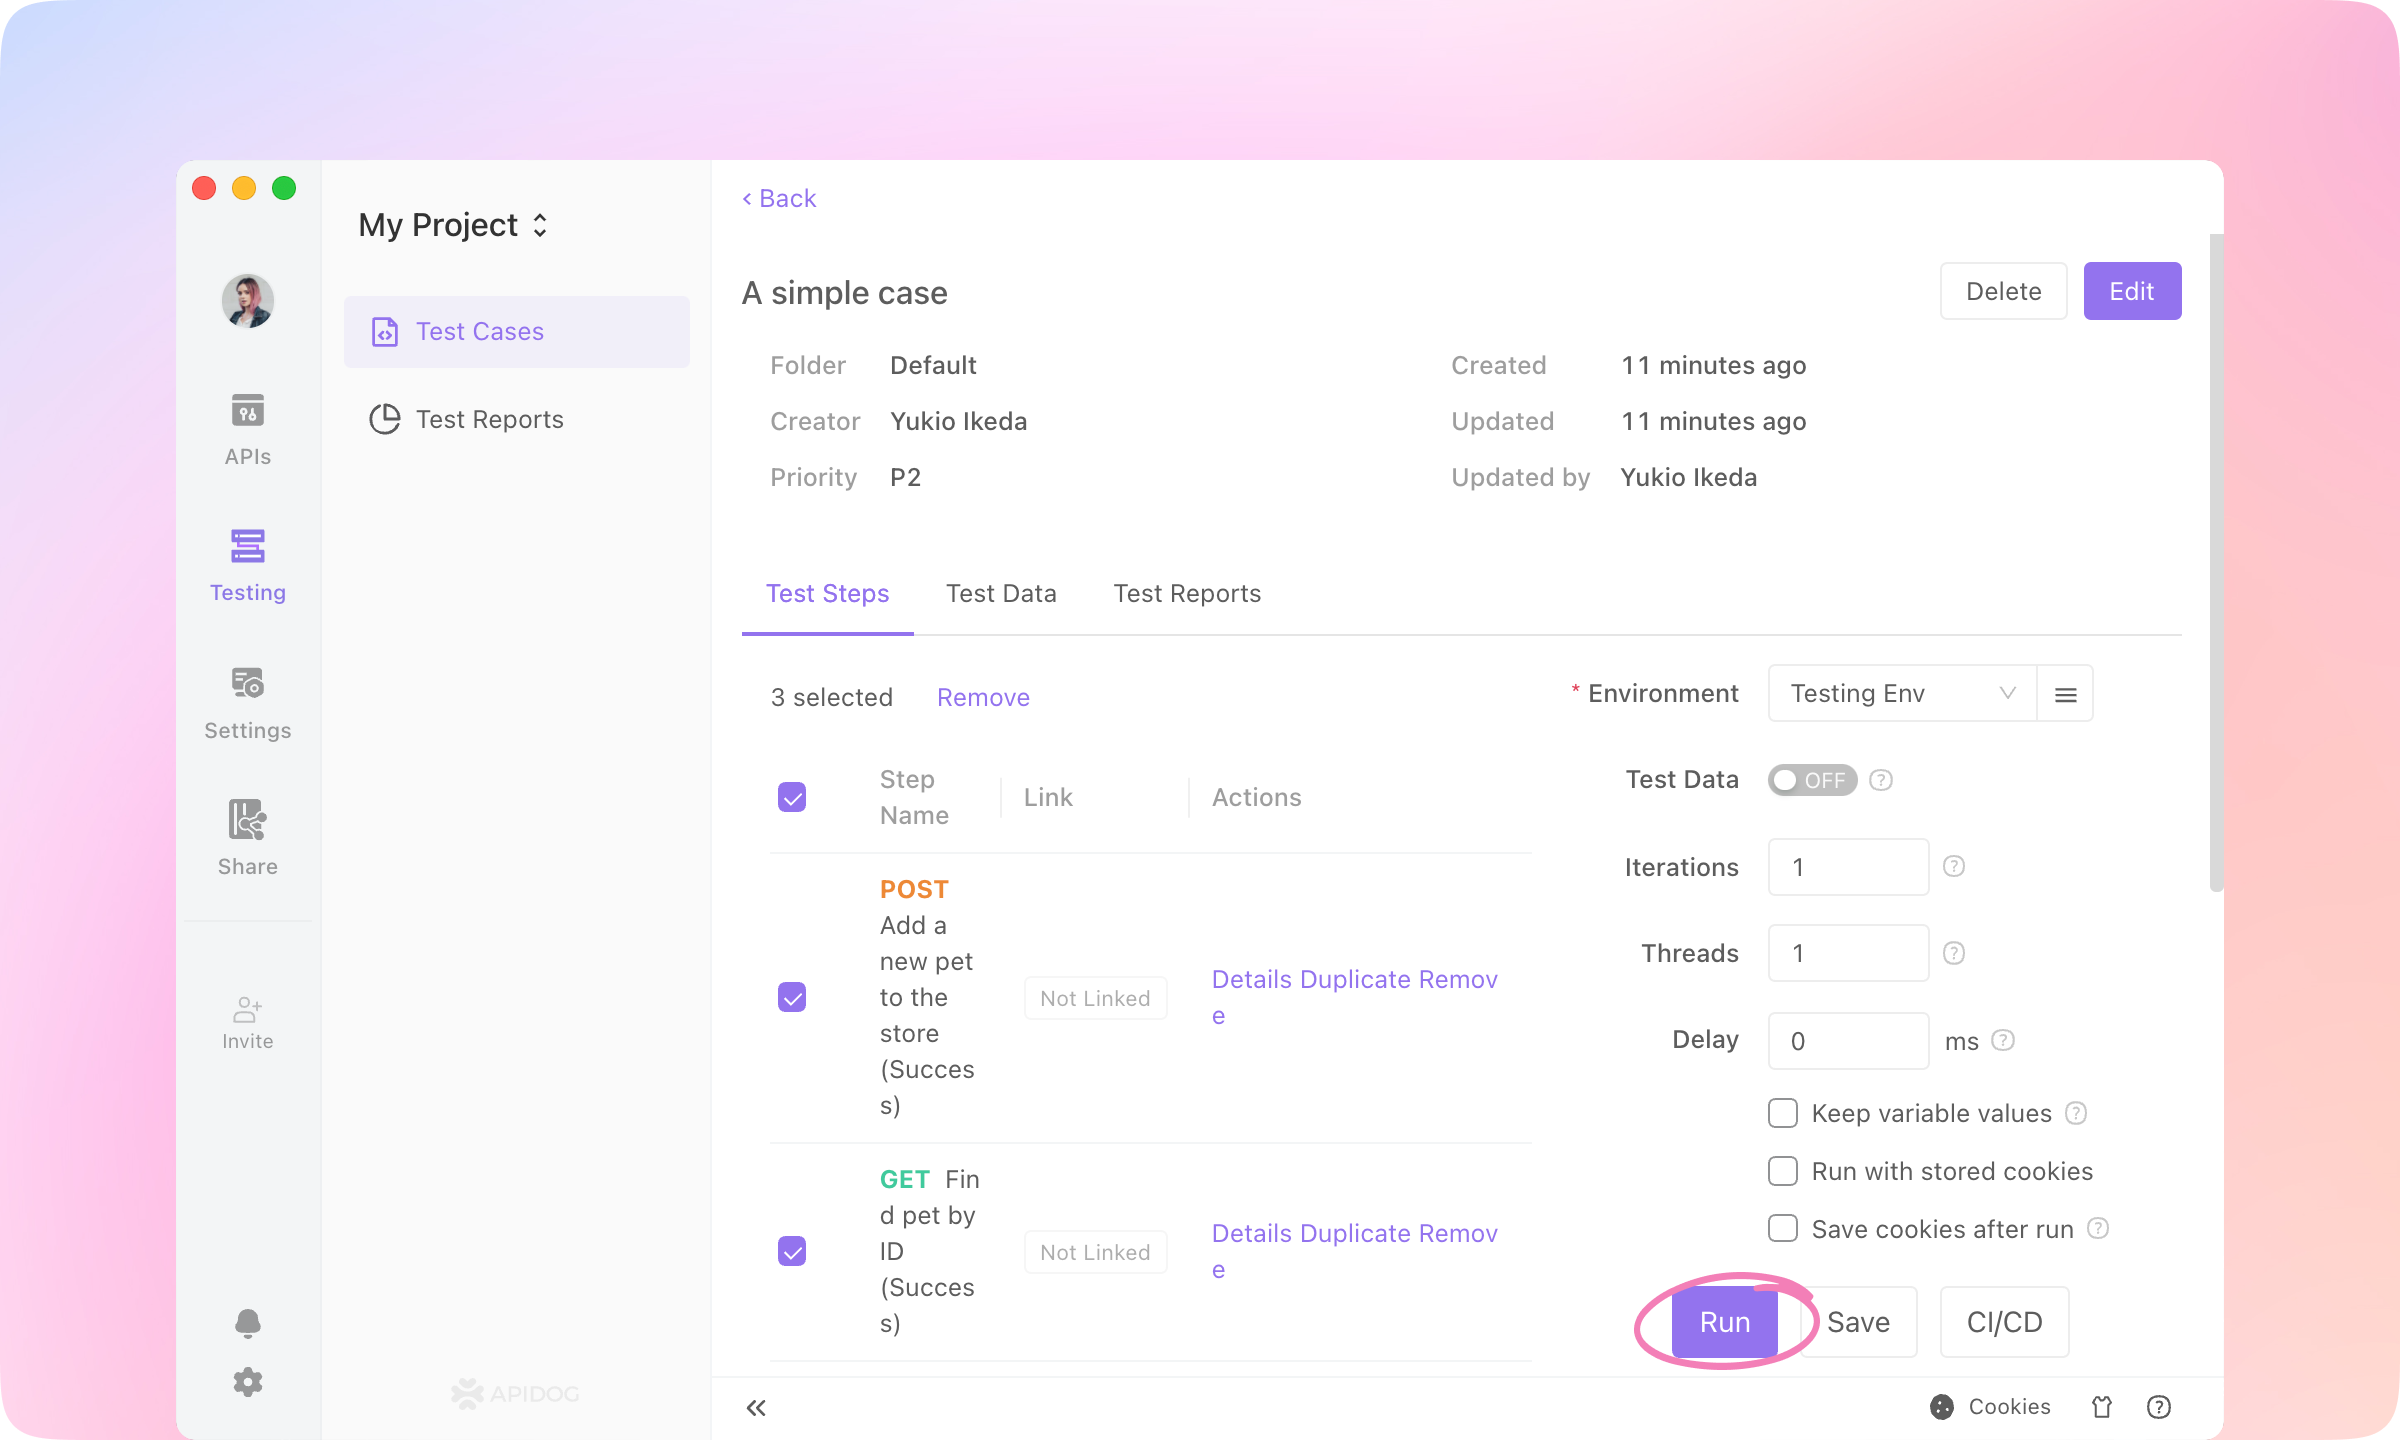
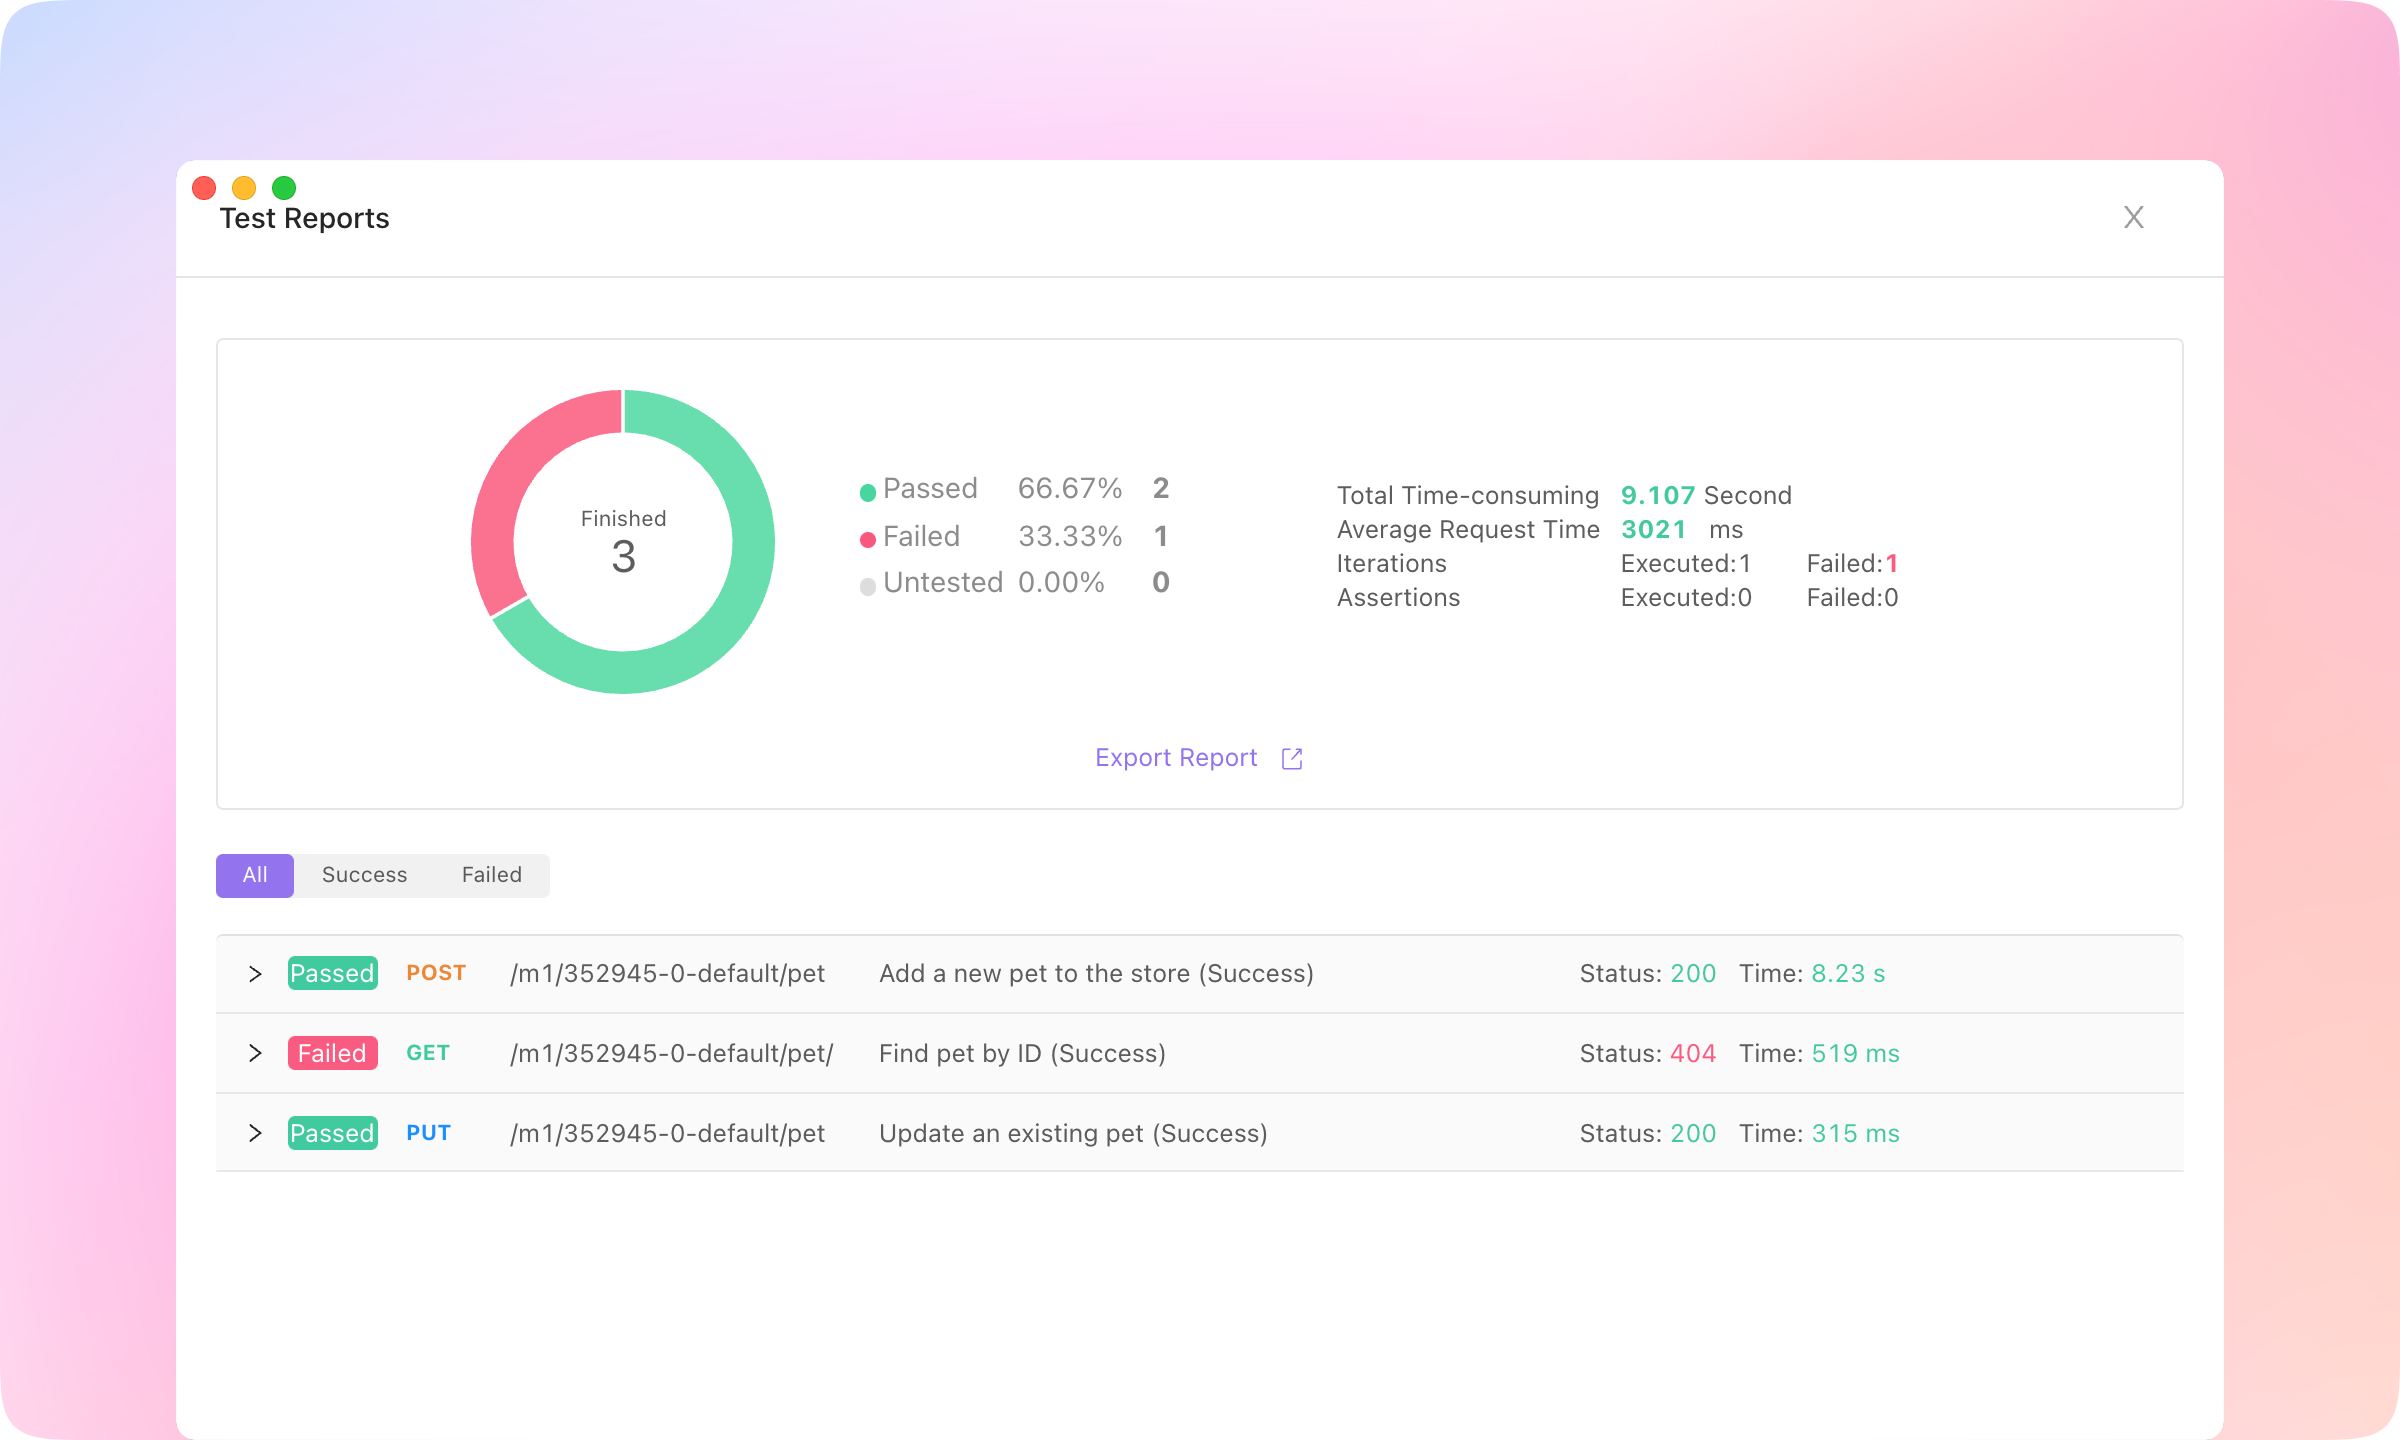
4.
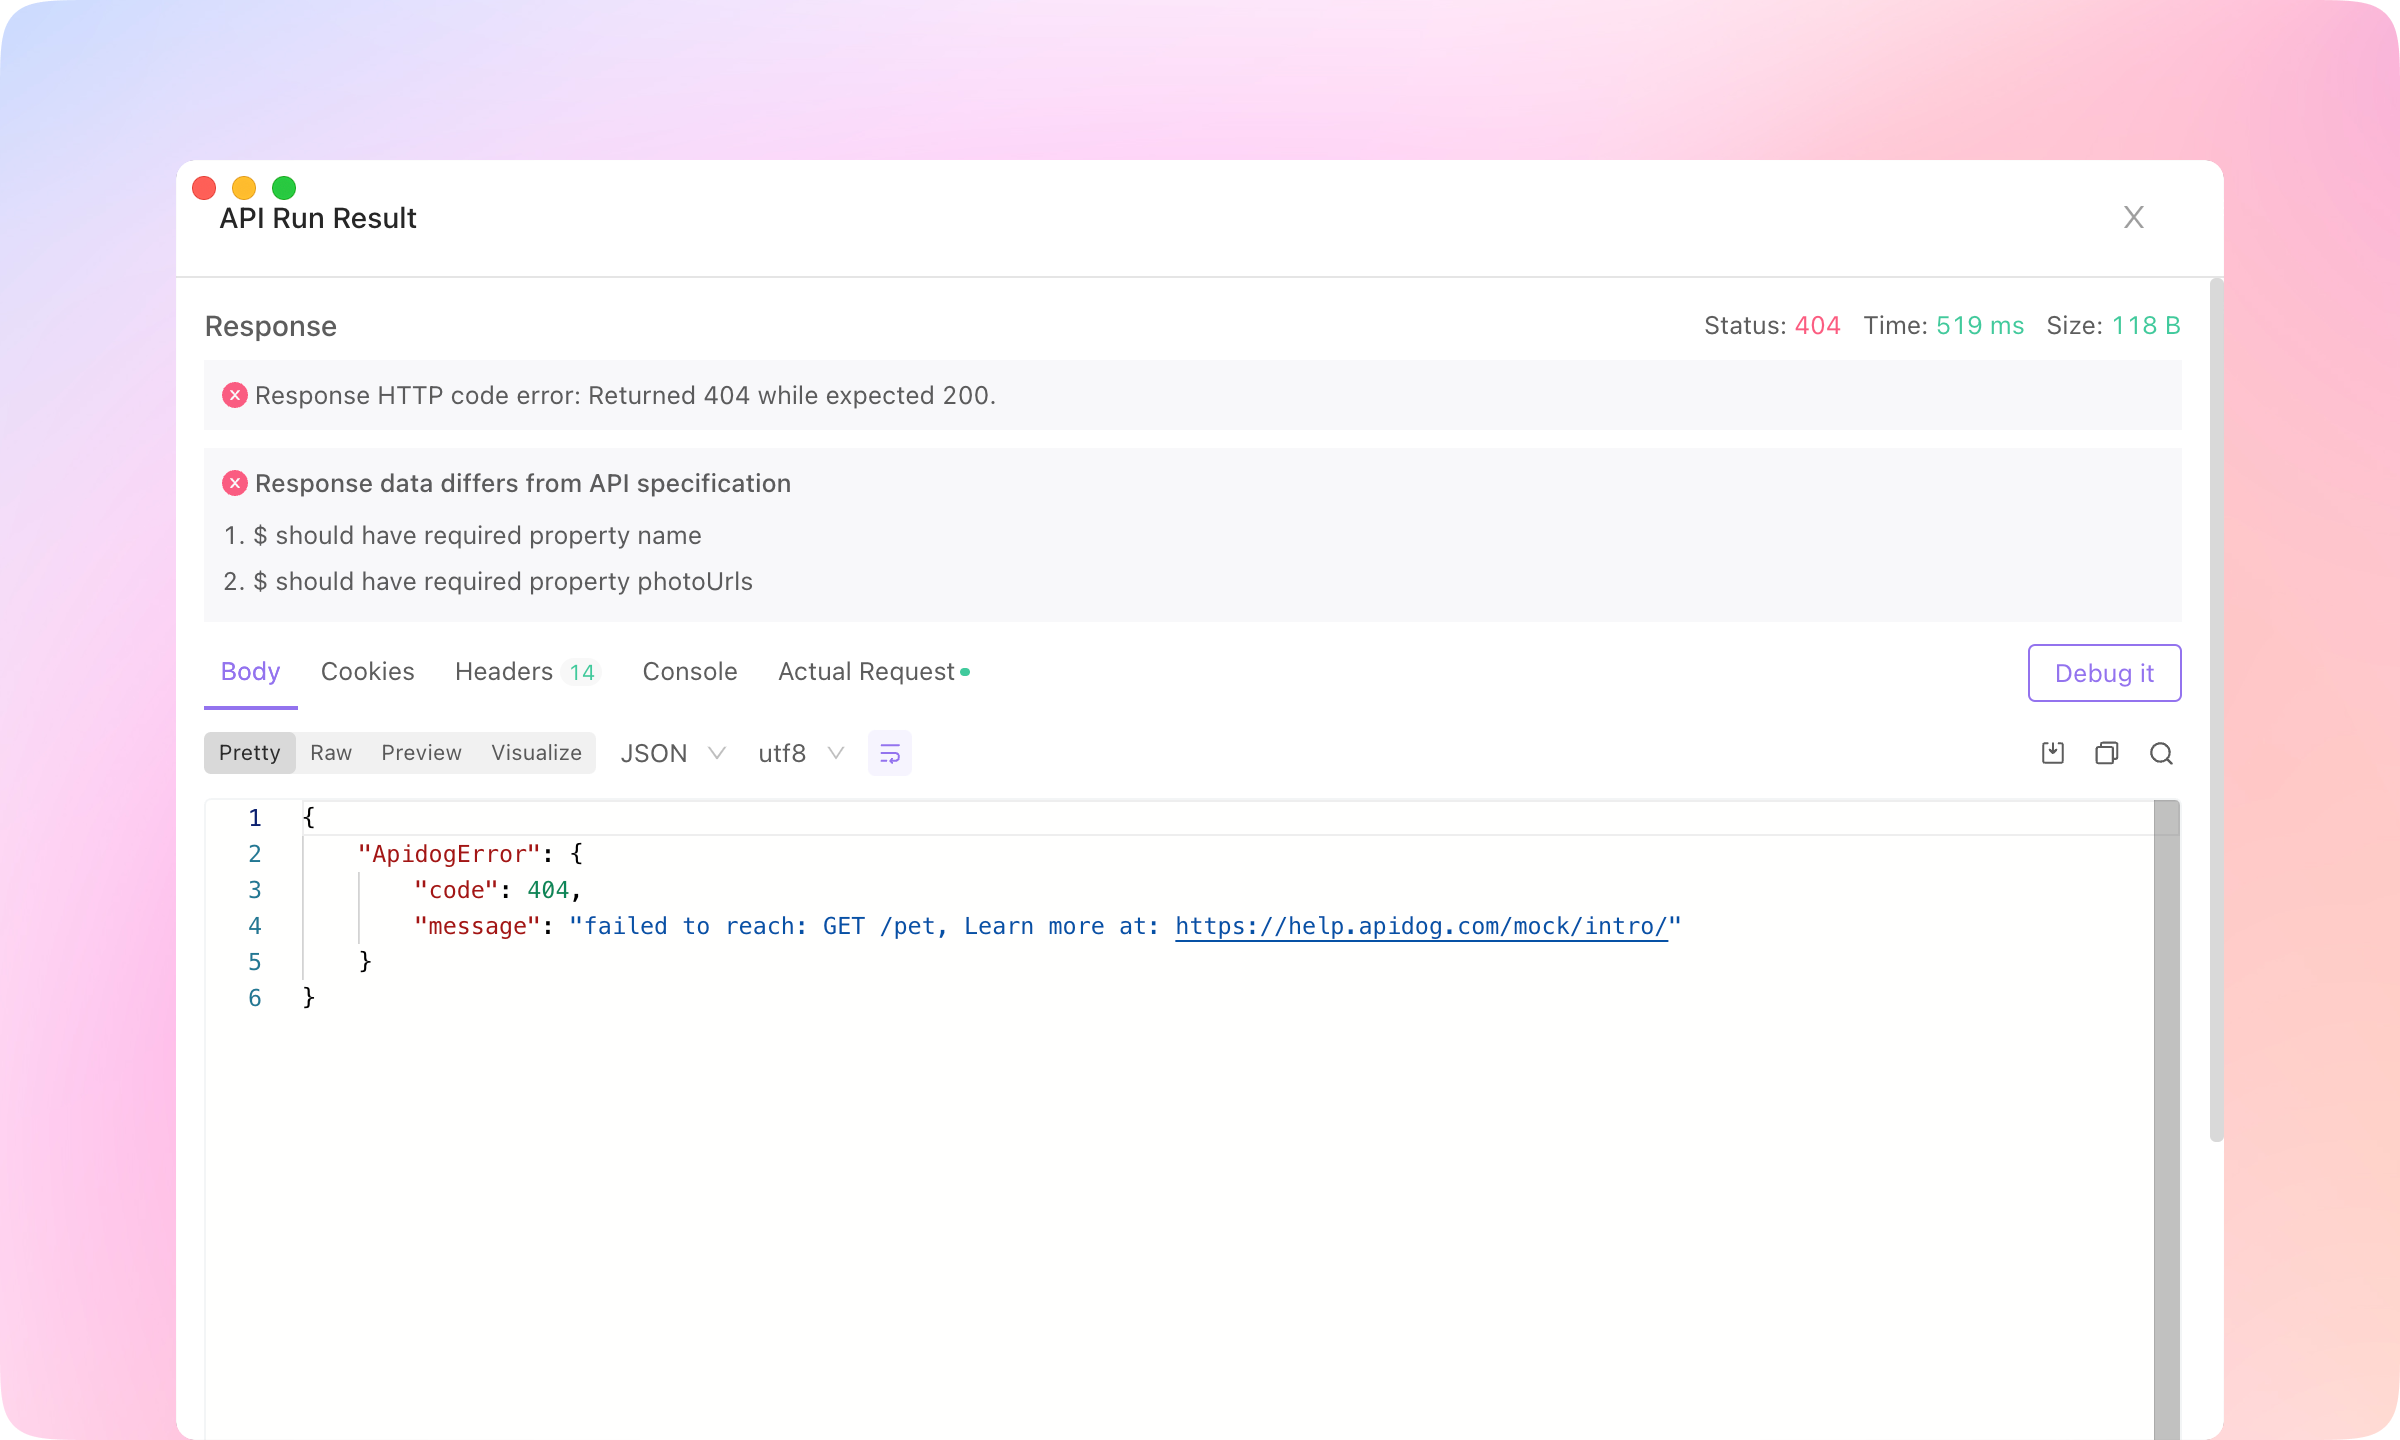
Click Run to execute the test case. Then you'll see a test report, and the details of each request.
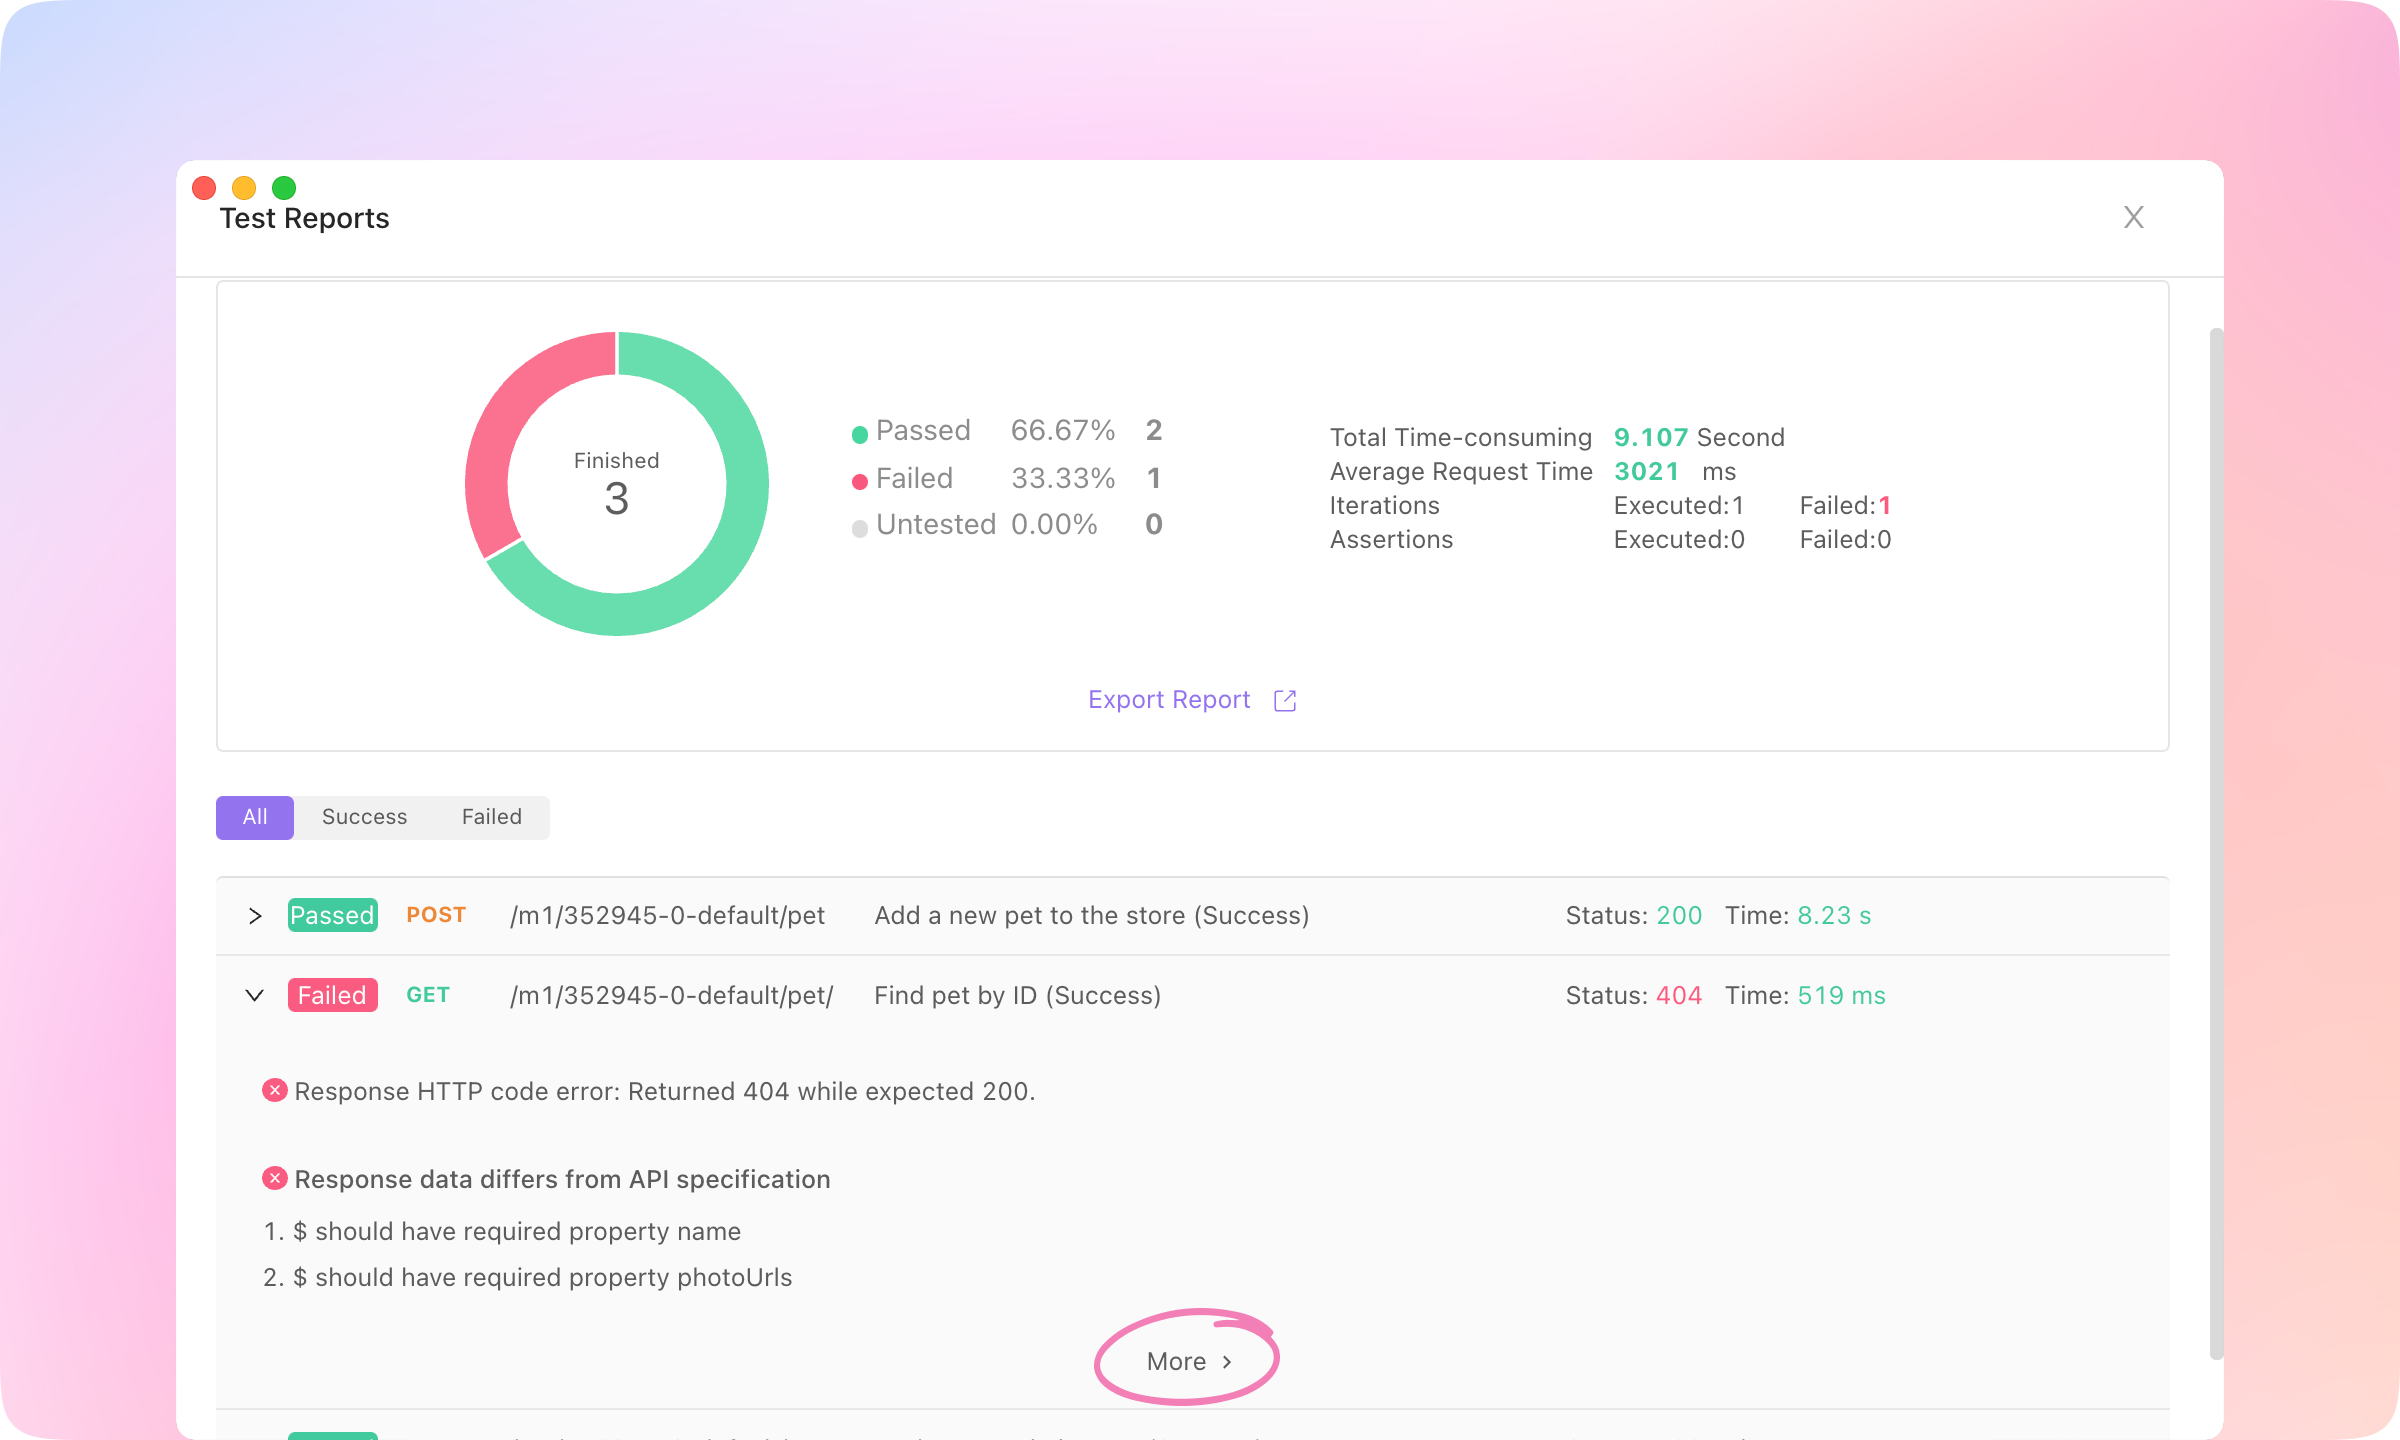
5.
Click More to see what went wrong with the failed API and compare the response with the assertions to locate the problem.
Learn more about Test Cases here. Data-Driven Testing#
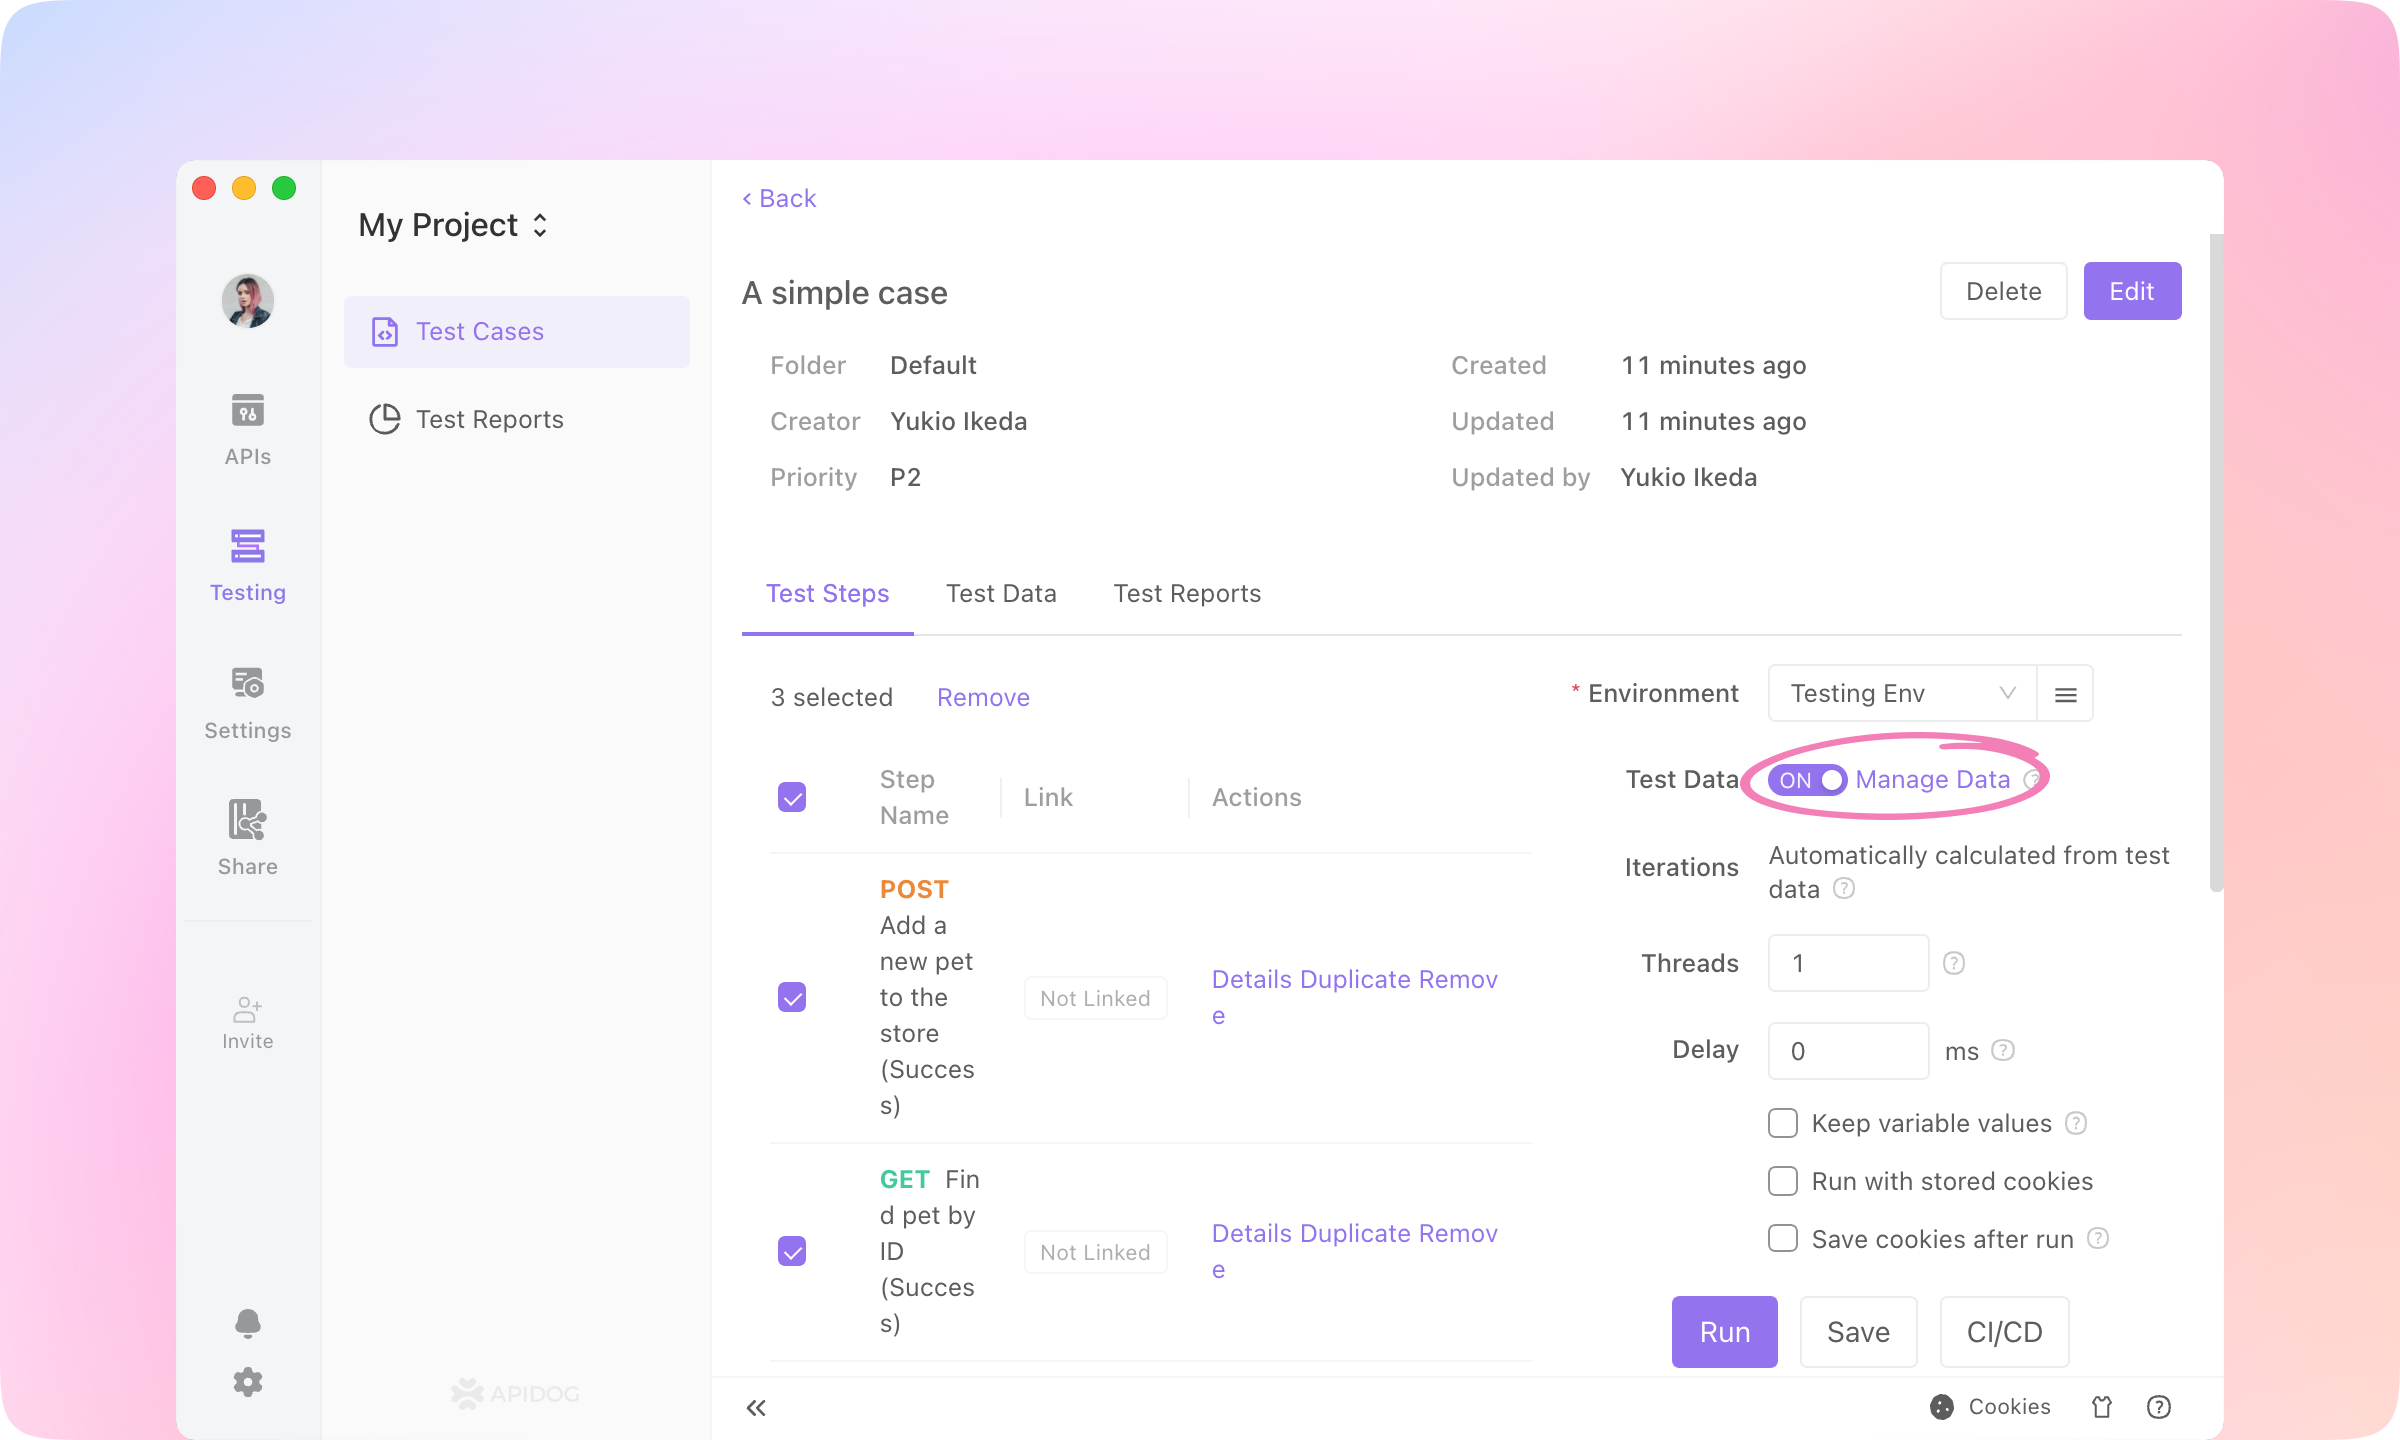
If variables are used in API cases, then the value of the variables can be set using a data table or by using the Dynamic Value feature to automatically generate variable values.1.
Turn on the Test Data switch, and click Manage Data.
2.
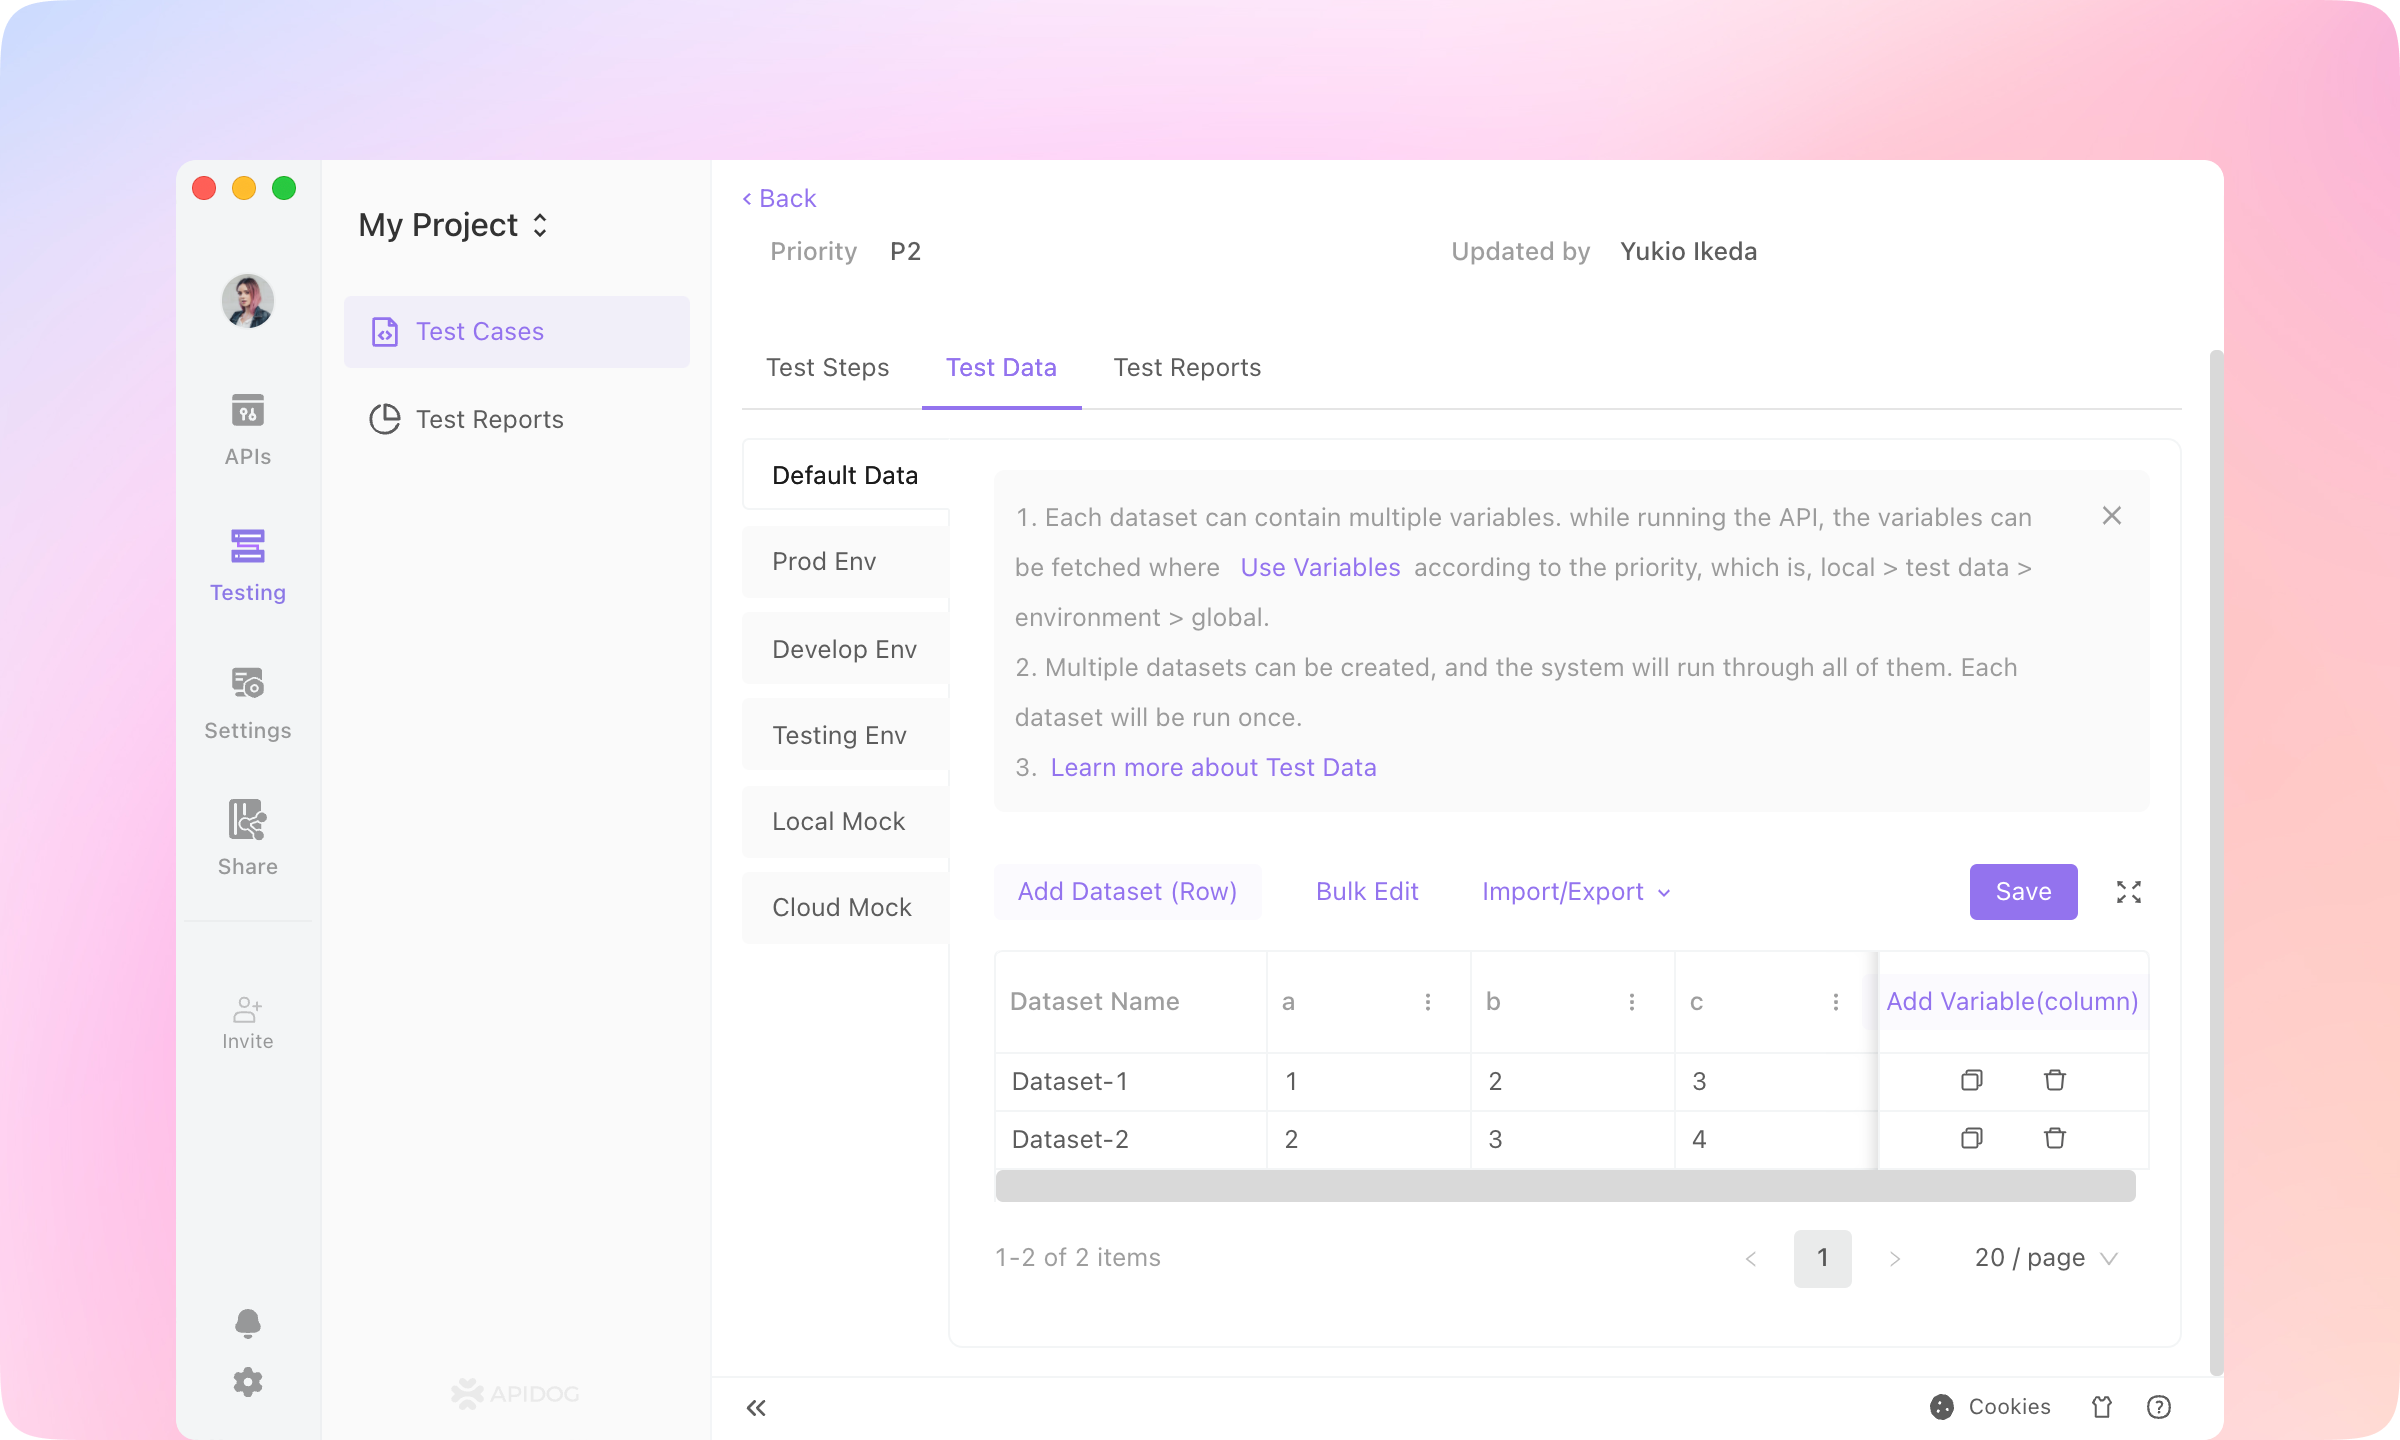
Add variables and datasets, then values of the variables. Importing from CSV or JSON is also supported.
3.
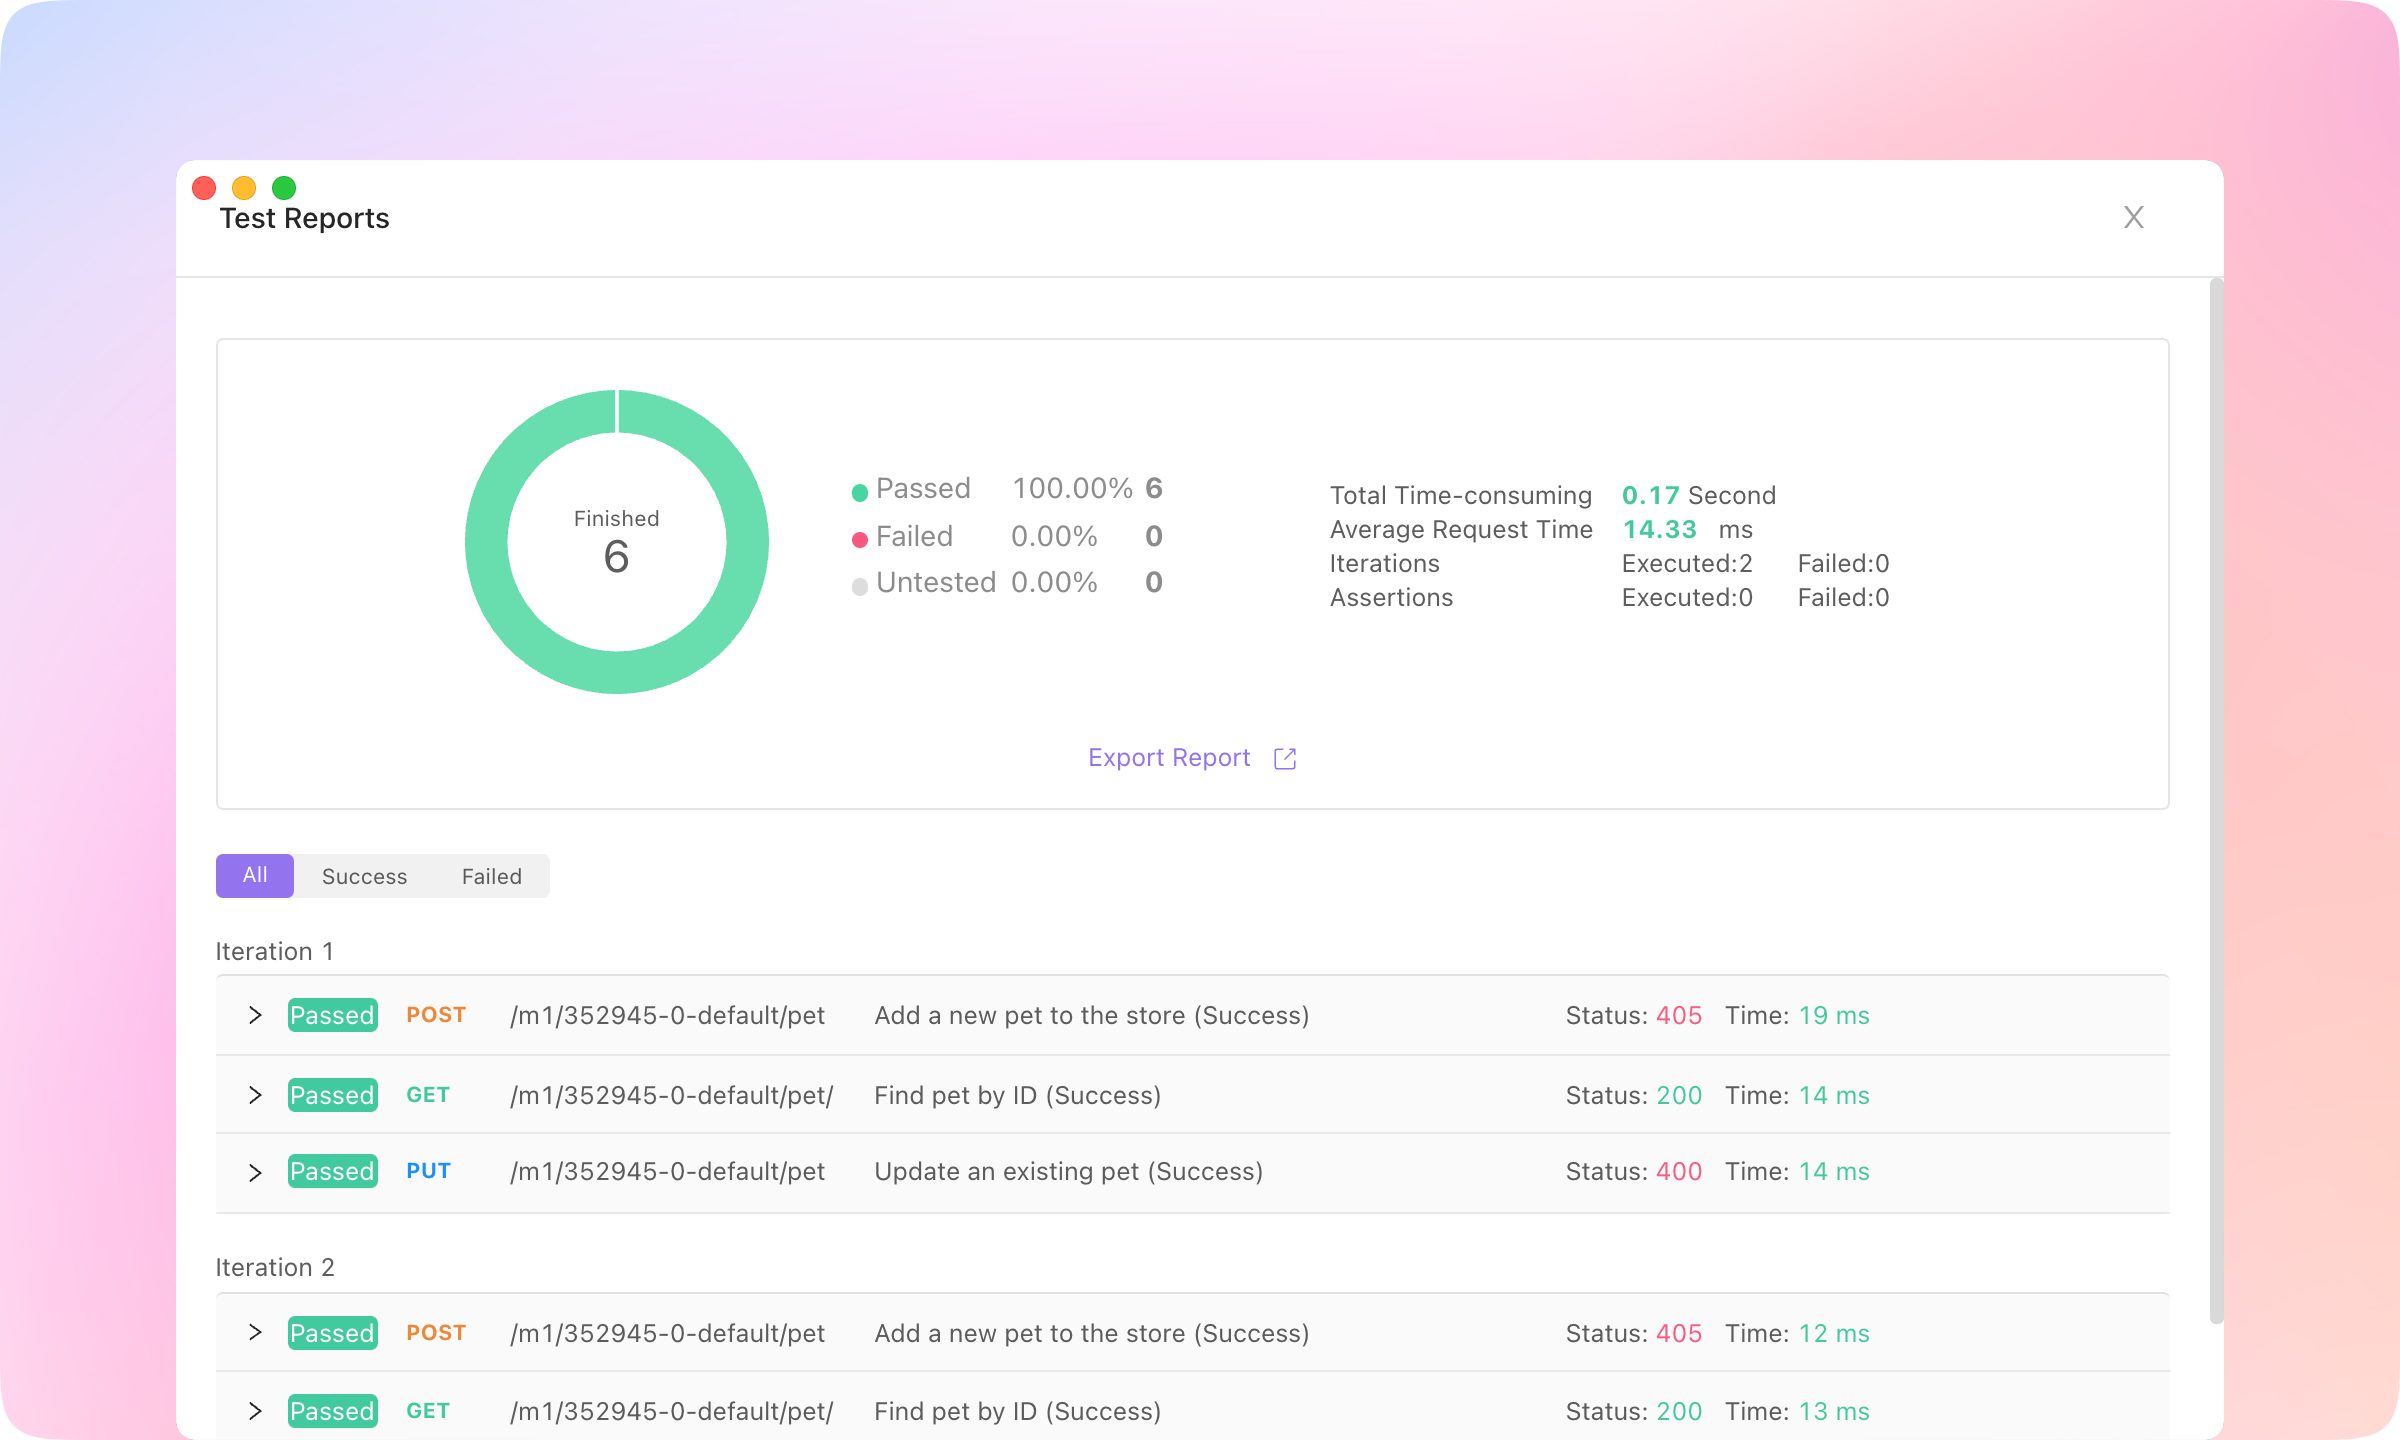
Save and Run, and the values of the variables will be used in the iterations of the test case.
Learn more about Test Data here. Dynamic Values#
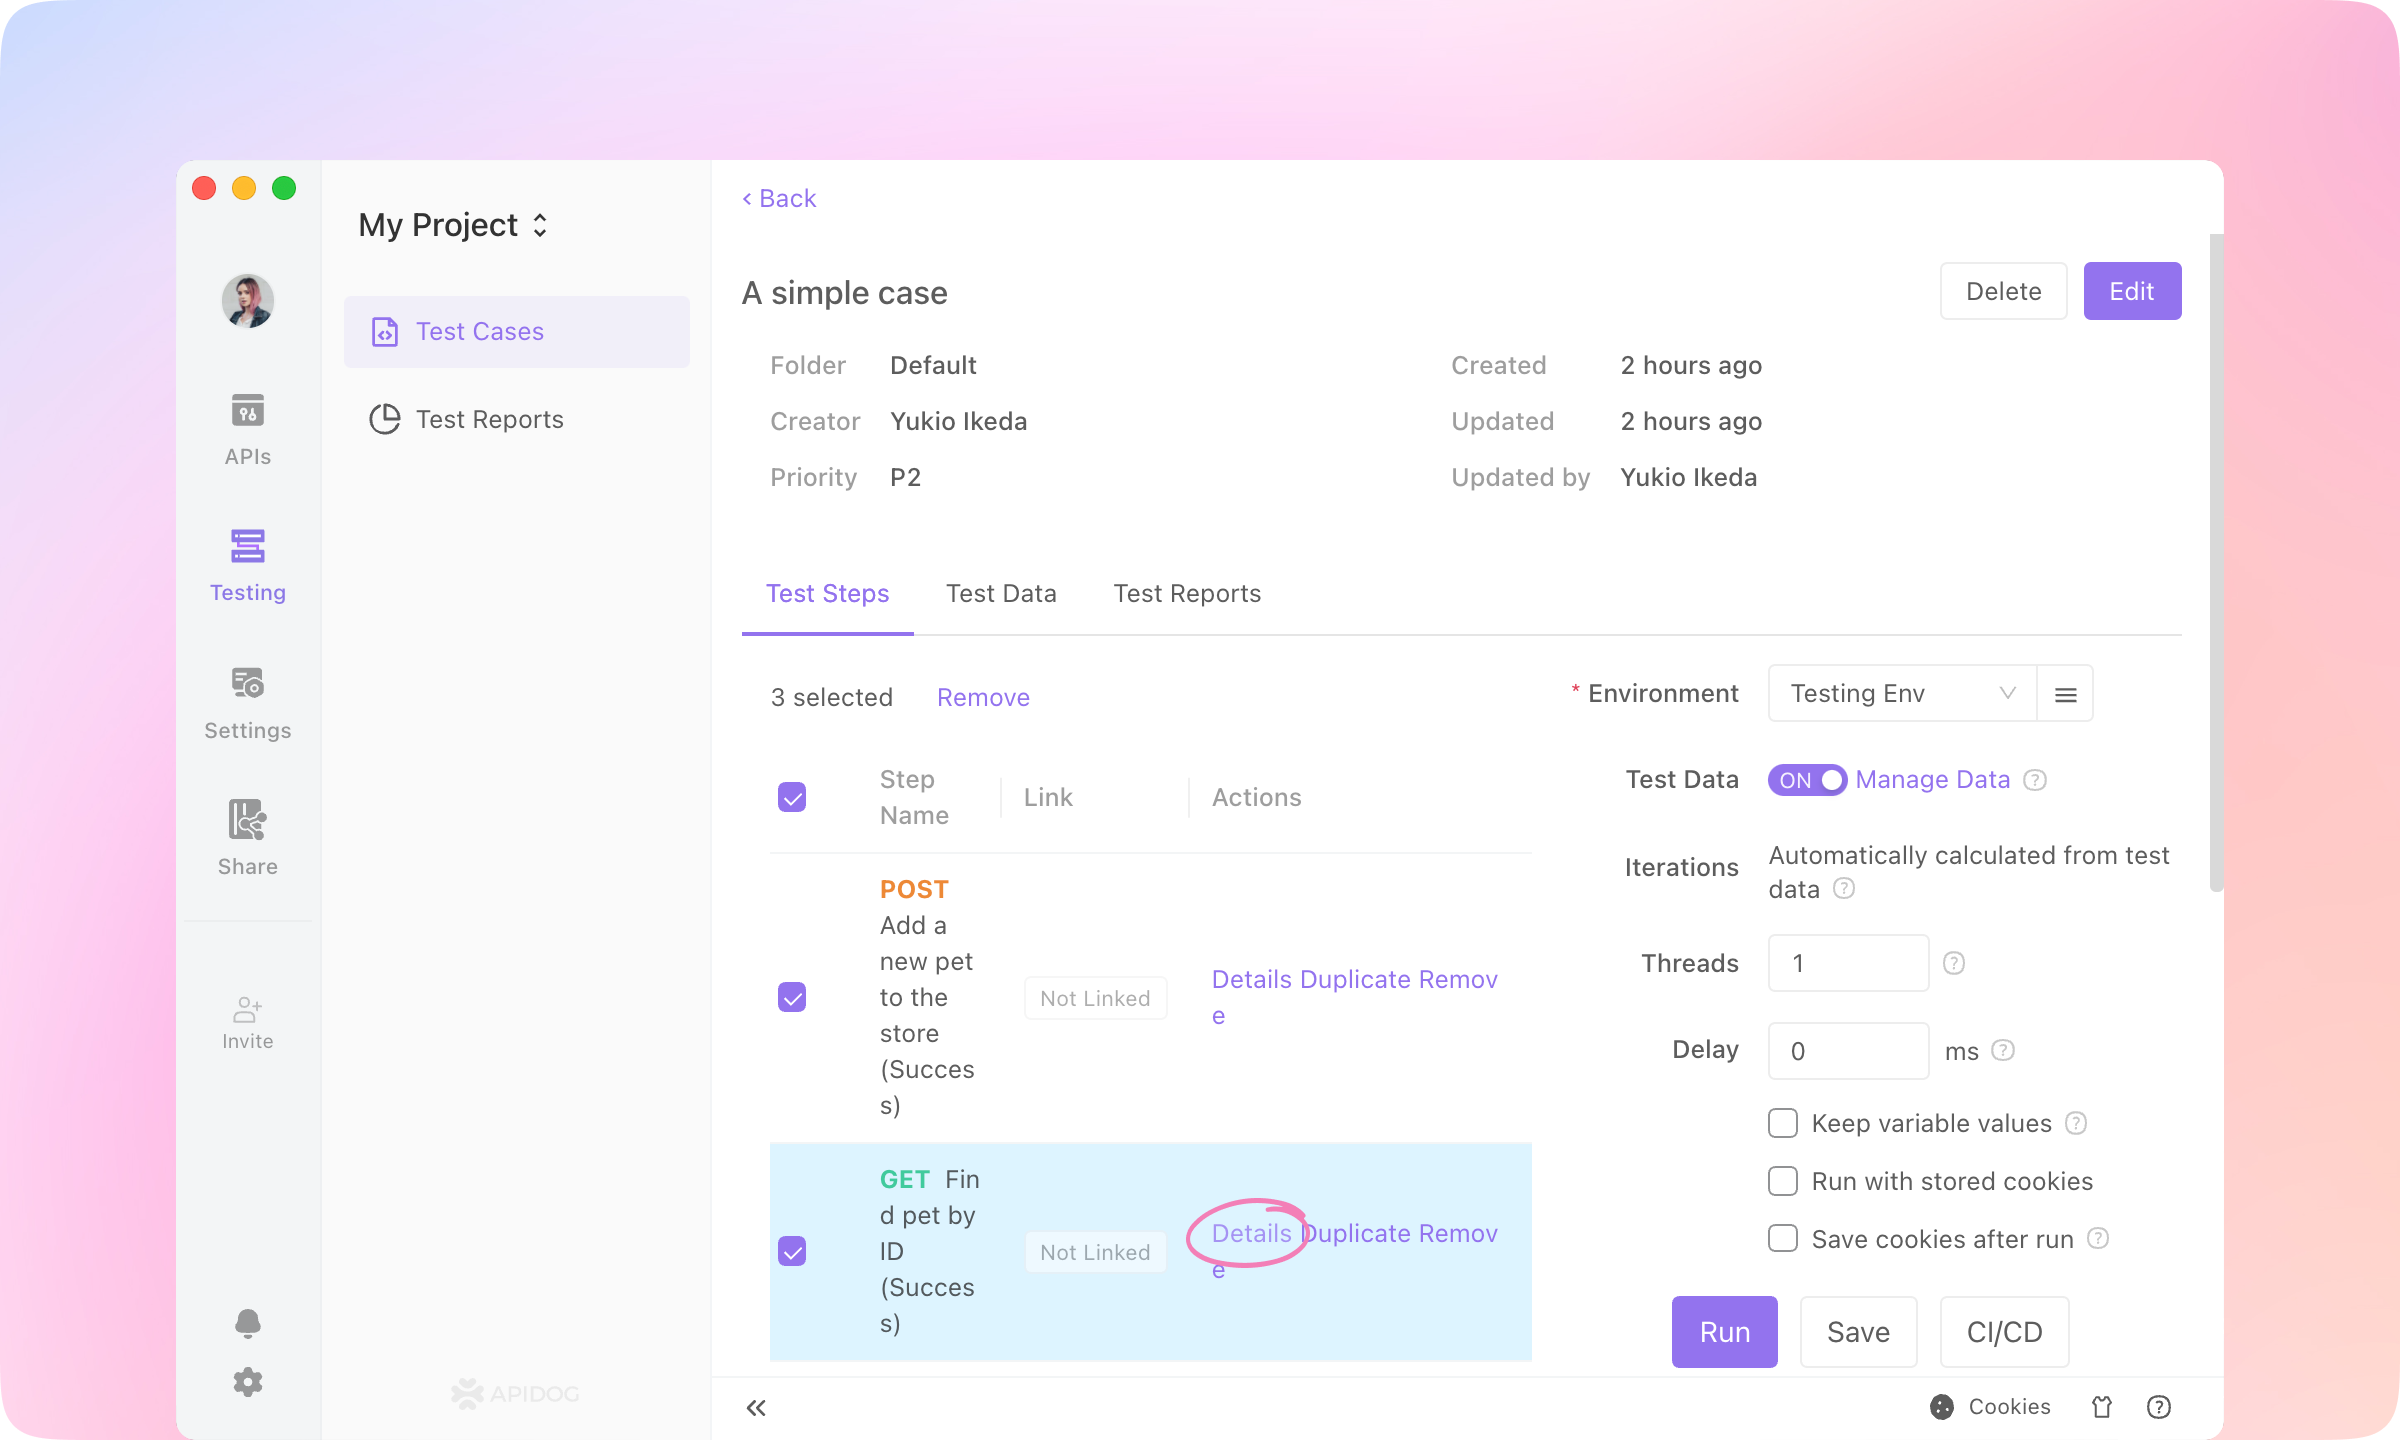
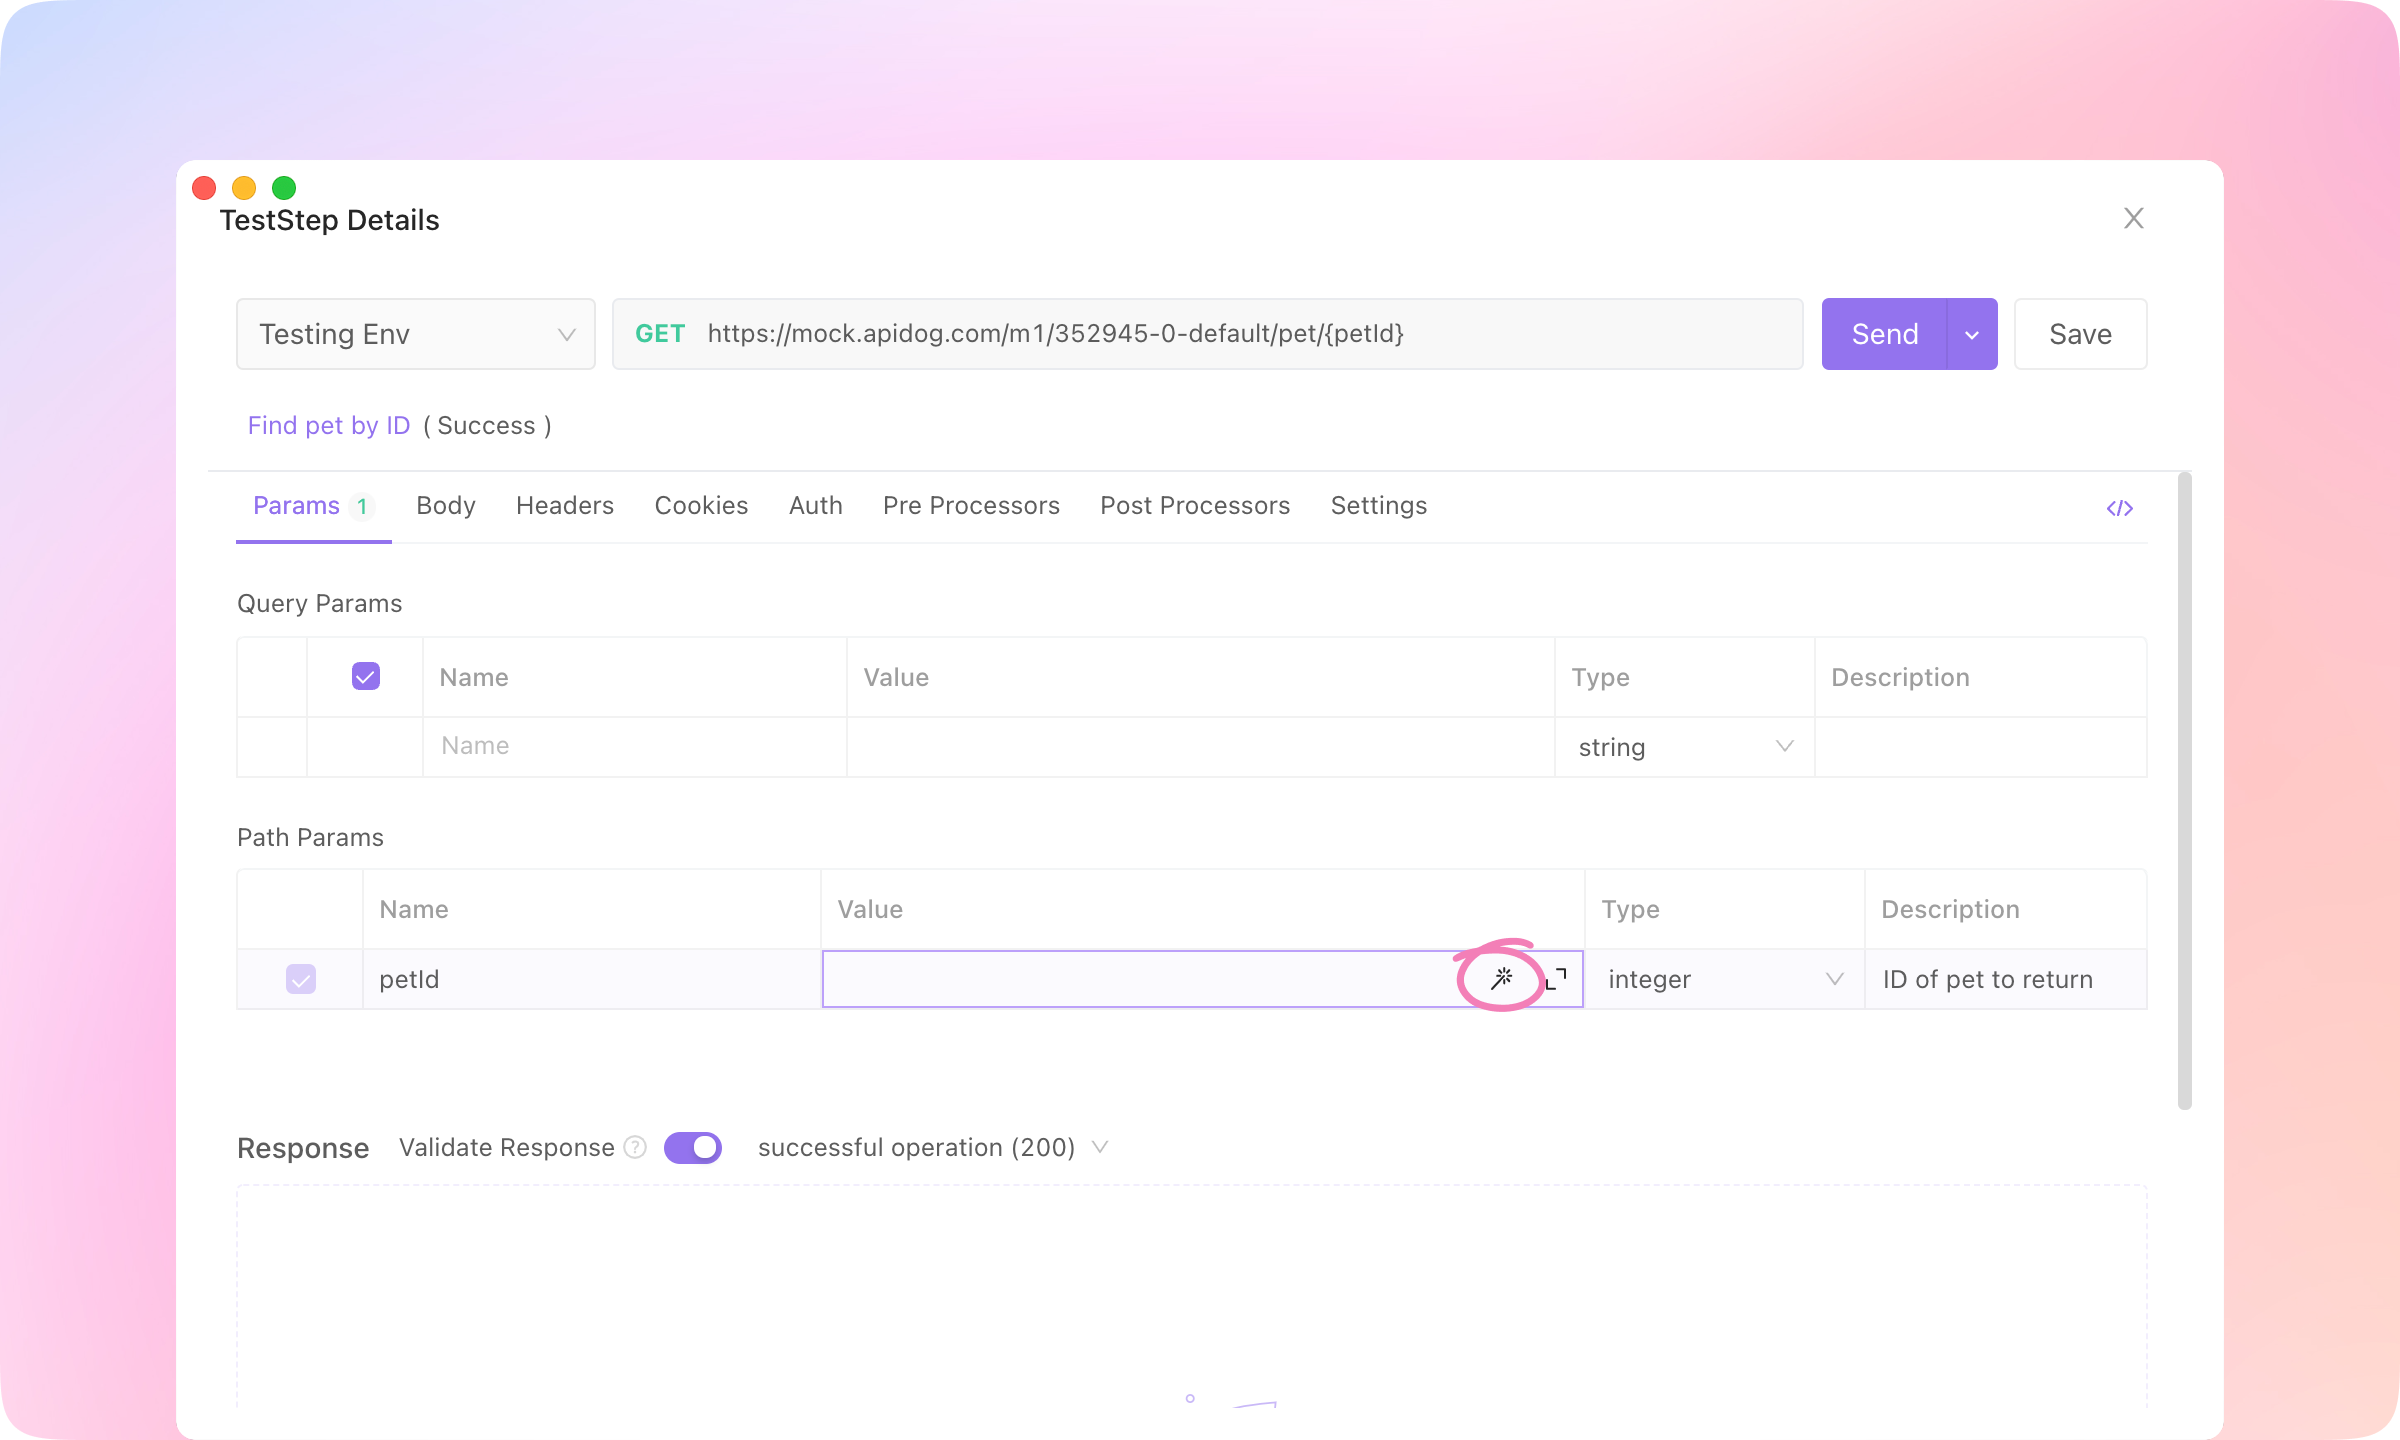
If you need a dynamic change in parameter values for an API, you can use the "dynamic variable" feature.1.
Click Detail of the API case, and click the 🪄(magic wand) button to open the Dynamic Value dialogue.
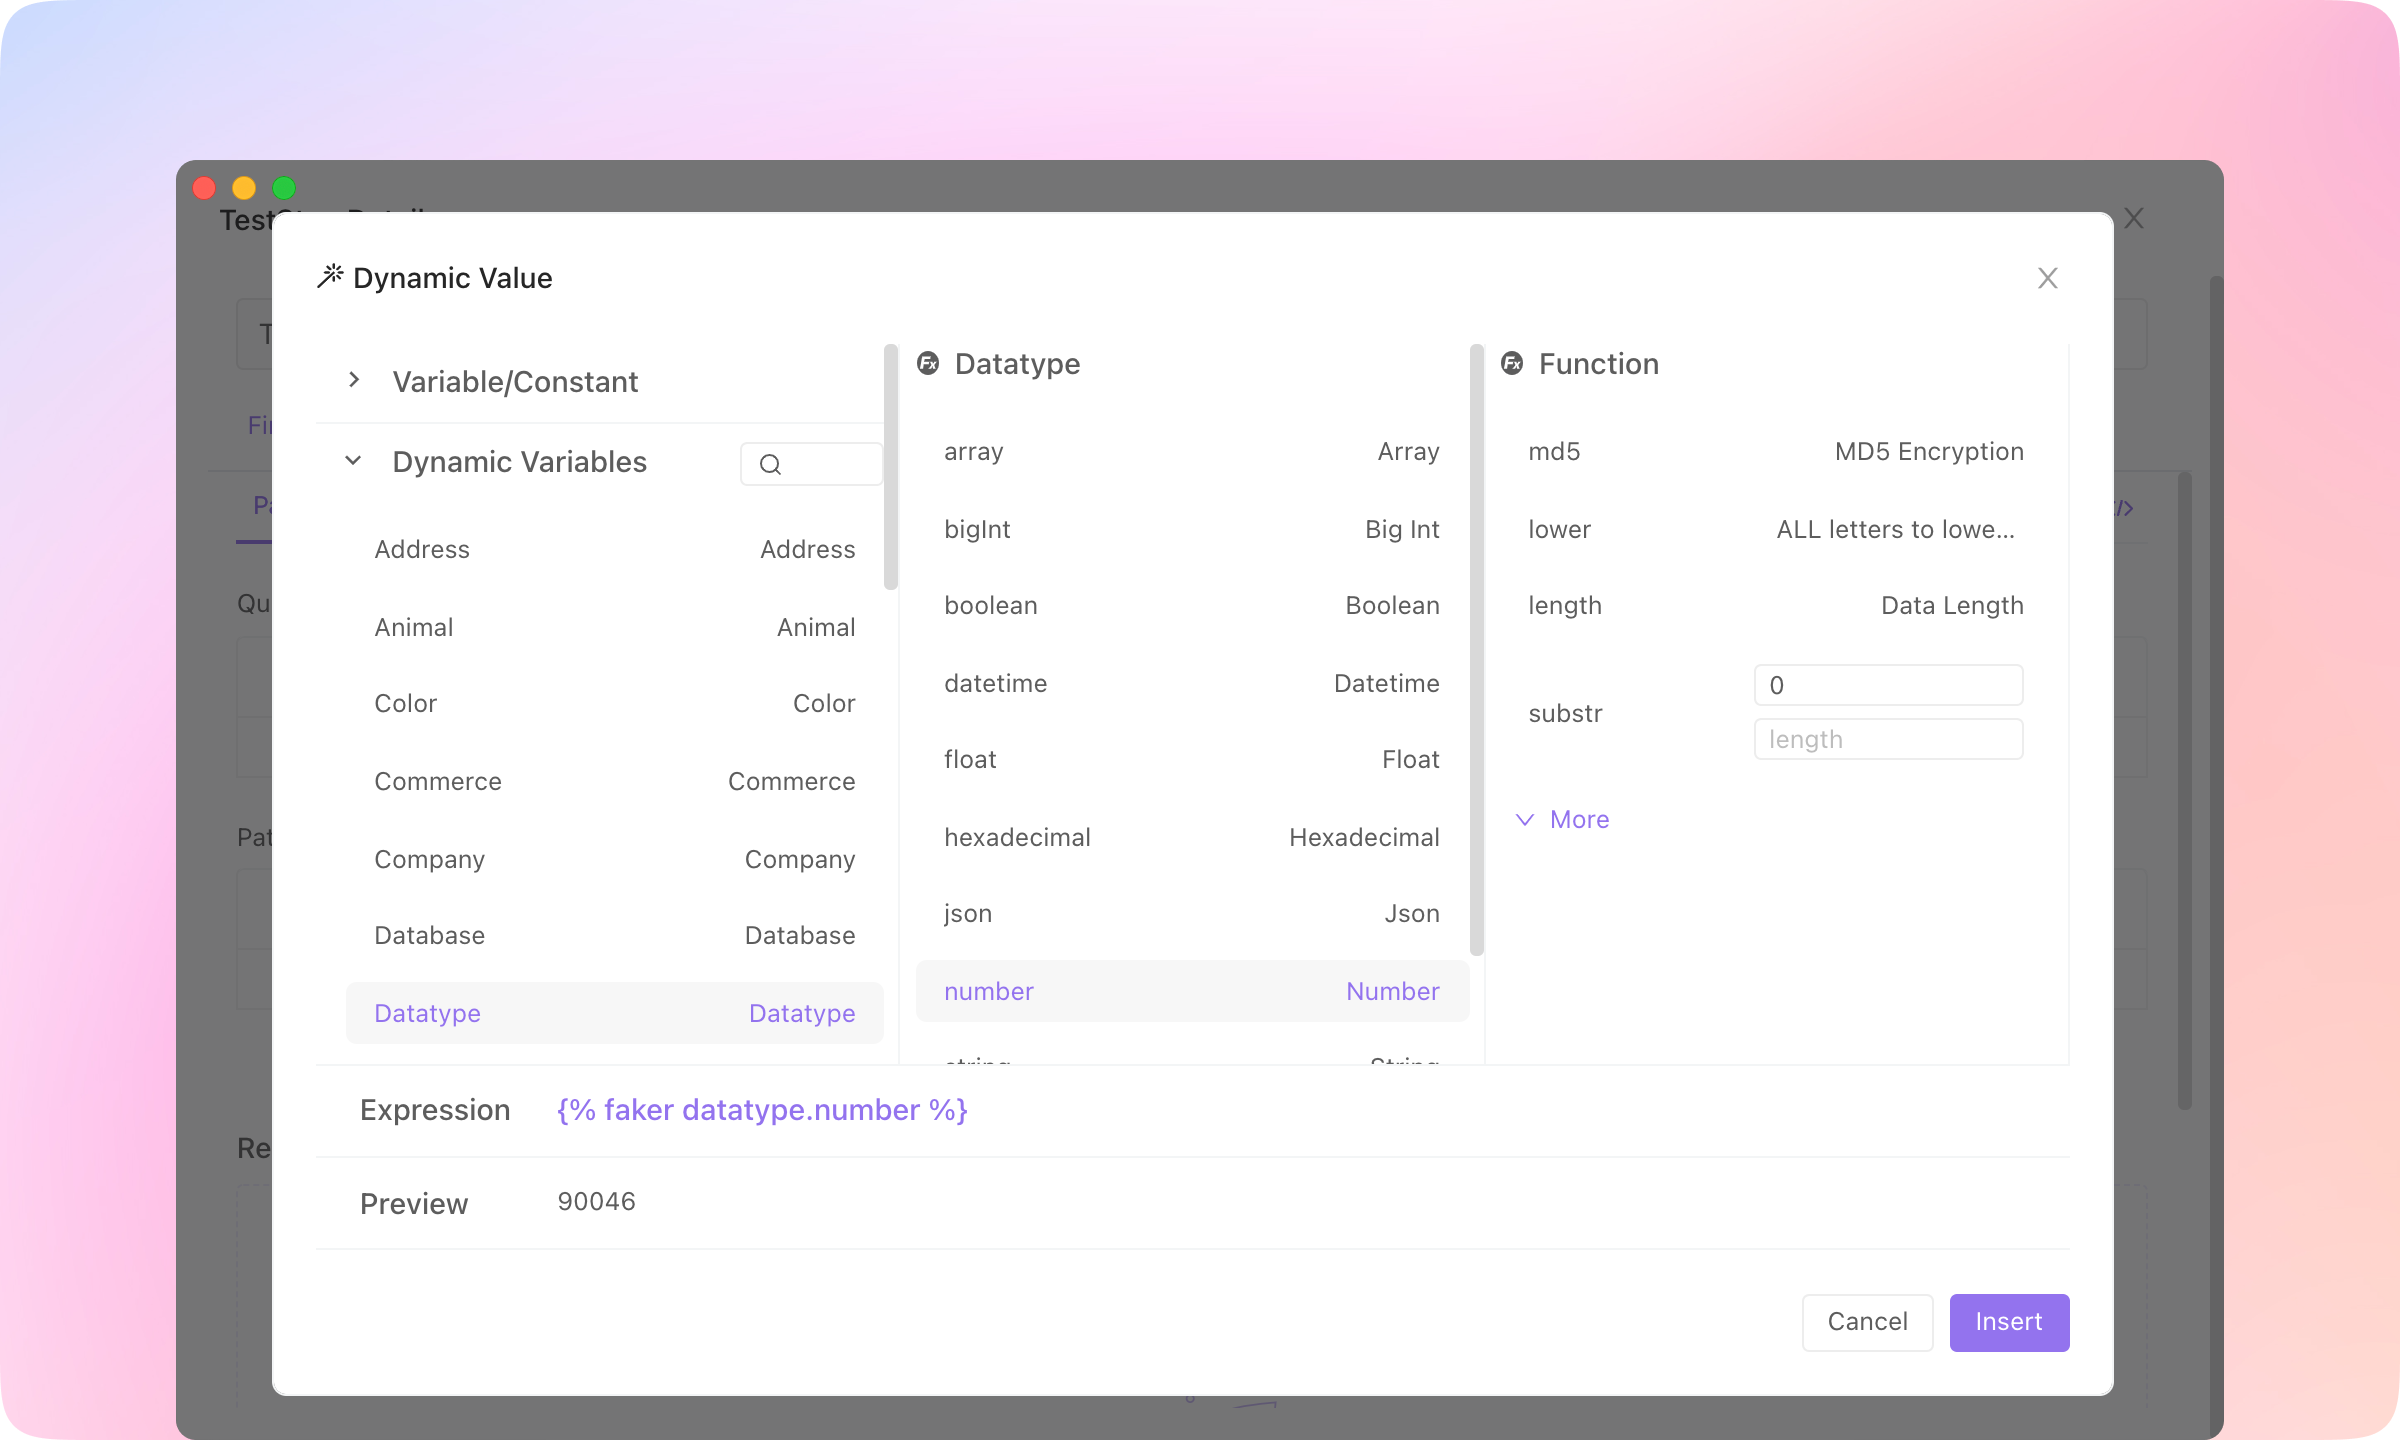
2.
Select Datatype - number, and you'll see a preview of the dynamic value. Click Insert to apply the dynamic value.
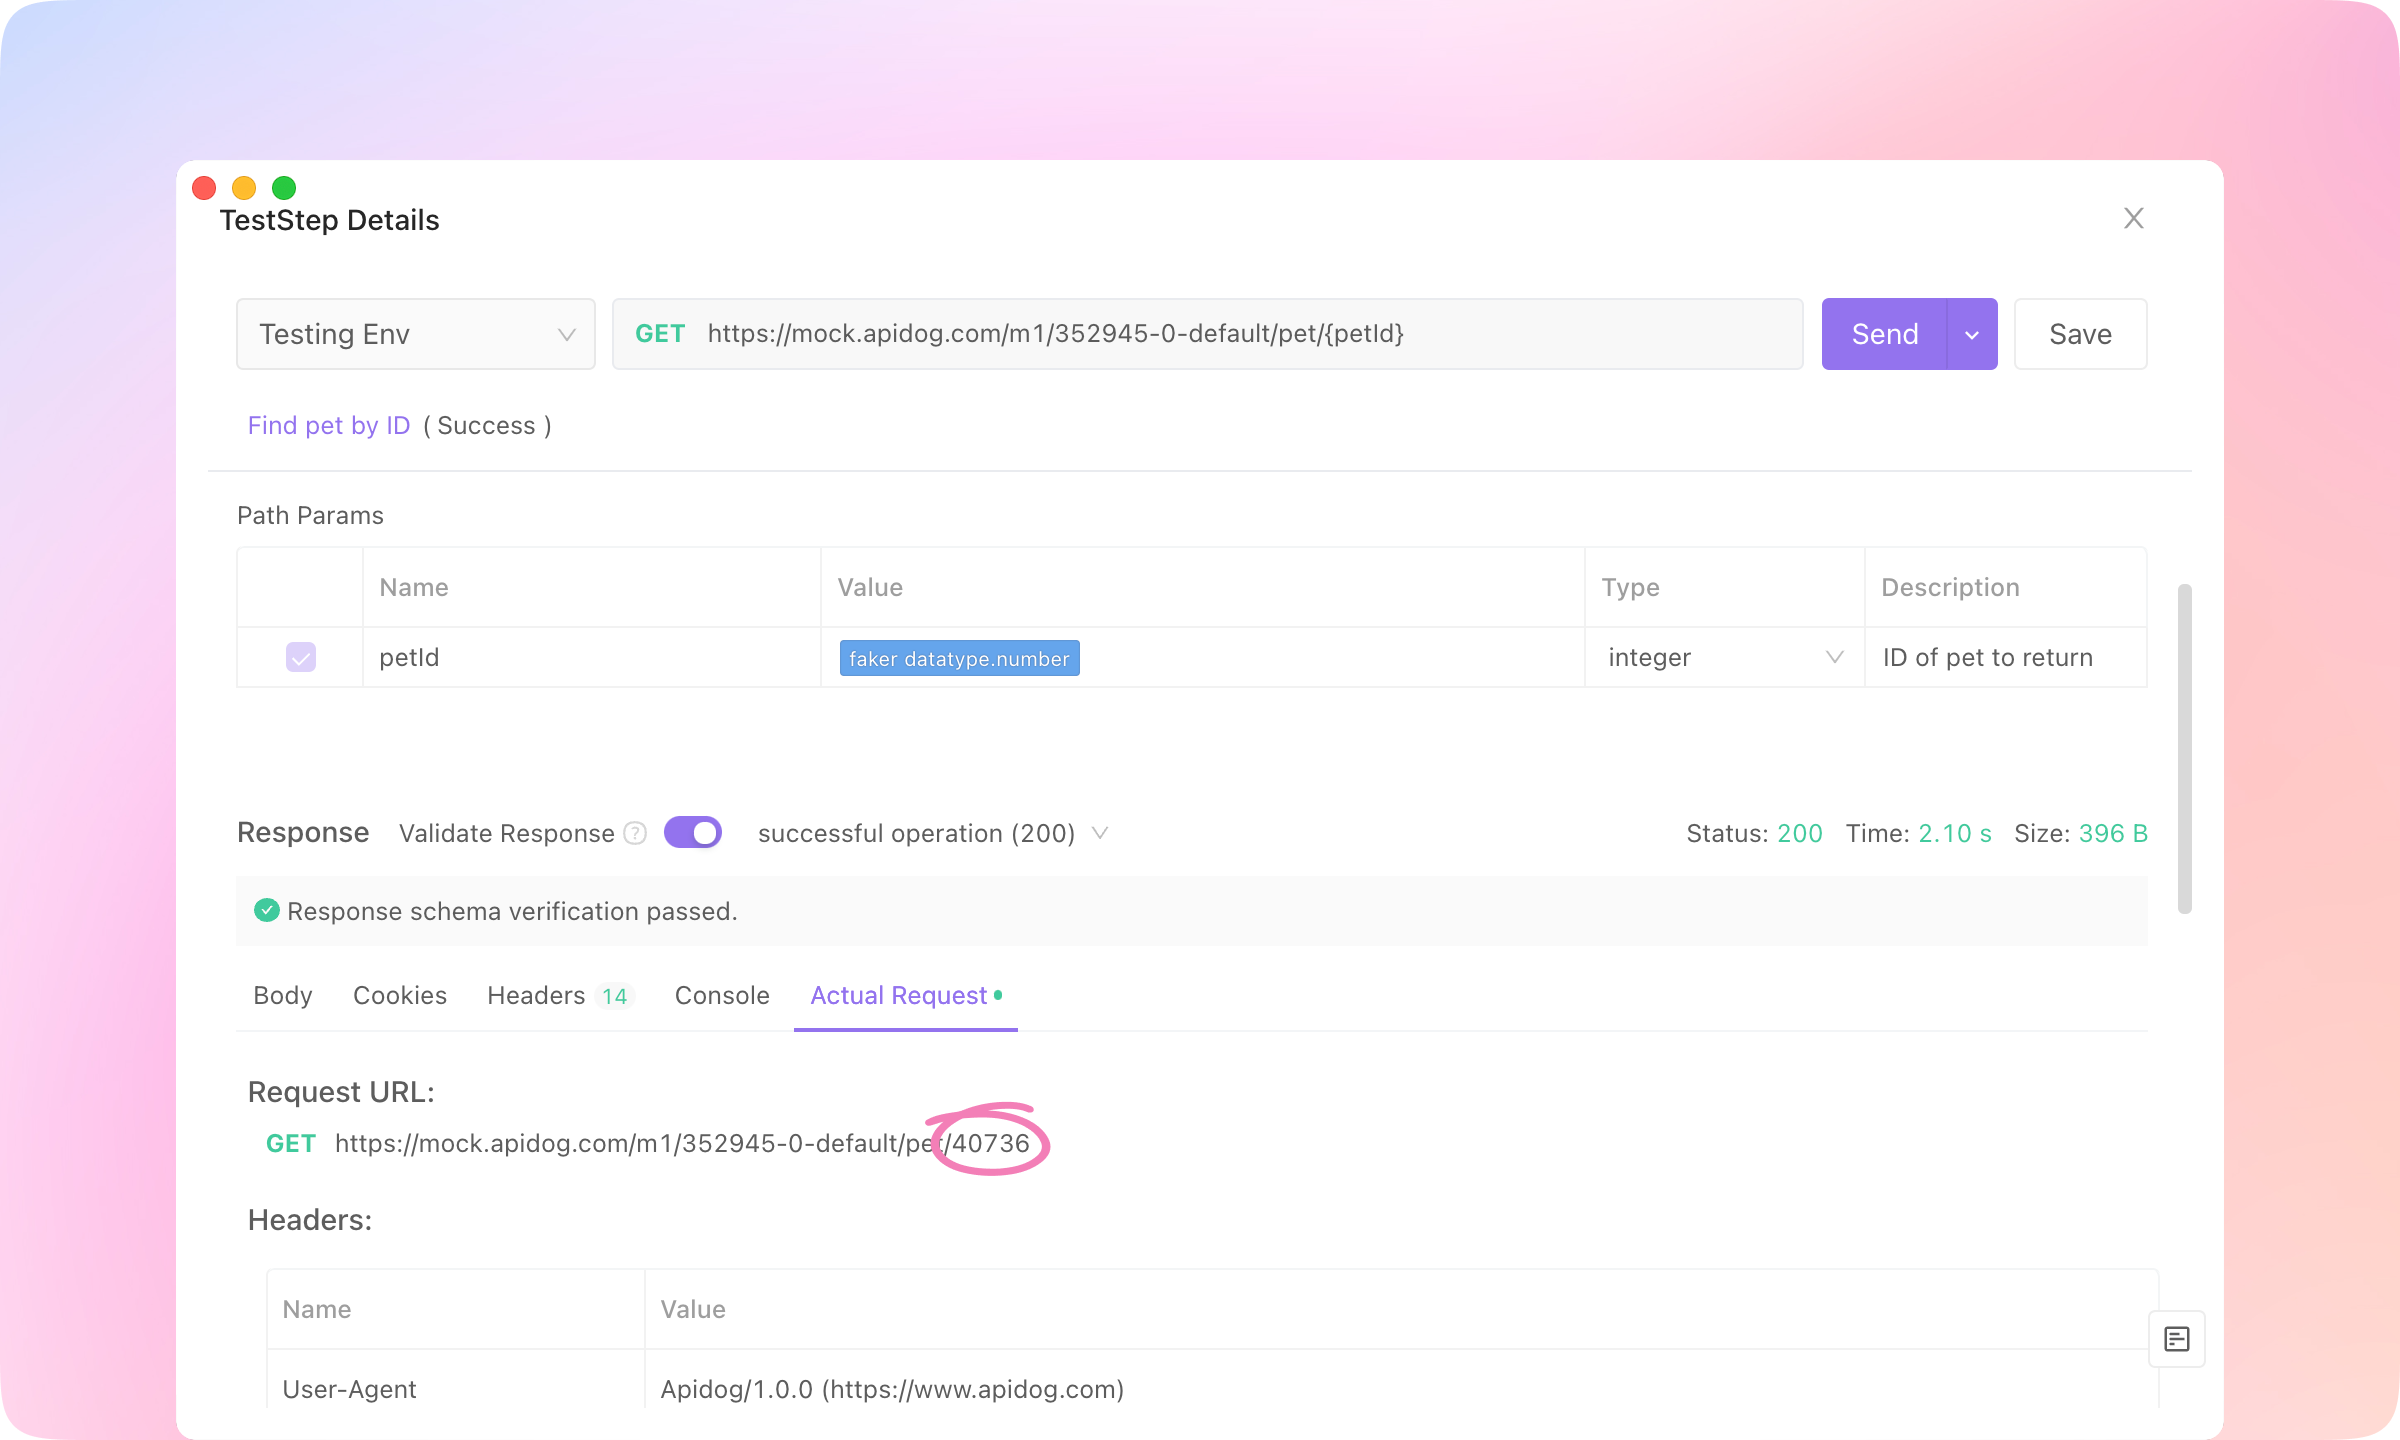
3.
Dynamic values will take effect in the actual sent request. You can see the actual values sent in the Actual Request. Each time the request is sent, the dynamic value will generate a new value.
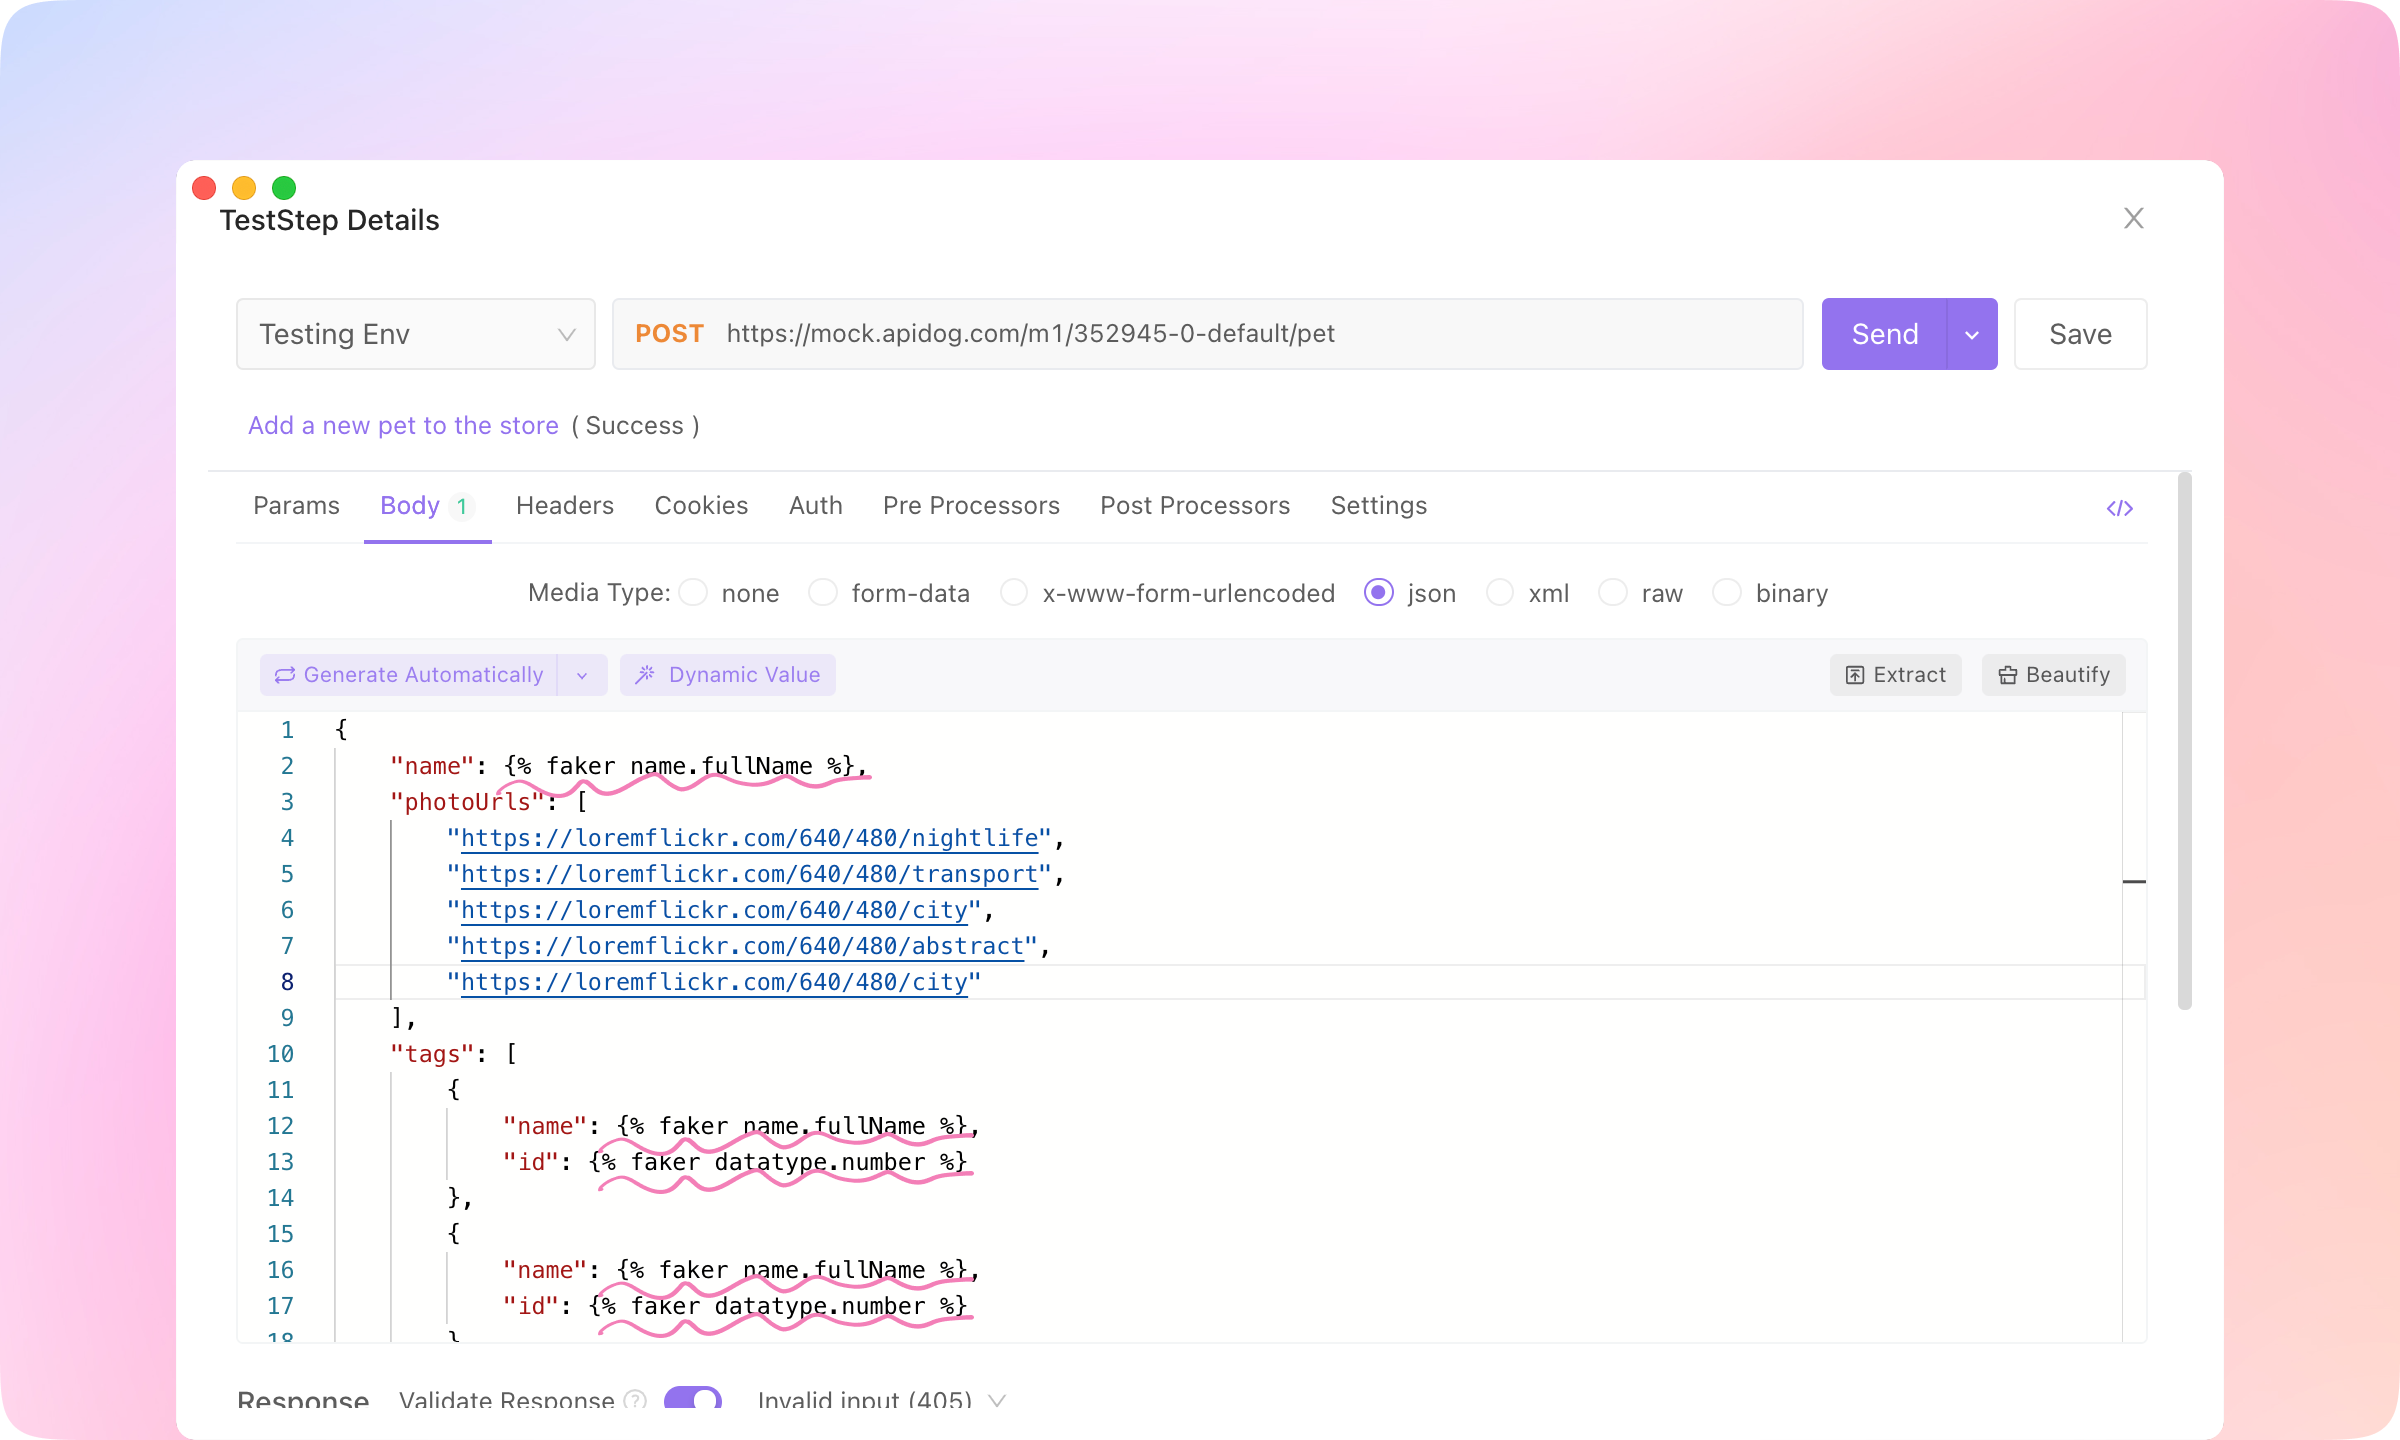
4.
Dynamic values can also be inserted into the request body in JSON or XML format and will also be processed as actual values when sent.
Learn more about Dynamic Value here. CI / CD#
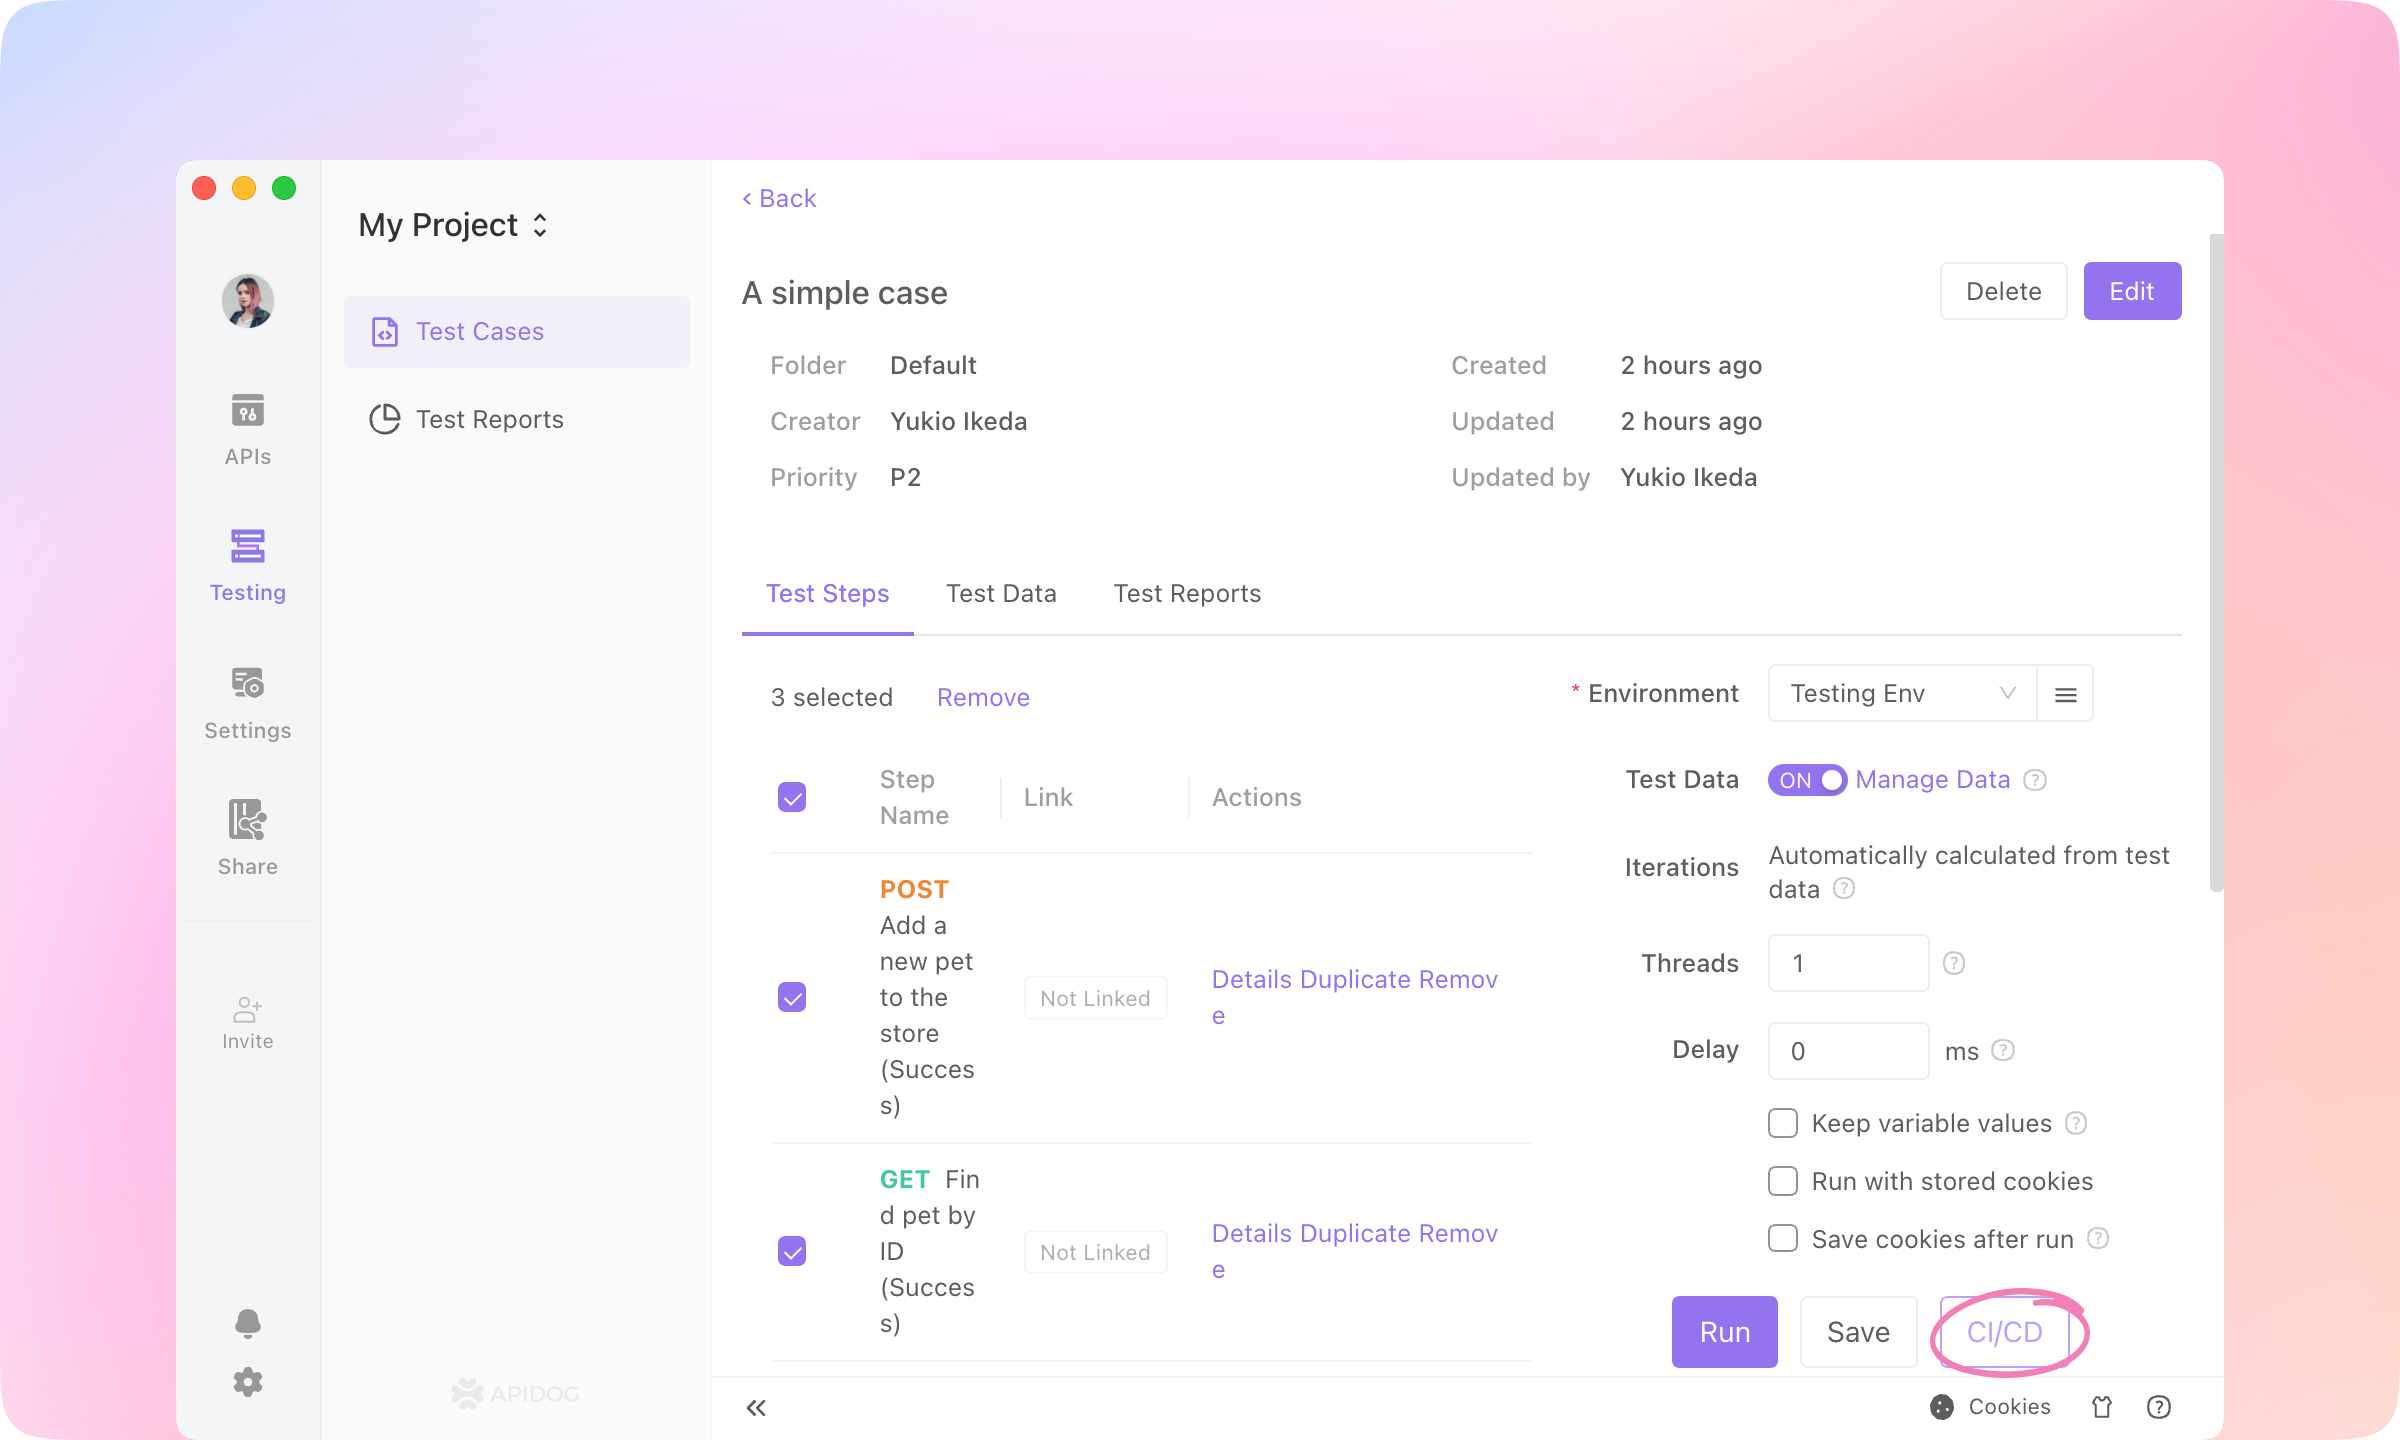
Apidog supports running via command line. After installing the Apidog CLI, you can use the command apidog run to get a command line test report. This command can also be used in Jenkins for implementing CI/CD.1.
Click CI/CD in a test case.
2.
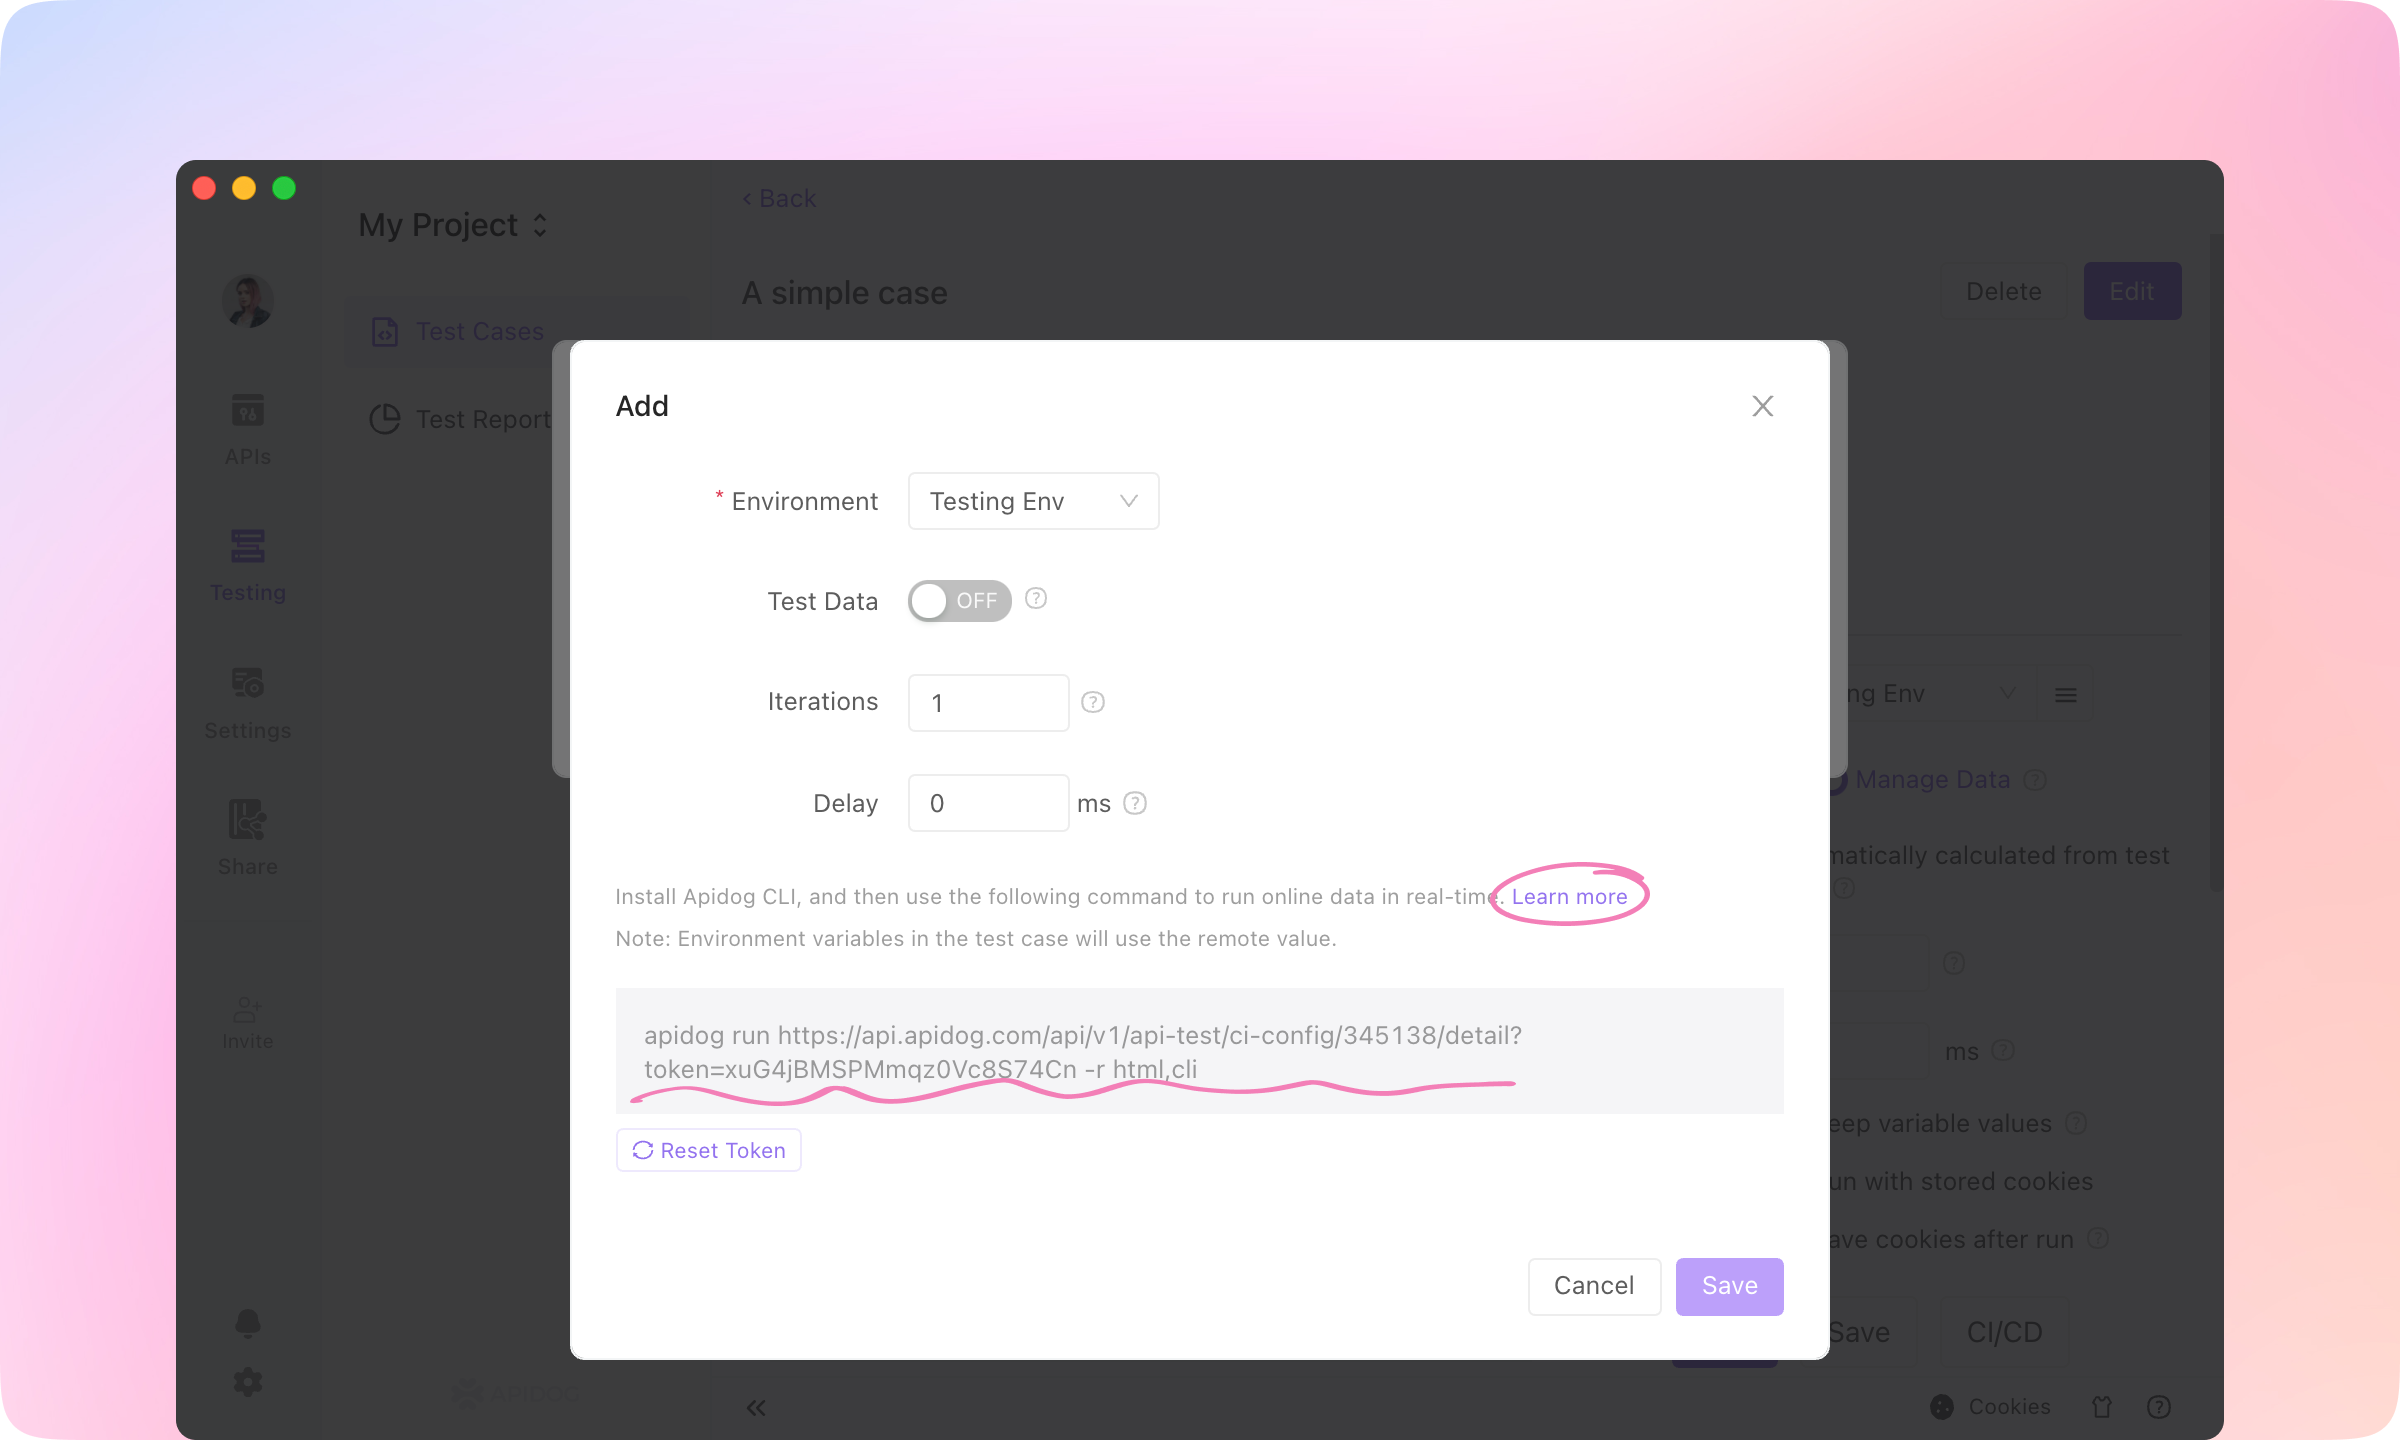
Set the test parameters and click save, and you will get a command line statement. Click Learn More to install Apidog CLI.
Learn more about CI / CD here. API Designers & API Consumers: API Documentations#
After the API is designed, developed, debugged, and tested, it becomes a product that can be called by other users. Apidog can generate beautiful API documentation, making it easy for the development team to publish the API outside of the team.1.
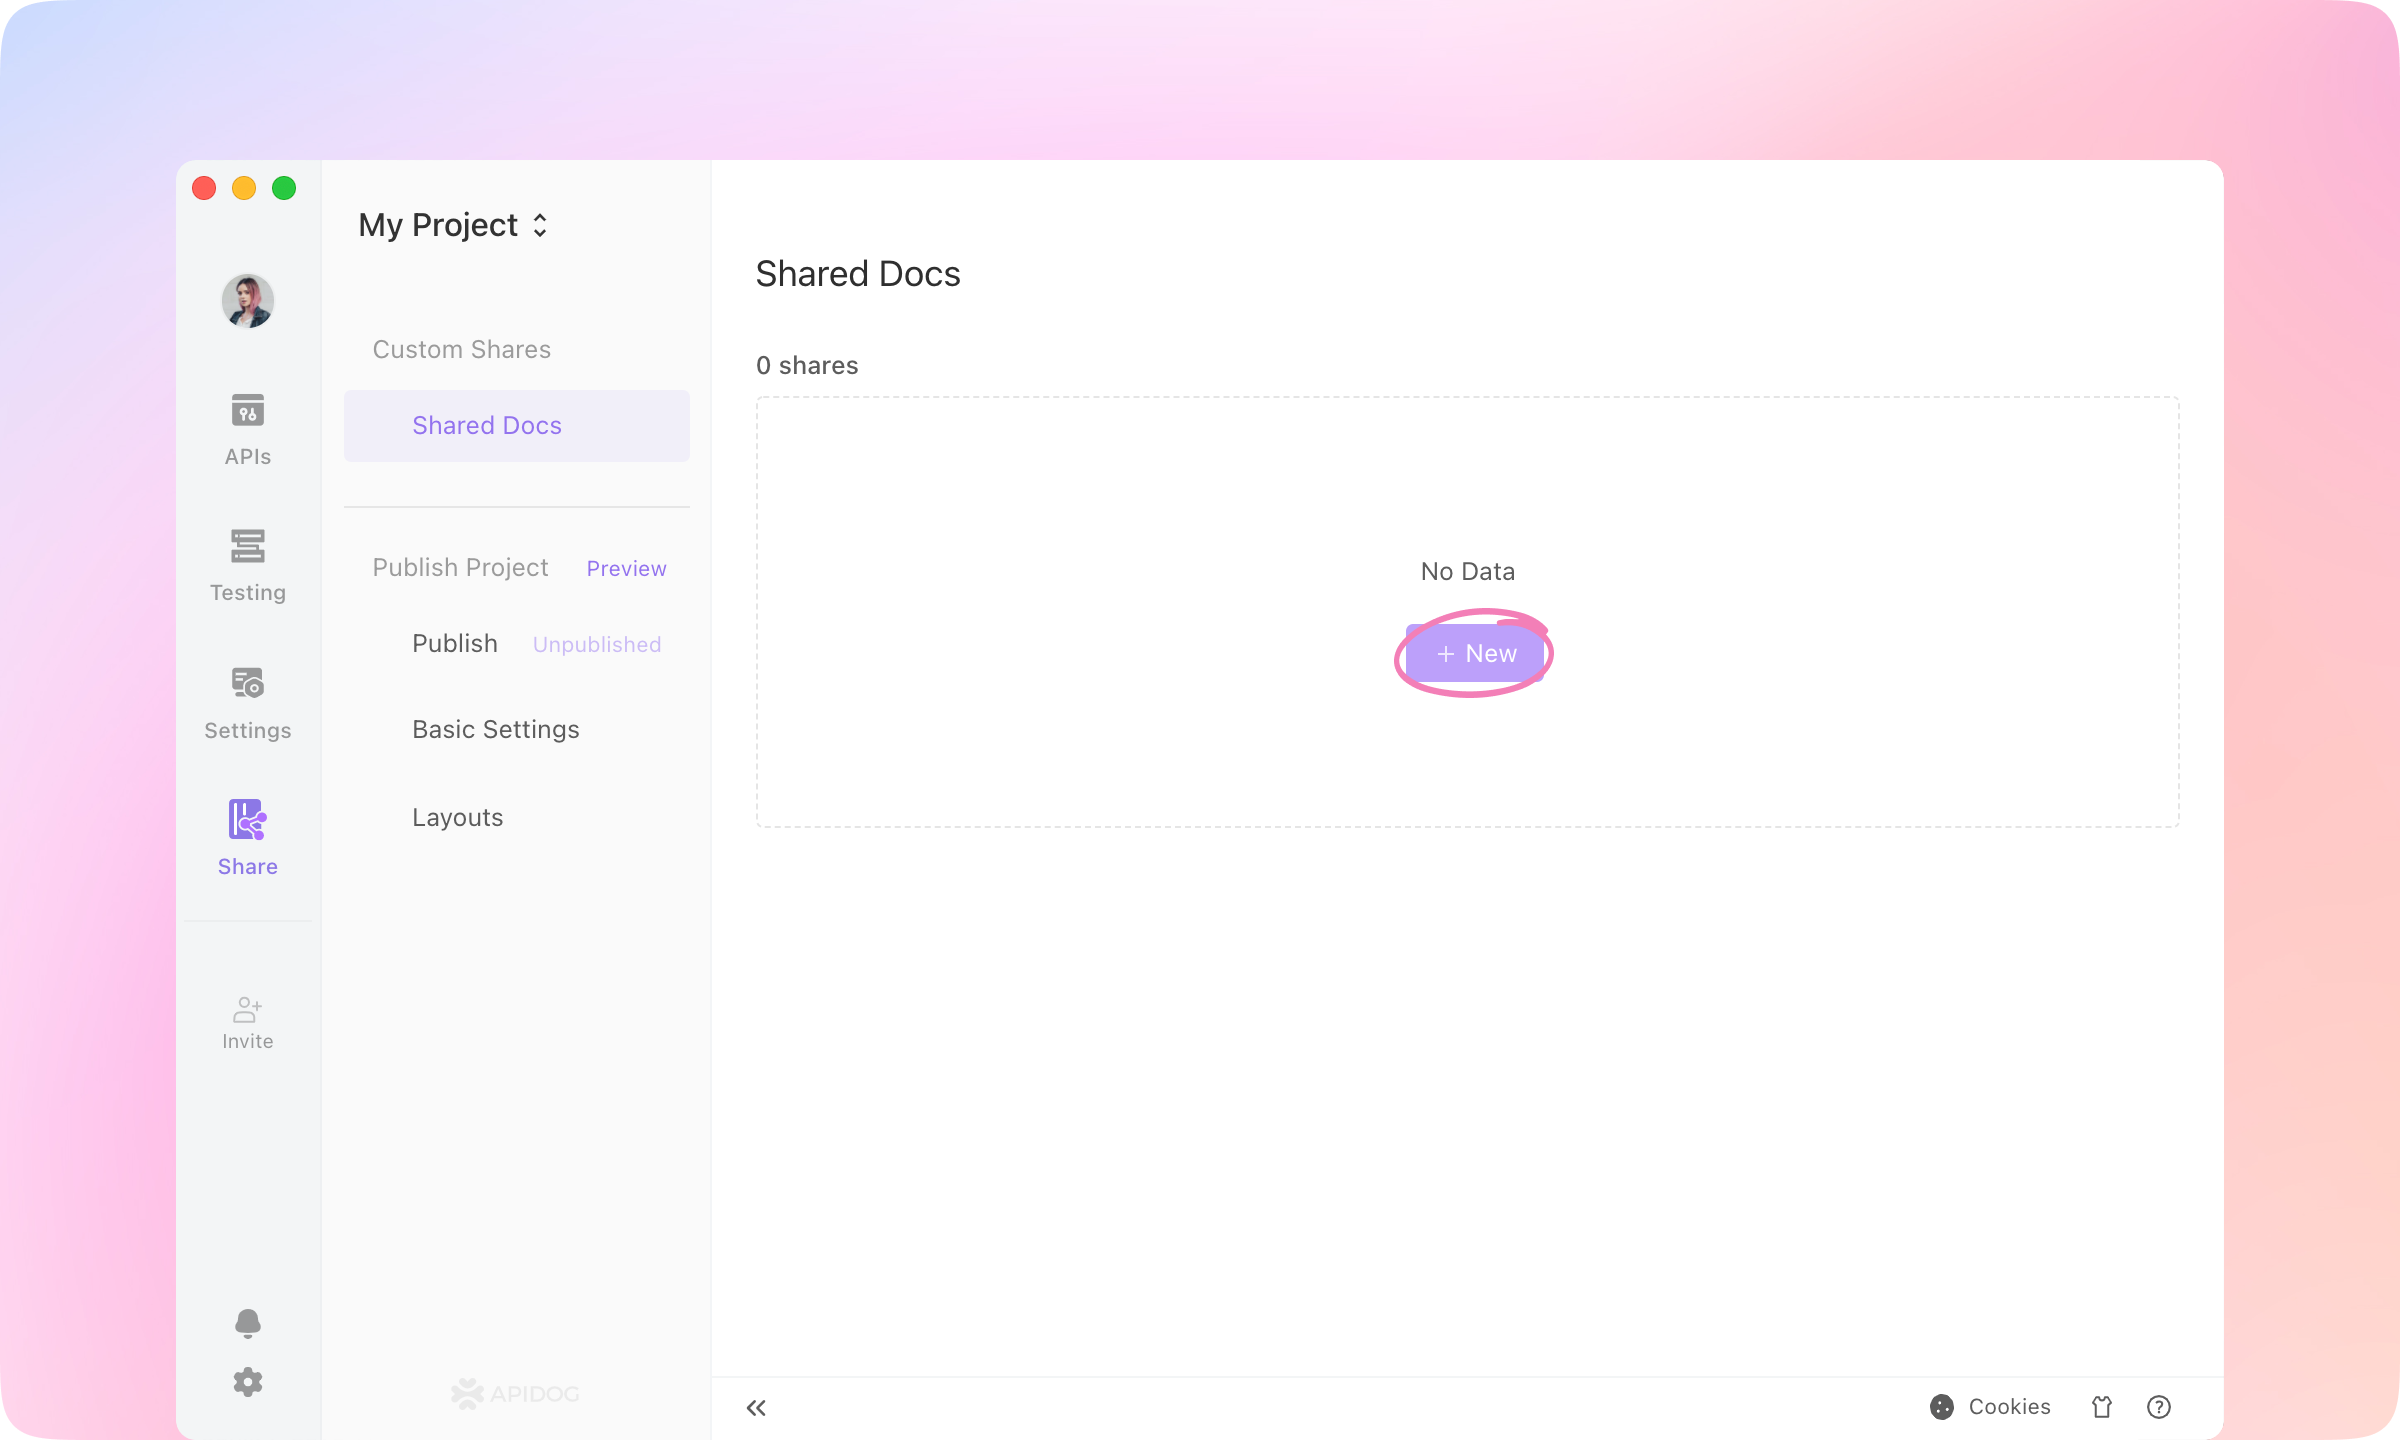
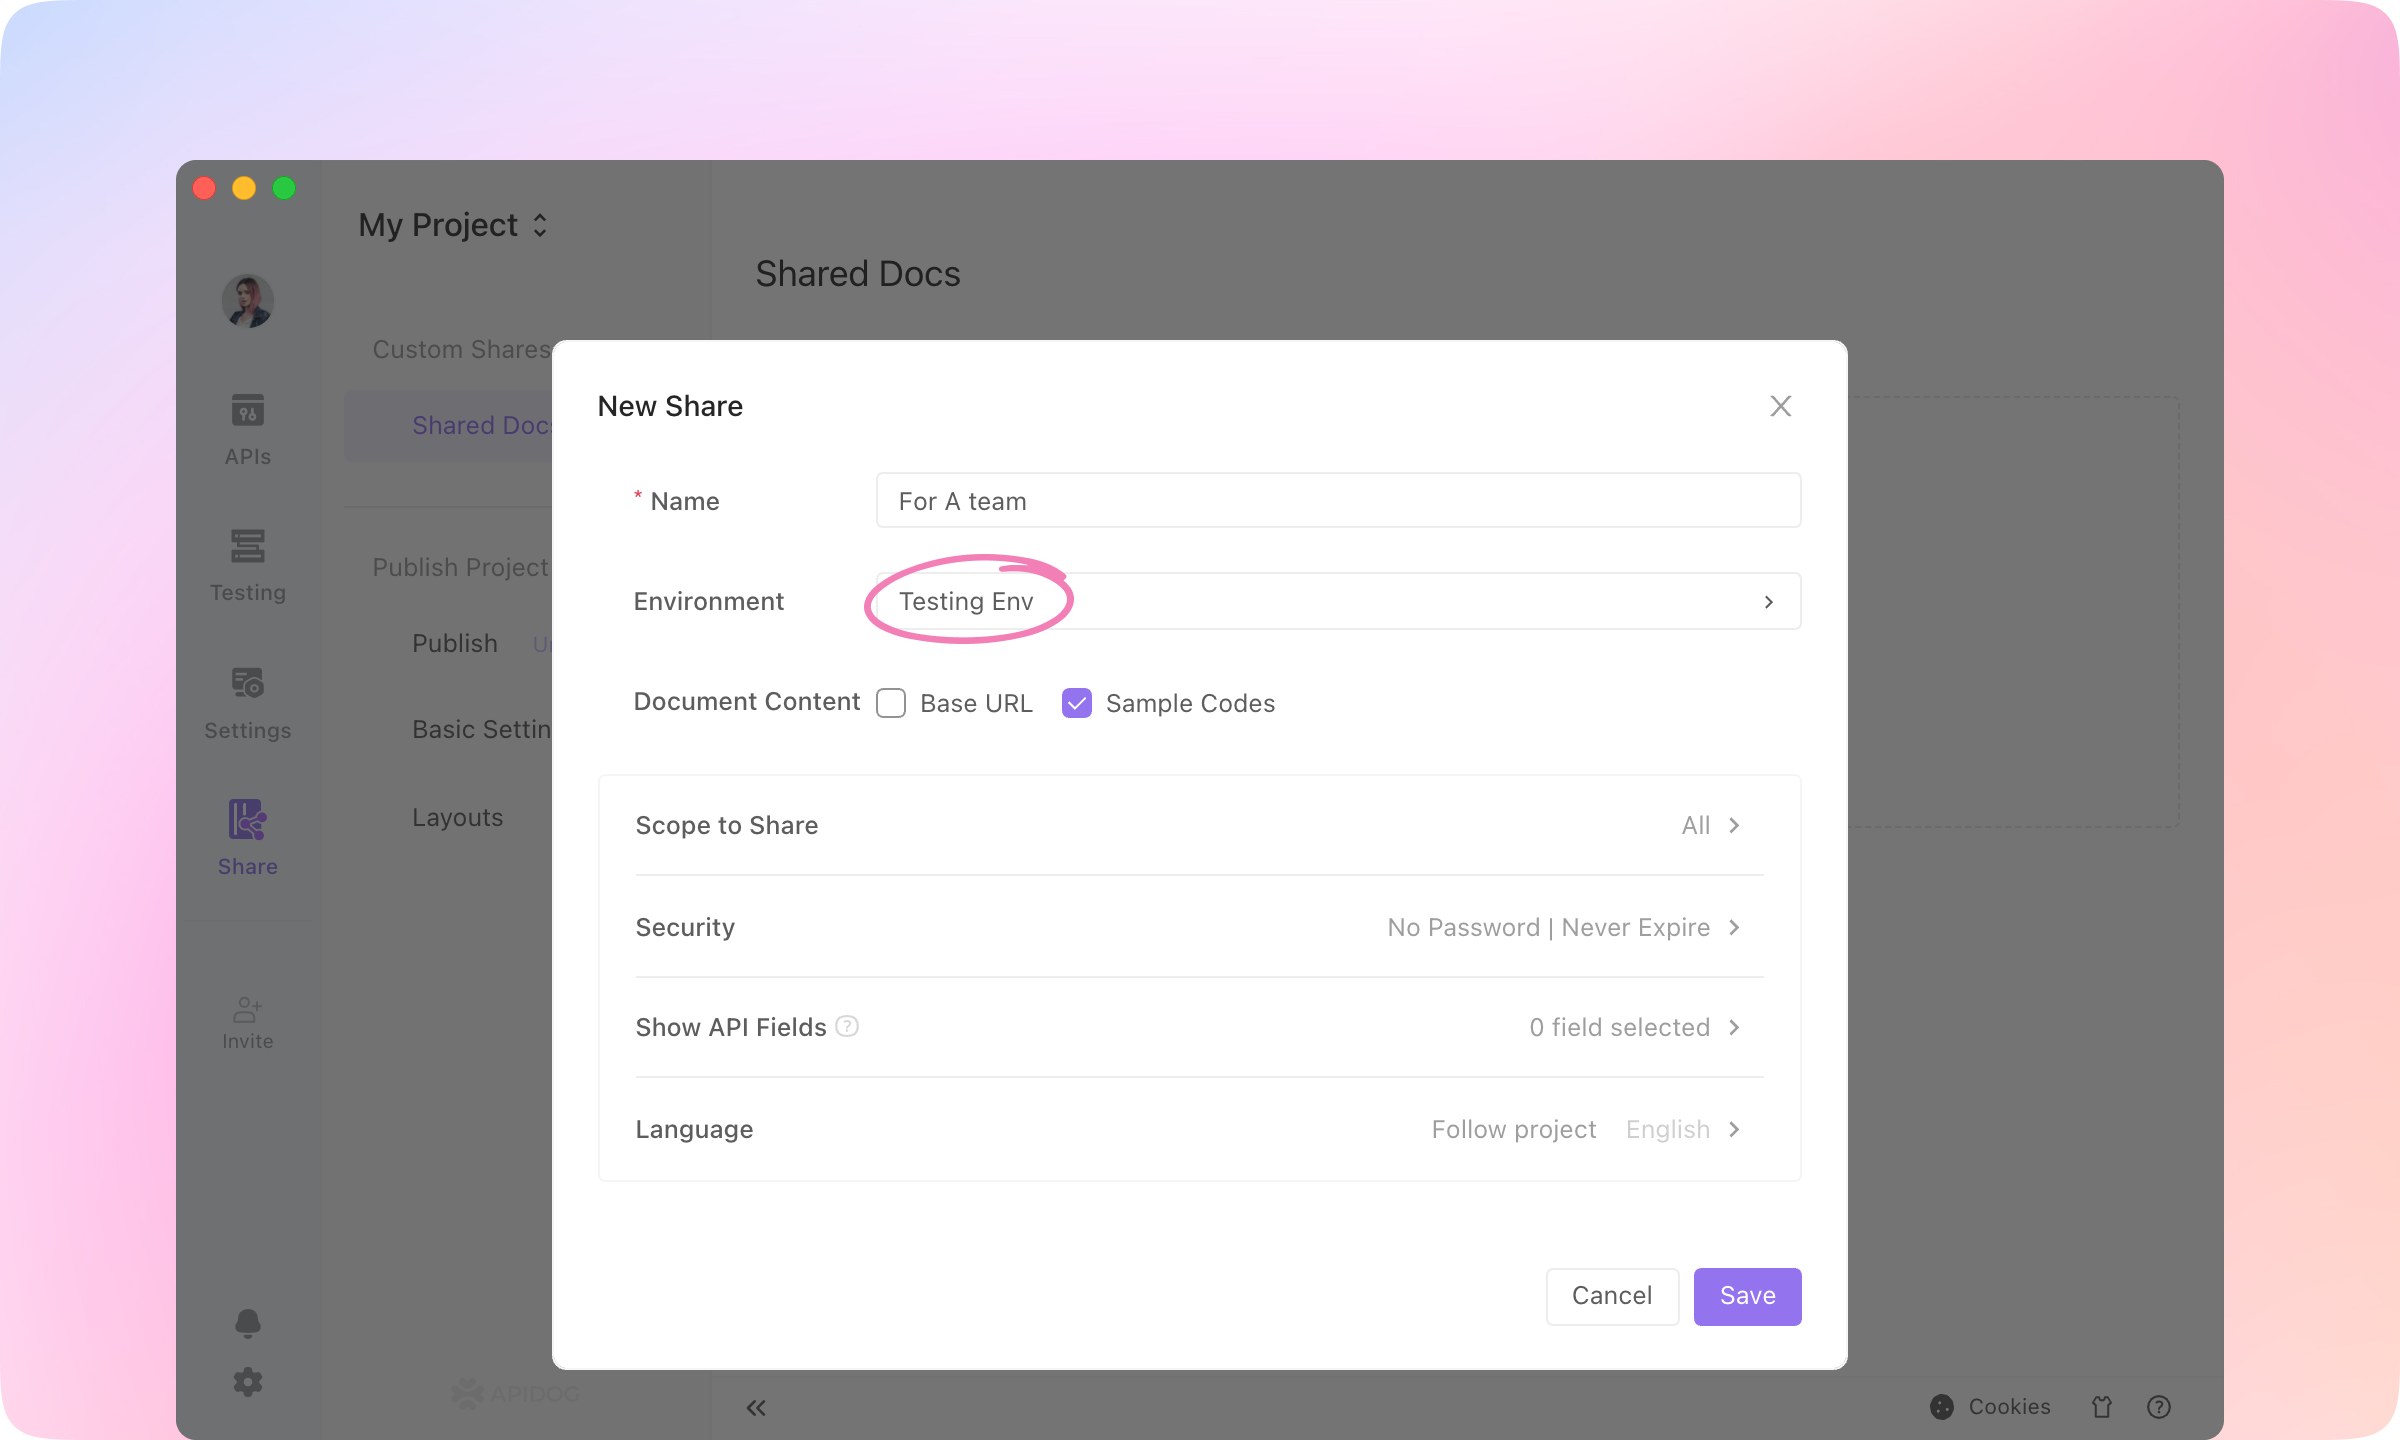
Switch to the Share module, and +New a share.
2.
Select the environment that will be effective in the API documentation. Readers of the API documentation will be able to use the environment configured here to run the API.
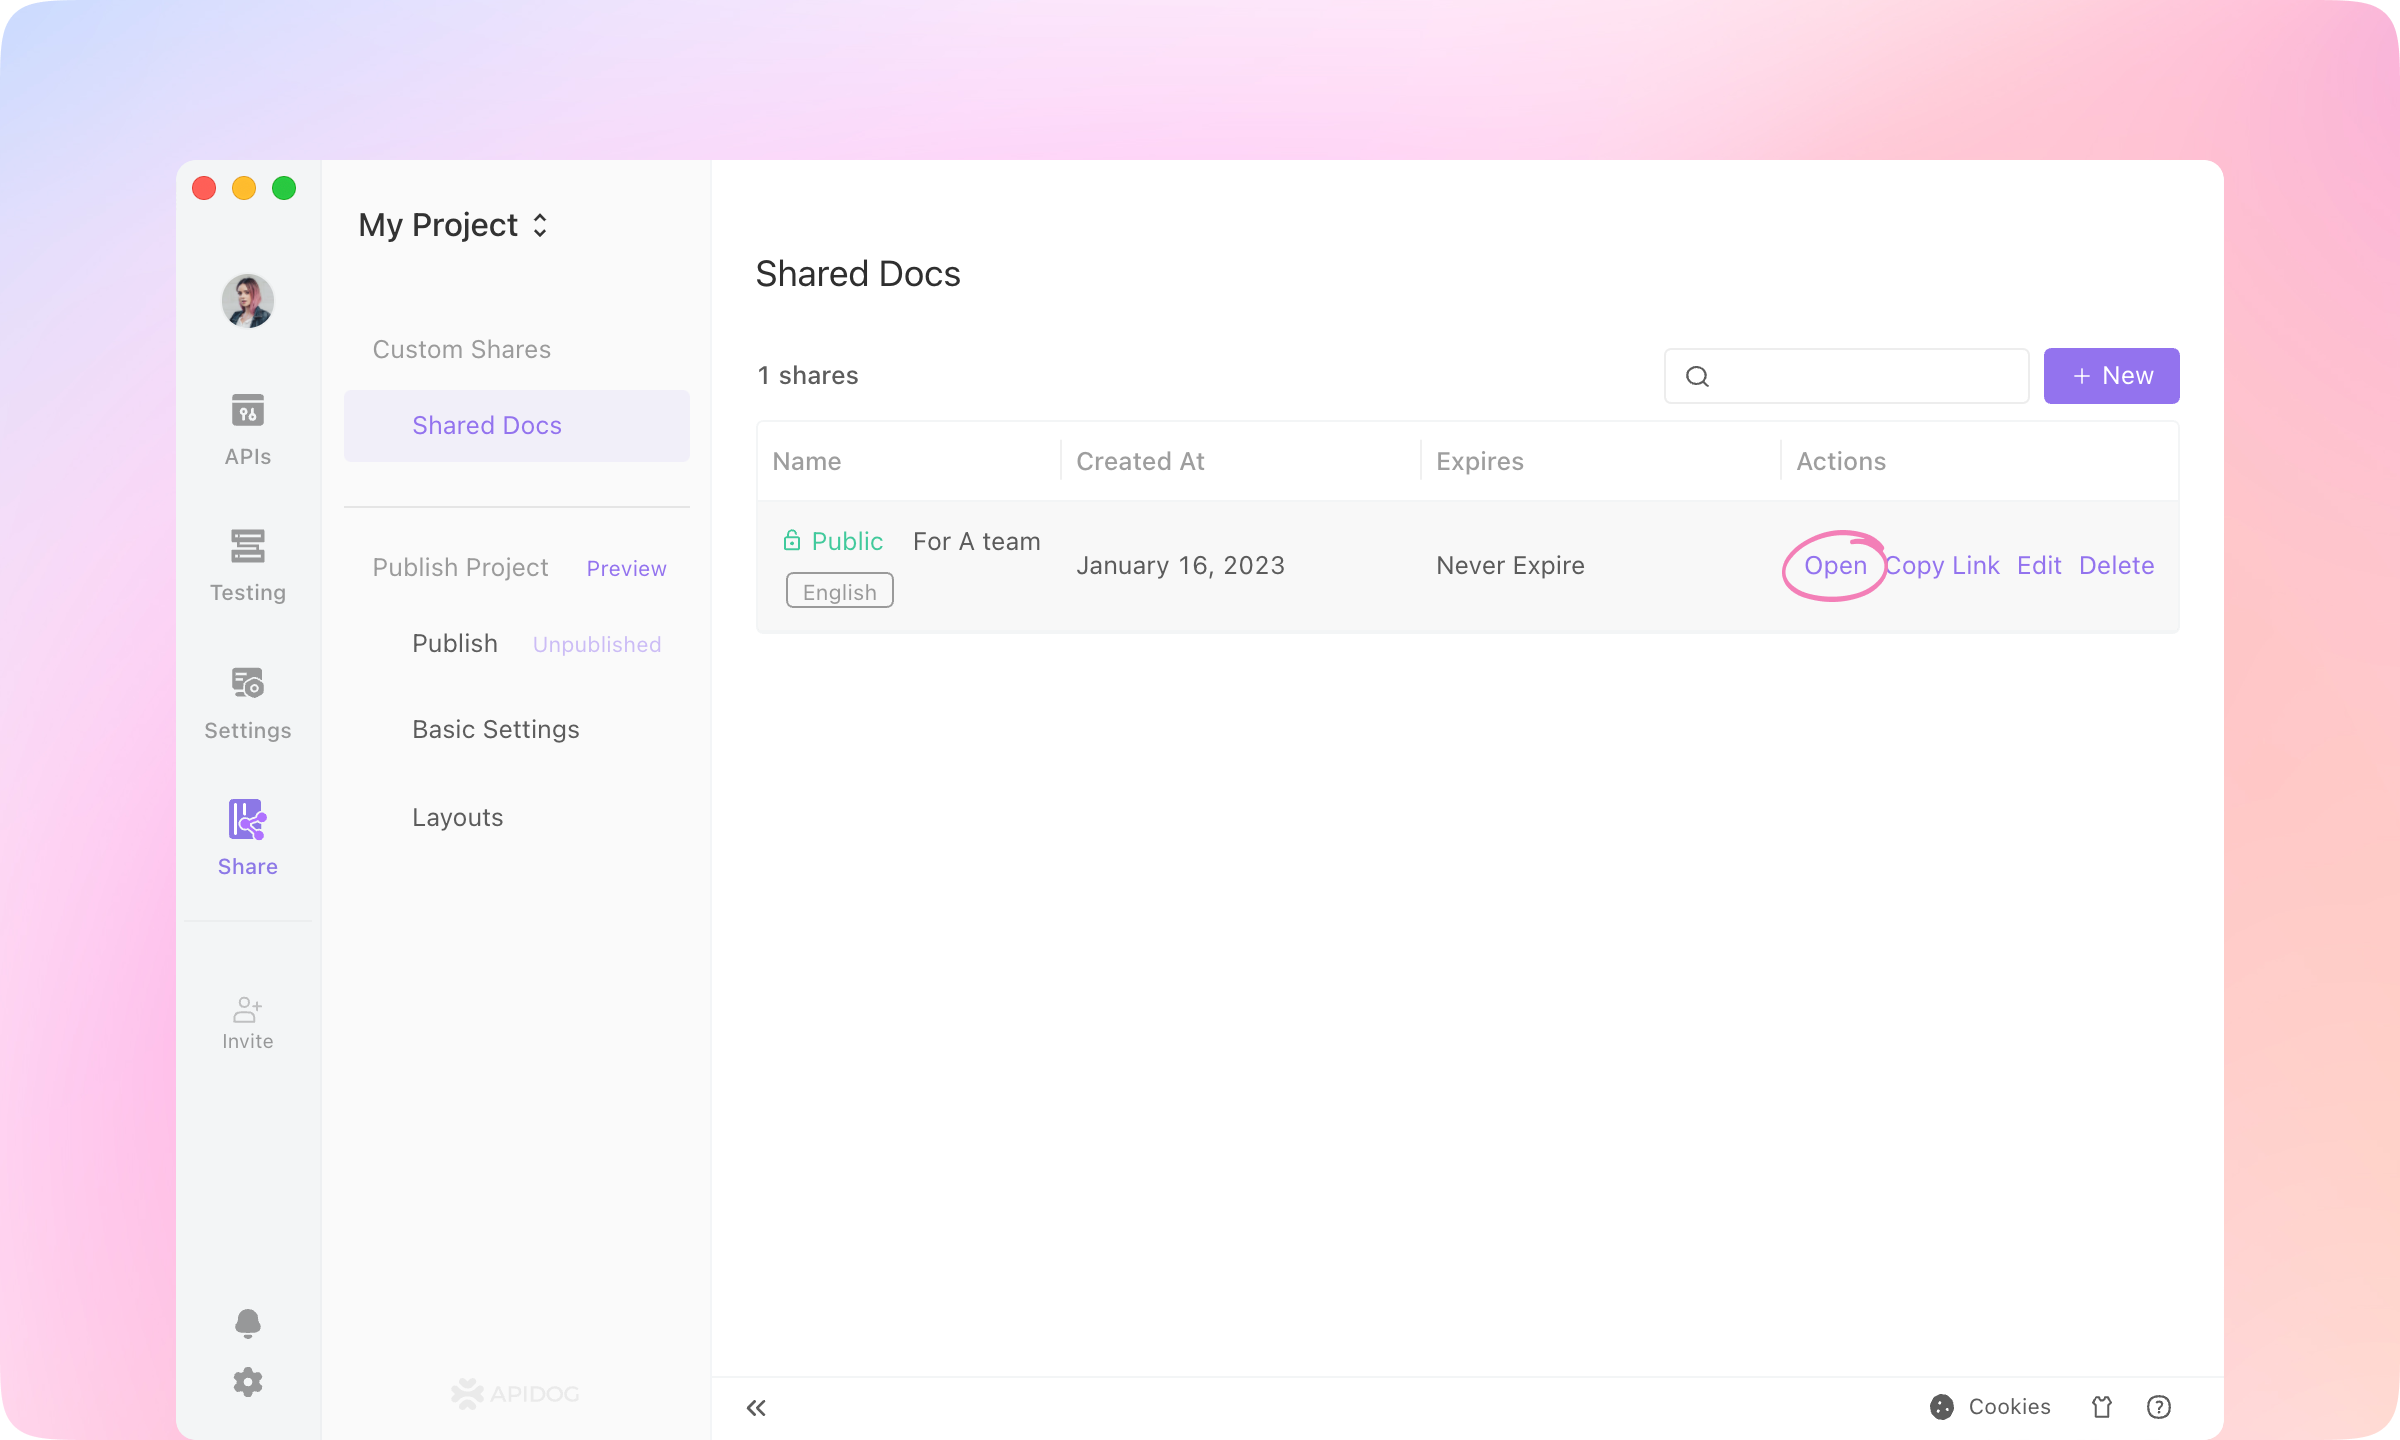
3.
Open the shared docs in a browser.
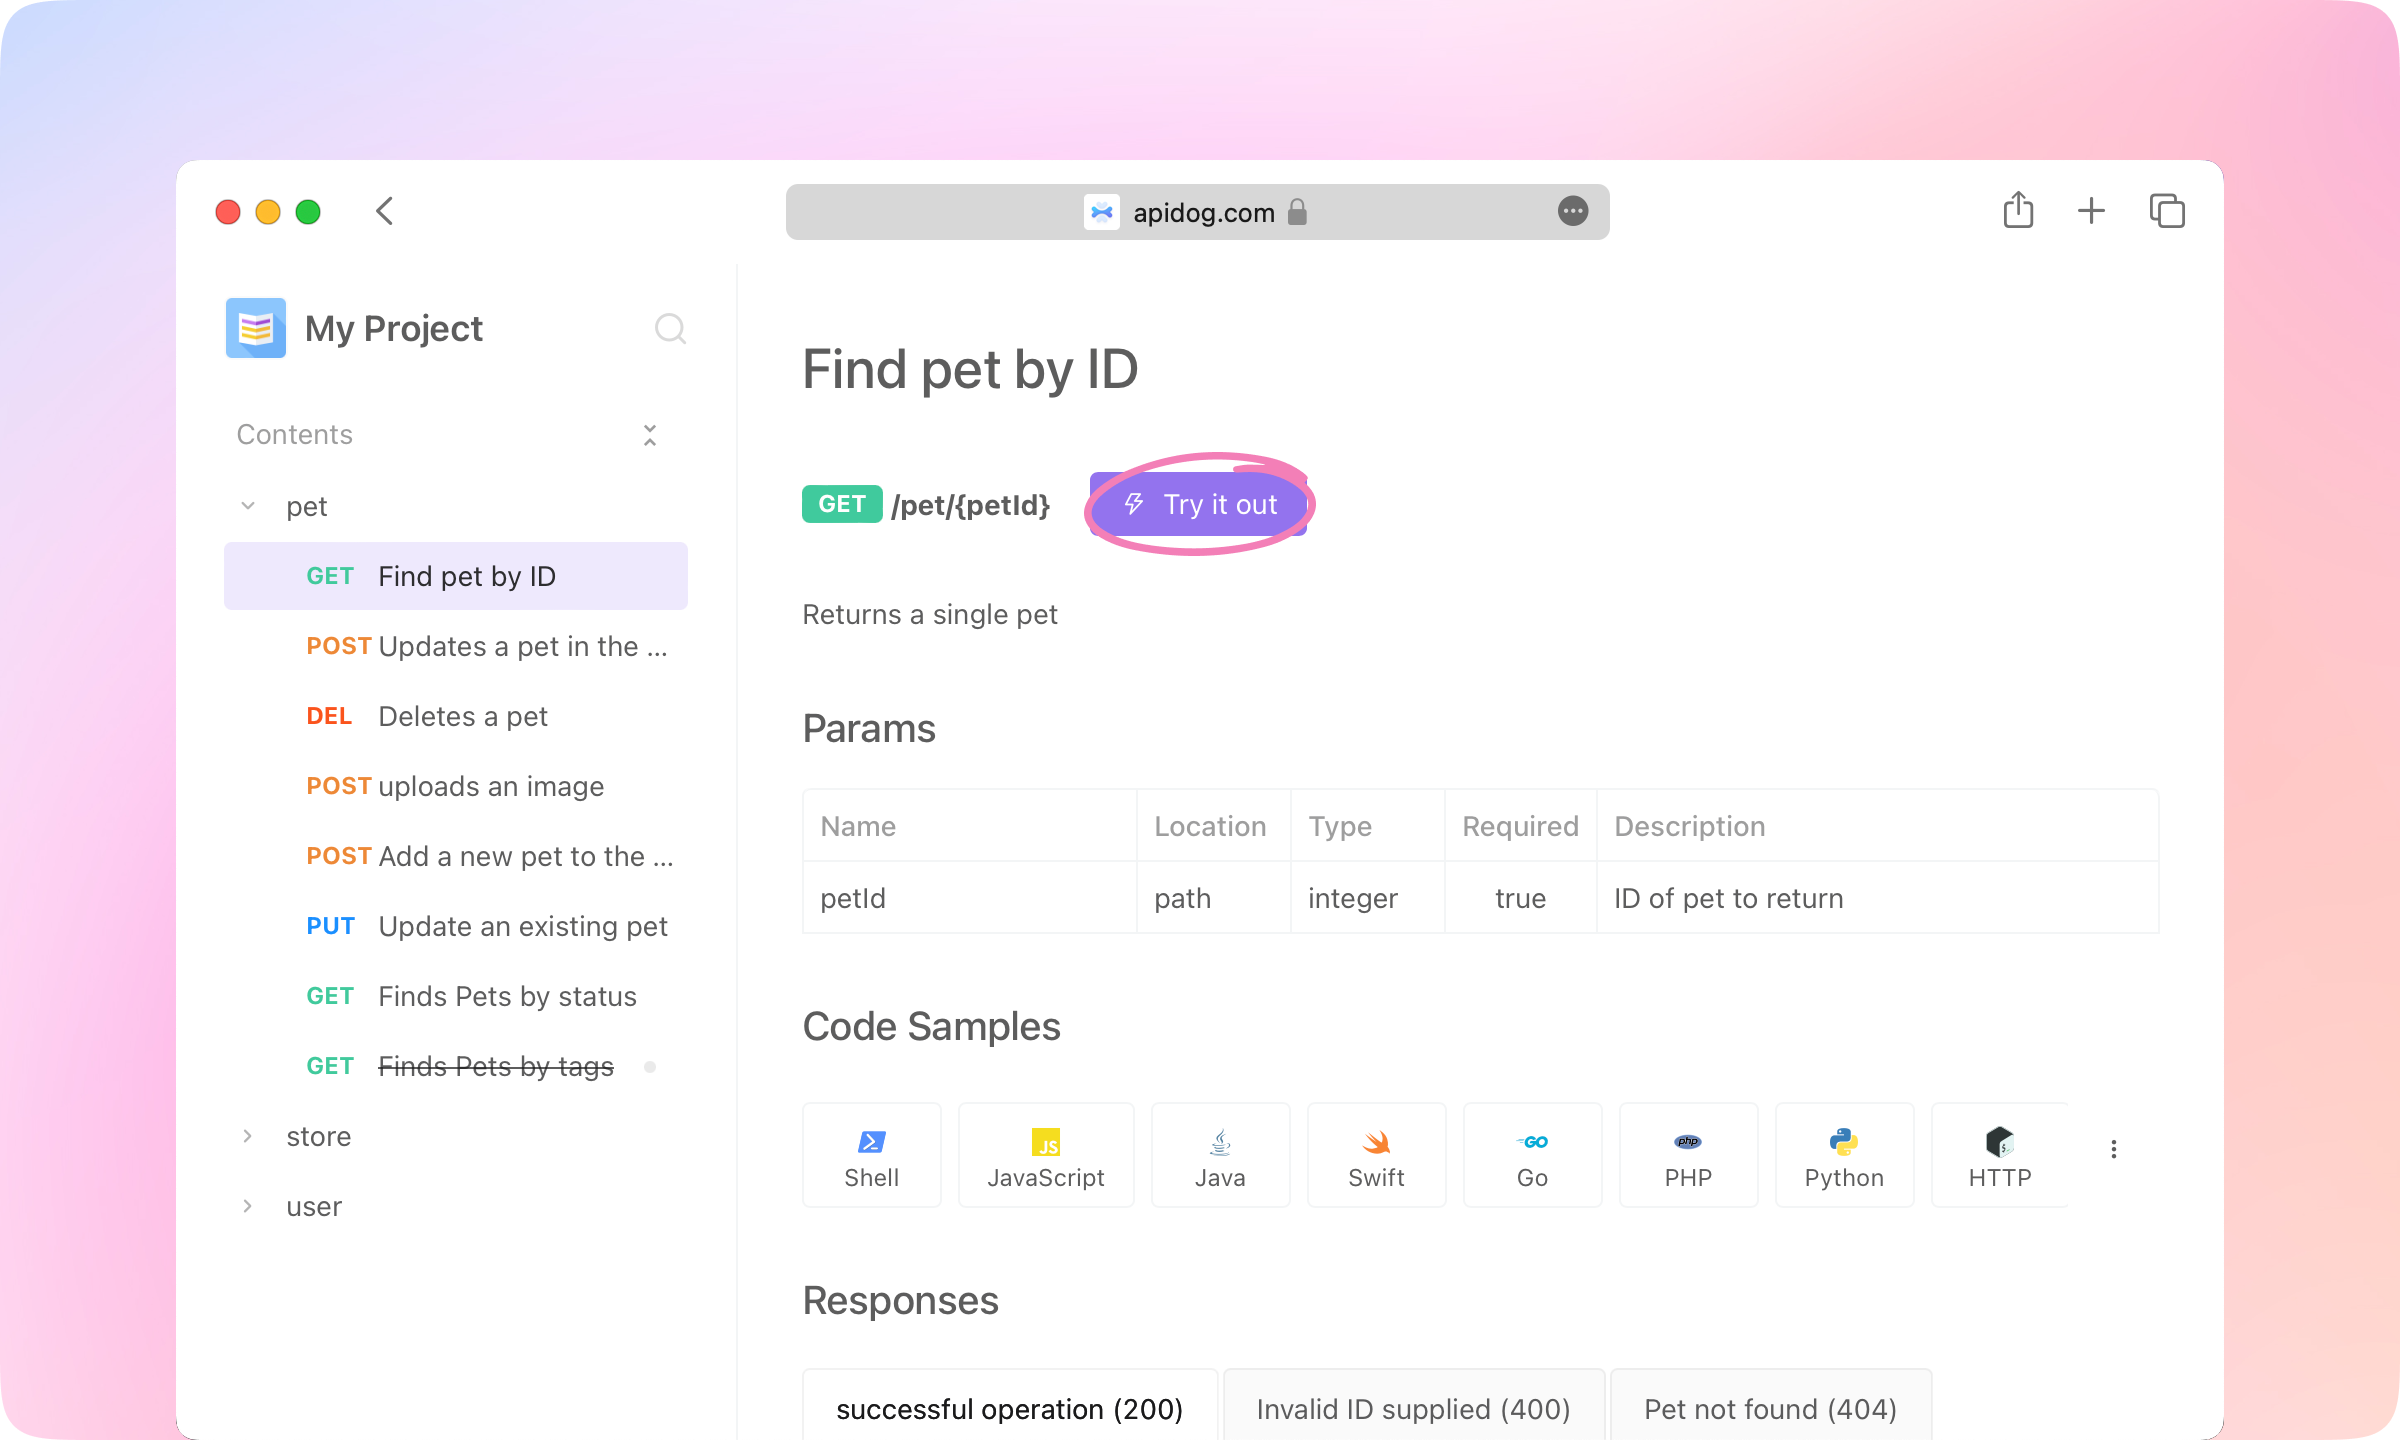
4.
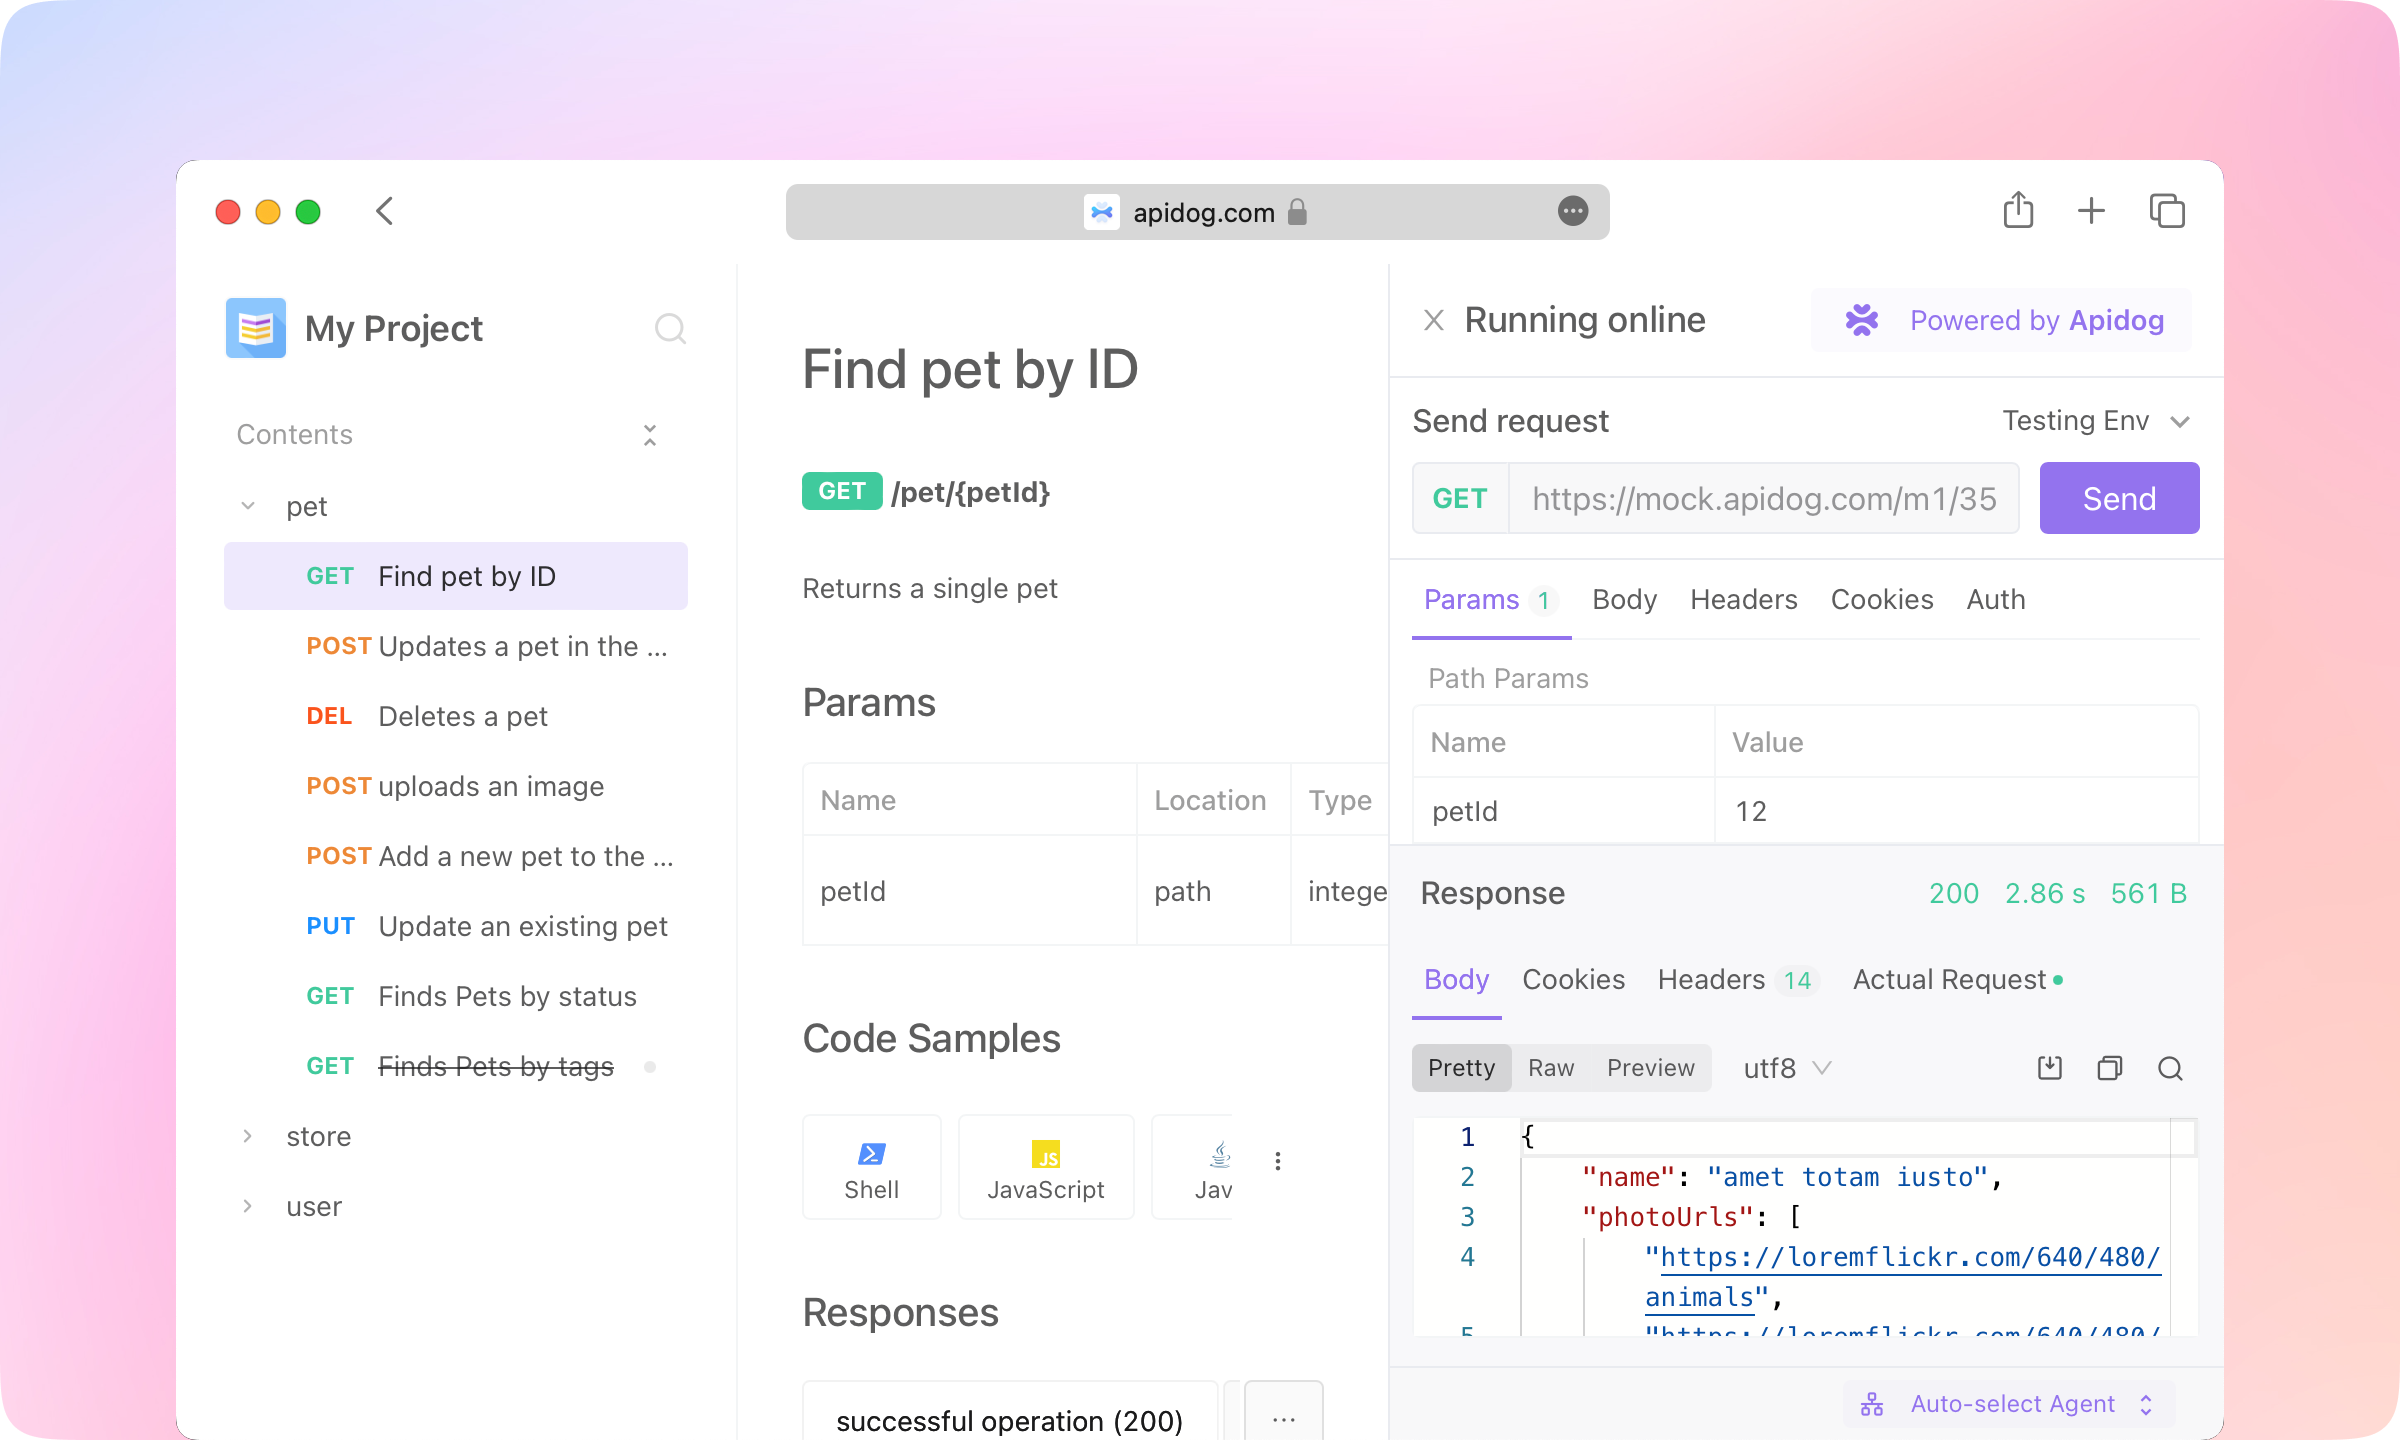
The API documentation is generated and can be shared on the internet. It also can be Try it out on the shared website.
5.
Code Samples feature supports generating API request code in dozens of languages, allowing API readers to directly call the API with the generated code.
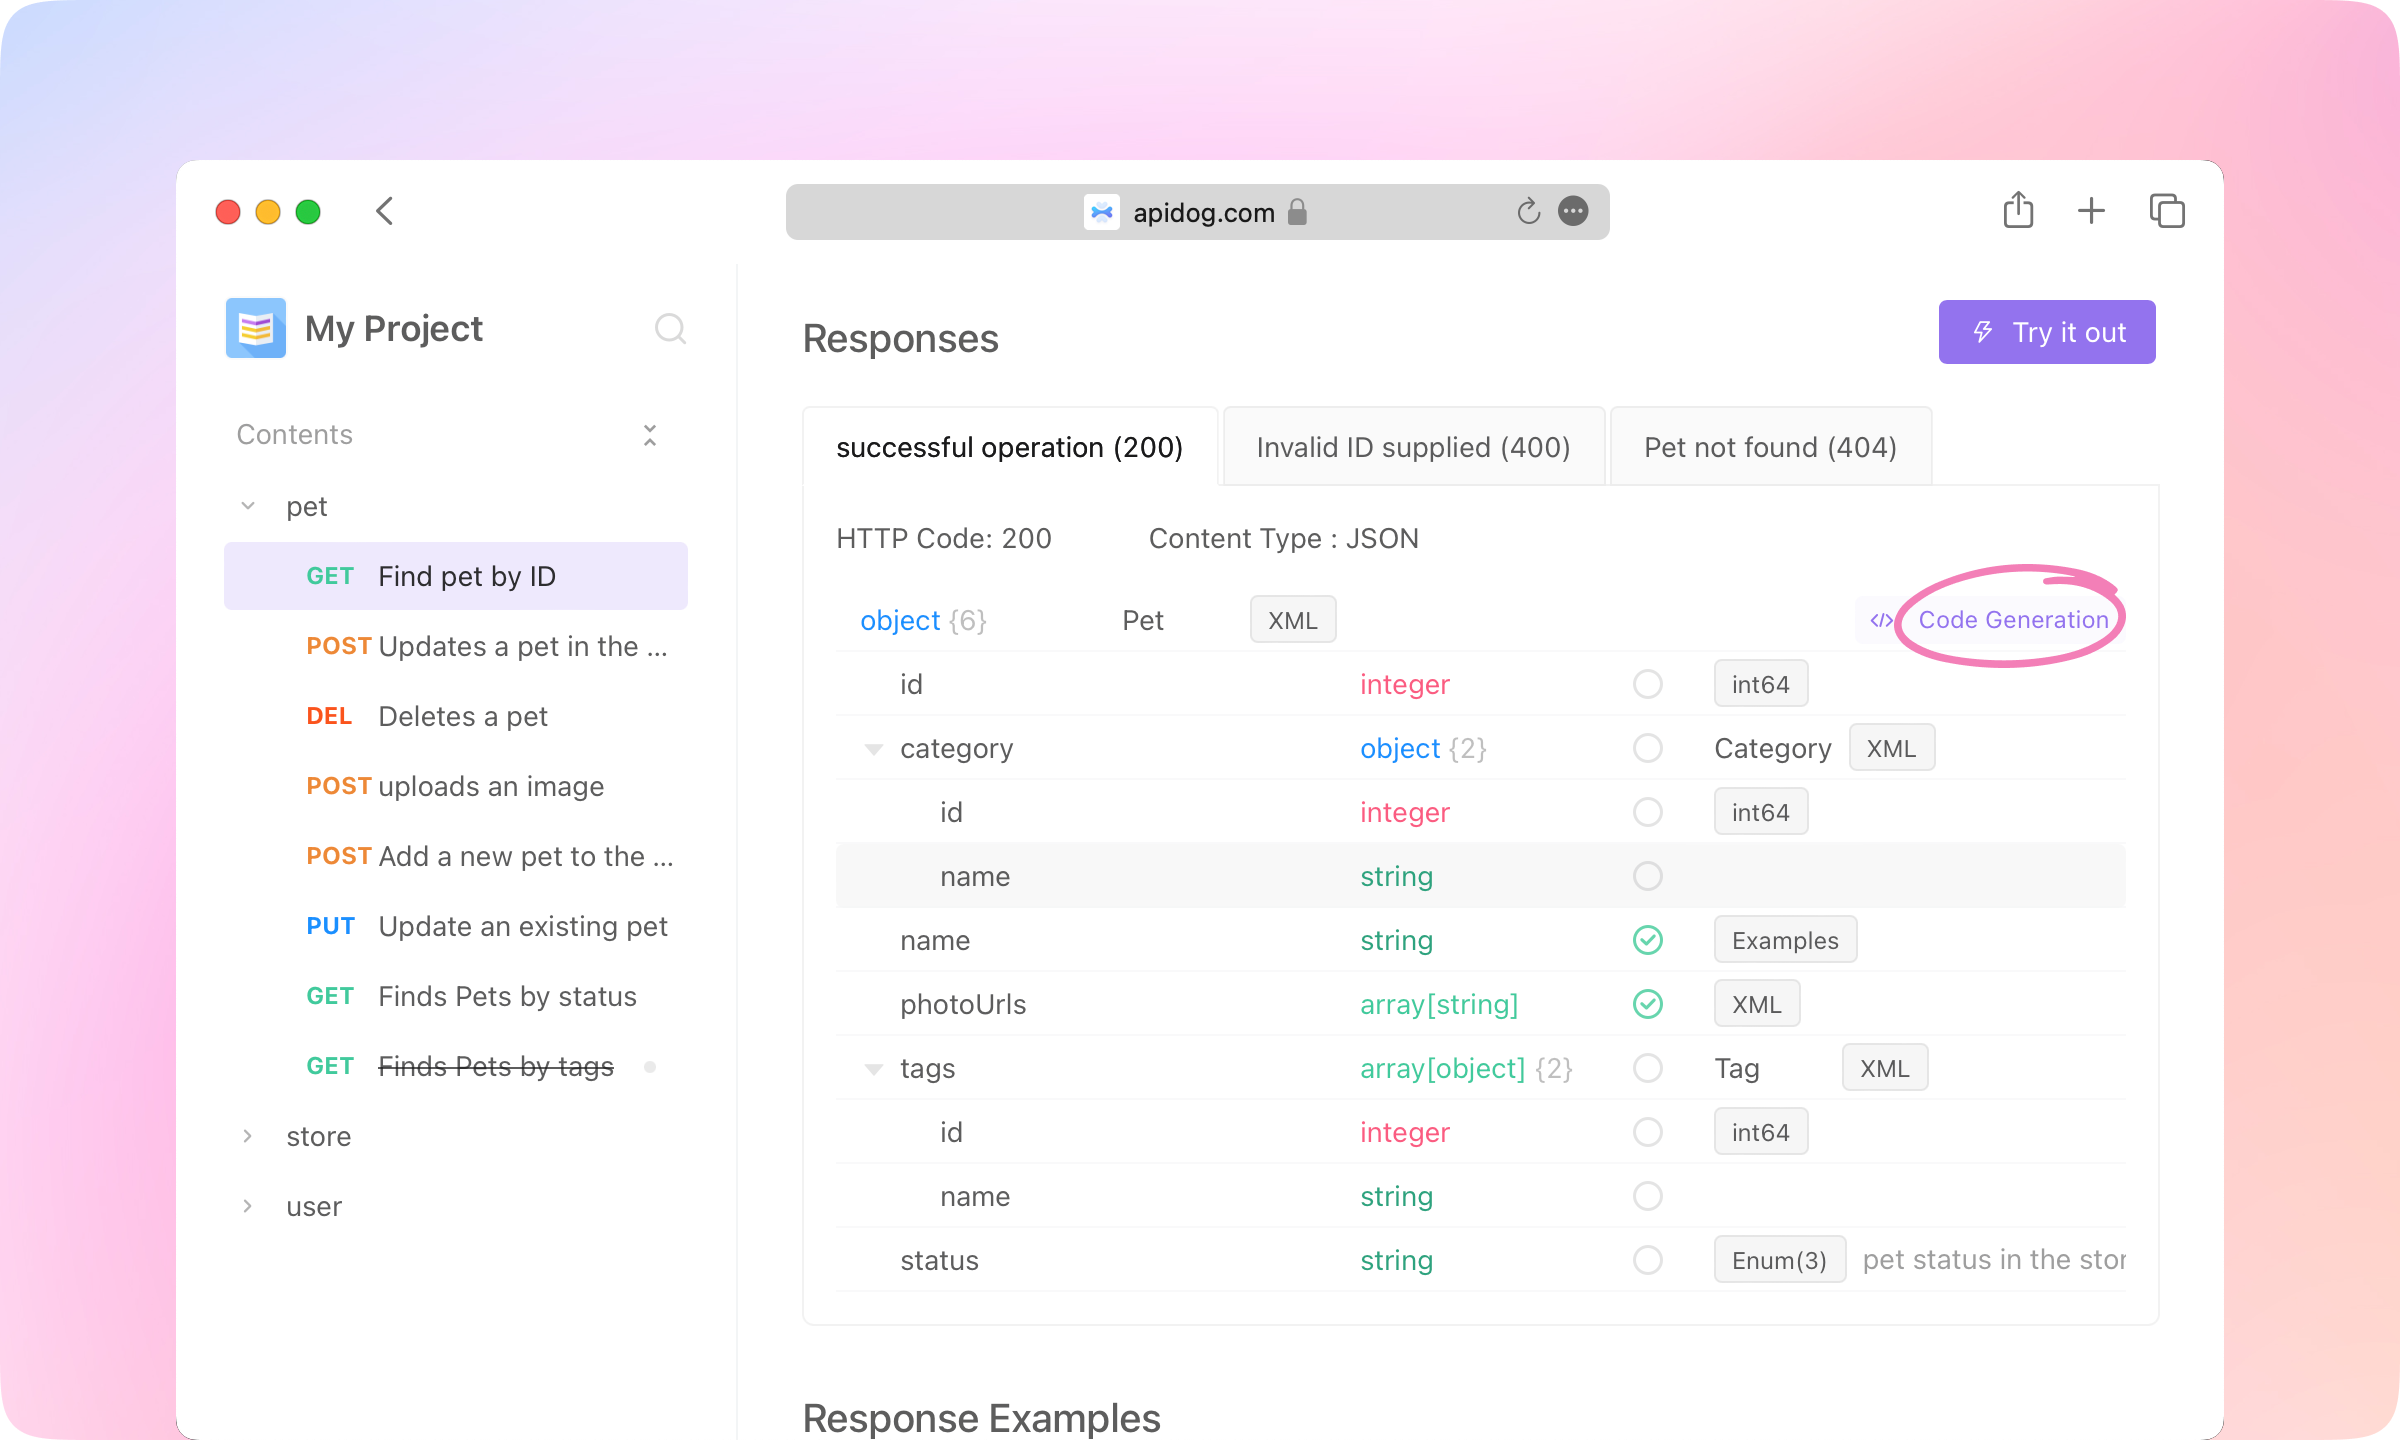
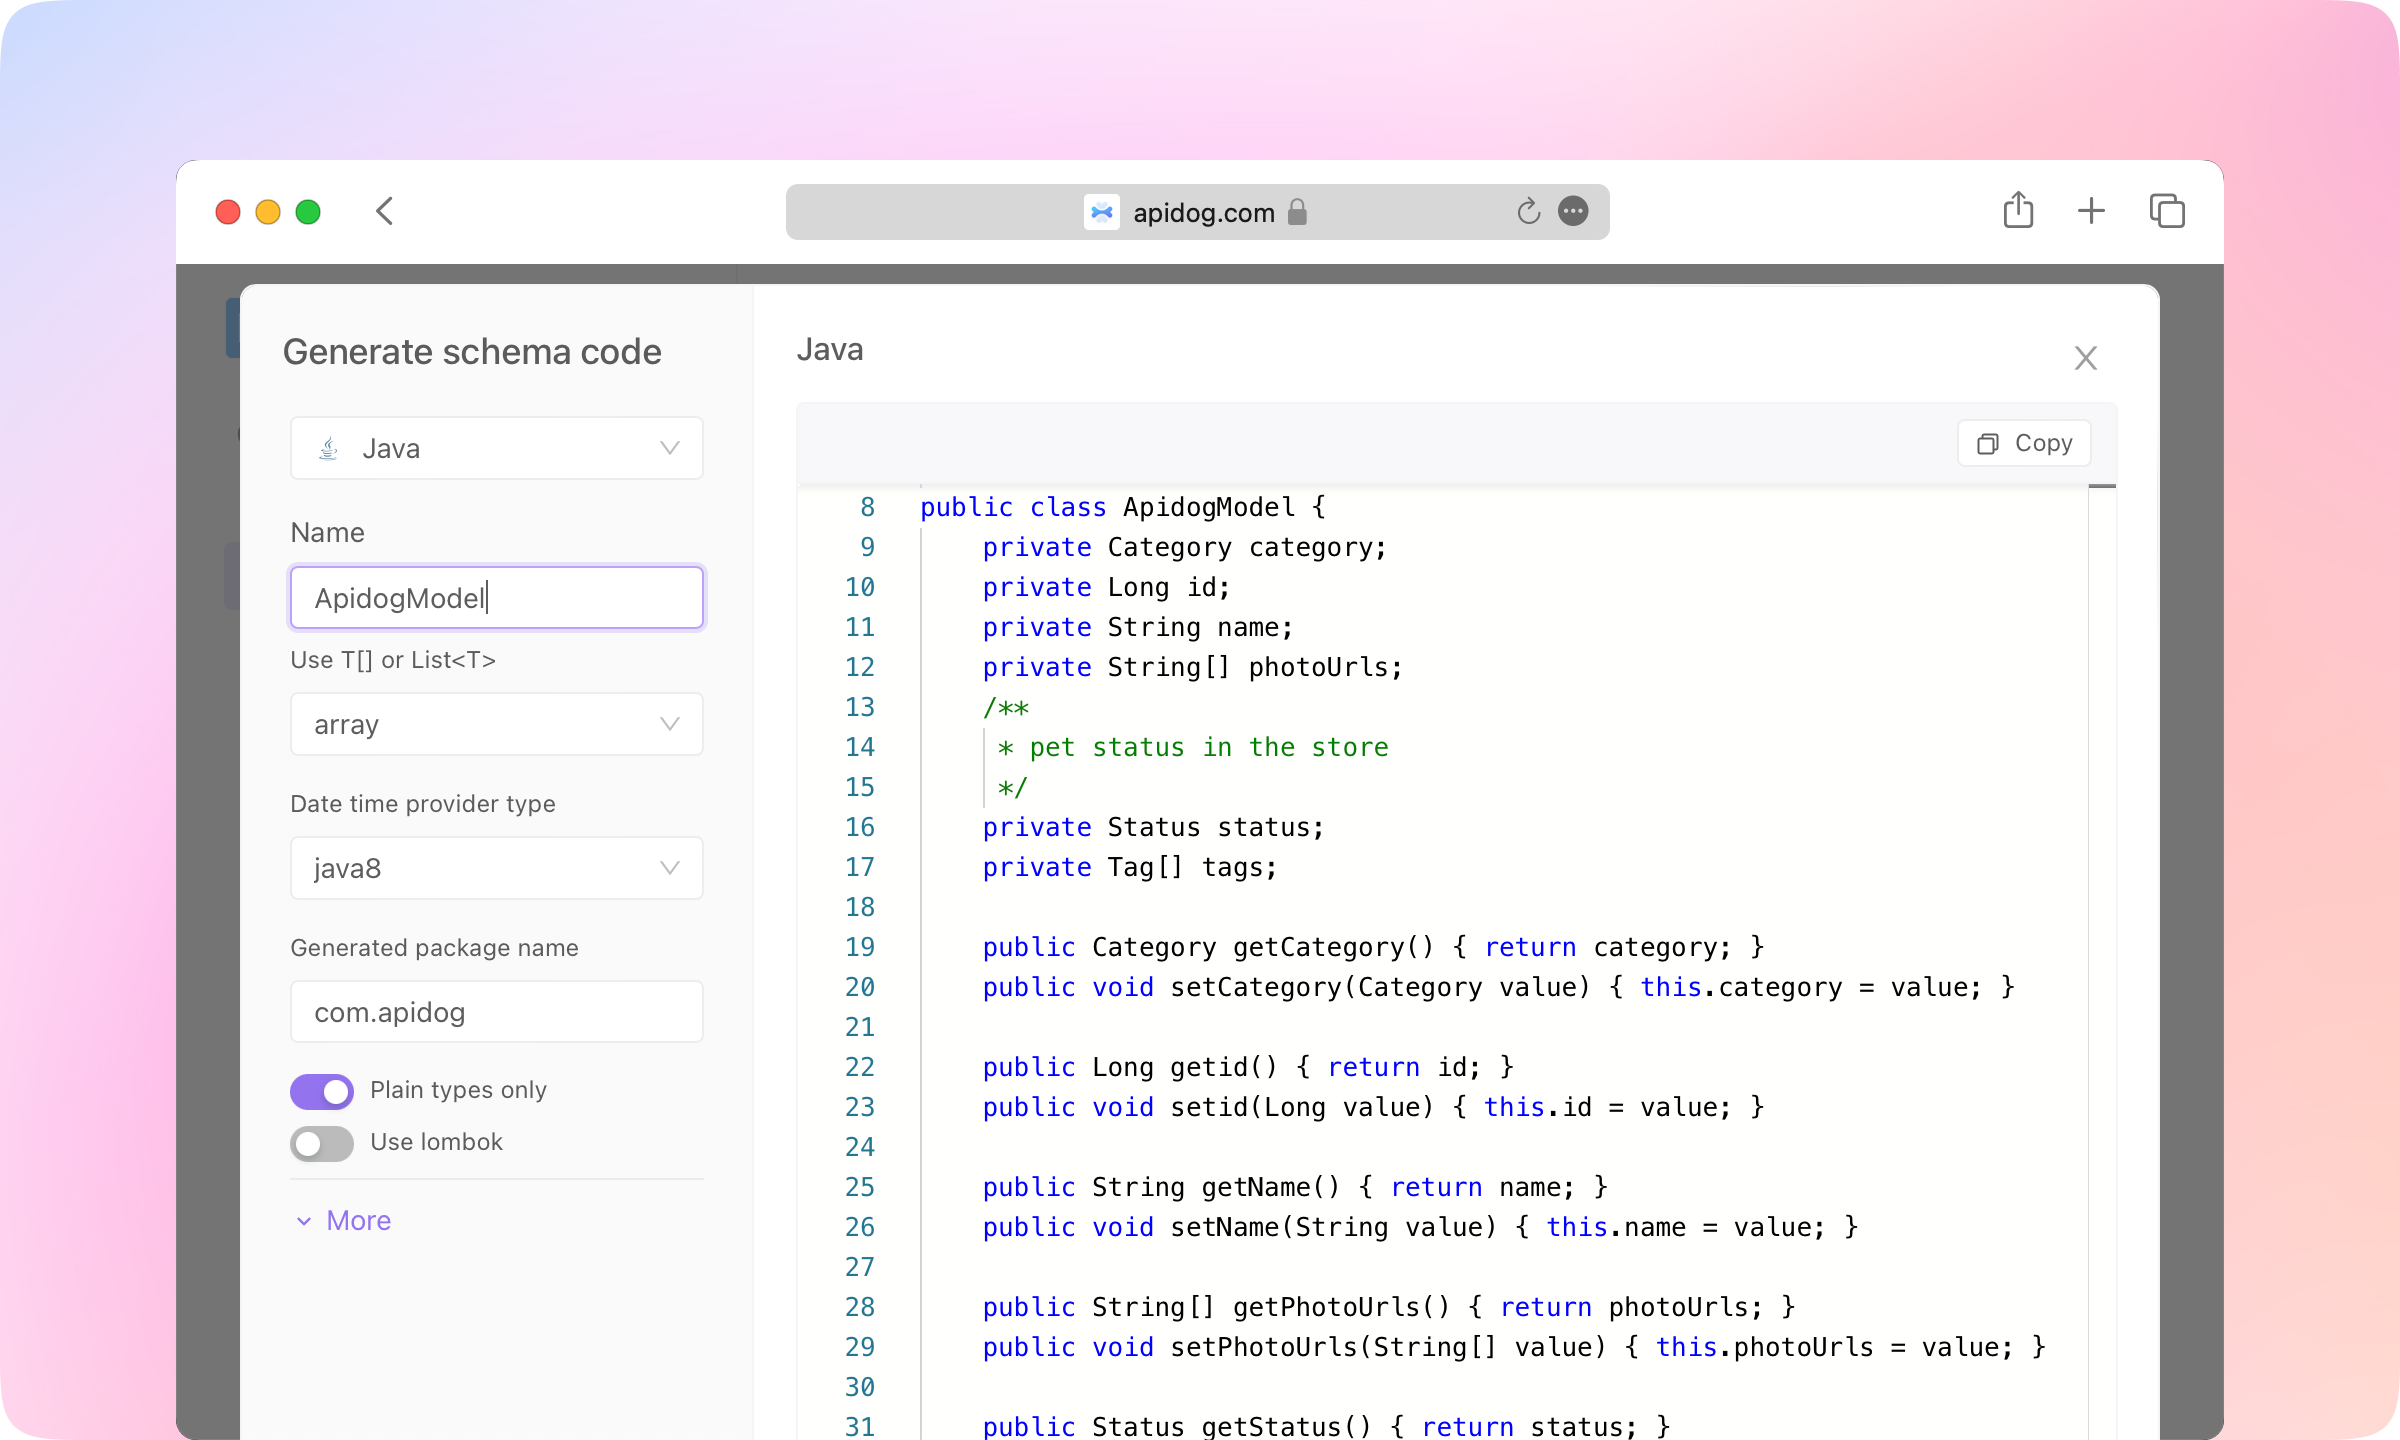
6.
Code Generation in the Responses also supports generating code for the structure of the response data, supporting several dozens of languages. API consumers can use the generated code in their implementation.
7.
Custom domain, Top Navigation, Catalog Style, Content Footer, and more custom features are also supported in the documentation.
Best Practice#
1.
In Apidog, the API designer (or Back-end developer) defines the specifications for the API.
2.
The development team collaborates to review and improve the documentation, and to ensure consistency in the API use cases.
3.
Using Apidog, front-end developers can begin development with automatically generated mock data, eliminating the need for manual mock rule creation.
4.
Back-end developers can debug using the API use cases during development. If all API use cases pass during debugging, the API development is considered complete. If changes to the API occur during development, the API documentation is automatically updated during debugging, ensuring timely API maintenance with minimal effort.
5.
After debugging, back-end developers can easily save the function as an API use case.
6.
QA engineers can then test the API directly using the API use cases.
7.
Once all APIs have been developed, QA engineers (or back-end developers) can use the test case and test collection function to conduct comprehensive multi-API integration testing.
8.
Joint debugging between front-end and back-end development is typically seamless because both teams adhere to the API's specifications, allowing front-end developers to switch from mock data to real data.
9.
Once the API development is complete, Apidog generates a beautiful API documentation, making it easy for the development team to publish the API to external teams.
Modified at 2024-03-06 01:29:02